Installing ipkg is not difficult, but I hate to do it manually each time I (re)install a Synology… So, here attached is a script to install it automatically.
[EDIT] ipkg is not maintained anymore. Many packages do not run anymore with the most recent DSM. So, use opkg instead.Click to Read More
First Installation:
- Copy on your NAS the script attached at the bottom of this post (Ex.: into \\<YourSyno>\web\admin as used for the illustration here after).
- Connect as root on your NAS (Ex.: via telnet using the command ‘telnet <YourSyno>’, the login ‘root’ and the password of your ‘admin’ account – see more details here).
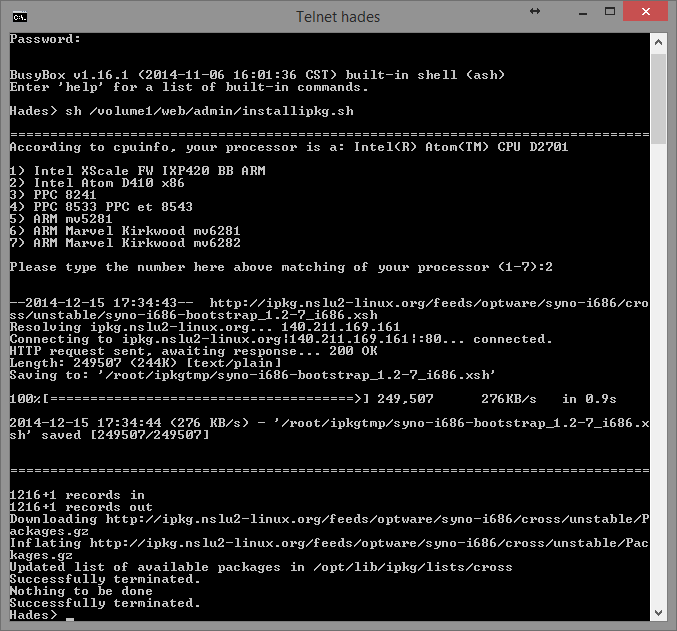
- Execute the script (Ex.: use the command ‘sh /volume1/web/admin/installipkg.sh’)
- Check which processor your have on your NAS and select the right option accordingly. The script will show you the cpu found using ‘cpuinfo’. But you can double-check here (NB.: I have a DS713+ which is currently not listed. I didn’t test ipkg for the other versions).
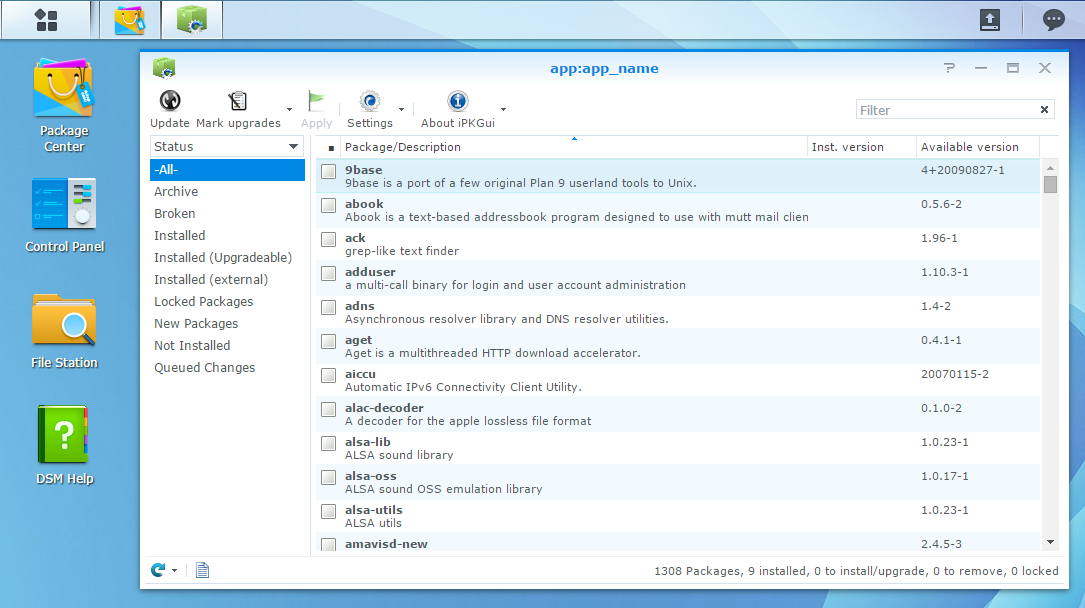
You can now use ipkg directly in a shell or via the (really) great UI named “IpkgGUI”. This one is available as a Community Package from cphub.net. Add “https://www.cphub.net” as a Package Source in the Package Center’s settings pane and install IpkgGUI.
Re-installation/upgrade:
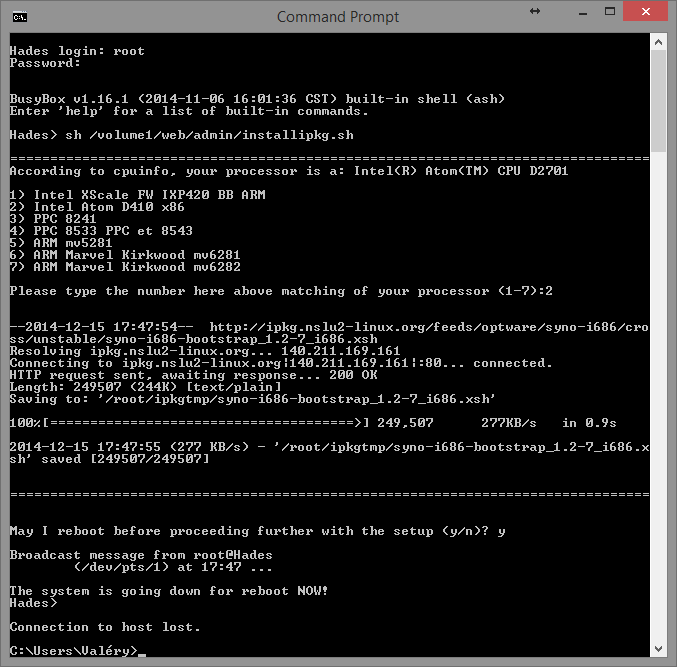
If ipkg is already installed, the script will remove it automatically and reboot the NAS before proceeding further with the installation (A reboot takes a bit more than one minute to shutdown and a bit more than two minutes to restart on my DS 713+). After the reboot, thanks to a script inserted into /etc/rc.local, the setup will continue automatically.
Installation status:
(After the reboot, reconnect to the NAS). You can now check the status of the setup in its log, using the command: cat /root/ipkg.log. The output should looks like this:
[code]

[Mon Dec 15 17:34:44 CET 2014] Installing IPKG...
Optware Bootstrap for syno-i686.
Extracting archive... please wait
bootstrap/
bootstrap/bootstrap.sh
bootstrap/ipkg-opt.ipk
bootstrap/ipkg.sh
bootstrap/optware-bootstrap.ipk
bootstrap/wget.ipk
Creating temporary ipkg repository...
Installing optware-bootstrap package...
Unpacking optware-bootstrap.ipk...Done.
Configuring optware-bootstrap.ipk...Done.
Installing ipkg...
Unpacking ipkg-opt.ipk...Done.
Configuring ipkg-opt.ipk...Done.
Removing temporary ipkg repository...
Installing wget...
Installing wget (1.12-2) to root...
Installing wget (1.12-2) to root...
Installing wget (1.12-2) to root...
Installing wget (1.12-2) to root...
Installing wget (1.12-2) to root...
Installing wget (1.12-2) to root...
Installing wget (1.12-2) to root...
Installing wget (1.12-2) to root...
Installing wget (1.12-2) to root...
Configuring wget
Successfully terminated.
Creating /opt/etc/ipkg/cross-feed.conf...
Setup complete.

[/code]
Notice: after the setup of ipkg, this one is upgraded and updated once automatically.
PS.: If you don’t choose the right version of the boostrap, the installation of ipkg will fail. While trying to run it, you could see errors like “line 1: syntax error: unexpected word (expecting “)”)“. Try to install the right package. The script should delete the previous installation and install the new one as explained above.
![]()
Leave a Reply