Month: March 2013

  • TP-LINK 300Mbps Wireless N Range Extender: TL-WA850RE

    TP-LINK Wireless N Range Extender TL-WA850RE
    TP-LINK Wireless N Range Extender TL-WA850RE

    Finally a Wireless Range Extender which is as nice as cheap and easy to configure!

    Click to Read More

    My wifi router is on the first floor and wifi connections from both the ground floor and the second floor are really poor due to the large concrete slab between each floor.

    I didn’t want to pay (a lot) for a new wifi routers which would offer much more features than actually required, have useless Ethernet ports (switch), be large and ugly/inappropriate in the landscape, …

    So, I decided to give a try to the nice and discrete TL-WA850RE sold for 38€.

    The connection with my Buffalo WZR-HP-G300NH was straightforward and went seamlessly.

    1. Plug the TL-WA850RE in a electrical outlet close to the wifi router to be extended
    2. On a laptop, open the pane to select a Wifi Network and pick the “TP-LINK_Extender_xxxxxx network”
    3. Start a browser and navigate to “http://tplinkextender.net”. It’s the url of the embedded administration website.
    4. Log in using the username ‘admin’ and password ‘admin’
    5. Follow the wizard to configure the TP-LINK Range Extender as described in the Quick Installation Guide. PAY ATTENTION: you have to disable your popup blocker or allow that website. Otherwise, the final status windows will be blocked and the process won’t complete.
    6. Once the wizard completed, go to the router configuration website and look for the IP assigned to the TP-Link device (on the WOL page of my Buffalo, I found it’s IP for the hostname = *). The best would be to assign a fix IP to the TP-Link’s Mac Address!
    7. Restart a Browser and navigate to the TP-Link’s IP address.
    8. Back to the TP-Link administration website, change the default username/password via System Tools > Password.
    9. Now, the device can be unplugged and moved into a electrical outlet of a room where the wifi signal is currently poor.

    There is a DHCP server embedded in the device as well as some other basic wireless features (relate to security, statistics…) that I won’t use as far as everything is managed by/on my Buffalo.

    So far, the TP-Link works really well to extend the range of my Buffalo 🙂

    The only “issue” is the blue leds shining too much in the dark which prevent me to sleep in my room if I use the repeater there 🙁

    TP-Link: http://www.tp-link.com/en/products/details/?model=TL-WA850RE

    Loading

  • Upgrade firmware of Buffalo WZR-HP-G300NH

    Buffalo WZR-HP-G300NH v1
    Buffalo WZR-HP-G300NH v1

    I have upgraded the firmware of my Buffalo WZR-HP-G300NH (v1) with the latest version of dd-wrt… seamlessly !

    Click to Read More

    My Buffalo bought end of 2010 was pre-installed with a version of dd-wrt (a.k.a the “Pro” firmware of Buffalo which was installed by default as of the second half of 2010 instead of their ‘friendly’ firmware).

    1. In the dd-wrt router database, I have searched for WZR-HP-G300H and found it was supported by v24-preSP2.
    2. I went to the file server where dd-wrt firmwares v24-preSP2 are available.
    3. On that file server, I went to the more recent sub-folder (/2013/02-11-2013-r20675) and looked for the folder “buffalo_wzr-hp-g300nh” and fetched the firmware “wzr-hp-g300nh-dd-wrt-webupgrade-MULTI.bin” (The other one “buffalo_to_ddwrt_webflash-MULTI.bin” is to upgrade from the Buffalo ‘Friendly’ firmware – which used to be installed by default before the second half of 2010).
    4. Using my laptop connected via wifi, I went to the “firmware update” page of my Buffalo, via its web interface menu “Administration > Firmware Upgrade”.
    5. I chose “don’t reset”  after flashing, selected the firmware downloaded previously on my laptop and clicked “Upgrade”. It took quite a few minutes.
    6. Next, the countdown being completed, I have refreshed my browser and the new interface appeared. The previous one was red with “Buffalo” displayed on top. The new one is mainly black/blue and yellow without Buffalo displayed anymore.

    Everything was still working fine immediately after the upgrade, without any lost of settings. I.e. mainly (from my point of view):

    • The Buffalo IP address, which was a custom one, didn’t change.
    • The Port Forwarding where still configured in NAT/QoS > Port Forwarding.
    • The wol addresses where still available in Administration > Wol.
    • The Static Leases of the DHCP Server where still configured in Services > Services.

    dd-wrt wiki for WZR-HP-G300NH : http://www.dd-wrt.com/wiki/index.php/Buffalo_WZR-HP-G300NH

    Buffalo : http://www.buffalotech.com/products/wireless/single-band-wireless-routers/airstation-highpower-n300-gigabit-dd-wrt-wireless-router

    Loading

  • A HTPC for 35€: Raspberry Pi + XBMC

    Raspberry Pi Model B

    I have just received the “Raspberry Pi Model B” I ordered two weeks ago on “RS Components” website. It rocks !!!

    Within 30 minutes, I was watching on my HD TV a 1080p movies streamed from my NAS :p

    Click to Read More

    Mine is in a black case bought from RS components. I also bought there a power supply and a HDMI cable. The big advantage of using a Raspberry pi is that

    • It has a very low power consumption (about 1-2 watts at idle)
    • It is really small 85.60mm x 53.98mm x 17mm (invisible behind the TV)
    • It has a HDMI with Audio with CEC support (you can pilot XBMC on the Raspberry Pi with the TV remote control)
    • It comes with codec license for MPEG4 & H.264 (hardware accelerated)
    • Licenses can also be bought here to play back MPEG2 or VC1.
    • The Model B comes with 512MB Ram (Only 256 on the Model A)
    • It boots a Linux from a SD card (= silent) in about 50 seconds (depending on the distribution). There are 3 distributions of Linux with XBMC targeting the Raspberry Pi (see the wiki here). Some Install Guides:
    • A 2GB SD is enough, but I use a 16GB class 6, the only SD I had
    • There are 2 USB slots that I use for a keyboard and a mouse. That can be expanded with a USB hub (There is only one USB port on the Model A). A USB HDD can be plugged to add extra storage if required.
    • There is a 10/100Gbs Ethernet Port (No Ethernet port on the Model A) with supports of various power management wakeup features, including Magic Packet™, Wake-on LAN (WOL) and Link Status Change. UNFORTUNATELY, albeit Pi’s Lan chipset does support WOL, the Pi’s lack of power management (ACPI) means it doesn’t support this Lan chipset features 🙁
    • It does not need a fan cooler (= silent)
    • The Model B uses a standard power supply capable of supplying 5V 700ma (the Model A requires 5V 300ma)
    • The GPU is capable of 1Gpixel/s
    • It can be easily overclocked (and overvolted to increase stability) up to 1000MHz (without making the warranty void !). By default the Raspberry Pi runs as 700Mhz and is overclocked at 800Mhz by RaspBmc…
    • Overall real world performance is something like a 300MHz Pentium 2 with great graphic performances.
    As mentioned, I decided to install RaspBmc. It’s really straightforward [EDIT: RapsBmc is now deprecated and replaced by Osmc).
    1. Plug the SD card in a PC (I am using Windows 8 )
    2. Format the SD card, e.g. using a tools dedicated to SD/SDHC/SDXC like “SD Formatter“.
    3. Download the raspbmc installer (Not available anymore on the official webstite) and “run As Administrator” the setup.exe . It will automatically download an image and copy it to the SD card.
    4. Plug next the SD card in the Raspberry Pi, plug the HDMI cable on the TV (I didn’t test the RCA/Audio output), plug an Ethernet cable and plug the power supply. Select the right HDMI input on your TV and you should see the Raspberry PI display. It will configure itself (get an IP address from DHCP server, download the latest release/updates, etc…) and after about 20 minutes, it should start XBMC.
    5. In XBMC, go to the main menu > System > Lower submenu > System info and take note for your URL. You can also get there the MAC Address if you prefer like me to configure your DHCP server to assign a fix IP to the Raspberry PI (recommended to remote control XBMC or configure NFS access to Synology – reboot required).
    6. On your PC, run a Browser and type the IP address of the Raspberry PI to get access to the XBMC web control UI (on the port 80 configured by default in Raspbmc). It can be used to remote control XBMC.
    7. On your Android Phone, install the XBMC official Remote Control (Not available anymore) and configure it with the IP address of the Raspberry Pi with port 80 (this is the default of RaspBmc). There is neither a username nor a password defined by default in RaspBmc for accessing the Web Control UI (Another good remote for Android is Yatse Widget).
    8. On Synology, enable the “guest” account and grant read access on the shared folders “music”, “video” and “photo” (I still have to find where I can configure a username in raspbmc to access smb/nfs – I know I could at least do it on the smb/nfs sources configured in XBMC: protocol://user:pass@synoIP/sharename)
      • The default username is “pi” and the default password is “raspberry”, but for some reasons, adding such a user on the Synology with adhoc rights on the shares does not grant raspbmc access on those ?!
    9. On XBMC, add video, music and photo sources. I am not using “uPnP” as it does not support use of metadata stored next to the media files. Instead I am currently using smb.
    10. On XBMC, you can go to the menu “Programs” to get access to the RaspBmc settings.
    The Android Remote Control for XBMC works really fine, as well as controlling XBMC with the TV Remote, which makes this HTPC from far the greatest for that price: ~35€!
    A few notes:
    • WOL does not work because the lack for “power management” on Raspberry Pi. The only other way to “power on” the device remotely is to plug its power cable into a USB port on the TV (USB voltage is standardized at 5.0v, so you only have to check the max A supported by your TV). When you turn on the TV the pi powers on too. However, the Pi draws less power when turned on then many Tvs do when off, so there is really no reason to ever turn it off. Turning it off would not significantly reduce power consumption unless it is also unplugged.
      • So, don’t ever use the “Power Off” button of XBMC. The only way to restart the Raspberry Pi would be to unplug and plug back in the power supply.
      • Power over Ethernet (PoE) is not yet supported. Maybe in a future version of the Raspberry Pi.
    • In XBMC, go to the main menu > System > Lower submenu > Settings > Apparence > Region. Set e.g. the “Langue of the interface” or your language as “Preferred Language for audio” although you like to watch the movies in O.V.
    • In XBMC, go to the main menu > System > Lower submenu > Settings > Services > SMB Client. Change the name of the Workgroup to match your.
    • Login on the Raspberry Pi via SSH (using Putty, username “pi”, password “raspberry”. Note: “root” user is disabled by default on RaspBmc) and Raspbmc will prompt you to choose your keyboard layout – use the space bar to select a layout and Tab to move the cursor onto the Ok button. On the next screen, set your layout as the default one and wait until it’s “generated” (can be a long process). Continue the configuration with the selection of your region and country. Type “exit” to close the SSH session.
    • Raspbmc overclocks the Raspberry Pi to a safe clock frequency (from the default 700MHz to 800Mhz). Notice that a change of the clock frequency does not blow the OTP (Over Temperature Protection). It is overvolting that does this. Overclocking is therefore not making the warranty void while overvolting will permanently set a bit which invalidates the warranty. Overvolting will also reduce the lifespan.
      • Here is a tutorial to overclock the Raspberry Pi with RaspBmc via SSH
      • Here is a tutorial to overvolt the Raspberry Pi with RaspBmc via SSH
      • Here is a tutorial to do the same with the Raspbery config tool (if not using RaspBmc
      • And here are more details on possible values for the overclocking/overvolting.
    • With RaspBmc, there is no need to manually update the firmware (via SSH). This is done automatically by RaspBmc, insuring that the kernel is fully compatible.

    site: http://www.raspberrypi.org (Look at the quick-start-guide and the FAQ)

    RaspBmc: http://www.raspbmc.com (Look at the FAQ)

    XBMC for Raspberry: http://wiki.xbmc.org/index.php?title=Raspberry_Pi/FAQ

    buy: http://raspberrypi.rsdelivers.com/default.aspx?cl=1

    Loading

    ,
  • Fuhu Nabi 2 with Google Apps – Great tablet for kids and dad

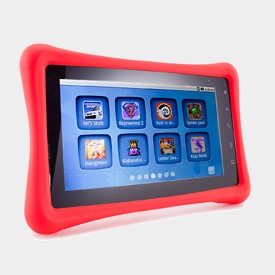
    I have just bought a Nabi 2, a tablet for kids which costed me only 155€ (+ 12€ for delivery from Ireland to Belgium) although it’s a quad-core 1.3GHz Nvidia Tegra 3 processor and 7-inch 1024-by-600-pixel Capacitive Multi-Touch display running Android 4.0.

    Fuhu Nabi 2 Kids tablet
    Fuhu Nabi 2 Kids tablet

    It could be the perfect tablet for dad and kids it it was not missing the Google Play Store, which may not be installed due to Google’s policies (Nabi having its own store)… (and maybe a GPS). Fortunately, if you are not afraid of rooting the device, all the Google Apps can be installed…

    Click to Read More

    The Nabi 2 is really great and fast.

    • It connects to 802.11b/g/n Wi-Fi networks on the 2.4GHz frequency.
    • It comes with Bluetooth 3.0 integrated (useful to connect with wireless headphones).
    • It has 1GB of RAM
    • It comes with 8GB of built-in storage of which 4.49GB are free
    • It has a microSD slot to increase capacity (support 64GB microSD without issues).
    • It has a mini HDMI out for playing videos on an HDTVs at up to 1080p.
    • The battery can last up to 7h30 while running a video with screen brightness set to maximum and Wi-Fi switched on.
    • It has a 2-megapixel front-facing camera above the screen.
    • It has an accelerometer
    • It comes with a thick red rubber silicone case that can be removed but is well protecting the tablet. Really let the kids play with it without much concern 😉
    • It has a proprietary Monarch OS UI.

    It’s built by a Los Angeles-area startup called Fuhu. You will find plenty of reviews on the web looking for “Fuhu Nabi 2”.

    Unfortunately, it does not come with Google Play and generally speaking, Google Apps (“gapps”) may not be installed. This was really an hold-back for me as I have already a lot of paid softwares bought on Google Play for my Android phone that I wanted to reused them on that tablet. Fortunately, a known “exploit” of Android has been used to root the device and add all the Google Apps as explained on XDA-developers forum.

    How to root the Nabi 2 is really best explained here (EDIT: see at the bottom for another improved package containing the “gapps”). Each manual steps are detailed here.

    It’s really clear and did work quite well for me.. Quite well because it appeared that at the step where I had to select the gapps.zip file and install it, this one was not available… I think that the problem that I didn’t have a microSD card in the slot… I would recommend to have one plugged before rooting the device… What I did to solve that issue: I copied the file manually from my PC on a microSD card, I did plug the card in the device and I used the “Mount” menu of TWRP to make the SD card acessible from TWRP. Finally, I could select  gapps.zip on the external SD.

    A last fright however. After the installation of the Google Apps (when TWRP says “Installation Complete!”) and before clicking “Reboot System” in the lower right, I noticed error messages in the logs: failed to mount \data.. Gasp !! I did try to mount it manually without success. As I still didn’t find a solution after one hour spent googling, I decided to reboot the device and pry…. And  fortunately, although it took a few minutes to restart and complete the update, everything appeared to be running really fine !

    Next, I had access to all the Google apps, including  Google Play. I did installed successively on the Nabi all the application I already paid and installed in the past on my Galaxy SII…

    There was however a remaining “issue” (neither blocking nor critical), the gapps package was giving a message ‘Android Upgrading’ on every boot. But there is a new package here that solves this issue. Simply copy it on your nabi 2 (E.g.: on the microSD – or download it directly on the internal storage). Next go to the recovery mode in TWRP 2.2.2.1 and install it:

    • While the nabi is turn on, press the “Power off” button for a few seconds to get the “shutdown” prompt.
    • Press next the “Volume +” and the “Power Off” buttons together for a few second to get the boot menu. You should see soon the following entries in the top left corner, is small fonts.
      • Boot normally
      • Fastboot Protocol
      • Recovery Kernel
      • Forced Recovery
    • Select “Recovery Kernel” with the “Volume -” button
      • Don’t wait too long before starting to select this entry or the device starts to “Boot Normally”
    • Confirm the selection with the “Volume +” button
      • The menu becomes brighter
    • Wait for a some long seconds and here it is: the TWRP menu
    • Select Install and browse to find the “gapps.zip” file.
    Another option is to copy the new gapps into the setup of jmztaylor and rerun the script. You may also replace the recovery.img (TWRP) with a more recent one (Read this thread)…

    IMPORTANT NOTICE. If like me you have the UK version (NABI2-NV7A-UK) don’t try to install more recent TWRP like the 2.3.3.0 or 2.4.4.0. They have a bug with the touch screen calibration. you won’t be able to touch and select menu/items/etc… anymore in TWRP 🙁 Really a nightmare. So stick to TWRP 2.2.2.1.

    So, as I had to redo the whole process several times, here is a resume (every info taken from xda-developers!):

    • On the Nabi 2
      • Power it on (Press the “Power” button for 5 seconds).
      • Go into the Daddy/Momy mode
      • Verify that “USB Debugging” is enabled in Settings > System\Developer Options.
      • Check also that you have at least the version 1.9.23 in Settings > System\About.
      • To update the nabi 2, go to Settings > System\ About, Update and click the “Check update” button.
    • On the PC:  Go to Control Panel, Device Manager and look for the Nabi tablet device.  If it has an exclamation mark next to it, install the PDANet software to get the required drivers. The Nabi 2 should next be properly listed.
    • Open a dos command prompt Run As Administrator
    • Go to the location where you have unzipped the jmzrootpackage
    • Replace the files\gapps.zip file with t499users_fuhu_nabi2_gapps.zip
    • Possibly replace files\recovery.img with the one from NabiTWRP244.zip
    • Run install.bat
    • Choose option 1. The ADB server used to communicate with the nabi 2 will start. Press any key to continue
    • The device will reboot and display a menu in the top left corner :
      • Bootloader
      • Continue
      • Reboot-bootloader
      • Reboot
      • Poweroff
    • Press any key in the dos command prompt to continue. The TWRP  will be copied on the nabi 2.
    • Press the “Volume +” button on the nabi to enter the “Bootloader” menu
    • Press next the “Volume -” button until the “Recovery Kernel” menu is selected
    • Press finally the “Volume +” button to confirm the selection. The whole menu appears next much brighter and a few long seconds later you enter the TWRP  UI.
    • In the dos command prompt, press any key to continue. The gapps.zip and root.zip files will be uploaded and the device will reboot and reenter TWRP.
    • In TWRP, press Install
      • If you have difficulties to Press the button, you possibly have the “touchscreen calibration” bug. Bad luck. It’s a real nightmare to use TWRP with that bug. Check the version displayed on the top. I had no issue with TWRP 2.2.2.1
      • I was unable to select the “internal storage” as source for the files to be installed
      • I didn’t find the files pushed from the dos command prompt and had to copy them manually on the microSD. (Visible from TWRP under /external_sdcard)
    • Select both root.zip and gapps.zip (add them in the queue) and proceed
    • During the installation, you could see like me a lot of “E:Unable to mount ‘/data’” and “E:failed to mount /data (Invalid argument)” errors…
    • After the installation press “Wipe Cache/Dalvik” and once done, press “Back”
    • Press “Reboot” and select “System” in the reboot menu. The nabi 2 power off
    • Power on you nabi 2
    • It will take quite a long time to boot. Eventually, it will be “updating Android”
    • Enter the Daddy/Momy mode and go to the Play Store to get “Root Checker”  (e.G.: from free Android tools) to see if the device is rooted properly.
    • You should also have an application named “SuperSU” available
    • You can now also delete the Fuhu apps that you don’t like
      • Use e.g.: ES File Explorer (as far as you already checked all the options in Settings > Root Settings) to delete the relevant .apk files under /vendor/app/. Pay attention that if you delete all of them, you will get a blank welcome screen. If you really want that, make sure that you hat set “Parent Mode as Default Mode” in the Settings > Personal/Security.
      • NvCPLSvc.apk, fuhu_AddApps.apk, fuhu_AppZone.apk, fuhu_Books.apk, fuhu_ChoreList.apk, fuhu_Crafts.apk, fuhu_Fan-a-tech.apk, fuhu_KidzMode.apk, fuhu_NabiCare.apk, fuhu_NabiCloud.apk, fuhu_NabiSpinletsPlusICS.apk, fuhu_NabiSpinletsPlusParentICS.apk, fuhu_NabiSync.apk, fuhu_OOBE.apk, fuhu_ParentalDashboard.apk, fuhu_SpinletPlusVideo.apk, fuhu_SwitchKids.apk, fuhu_TreasureBox.apk, fuhu_University.apk, fuhu_Videos.apk, fuhu_Web.apk, fuhu_nabiMD.apk
    • If you still get the “Android Upgrading” message every time you reboot (as I had… although using the new gapps.zip), it is said that you have to delete manually the two following .odex files (I did renamed them, but as it didn’t work for me, I finally  restored them)
      • /system/app/Gallery2.odex
      • /system/framework/com.google.widevine.software.drm.odex
    • I did notice that although I had update the device from version 1.9.36 to  1.9.37-release-keys , there was still OTA updates available (version v2.0.5)… So I did download and install them and the device did reboot in TWRP mode. As I didn’t know what I had to do, I did “install” again the root.zip and the gapps.zip (in that order!), press again “Wipe cache/Dalvik” and press “Reboot System”… The funny thing is that the update didn’t complete successfully as it is still in the list if I do a “check update”. But instead, the “Updating Android” message is gone 😀

    site: http://www.nabitablet.com

    xda-developers page: http://forum.xda-developers.com/wiki/Fuhu_nabi_2

    Automated scripts: http://forum.xda-developers.com/showthread.php?p=36758895

    Loading

  • Remove Print Jobs stuck in Queue with state Deleting

    I have time to time Print Jobs stuck in the Print Queue that cannot be canceled or deleted. It’s always very frustrating as it blocks other Print Jobs which are usually quite urgent… The only solution is to stop the spooler and delete its content from a command prompt.

    Click to Read More

    Often, it starts with a Job stuck in the Print Queue and not printing. For some reason, although I restart both the PC and the Printer, the Job never starts. So, I try to cancel it but the Job does not disappear from the Queue and keeps displaying the status “Deleting-Printing…” for ever.

    I think that the problem occurs when the PC goes into the Sleep state while the Print Job is not yet completed (But I am quite sure there are other causes). When the PC is waked up, the Job appears stuck for ever.

    Here are the commands  to stop, clean and restart the spooler:

    [bash]net stop spooler
    del %systemroot%\system32\spool\printers\*.shd
    del %systemroot%\system32\spool\printers\*.spl
    net start spooler[/bash]

    Loading