I recently tried to install the plugin “Use Google Libraries” for WordPress but it didn’t work because all its URLs where rewritten by the plugin “Root Relative URLs”. This can be solved with a black list url…
Click to Read MoreClick to Close
Concretely, the plugin “Use Google Libraries” uses URLs like src=’//ajax.googleapis.com/ajax/libs/…’. Those were rewritten by mistake into src=’/ajax/libs/…’
I couldn’t disable the plugin “Root Relative URLs” as it’s the only way to make my blog accessible seamlessly from both internet and my intranet, using either the netbios name of my NAS, its IP or its dynamic DNS name.
So, I tried to add //ajax.googleapis.com in the “black list urls” of “Root Relative URLs”. Those can be set in the Dashboard > Settings > General > (scroll to the bottom) “
Unfortunately it didn’t work… Until Hube2, who wrote a hack of “Root Relative URLs”, told me how to set it correctly: one may not use the domain name in the black listed URL’s.
Conclusion, in my case, I had to black list “ajax/libs”, et voilà!
Since a few months, I couldn’t “Add Media” or “Insert/Edit Link” anymore within the Visual Editor of my WordPress, when editing existing Posts. Everything was however working fine when creating new Posts… According to me, it is due to the use of a too recent version of ajax/jQuery, not compatible/conflicting with WordPress 3.8.2’s libraries. I found indeed some plugins recently updated/installed that had to be removed to solve the problem.
Click to Read MoreClick to Close
Concretely, Modal Popups didn’t open anymore…
I didn’t get time to investigate that issue before this week-end. But it took me only a few minutes to discover that everything was working again when disabling the plugin Akismet 3.0.0 (updated by the way from 2.5.9 a few months ago).
Instead of disabling all the plugins and re-enabling them one by one, I did compare the html source of the pages used to create a new Post and to edit an existing Post (As the problem only occurred when editing). I noticed immediately that the main difference was the inclusion of some Akismet’s javascripts. Reason why I tried first to disable that plugin…. and Bingo!
As suggested on WordPress’ forum, I tried to installed the plugin “Use Google Libraries”. But it didn’t solve the problem. Actually, using that plugin while Akismet is disabled also results in Modal Popups not opening…
When the problem occurs, there are errors logged in the Chrome’s developer Console (F12 > tab “Console”) : Uncaught TypeError: undefined is not a function. This error occurs in scripts from jquery-ui.min.js
So, IMO, both “Use Google Libraries” and “Akismet” use a too recent version of ajax/jquery for WordPress 3.8.2. But as I didn’t want to upgrade to WordPress 3.9 or 4.0 beta (as long as Synology don’t provide its own package) I did simply rollback to Akismet 2.5.9. I had fortunately a backup… And did uninstall “Use Google Libraries”… Et voilà !
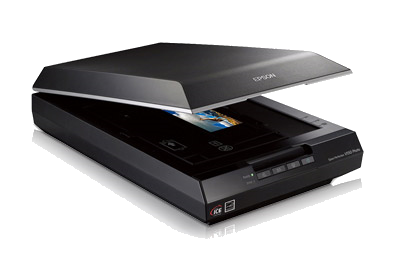
I always wanted a good device to scan all my negatives. I finally decided to buy an Epson Perfection V550 Photo…
Click to Read MoreClick to Close
I didn’t want something like those small “film scanners” at ~80€ because those are actually camera taking a photo of the negatives. As a consequence, the quality of the output is only good enough to published the photo on the web or to watch them on a screen… Even with a higher DPI, the quality is still far from amazing.
Film Scanner
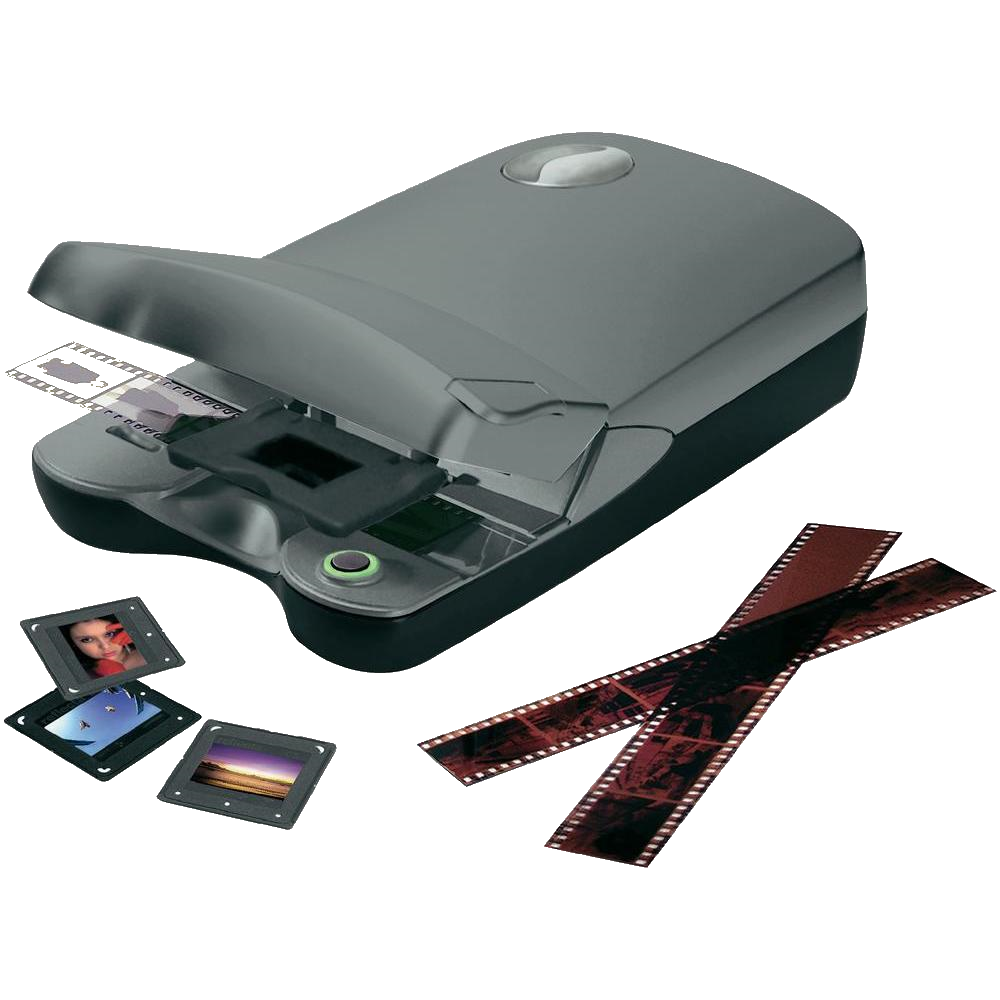
However, a real semi-pro film scanner cost at least 500€ and much more (1200€, 1500€, ..). As that was out of my budget, I was therefore looking for something as a “Reflecta CrystalScan 7200” (~200€), a typical great compromise between price and quality; the high quality of the output being mainly due to the feature named “Ice Techonology”. This one is amazing when used to remove dusts and scratches on photos. Unfortunately, it only scans the negatives one by one and one has to move the film manually. I would have needed ages to scan all my negatives…
Reflecta CrystalScan 7200
So, I finally decided to go for the excellent EPSON Perfection V550 Photo, the smallest in its family, but with all the features I needed. It uses the ICE Technology and scan up to 2×6 negatives from 35mm films at once at 6400 dpi. Here is an excellent review for details.
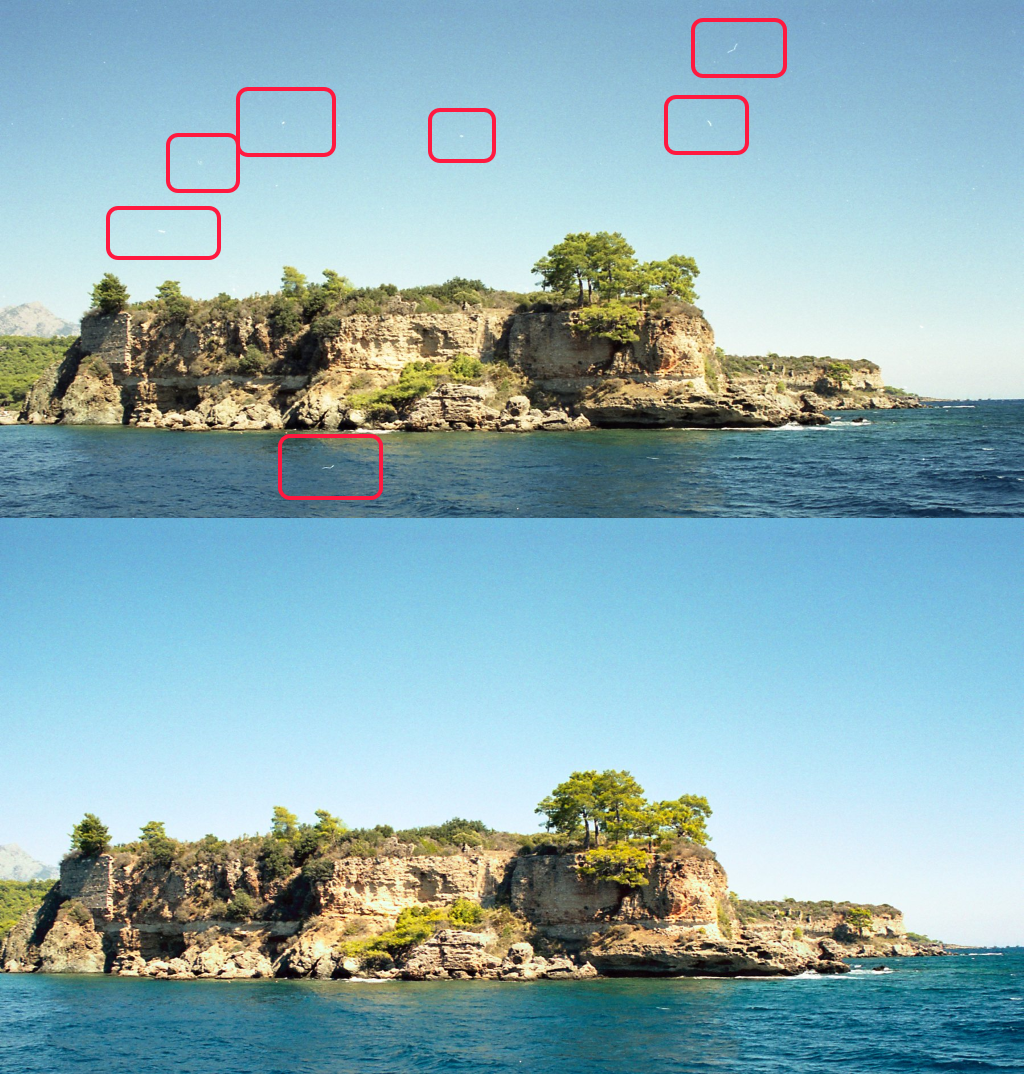
And here is a demo of an automatic scratch and dust removal with EPSON Perfection V550 Photo’s ICE Technology:
Demo of ICE Technology
Here after, how I process to scan negatives from 35mm films into 10×15 photo, each one around 5MB, 7200x4800px, 24 bit depth (online documentation here and good guidance here and tutorials)
Turn on the EPSON and wait until the « Ready » green led on the front panel stops blinking.
Start the “EPSON Scan” software on the PC
Choose “Home Mode”
If the “Configuration” was changed in the past, reset the settings via the “Configuration…” button > tab “Other” > “Reset All”
As far as I am concerned*, I go to the “Configuration…” button and in the “Color” tab, I select the option “ICM” with
“EPSON Standard” as a “Source”
“sRGB” as target (“RVB” in french)
and the option “Display preview using Monitor Compensation” ticked
As “Document Type”, choose “Color negative films”
As “Image Type”, use “Color”
As “Destination”, use “Other” and
set 1200 as “Resolution”
with 10×15 cm as “Target Size”.
Under “Adjustement” select the option “DIGITAL ICE Technology…” (The only one enabled when one choose “ICM” in the “Color” tab of the “Configuration” windows.
* I noticed that the result was often (but not always) better on my display screens. However, switching between the option “ICM” and Color Controls results in something weird… The background color of the photos become blue:
Once all the steps above are done:
Click on “Preview”
Select the “negatives” to be scanned in the “Preview” window.
Back into the “Epson Scan “ main window, Click on “Scan”
In the new window (“File Save Settings”) select
The location for the output (Ex.: My Pictures)
A prefix for the images
The “Type” of “Image Format”: “JPEG”… Then click on “Options” next to the “Type” and be sure that you kept:
“16” as compression level
Encoding Standard
Embed ICC profile
Set the other option according to your preferences and click “Ok”.
When the operation ends, it will open the destination folder if you did ask for it in the options above..
To scan one negative, it takes close to 3 minutes on my PC (a Quad Core I7 3.6GHz, 16GB Ram) although 8 minutes are announced. The negative used for this test is a 14 years old AGFA film. Here it the outcome: a picture of about 5MB, 7200x4800px:
If I choose next “Printer” as “Destination”, still with “DIGITAL ICE Technology” enabled, it takes a bit less than 2 minutes to get a picture of about 2MB, 1800×1200.
If I choose “Color Controls” in the “Configuration…” window instead of ICM with a “Display Gama 2.2” and a mean “Continuous Auto Exposure”, I have other options in the “Image Adjustment” pane. NB.: whenever you change an option in the “Image Adjustments” pane, look at the “Preview” pane to see what’s the results…
Ticking then the options “Color Restoration” and “Backlight Correction” in addition to “DIGITAL ICE Technology”, I get this ugly output:
Ticking the option “DIGITAL ICE Technology” with the “Backlight Correction” only, I get something better:
And ticking only the Image Adjustment “DIGITAL ICE Technology”, the output comes resp. in a bit less than 3 minutes at 1200 dpi (picture on top) and in a bit less than 2 minutes at 300 dpi (for printer, picture bellow):
Far from an expert in photography, I have my own preference for the results with only the “DIGITAL ICE Technology” Image Adjustment enabled…
If I select 10 negatives (2 slides of 5) to be scanned at once with “ICM” selected in the “Configuration” and “DIGITAL Ice Technology” enabled, EPSON Scan announces 21 minutes for 300dpi, 1800×1200 (“Printer” as a destination)…. But it takes concretely only 16 minutes. With the very same options, but targeting 1200dpi, EPSON Scan announces 51’ and takes 30’.
Now, instead of using the “Home Mode”, one could use the “default” mode, which is a the “Full Auto Mode” – used when one presses the rightmost button on the front of the scanner. Here is a result, a ~2MB picture, ~1800×1200 full of dust and scratches (as you can see in full size):
NOTICE: if getting noise and grain in the picture, read this tutorial to use the advanced mode and fix this issue.
Final interesting touch: the scanner will automatically switch off when not in use anymore (Ex.: if the PC enter any standby mode due to inactivity).
Another tutorial here to scan on a V550 with professional settings.
[EDIT 07/2020] to scan B&W negative films, I had good results with
Type of image: 16 bits grayscale.
Resolution: 2400 dpi.
I do not use Unsharp Mask – I prefer to do it later with another software.
Grain Reduction – I use it with level medium.
Color Restoration – I disable it for black and white. If enabled, the images are less dark but this remove interesting shadows.
Backlight Correction – I disable it as it adds too much light. Try it to see if you like the results.
Dust Removal – I use it with level low. It can produce weird results (like removing closes eyes). Usually there is a trade-off in absolute image quality (sharpness) and effort you’ll have to expend later removing dust.
Digital ICE Technology – I disable it for Black and White. This setting uses an Infrared channel to detect and remove scratches and dust. The silver in B&W film interferes with this function. The results is really awful!