Month: November 2014

  • Parental Control for Plex on Synology

    Many years ago, Parental Control was already a native feature of my previously favorite Media Library Manager: Media Browser – reason why, since I am using Plex (mainly because Plex Media Server runs on my Synology), the lack of efficient support for such Control has been really frustrating. A solution has fortunately been developed by iSh0w, early in 2014, as a plugin named “L0ck”. This plugin is now really pretty mature!

    NB.: two days after this post, Plex released native Parental Control as part of their new Plex Home feature… But this is not yet available for Samsung so L0ck still makes sense for me.

    [EDIT 12/2015] Later in 2015, a new version of Plex for Samsung has been released, which support user accounts (and hence, Parental Control).

    Click to Read More

    The only solution currently suggested by Plex to prevent Kids watching inadequate content is to create dedicated Plex Accounts for the kids and only share with those accounts the adequate content. This is totally inconvenient, especially when sharing the same player device such as a TV or a Tablet. Indeed, parents may not forget to “disconnect” the device from their account. Next, kids need to be able to connect with a login/password, which is far from easy for the youngest ones. Definitively, Plex is missing a a true Parental Control!

    L0ck plugin for Plex, although(*) not yet the very best solution, should be loved by the thousands of users who voted for such a feature!

    (*) You have to re-Lock the libraries before quitting your Plex Client. Libraries are not automatically re-locked after x hours or when Plex Client is restarted… Also, when unlocked, libraries are visible for all the Plex Clients, possibly for other devices that would start Plex! Next, the plugin is unl0cking/l0cking all the Controlled libraries at once (If there is a trick to protect distinct subsets of libraries with distinct passwords, I didn’t find it yet). Finally, restarting the Plex Client is usually required… But still, this is better than nothing or much better than Plex’s suggested approach.

    Here is how to install this plugin for Plex on Synology:

    1. Disable the “authentication on local networks” on your Plex Media Server (if enabled)
      1. Go to your Plex Server Administration page http://<YourSynology>:32400/web/index.html#!/settings/server
      2. Click on the entry “Connect”
      3. Click on the button “Show Advanced
      4. Disable “Require authentication on local networks”
    2. Go to the “L0ck” page to download the Plugin customized to lock/unlock some of your Libraries with a password
      1. Type the local IP (LAN) of your Synology
      2. Click “Search For Section(s)!
      3. Select the section(s) you would like control access to.
      4. Enter next Password. Ex.: 4 digits
      5. And click on “Generate Plugin!
      6. Finally click on “Download plugin!” on download a zip with your customized plugin (This is not working with all browsers! Use Chrome).
    3. Deploy the plugin into Plex’s plugin folder after customization for Synology
      1. Unzip the archive downloaded at step 2..F into a temp folder
      2. Open within notepad++ the file <YourTemp>\L0ck.bundle\Contents\Resources\l0ck_support\l0ck.sh
      3. Search and Replace “/var/lib/plexmediaserver” with “/volume1/Plex” and Save the file.
      4. Open next the file <YourTemp>\L0ck.bundle\Contents\Resources\l0ck_support\unl0ck.sh
      5. Search and Replace “/var/lib/plexmediaserver” with “/volume1/Plex” and Save the file.
      6. NB.: No need to change the __init__.py as mentioned on L0ck’s webpage.
      7. Finally Move the folder L0ck.bundle into the hidden Shared folder \\<YourSynology>\Plex\Library\Application Support\Plex Media Server\Plug-ins\
    4. Grant access for plex onto the plugin
      1. Open a Telnet console onto your Synology
        1. Run “telnet” from Windows
        2. Type: open <YourSynology>
      2. Login as ‘root’ with your admin password
      3.  Execute the following commands
        1. cd /volume1/Plex/Library/Application\ Support/Plex\ Media\ Server/Plug-ins
        2. chown -R plex:users L0ck.bundle
        3. cd L0ck.bundle/Contents/Resources/l0ck_support
        4. chmod a+x l0ck.sh
        5. chmod a+x unl0ck.sh
        6. chmod a+x sqlite3
    5. Re-enable the “authentication on local networks” on your Plex Media Server (if it was enabled)
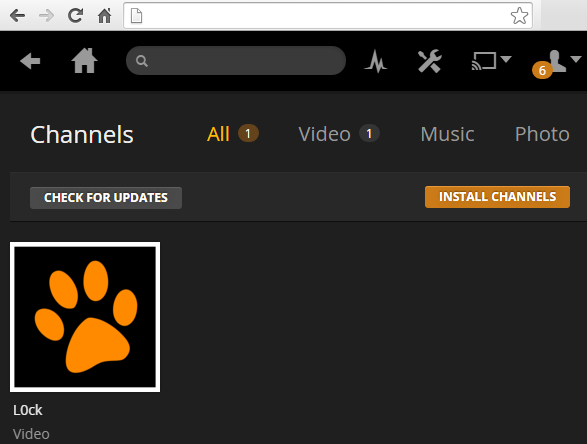
    6. Restart now your Plex Clients and go to the “Channels” where you should see the L0ck” Icon:
    L0ck Plugin
    L0ck Plugin

    Et voilà 😉

    NB 1: By default, the libraries to be “controlled” are all unlocked. So, enter the plugin and L0ck them.

    NB 2: The display is not the same within Plex Home Theater and Plex Web Client. E.g.: in the Plex Home Theater (for Windows), you see both the icon “L0ck” and “Unl0ck”. In the Plex Web Client, instead, you see only the “L0ck” icon. In the Plex Home Theater, when you click on “L0ck”, nothing seems to happen while in the Plex Web Client, you see an “Locked” icon replacing the “Lock” icon. But you will quickly find your path…

    NB 3: Once your have clicked on “L0ck”, you have to restart your Plex Home Theater or refresh your browser if using Plex Web Client. On the opposite, with Plex for Samsung, I don’t have to quit and restart Plex after Unl0cking/L0cking my libraries, even if e.g. unl0cking via the Web Client…

    NB 4: To Unlock the libraries with the Plex Web Client (where the “unl0ck” icon is missing), go to the “Channels” page and enter the “L0ck” channel. Then type your password in the Search box and simply hit “enter”.

    NB 5: Once a movie started from an unl0cked Controlled library, the libraries can be rel0cked immediately. This is not stopping the movie as you could see when playing a movie within Plex Home Theater and re-locking the libraries via a Web Plex Client. So, based on that finding, I have customized the L0ck plugin to add a new button: “Short Unlock“. This one unl0cks the libraries for 2 minute and then re-locks them automatically. If you are interested in such a feature, you can simply add the following line in unlo0ck.sh, before the last line (with “exit;”):

    [shell](sleep 120 ; sh ./l0ck.sh) &amp;amp;amp;amp;[/shell]

    I have submitted this idea to the creator of the plugin (See here). So far, adding a new button does not offer the best user experience with the Plex Web Client due to some technical limitation…

    For additional Info: read the FAQ.

    On Synology, L0ck plugin’s log file is named “com.plexapp.plugins.l0ckunl0ck.log” and located in \\<YourSynology>\Plex\Library\Application Support\Plex Media Server\Logs\PMS Plugin Logs. It has better be opened with notepad++.

    Here is the thread about the release version of the plugin. And here is the thread about the development of the plugin…

    Loading

  • Expand a Synology RAID 0 Volume with bigger disks using VMWare…

    I had 2 x 2TB disks in a RAID 0 Volume on my DS713+ and wanted to replace them with 2 x 3TB… My first idea was quite simple: move the 2TB disks from the DS713+ into my PC, next to the 3TB disks, clone those 2TB onto the 3TB disks and resize the data partition… Unfortunately, googling for users’ feedback on such an operation, I finally felt that it could possibly be no such a real piece of cake… So, I used my second idea: “Backup” the DS713+ into a Virtual Synology, replace the 2TB with the 3TB in the DS713+ and “Restore”.

    Click to Read More

    I decided to not try the “partition resizing” approach because it seems that expanding next the Volume to use the free space on the partition could be difficult (if possible at all). I will for sure try that idea later with dummy data. But for now, I wanted a peace-of-mind-solution. So, I did:

    1. Create a Virtual Synology (a DS3612xs with DSM 5.0-4528) with enough space,
    2. Enable the Network Backup Service on that DS3612xs
    3. Clean-up as much as possible on the DS713+ (DSM 5.0-4528 update 1)
      1. Disabled the camera in Surveillance Station and  deleting all the recordings
      2. Stopping Plex, Video Station, Audio Station and Photo Station
      3. Deleting all the movies from \\<DiskStation>\video (As those are anyway backuped on my main server)
      4. Deleting all the musics from \\<DiskStation>\music (As those are anyway backuped on my main server)
      5. Keeping however the photos to not loose albums’ settings and thumbnails (as those would require days to be recreated!)
    4. Backup as much as possibly from the DS713+
      1. Using the native “Backup & Replication” feature, but also
      2. “Exporting” the Configuration of the “Surveillance Station” and Copying the extra licences (not the default one)
      3. “Exporting” all the complete zones’ settings from the “DNS Server”
      4. Taking note of the information not backuped:
        1. “QuickConnect”
        2. “External Access”
        3. “Network”
        4. “Security”
        5. “Notification”
        6. “Application Portal alias”
      5. Taking note of:
        1. All the Packages installed:
        2. The custom “Package sources” configured in the settings of the Package Center
      6. Backuping Wordpress
        1. Stopping first WordPress
        2. Taking a Backup of the database wordpressblog via a full “Export” with phpMyAdmin
      7. In addition, to be 100% safe,I also took a full copy of
        1. the Plex’s configuration & settings: \\<DiskStation>\Plex\Library\Application Support\Plex Media Server
        2. the WordPress installtion: \\<DiskStation>\web\wordpress
        3. All my “customized” stuff
    5. Replace the 2 x 2TB with the 2 x 3TB in the DS713+
    6. Reinstall DSM 5.0 on the DS713+ with the same name and admin’s password as previously
    7. I reinstalled WordPress, Plex, DNS Server and PhotoStation, but I did not configure them and stopped them! (Actually, I don’t know yet if installing them before the restore was required… — to be checked).
    8. Enable the Telnet Service in “Terminal & SNMP”
    9. Restore manually the information for
      1. “QuickConnect”
      2. “External Access”
      3. “Network”
      4. “Security”
      5. “Notification”
    10. Restore the Backup made on the DS3612xs. It included:
      1. All the Shared Folders selected to be backuped
        1. Shared Folders recreated when installing a Packages are renamed!
      2. The “File Services” settings
      3. The “Users”
      4. The “Groups”
      5. (I don’t use the Directory Services)
      6. The “Regional Options”
      7. The “Task Scheduler”
      8. The “Application Portal” alias
    11. Reinstall the other Packages.
    12. Import manually the DNS zones exported previously (via “Create” > “Import zone”).
    13. Fix issues with “Surveillance Station” if any.
      1. I had to delete the camera restored with the Backup in “Surveillance Station” (weird as I successfully restored such backups in the past…)
      2. Add manually my extra licences
      3. Import manually the Configuration settings I exported previously.
    14. Restore manually the database of WordPress via phpMyAdmin and start next WordPress. It should not prompt you anymore to configure it.
    15. Check that the expected content has been restore in the various Shared Folders: photo, Plex (music and video if not cleaned-up), etc…
    16. Delete all Plex’s plugins (hidden folder \\<DiskStation>\Plex\Library\Application Support\Plex Media Server\Plug-ins). They will be reinstalled automatically when you will start Plex. I have indeed noticed that various features do not run fine anymore in the Administration site otherwise. Ex.: choose language when editing libraries or fixing incorrect match, choosing providers, etc…
    17. Start all Packages currently stopped.

    Here after, the steps to create a Virtual Synology:

    Click to Read More

    1. Take the latest Boot Image iso available to start a “DSM” in a VMWare (Nanoboot-5.0.3.2 DSM 5.0-4528 x64) here.
    2. Take next the latest DSM pat Image (DSM 5.0-4528) here.
    3. Get the Synology Assistant from here and install it.
    4. Use VMWare Workstation 10 to create a new VM (You may create a Shared one to be able to run it remotely if you want):
      1. Create a “Custom (Advanced)” virtual machine
      2. Linux, version “Other Linux 2.6.x kernel 64-bit”
      3. With 1 processor, 2 cores
      4. 1024MB Memory
      5. Using a Bridged network
      6. LSI Logic Controller
      7. SCSI Disk Type
      8. And a large new virtual disk fully allocated (for performance reason)
    5. Instead of starting the new machine immediately, edit the settings: the CD/DVD must be changed to use the Iso Boot Image donwloaded at step 1.
    6. Next, edit the “.vmx” file created by VMWare next to the VM: Add this line just after the first one: bios.bootOrder = “cdrom”
    7. Now start the VM. It shows a menu with various entries named “Nanoboot-5.0-4528 xxx”. Pick the one to “Install/Upgrade”.
    8. Run next the Synology Assistant. It will find a “DiskStation” not yet installed. Select that one and right-click to “Install” it.
    9. When prompted for the Installation File, pick the pat file downloaded at step 2.
    10. Proceed until the installation is completed (Give a name to you new Synology. No need however to setup a QuickConnect ID).
    11. Enable the Backup https://www.synology.com/en-us/support/downloadService via the Start Menu > Backup & Replication > Backup Service > Enable Backup Network Service.

    You are now ready to backup your actual Synology.

    And icing on the cake, here is how to access the DSM and data still available in the old RAID 0 Volume (I.e.: on the two old 2TB):

    Click to Read More

    I did create a second Virtual Synology with the RAID 0 volume still available on the two old 2TB! Doing so, I will still be able to access all my data and settings if by any chance some have not been correctly restored.

    1. Take the latest Boot Image iso available to start a “DSM” in a VMWare (Nanoboot-5.0.3.2 DSM 5.0-4528 x64) here.
    2. Get the Synology Assistant from here and install it.
    3. Use VMWare Workstation 10 to create a new VM (You may NOT create a Shared as those do not support physical disks. Also you better have to run VMWare as Administrator otherwise adding physical disks could be disabled):
      1. Create a “Custom (Advanced)” virtual machine
      2. Linux, version “Other Linux 2.6.x kernel 64-bit”
      3. With 1 processor, 2 cores
      4. 1024MB Memory
      5. Using a Bridged network
      6. LSI Logic Controller
      7. SCSI Disk Type
      8. And add the two old physical disks. Notice: the order is important. If they are not in the correct order, the DSM won’t start and report a disk access failure. No panic: simply swap the disks and retry 😉
    4. Instead of starting the new machine immediately, edit the settings: the CD/DVD must be changed to use the Iso Boot Image donwloaded at step 1.
    5. Next, edit the “.vmx” file created by VMWare next to the VM: Add this line just after the first one: bios.bootOrder = “cdrom”
    6. Now start the VM. It shows a menu with various entries named “Nanoboot-5.0-4528 xxx”. Pick the one to “Install/Upgrade”.
    7. Run next the Synology Assistant. It will find your old Synology “Migratable”. Select that one and right-click to “Migrate”. The RAID 0 Volume is detected automatically and the DSM should load. If it fails around 50%, swap the physical disks and restart the VM. They are probably not in inserted in the correct order (I did swap them physically in my PC – as using bays- but I could have removed them from the VM configuration and re-added them in the right order).
    8. NB: installing with the option to download the latest DSM version failed. I had to download and use the pat file DSM 5.0-4528 available here.
    9. Give this new Synology a unique name and disable any service that would conflict with one already running somewhere else.

    Loading