“ACPI-On-Lan” is a package I have created for my Synology DS 713+ (also tested on my DS 3612sx).
It installs a website that list all your network devices. Depending on the OS, you can possibly send a sleep, shutdown or hibernate command to the device. ACPI-On-Lan tries also to reach each device (using a ping) and checks if there is a default web page accessible on the device (Ex. a configuration or administration page). Finally, it can send Wake-On-Lan magic packets to wake-up devices currently switched off.
Click to Read More
Disclaimer
This package is a prototype made for learning purpose. I did test many development techniques and libraries I never touched before: ajax/jquery, boostrap, .Net click-once deployment, creation of Synology spk packages, WebAPI/Microsoft .Net Owin, Newtonsoft.Json, running shell commands from php, etc… So don’t expect the most amazing bits out of there. It’s just this well known Big Ball of Mud 😳
This is not a beta version (even not an alpha), which would be well designed. My prototype is a Quick and Dirty App made of various pieces of code dropped together. It must be complete rewritten properly or at least deeply re-factored. Briefly said, I don’t want my name to be associated with this ugly mess (even if most scientists seem to produce such a code :D).
Nevertheless, and although still really incomplete (as most prototypes), it works on my own NAS and I have already been asked to share it. So, here it is:
Some details
A few details on ACPI-On-Lan’s basics first:
- it reuses the login cgi module of the Synology to authenticate the user
- it parses the ARP table of the Synology to find the devices available on the LAN.
- it pings the devices using the “inetutil” library (from ipkg)
- it does not use any database
- it stores all the details about the network devices in a file with json format. If you plan to uninstall the package, you must backup those files manually first.
- for hibernate, sleep, standby, restart Windows PC, it talk to a Windows Service hosting WebAPI services.
- this Windows Service was intended to be deployed via click-once. Because I didn’t want to resign the click-once setup for each new deployment url, the Windows Service is installed now via MSI. However, the Windows Service is still self-installing (simply run the exe once and it will do the complete setup)
- all commands (ping, WOL, …) are executed server side (by the NAS). So the Web UI can be used from the WAN without requiring direct access to each devices on the LAN.
Notice also that:
- the web UI doesn’t render well on mobiles.
- there is not support yet to shutdown MAC, LINUX or ANDROID devices. I am planning to look how to use RPC commands (later this year 😉 )
- Windows mobiles are not yet supported.
- there are still some bugs when refreshing the status of some devices and a wrong state can sometimes be displayed. Also an action to “shutdown” the NAS is displayed although not yet implemented.
- it’s not possible to define a specific port for the website possibly hosted on a device (Ex.: a custom local port of a port forwarded from the modem/router in order to access the device from the WAN)
- I have to yet filled the spk’s “texts” files to translate the package.
Prerequisite:
You will have to install the package ‘inetutil’ on your NAS. This is required to be able to ping the devices while not running as super user (i.e.: ‘root’).
The package ‘inetutil’ can be easily installed via the graphic interface “IpkgGUI” once IPKG is installed. And there are many tutorial on the web to install IPKG. If you are not afraid, you can try my own installation script*, described here (“IpkgGUI” is a graphical interface to manage IPKG packages. It is available as a Community Package for Synology on https://www.cphub.net)
(*) Notice that you can install the package “ACPI-On-Lan” first and than connect on your NAS via telnet. The script to install IPKG is deployed with “ACPI-On-Lan”. Once connected, run: sh /var/packages/AcpiOnLan/target/application/service/installipkg.sh
If you want to be able to send Sleep/Restart/Hibernate/shutdown command to Windows PC, you will need the Microsoft .Net Framework 4.5. This service is not required if you only want to send WOL commands to Windows machines.
Setup:
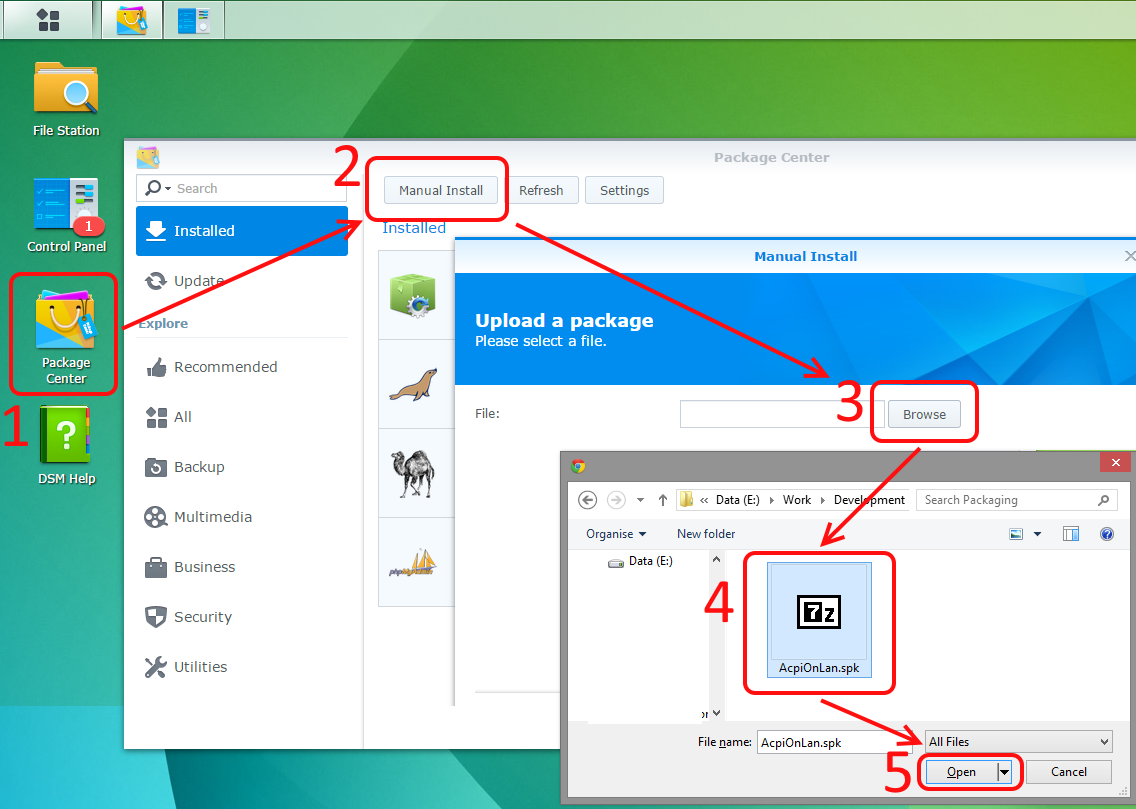
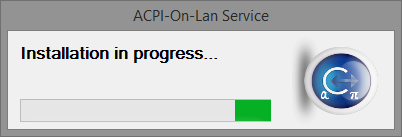
1) Download the package attached at the bottom of this page and install it manually via the “Package Manager” of Synology. 5 clicks and ~that’s it~.
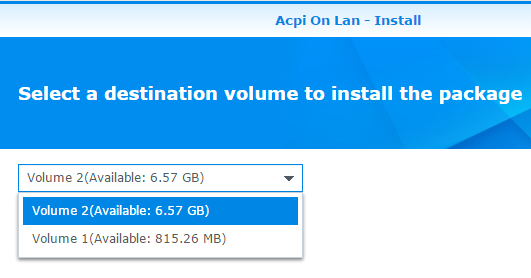
2) It can theoretically be installed on any volume (if you have several).
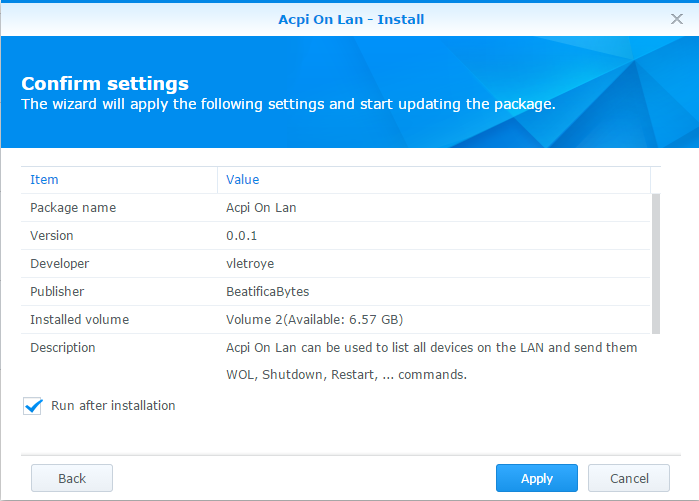
3) And you can “run it after installation”
The setup of the package will mainly:
- deploy the sources under /var/packages/AcpiOnLan/
- the web application will be in /var/packages/AcpiOnLan/target/application
- all the data of AcpiOnLan will be stored next to the web application in a file named Computers.json
- create a php alias AcpiOnLan to “redirect” the http calls into the folder here above
- force open_basedir = null for the new web site “AcpiOnLan”
- add an icon into the DSM Start Menu

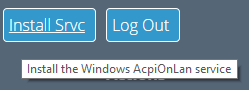
4) Once ACPI-On-Lan opened in a browser, you will have access to a menu “install srvc”. Click on it to download the MSI which installs the Windows Service (Do this on Windows only!).
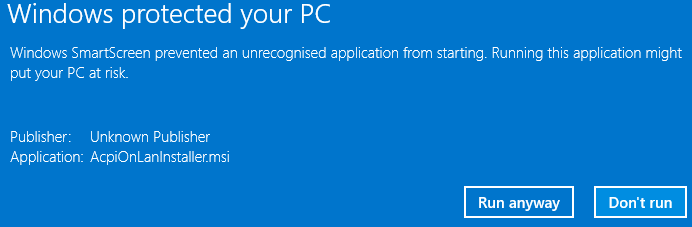
5) The download of AcpiOnLanInstaller.msi will most probably be blocked by your browser/antivirus as it’s not a common download. If you want it, you have to accept the download (“Keep” within Chrome)

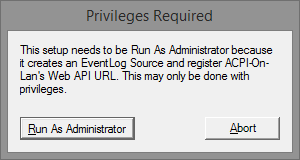
6) Once you run the msi, recent version of Windows will also prevent its execution
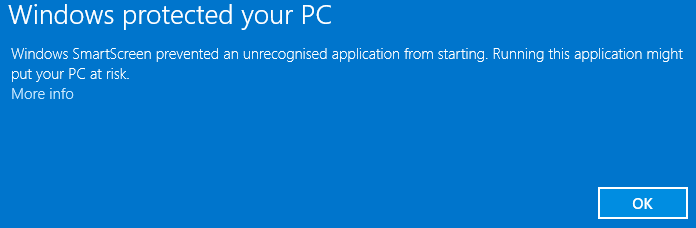
7) You will have to approve the installation by clicking on “More Info” here above and then “Run Anyway”
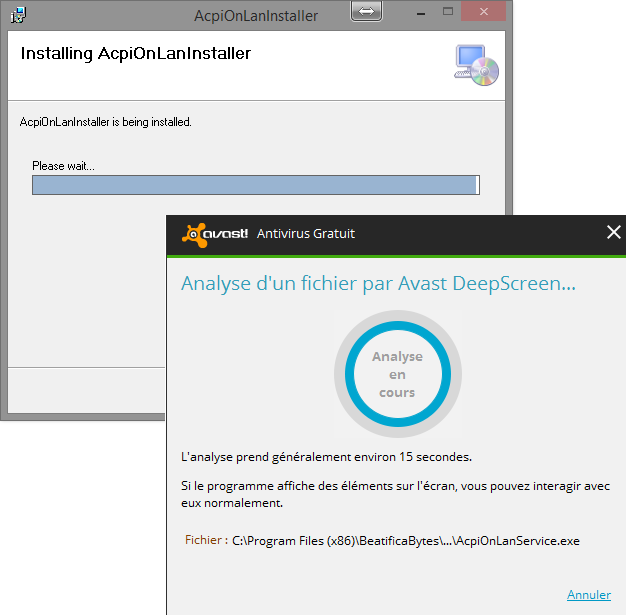
8) Once the msi is running, it will copy the required files and do a first run of the service. When the service is run interactively (it’s the case when run by rom the msi), it install/uninstall itself instead of starting WebAPI Services. But it means that the antivirus will again react. Due to installation timeout this could disturb the setup…
9) The Windows Service will be installed and will register itself the port the url where it will run its WebAPI services (It uses ‘netsh’ for that purpose)
Et voilà, the Windows Service should now be running.
IMPORTANT NOTICE 1: as the Windows Service was designed to be deployed via Click-Once, it was not assumed to be launched “As Administrator” directly (An exe “run” via Click-Once can by the way not require elevated rights). So, if run without such rights, the exe of the Windows Service will stop itself automatically and restarts “As Administrator” (You could be prompted to provide adhoc credentials).
IMPORTANT NOTICE 2: when the Windows Service is installed via the msi, NEVER run the exe yourself from a command prompt of from the Windows Explorer. Again because the service has not been designed to be installed via a msi (with ‘installutil’ tool or with an installer class) a “self-installation/uninstallation” process has been foreseen if and only if the exe is run “interactively”. So, if you run the exe after the installation of the msi, it will do a self-uninstallation of the service.You have to run it once more to reinstall it.
IMPORTANT NOTICE 3: The worst wase occurs if you run the exe once ad then uninstall the msi via the Control Panel > Add & Remove Programs. Indeed the msi will simply run the exe which will actually do a self-reinstallation of the service. So you will still have the service defined in the “Local Services” but neither the exe nor the entry in “Add & Remove Programs” anymore. To fix this, Quickly reinstall the msi, which will do a self-uninstallation of the service. Than run the exe interactively (from Windows Explorer) to redo a self-installation of the service. And you will end with the service defined in the “Local Services”, the exe available and the entry in “Add & Remove Programs” (which can now be used to safely uninstall the service). Sorry for that. I will improve the process to prevent the msi to put such a mess asap.
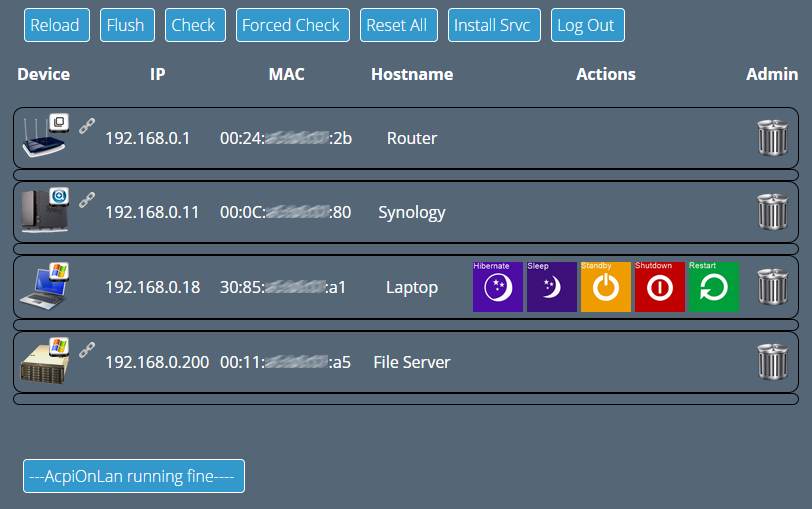
Quick guide:
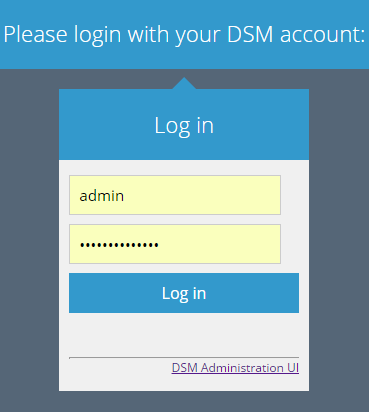
1) When you access Acpi-On-Lan, you have to log in with a DSM account
2) When you run Acpi-On-Lan for the very first time, it will search for your LAN (possibly one per Ethernet port on your NAS)

3) Next, it will scan the LAN(s) (look into the ARP table)

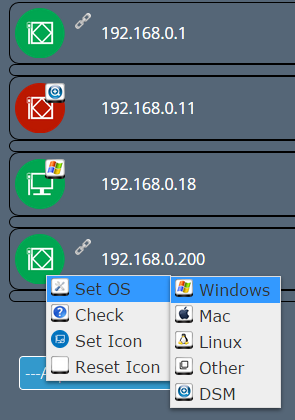
4) Finally, it will display a list of network devices found. For each device, you will have to “Set the OS” and “Set an Icon” (Except if you are happy with the default icons).
5) If there is an hyperlink symbol next to a device, it means that there is a we page available. You can click on it. Also to refresh the status of a device, you can use the menu “Check”.
6) Depending on the OS:
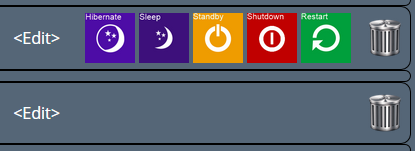
- if the device if on, you will have actions to Hibernate, Sleep, Standby, Shutdown or Restart the device.
- Once you have clicked on an action, an Abort action is made available for a few second.
- If the device is off, you will only have a Wol action.
The recycle bin can be used to hide a device and you can edit the name of the device.
7) Finally, you have various menu

- Reload: will reload the list of devices (and add newly detected ones if any)
- Flush: will empty the ARP table and reload the list of devices (you will have to ‘reload’ again until all the devices appear. Possibly ping manually your devices from a telnet session to populate the ARP table… I will possibly add such a feature in the UI soon or later)
- Check: check the status of all the devices displayed in the list not checked since 5 minutes. Notice: up to 3 devices are checked simultaneously by the UI (limitation for mobile devices slow to execute jquery)
- Forced Check: check the status of all the devices displayed in the list even if checked within the latest 5 minutes.
- Reset All: delete all the devices from the list (including your customization like icons/OS/hostnames). The network will net be rescanned. Notice that your previous data will actually be backuped in a subfolder “backups” and named Computers.x.json. You can manually restore them.
- Show All: will show all devices previously hidden by clicking on its recycle bin. Clicking again on its recycle bin will un-hide the device.
- Hide: Hide all devices marked to be hidden (to be used after the menu Show All)
- Log Out: guess 😉
NOTICE: your devices will be listed only if they have been switched-on at least one and in touch with the NAS during that time (I.e.: if they have been added into the ARP table). Some devices although switched-on are never in touch with the NAS. EX.: power lines Ethernet adapters, … I will plan a procedure to ping all the IP in the LAN so all such devices are touched (if switched-on). In the mean time, you will have to ping them yourself from a telnet session. Ex.: ping -c 1 192.168.0.1
![]()