It’s really easy to download playlists from YouTube with the Download Station of Synology. I do this to get locally new “No Copyright Music’s”, to be used later within my video’s.
I am using the “Download Station” as it simply works, opposite to many free or paid software’s which pretend to work but usually fail (and are full of advertisements…)
Bref… Assume that you want to get all the free music’s from the excellent YouTube Channel “VLOG No Copyright“:
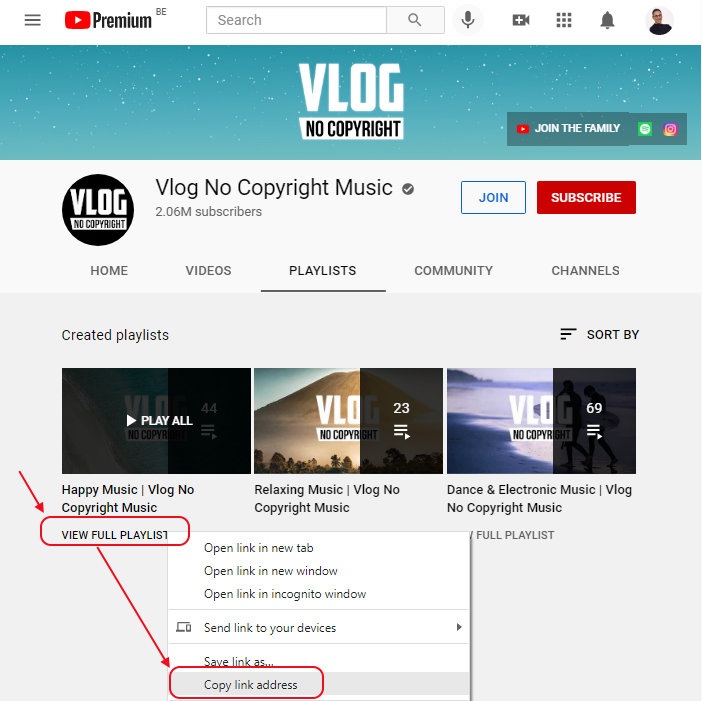
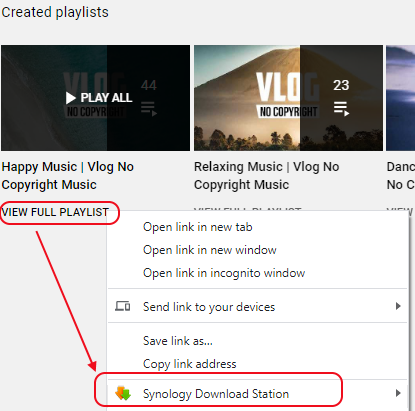
- Visit their “PLAYLISTS” in your Browser (All such channels have a tab “PLAYLISTS” as you can see in the screenshot bellow).
- Right-click on the link “VIEW FULL PLAYLIST” of the desired playlist.
- This is important: don’t use any URL from the “HOME” tab or from any tail representing a playlist (with the “PLAY ALL”). It would only download one video and not all the playlist.
- Select the menu “Copy link address”
- The copied url should be like this : “https://www.youtube.com/playlist?list=xxxxxxxxxx”
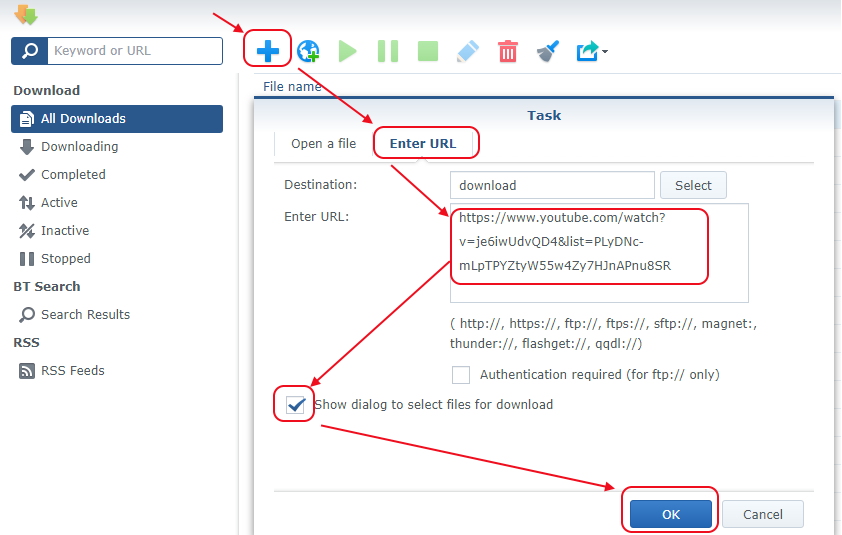
Now, go to your “Synology Download Station” and:
- Click on the large blue sign “+“. It opens a window to create new download tasks.
- Go to the tab “Enter URL“.
- Paste there the URL of the playlist copied previously.
- A subfolder with the name of the playlist will automatically be created under the destination folder and the video will be saved in that subfolder
- Select the option “Show Dialog to select…” if you when to download only some of the video’s. Otherwise you can unselect that option.
- Click “Ok”.
You should now see a line as illustrated here below, “waiting” to start:

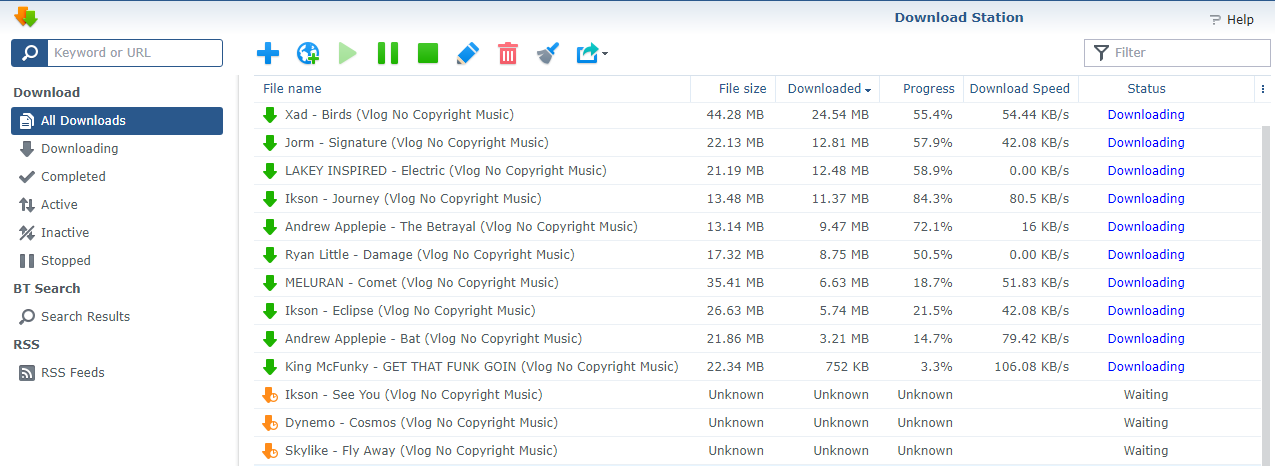
You have to wait until the Download Station has crawled across the whole playlist and found all the files to be downloaded… Then, you will see the list of music’s:
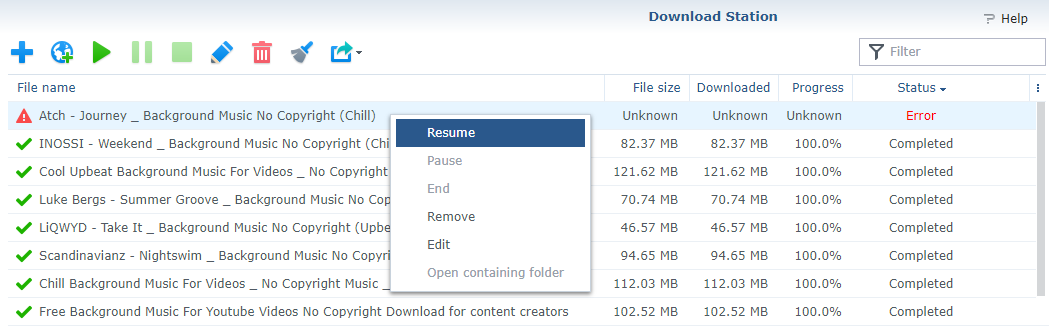
During the download, you could see some failed tasks, with a status “Error”. It happens from time to time, but this is usually a temporary issue. Sort the list within the Download Station on the “Status” column and select all the “Error” . Then, right-click the list and select the menu “Resume”.
Personally, as soon as the “music video’s” are downloaded, I extract the sound tracks and keep only those. There are many software to do this. But one of my favorite option is to use ffmpeg directly on the Synology (you have to install that package). Simply type this command in a console, in the download path were are saved the video’s:
for i in *.mp4; do ffmpeg -i "$i" -codec:a libmp3lame -q:a 0 -map a "${i%.*}.mp3"; done
To process mp4 in all subfolders in the download path, I use the command:
for d in *; do cd "$PWD/$d/"; for i in *.mp4; do ffmpeg -i "$i" -codec:a libmp3lame -q:a 0 -map a "${i%.*}.mp3"; done; cd ..; done
If you are using Chrome, I can suggest some extensions to help in downloading Playlists..
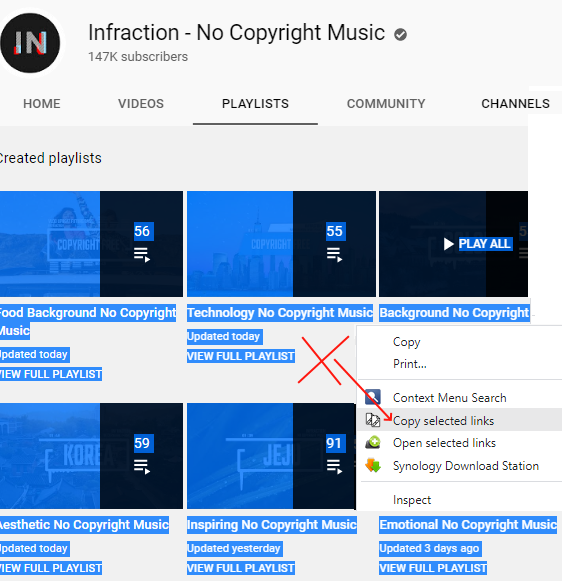
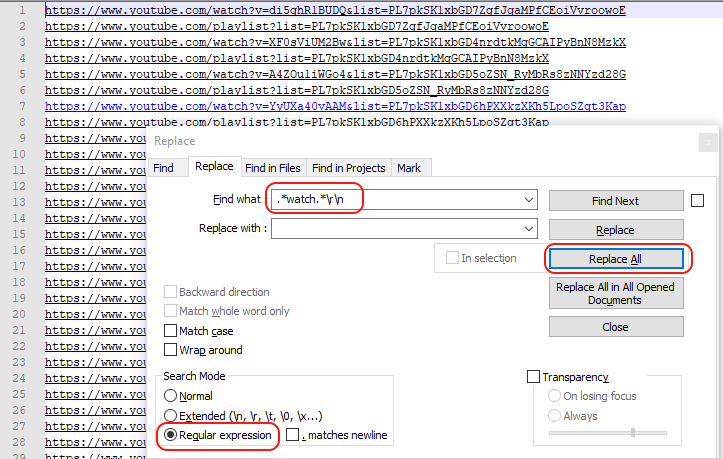
1. The extension “Copy Selected Links“. Using that one, you can copy the URL’s of all the playlists of a Channel, at once. Select the whole text under the tab PLAYLISTS (it will then appear highlighted in blue as illustrated on the screenshot here under). Next, right-click in an empty area and select the menu “Copy selected Links”.
Now go into Notepad++, as we have to keep only the playlists. Paste the Clipboard into a new tab of Notepad++. Press CTRL-Home to come back to the top. Press CTRL-H to open the “Replace” window. Select “Regular Expression” at the bottom of that window and click the “Replace All” button once you have entered this into the field “Find What”: .*watch.*\n (or .*watch.*\r\n if it does not work properly)
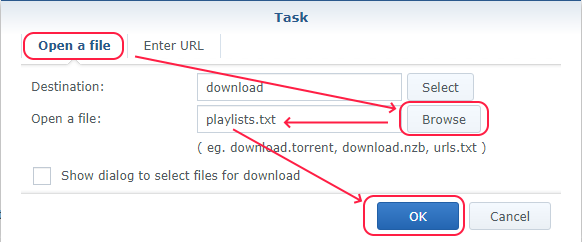
Now, you have two options. If you have no more than 50 playlists, you can paste them directly into the Download Station via the button “+” and the tab “Enter URL” as explained previously. Otherwise, you have to save with all your URL’s into a .txt file (with Notepad++) and upload that file via the tab “Open a file” instead of the tab “Enter URL“.
2. The extension “Download Station” (or this version in Chrome Web Store) to more easily download the playlists. Same principle as above, but instead of right-clicking “View Full PlayList” to copy the playlist URL, you now have a extra menu “Synology download Station” (or Download with “Download Station”).
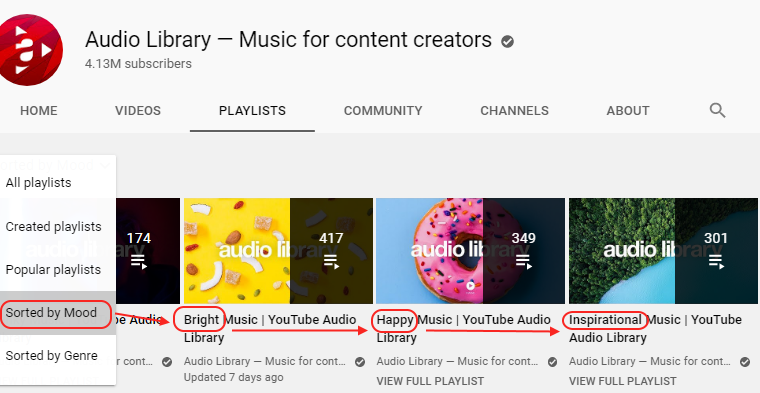
Another trick, when available in the PLAYLISTS tab of a Channel: select and download the Playlists “Sorted by Mood” or “Sorted by Genre”. This will help you when you search for a particular type of music for your video. Ex.: with the Channel “Audio Library”:
Adive: each time you add a playlist in the Download Station, check that the amount of new download tasks match with the amount of tracks in the playlist. Indeed, it happens that not all the video’s are added into the Download Station as it has limits(a total of max 2048 download tasks <= reason why you have to clean-up all downloaded tasks before downloading new long playlists. There is also a limit of 256 links per “file” uploaded and a limit for a playlist of “2048 – amount of current download tasks”).
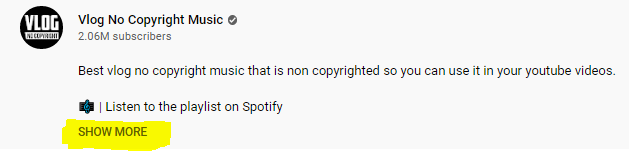
Don’t forget that for most “No Copyright Music’s”, you have to mention the author in your video’s or posts. Often, in YouTube, you have to click on “Show More” under the video to see the details of the license:
The License is usually clear. Ex.:
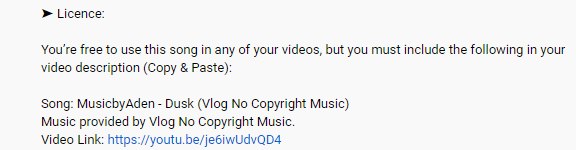
To find again later the video’s on YouTube and check the type of license, it’s important to keep:
- The original name of the video when converting into mp3
- The name of the playlist
- The name of the channel
To do so, the easiest is to add some metadata into the mp3 extracted with ffmpeg. Once downloaded by the “Download Station”, your video’s should be in subfolders which have the name of their playlists. And the filenames usually contain the Author, the name of the song and the name of the YouTube Channel. So, it’s easy to create the metadata. Ex.: the playlist “Dance & Electronic Music | Vlog No Copyright Music” of Vlog has been downloaded into a subfolder named “Dance & Electronic Music _ Vlog No Copyright Music” and the video’s are all named like “Artist- Title (Vlog No Copyright Music).mp4”
So, to process that subfolder, I will use the command:
for i in *.mp4; do playlist=${PWD##*/}; artist=${i% - *}; other=${i##* - }; title=${other% (Vlog*}; ffmpeg -i "$i" -codec:a libmp3lame -q:a 0 -map a -metadata artist="${artist}" -metadata title="${title}" -metadata album="Playlist: ${playlist}" -metadata Publisher="From YouTube Channel: Vlog No Copyright" "${artist} - ${title}.mp3"; done
As you can see, I am using the “Publisher” to store the Channels and the “album” for the playlist… This is a personal choice! (More details on ID3 tags and ffmpeg here)
Regarding the pattern matching used in shell, it’s not always that simple and you will have to be creative… Just about the pattern matching:
- variable2=${variable1%xyz*} => variable2 is the shortest left part of variable1 before a substring xyz.
- variable2=${variable1%%xyz*} => variable2 is the longest left part of variable1 before a substring xyz.
- variable2=${variable1#*xyz} => variable2 is the shortest right part of variable1 after a substring xyz.
- variable2=${variable1##*xyz} => variable2 is the longest right part of variable1 after a substring xyz.
- in xyz, x and z may be blanks (in my case, “xyz” was ” – “)
As there are many duplicates in those playlists, I have written my own script to replace such duplicates by hardlinks (on my Synology). I can’t use jdupes or rmlint as those are doing “binary comparisons” and due to the conversion via ffmpeg, it doesn’t work. Instead, I search for duplicates based on the filename and size only (per channel, they are usually unique anyway). Here is my script for illustration purpose. It must be stored in an ANSI file (ex.: dedup.sh) and run with: sh dedup.sh go
echo "Start looking for duplicates"

find . -iname "*.mp3" -printf "%p ~ %f\n" | sort -f -k2 | uniq -Di -f1 > list.dup

echo "Duplicates found"

test="$1"
previous=""
previouspath=""
skip=true
while read p; do
mp3name="${p#* ~ }"
mp3path="${p%% ~ *}"
if [[ "$mp3name" == "$previous" ]]; then
mp3new="${mp3path%%.mp3}"
node=$(ls -l "$mp3path" | grep -Po '^.{11}\s1\s.*$')
if [[ "$node" == "" ]]; then
echo " $mp3path is already a hardlink"
else
skip=false
if [[ "$test" == "go" || "$test" == "test" ]]; then
SIZE1=$(stat -c%s "$mp3path")
SIZE2=$(stat -c%s "$previouspath")
#Delta=$(awk "BEGIN{ printf \"%d\n\", sqrt((100 * ($SIZE2 - $SIZE1) / $SIZE1)^2)}")
#if [[ $Delta > 1 ]]; then
Delta=$(awk "BEGIN{ printf \"%d\n\", ($SIZE2 - $SIZE1)}")
if [[ "$Delta" == "0" ]]; then
mv "$mp3path" "$mp3new.old"
ln "$previouspath" "$mp3path"
echo " $mp3path now linked to original"
else
echo " $mp3path seems different from $previouspath"
fi
else
echo " mv $mp3path $mp3new.old"
echo " ln $previouspath $mp3path"
fi
fi
else
if [[ "$test" != "test" ]] || [[ "$skip" = true ]]; then
previous=$mp3name
previouspath=$mp3path
echo "$mp3name has duplicate(s) (original in $mp3path)"
else
break
fi
fi
done <list.dup
Note: Facebook will possibly remove the audio from your video even if they is a “No Copyright Music”. When you get such a notification from FB, you can simply click to restore the audio if you did mention the Author in your post or video.
Some YouTube Channels with “No Copyright Music’s”: