I am running openHab2 on my raspberry pi 4 using openhabian and I wanted to schedule a backup of my config into a shared folder of my Synology.
Backup as root
Openhabian’s backup solution ‘Amanda’ didn’t convince me to automate such a backup. So I wrote my own backup script and scheduled it with a cron job.
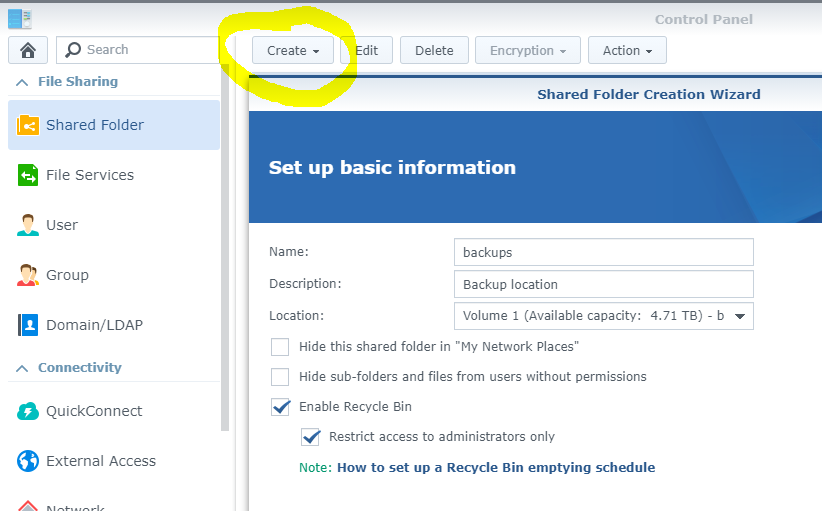
First, create a shared folder named “backups” on your Synology via Control Panel > Shared Folder > Create:
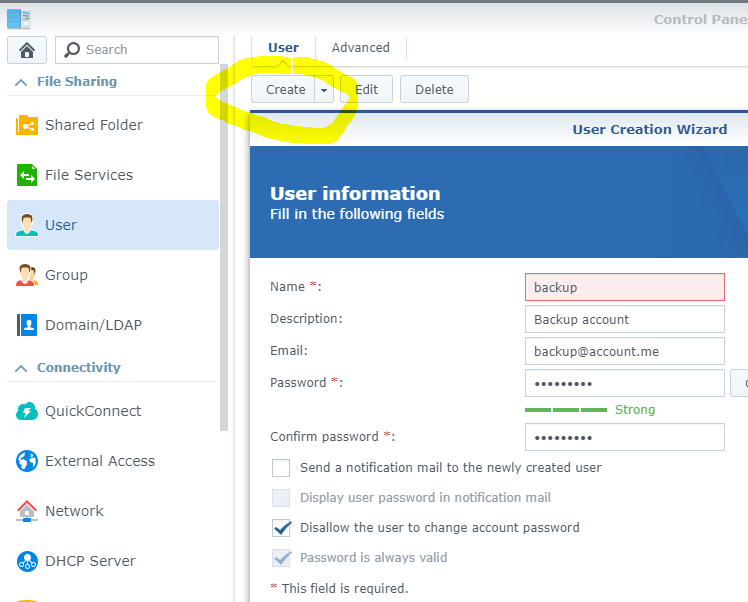
Next, create a user account named “backup” via Control Panel > User > Create:
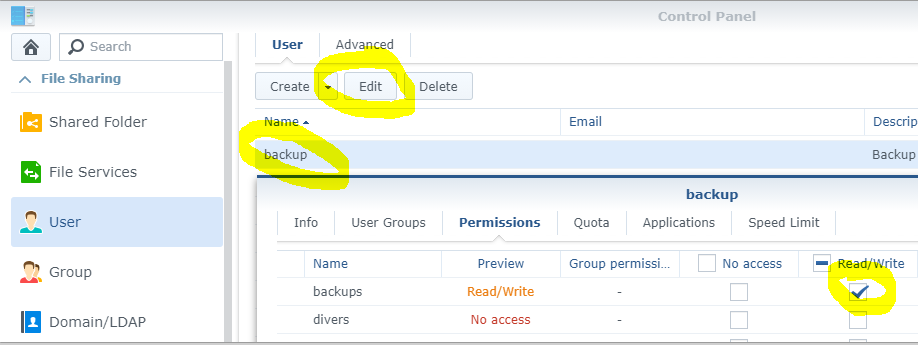
Grant that account write access on the shared folder “backups” via Control Panel > User > backup > Edit > Read/Write
The Synology part being ready, move now to openhabian, on the RPI, using a ssh console (E.g.: Putty) to create and schedule the backup script. Most parts will have to be done as ‘root’ (to make it simpler… but no safer), so type;
sudo -i
If just like me you previously tried to configure the backup with Amanda, using the command “sudo openhabian-config” and then the menu 50 > 52, a mailer daemon (exim4) was probably installed and you want now to remove it… Check if it’s running (not with the command “systemctl –type=service –state=running” but) with:
sudo service --status-all
If you see a + in front of exim4, disable and remove it
sudo systemctl stop exim4
sudo systemctl disable exim4
sudo apt-get remove exim4 exim4-base exim4-config exim4-daemon-light
sudo rm -r /var/log/exim4/
You can also next uninstall and remove Amanda
sudo apt remove amanda-client
sudo apt remove amanda-server
sudo rm -r /var/lib/amanda/
sudo rm -r /etc/amanda
Now, we can start with the preparation of the backup script. Define first a mount point on your RPI. E.g.: “/mnt/backups”:
mkdir /mnt/backups
Define next the shared folder of your Synology by editing the fstab file:
sudo nano /etc/fstab
Add the line here under in that file and save your change with CTRL-o, Enter, CTRL-x:
//<ip of your Synology>/backups /mnt/backups cifs username=backup,password=<password>,uid=1000,gid=1000,vers=3.0 0 0
Attention: the network is usually not yet available when the fstab file is used to mount the drives a boot time. So this shared folder will most probably not be mounted automatically!
Create a file:
nano /home/openhabian/maintenance.sh
with the backup script here under:
#!/bin/sh# Backup Openhab of Synology
log="/var/log/maintenance.log"
echo $(date) "Run openhab maintenance: $0" >> $log
if mountpoint -q /mnt/backups
then
echo $(date) "Synology's backups share is mounted." >> $log
else
echo $(date) "Synology's backups share is not mounted. Try to mount as per fstab definition." >> $log
sudo mount /mnt/backups
sleep 3
if mountpoint -q /mnt/backups
then
echo $(date) "Synology's backups share is now successfully mounted." >> $log
else
echo $(date) "Synology's backups share cannot be mounted." >> $log
fi
fi
if mountpoint -q /mnt/backups
then
# Keep the 10 last backups
rm -f $(ls -1t /mnt/backups/Raspberry/openhab2-backup-* | tail -n +11)
cd $OPENHAB_HOME
sudo ./runtime/bin/backup /mnt/backups/Raspberry/openhab2-backup-"$(date +"%Y_%m_%d_%I_%M").zip" >> $log
echo $(date) "custom backups of openhab completed." >> $log
echo "-----------------------------------------------------------------" >> $log
fi
Make that script executable (for all users…)
sudo chmod a+x maintenance.sh
To run that script as root on a regular basis, you have to schedule it as root (using now sudo explicitly if you didn’t type sudo -i earlier) via crontab:
sudo crontab -e
If it’s the first time you run crontab, you will have to pick your prefered editor. I advice nano 😉
Select an editor. To change later, run 'select-editor'.
1. /bin/nano <---- easiest
2. /usr/bin/vim.basic
3. /usr/bin/mcedit
4. /usr/bin/vim.tiny
5. /bin/ed

Choose 1-5 [1]: 1
In crontab, add this at the end and ave that change with CTRL-o, Enter, CTRL-x:
0 1 * * * /home/openhabian/maintenance.sh
Notice: if you want to mount the shared drives at boot, which usually fails as mentioned previously as the network is not yet available when fstab is first called, you can add this in the crontab too:
@reboot sleep 300; mount -a
You can now try the script with:
sh /home/openhabian/maintenance.sh
If it works, it should also work when triggered by the cron job.
Backup as openhabian
To run scripts as root is usually not recommended. But the backup script of openhab may only be run as root… We could run it with the account ‘openhab’, but the backup files will belongs to the user ‘openhabian’, making the cleanup tricky. I you really don’t want to run and schedule my script as root, then the best option is to run it with the account “openhabian”:
Still being is root mode (sudo -i), create the log file manually and grant access for all users:
touch /var/log/maintenance.log
chmod a+rw /var/log/maintenance.log
Authorize the user “openhabian” to execute the backup script “/usr/share/openhab2/runtime/bin/backup”. To do this, you have to create a file in the /etc/sudoers.d folder. All files in that folder are used by the “sudo” command to authorize configured users to execute specified commands as root, with or without password. You MUST ABSOLUTELY edit that file with the command “visudo“. This one will check that your changes are valid. If you edit that file with another editor and it contains an error, you won’t be able to use the “sudo” command anymore (you will have to plug the SD card into a USB adapter on another raspberry to fix the issue or to simply delete the invalid file. USB device are automatically mounted under /media/usbxxx if you installed the package usbmount).
visudo /etc/sudoers.d/openhab
In that file, add the line here under and save your change with CTRL-o, enter, CTRL-x
# Allow openhabian user to execute the backup script
openhabian ALL=(ALL) NOPASSWD: /bin/mount, /usr/share/openhab2/runtime/bin/backup
Unschedule the script from root’s crontab (remove the line added with crontab -e)
crontab -e0 1 * * * /home/openhabian/maintenance.sh
And schedule it now within openhab’s crontab (has to be done as ‘openhabian’ user)
sudo -u openhabian crontab -e
And add
0 1 * * * /home/openhabian/maintenance.sh
Et voilà.
PS.: If you experience issues when mounting the remote shared folder, try to mount it interactively (using an administration account of your Synology or an account having a password without symbols such as %, # or !)
apt install smbclient
smbclient //<remote ip>/<shared folder> -U <user account>
You can also check the latest messages from the kernel
dmesg | tail -n10
![]()
Leave a Reply