There are many many reasons why a PC can be lagging and very slow. But the worst was is when you look at the Task Manager and you see that both CPU and GPU are low, there are still plenty of free RAM and there is no high disk activity. In my case the problem was due to CPU Frequency being reduced.
Click to Read More
First thing to check, the CPU/GPU/Ram and Disk Usage. Press CTRL-SHIFT-ESC to open the Task Manager.
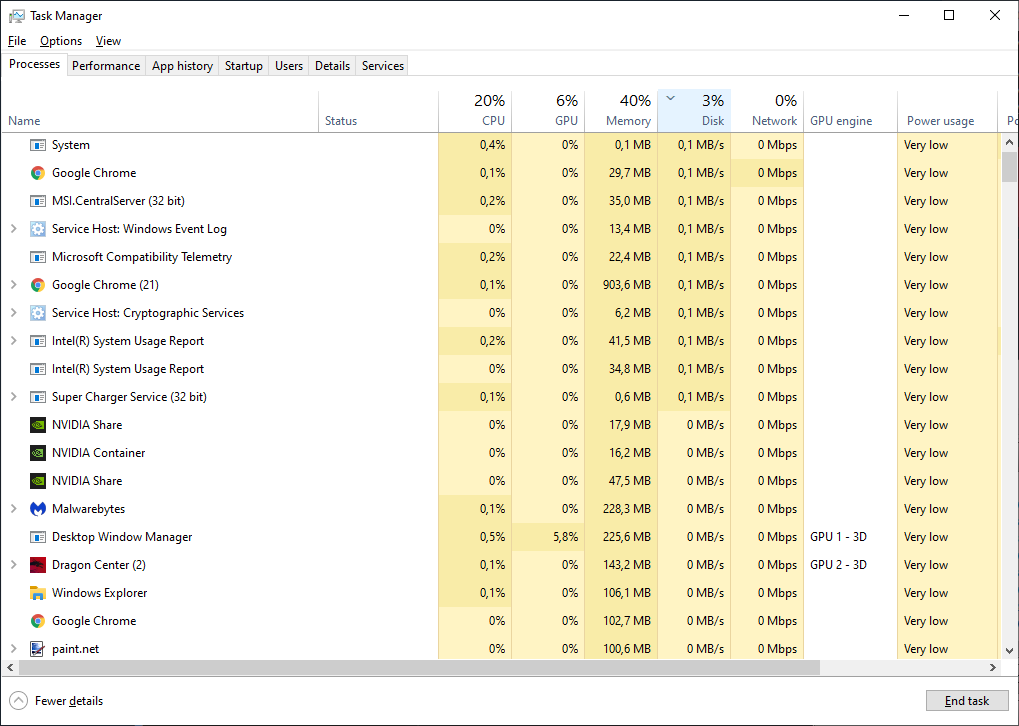
You see that everything is low. So what ?
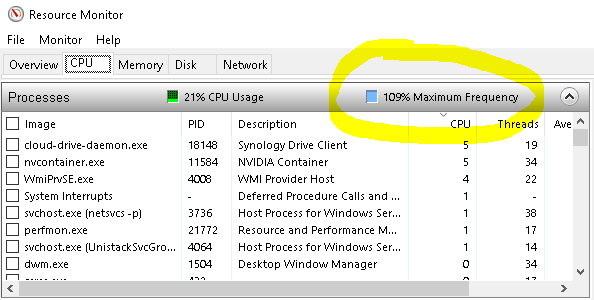
Run now the Resource Monitor by pressing Windows-R and typing: resmon
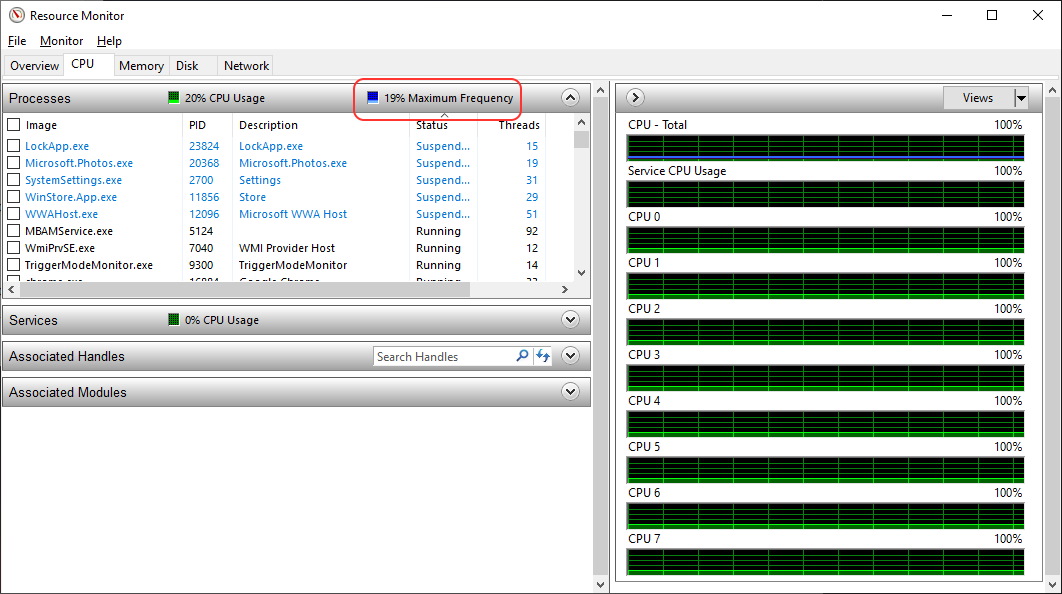
Very interesting. We see that the CPU runs at 19% of its maximum Frequency. So, something has reduced the CPU frequency. Indeed, with Intel speedstep, power saving and everything else disabled, this should always read 100%.
So, the problem can be the “power plan” or some “failed” overclocking…
You can test this by adding some load on the CPU with “CPU Grab” or “CPU Stres“. Here under, using CPU Grab to load the CPU at 100%, we can see that the CPU is still limited to ~20%:
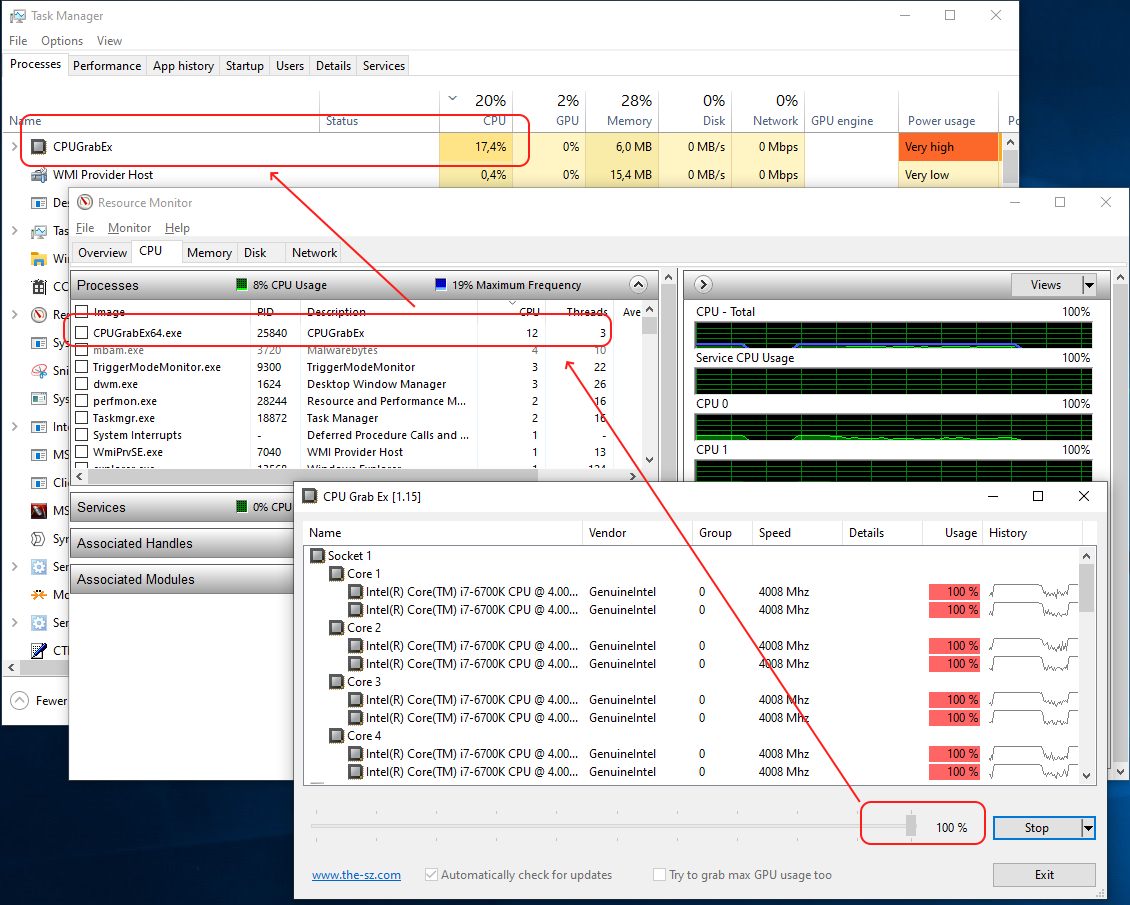
NB.: You can also give a try to Intel® Extreme Tuning Utility
Regarding SpeedStep and Power Saving, you can edit your Power Plan Option. Press Windows-R and enter: powercfg.cpl, then click “Change plan settings” > “Change advanced power settings”. Set all limits to 100%.
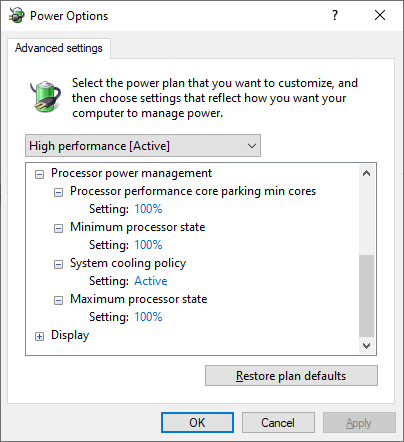
NB.: For laptop, there are distinct settings “On Battery” or “Plugged in”…
NB.: Keep the “System cooling policy” on “Active” to avoid your PV to burn 🙂
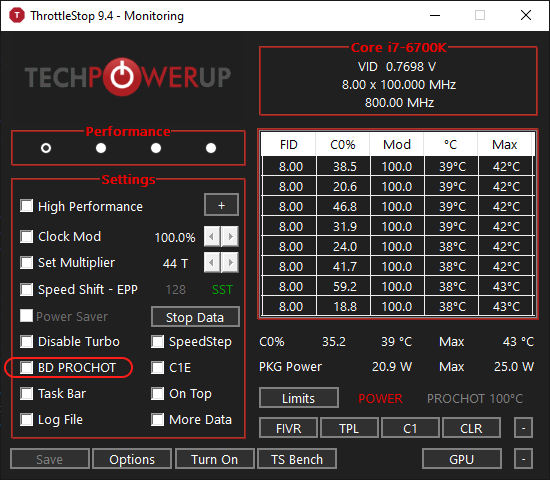
If this does not help, then give a try to Throttle Stop (Basically, uncheck the BD PROCHOT checkbox an click Save)
Possibly, disable manually the Intel Processor Power Management feature (ippm). Run a cmd prompt as Administrator and execute this command before restarting your PC :
sc config intelppm start=disabled
NB.: To to re-enable “intelppm”, execute the command
sc config intelppm start=demand
Possible values are : {boot | system | auto | demand | disabled | delayed-auto}.
Also look here for disabling DPTF ( “Intel(R) Dynamic Platform and Thermal Framework”). Windows has it’s own built-in processor speed and thermal management already, which is sufficient on its own.
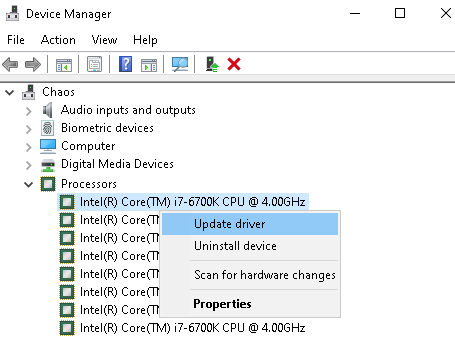
Update the drivers of your Processor, pressing Windows-R and typing: devmgmt.msc
Check the settings in your Bios. If you have an option “CPU Power Management” set on “ENABLED”, Windows will ignore the minimum CPU power setting and clock down to the default frequency but clock up when required. If you have an option “Intel Speed Step Technology” set on “DISABLED” at the same time, the maximum frequency will be that of what it is advertised for your CPU, instead of maximum turbo boost.
Finally, you can also check your RAM just in case, by pressing Windows+R then and typing in mdsched.exe. Then restart the PC.
Finally, you should have solved the maximum Frequency:
NB.: here above, my CPU been overclocked, you see more than 100% CPU available
![]()
Leave a Reply