Here is a step by step “How-To create a Virtual Machine to emulate a DS3622xs+ running DSM 7.1” using VMWare and a Loader from redpill
Click to Read More
I used a tutorial from internet to create a VM in VMWare 16 and exported this one as ovf. Using that ovf, you can easily setup your own VM with a DS3622xs+ running DSM 7.1.
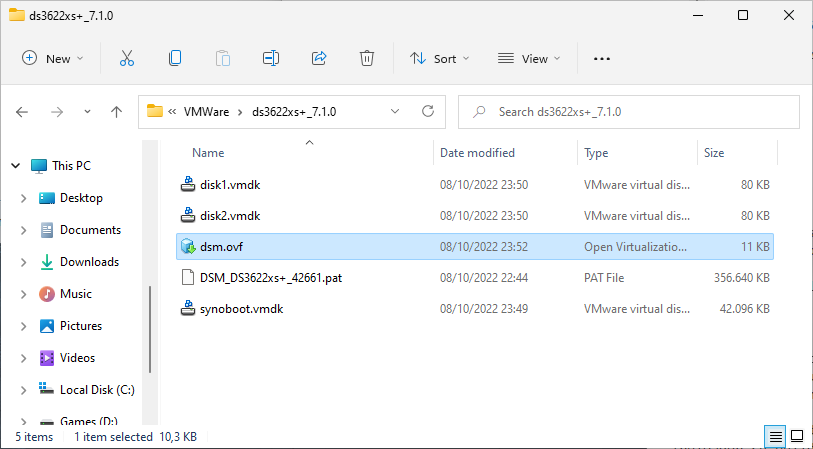
1: Download and unzip this package, containing:
- the configuration of the virtual machine (dsm.ovf and two disk.vmk),
- the boot file for DS3622xs+ (synoboot.vmdk) and
- the image of the DSM 7.1 for DS3622xs+ (DSM_DS3622xs+_42661.pat)
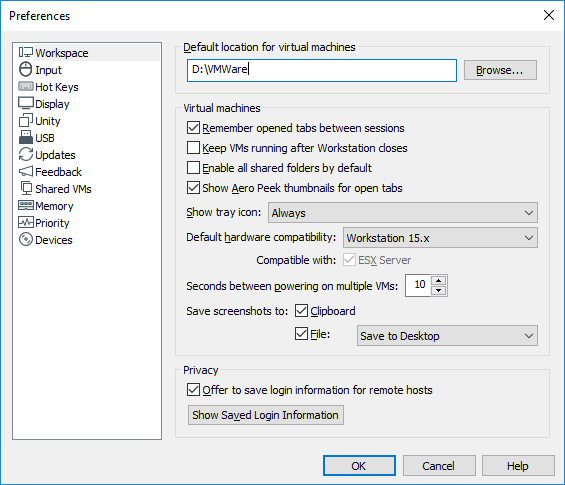
2: Open VMWare Workstation. If you never configured the default location where you want to create your Virtual Machines, press CTRL-P to open the “Preferences” panel. There, set this default location (I am using E:\VMWare).
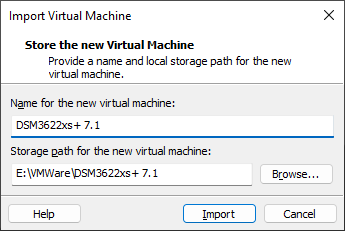
3: Go next to “Windows Explorer”, in the folder where you have unzipped the package, and double click dsm.ovf. This is going to import the VM into VMWare. Type a name for the new virtual machine (I am using DSM3622xs+ 7.1) and click “Import”.
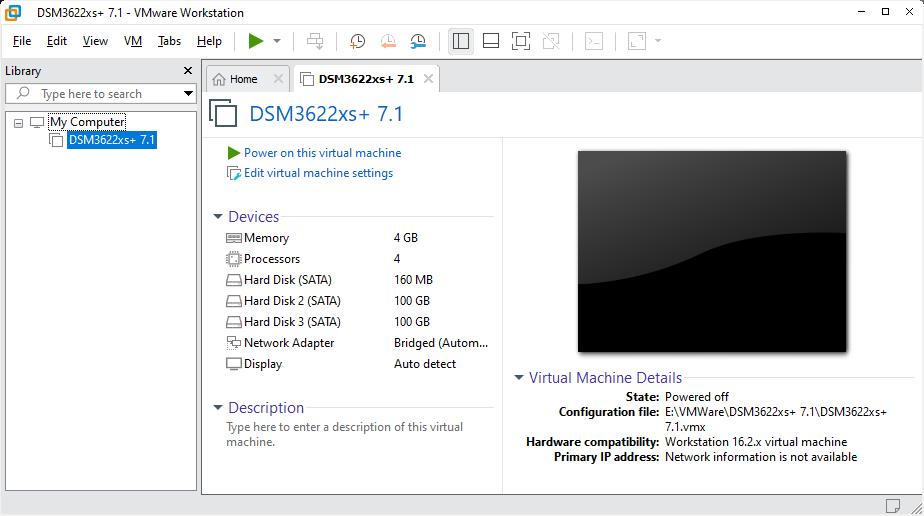
4: Here is the outcome to the importation. You can now click on “Power on this virtual machine”. If you want, you may also first increase the Memory, the Processors or the size of the Hard Disk 2 and 3 (Do not touch the first Hard Disk which contains the boot loader).
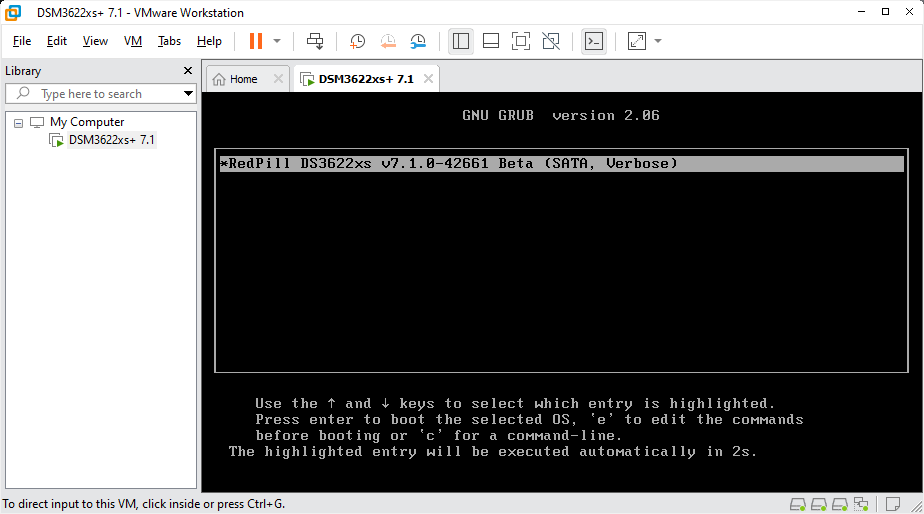
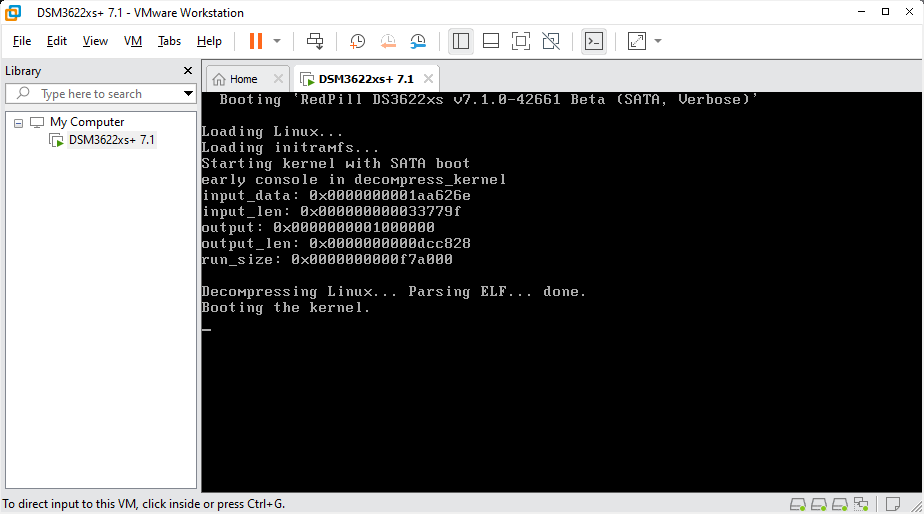
5: 5 sec after starting the VM, the bootloader will run:
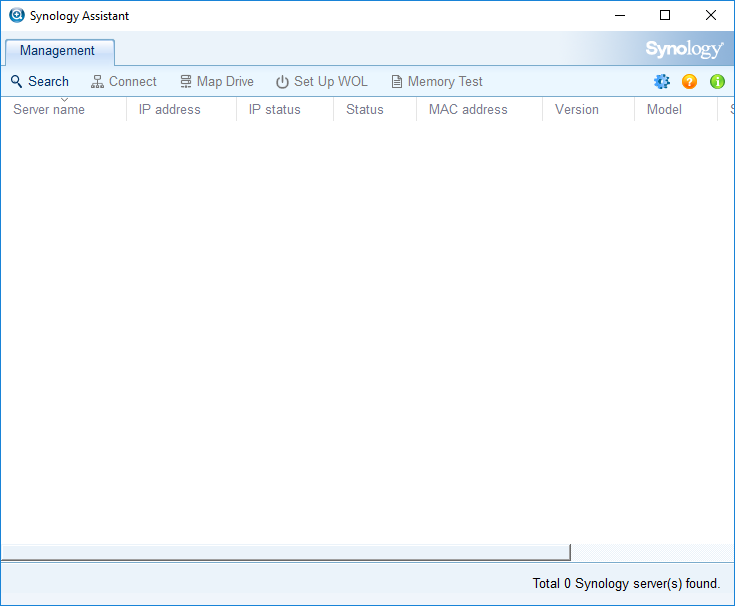
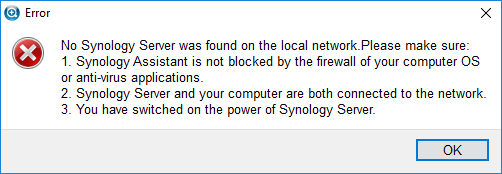
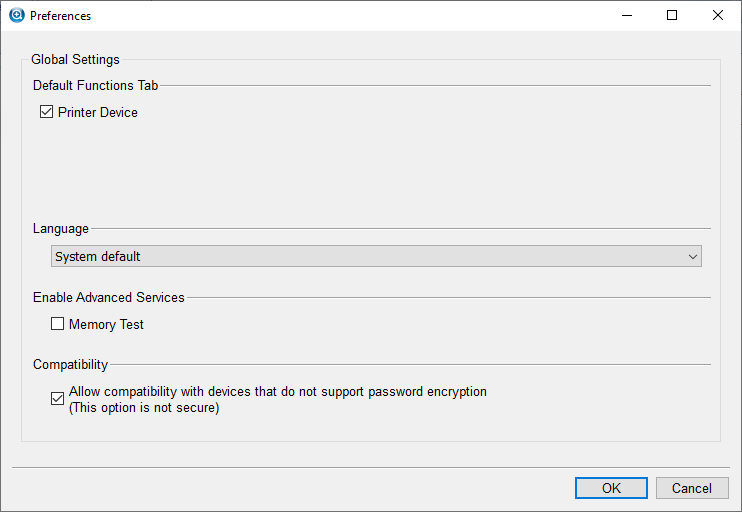
6: Open the “Synology Assistant”, which is more efficient than the page http://find.synology.com to find your VM, and after +/- 3 minutes (depending on the perf of your PC) click on “Search”. If you didn’t wait long enough, you will see an Error message (In such a case, check that you have enabled the option “Allow compatibility with devices that do not support password encryption” in the preferences – via the gear icon in the top-right corner – and/or click Search “Again”. I never had to do this more than 3 times).
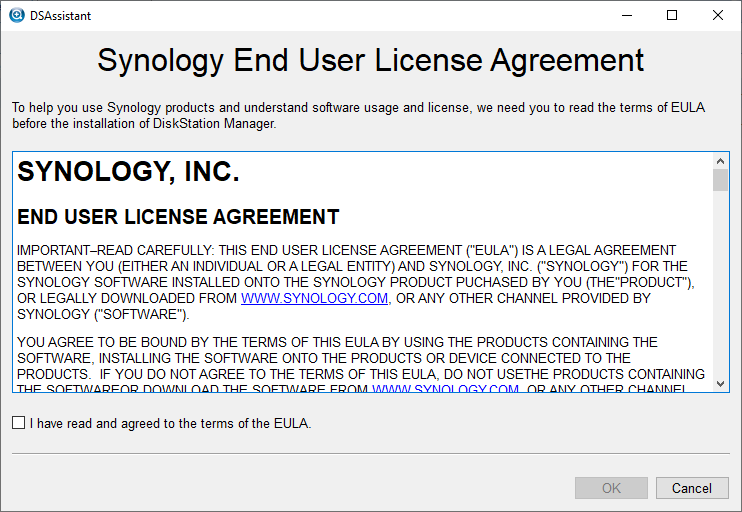
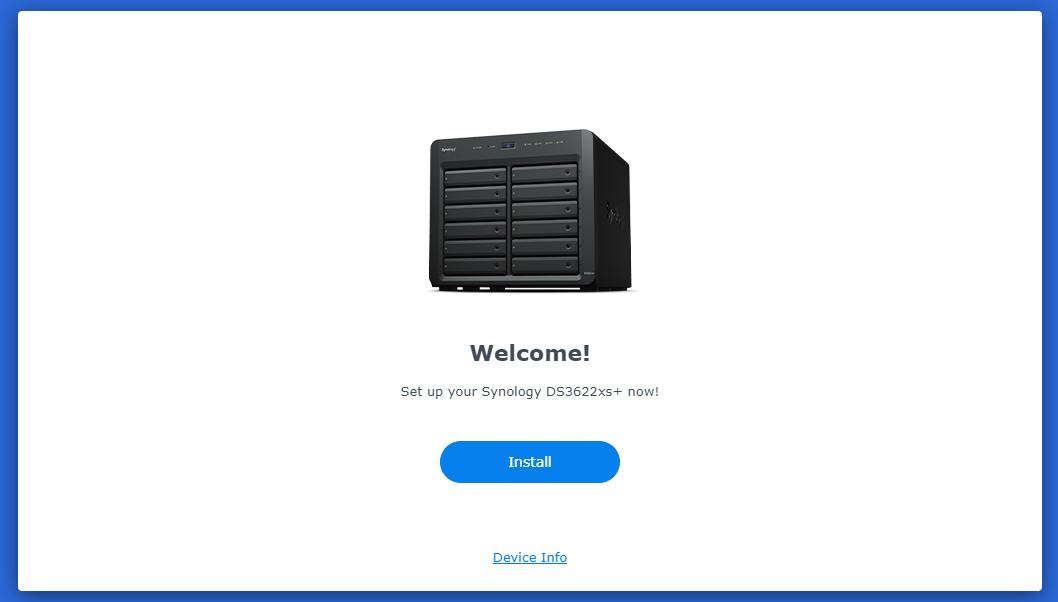
7: Finally, the Assistant will find your VM. A webpage should automatically open (Otherwise, double-click on the VM). Approve the EULA and click Install.

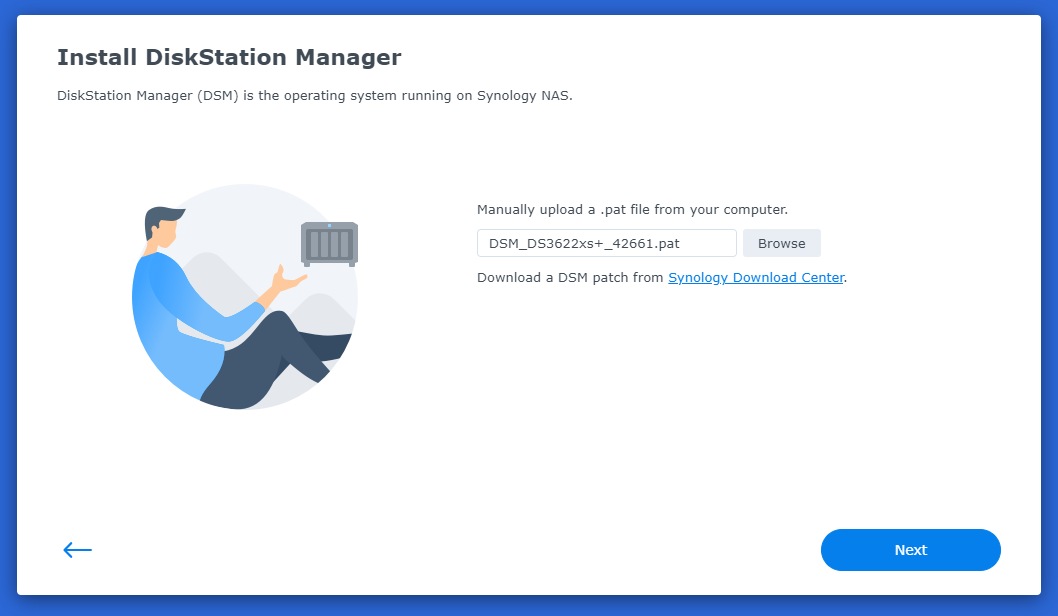
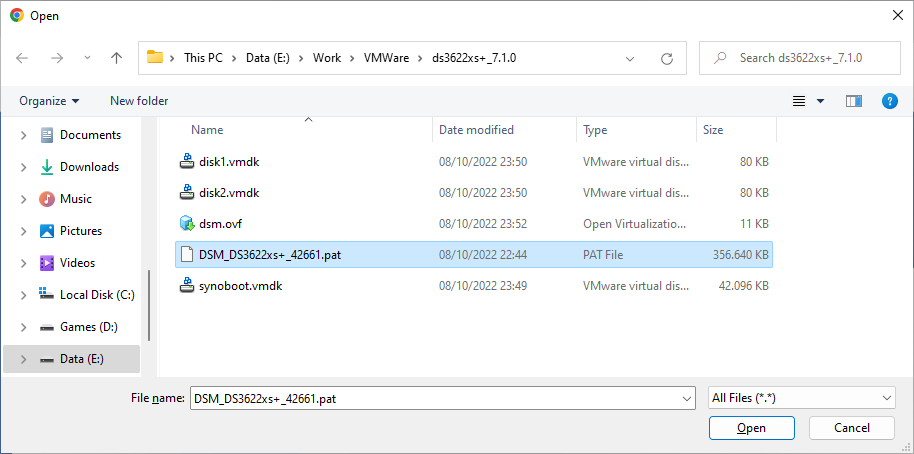
8: Click next on Browse to select the image of the DSM 7.1 for DS3622xs+ and Select the file “DSM_DS3622xs+_42661.pat” in the folder where you unzipped the package downloaded previously.
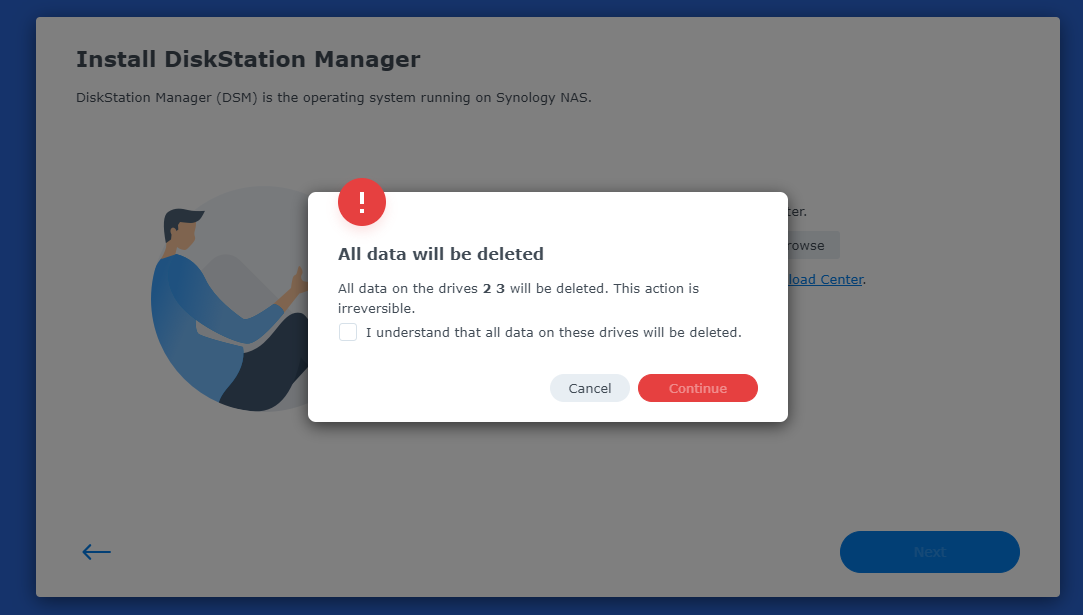
9: Finally, click on “Next” and confirm that the installation can override the disk… (You can safely tick the “I understand…” it’s the virtual Hard Disk member of the VM. No worry 😉 )
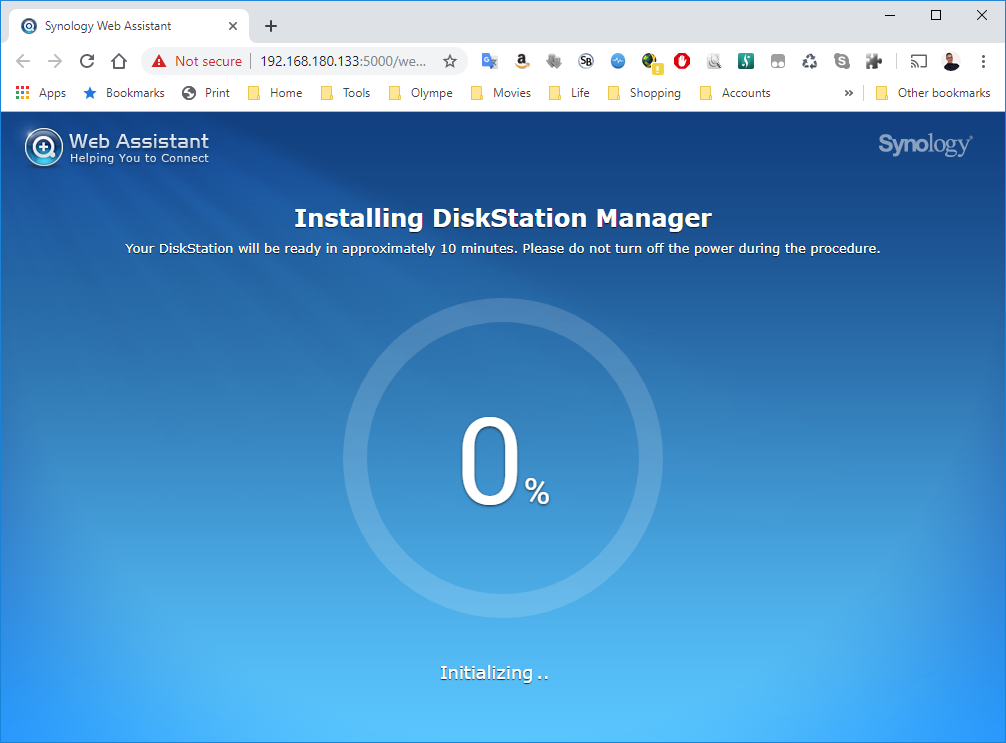
10: The installation will take a few minutes
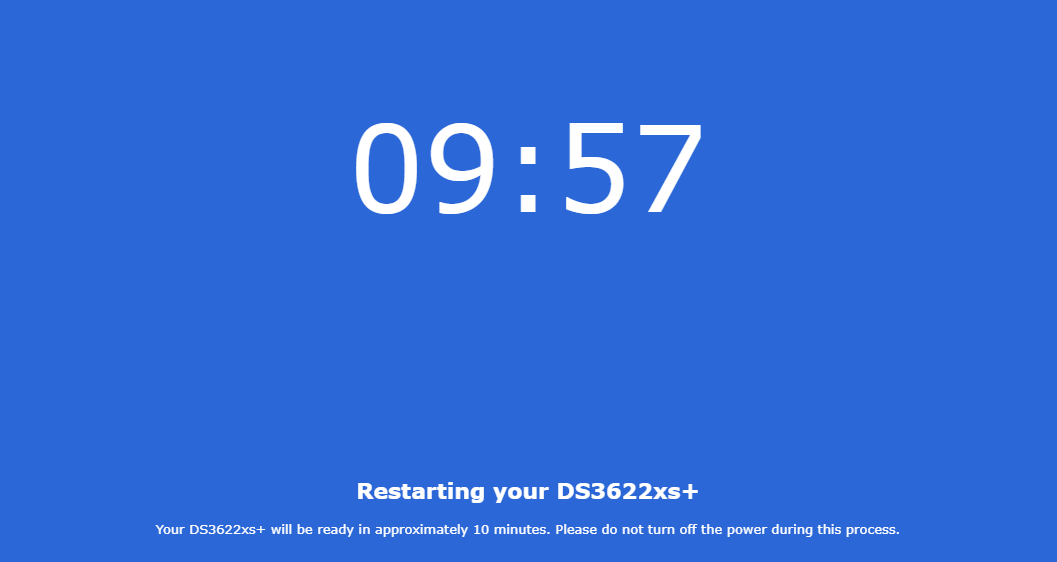
11: Once the installation complete, you will see in the VMWare Workstation that the VM is rebooting. On the installation page, you see a countdown.
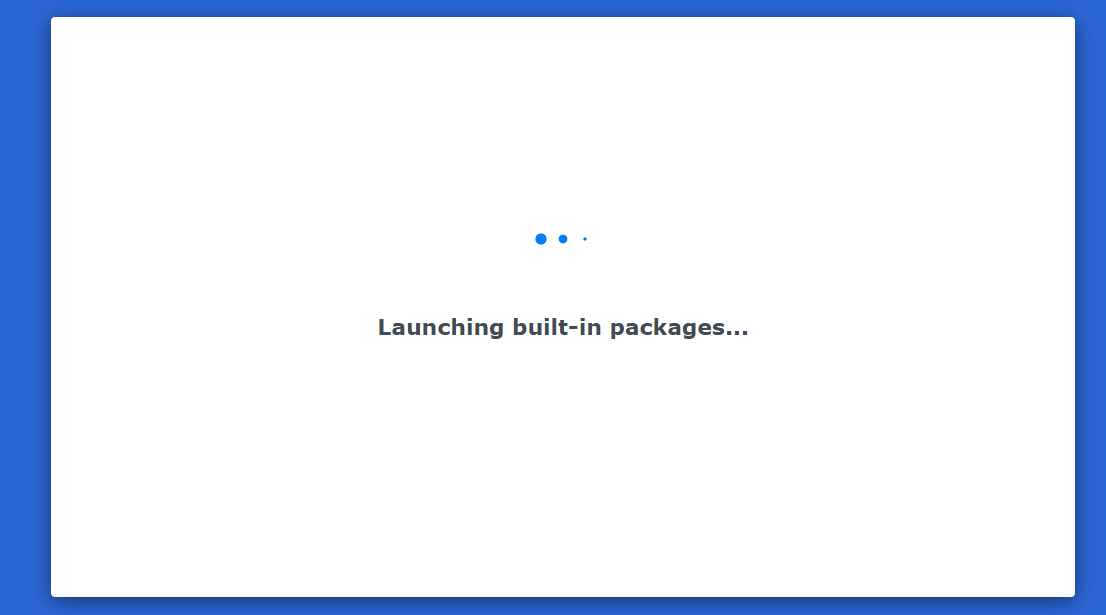
12: You should soon see that it’s installing packages before being finally ready to “start”
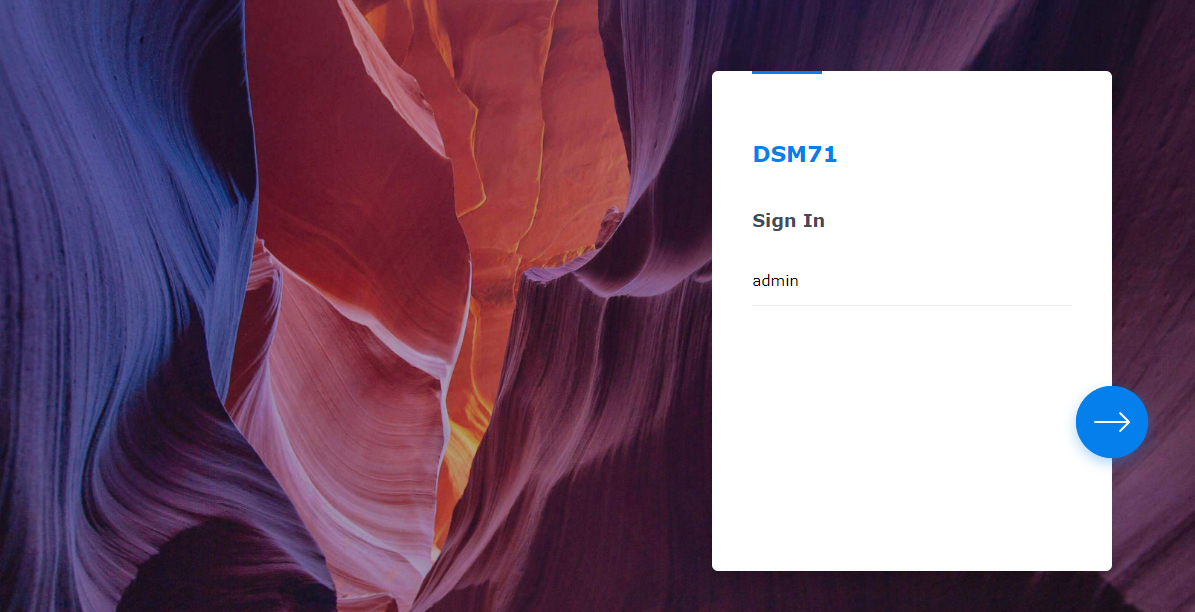
13: If you are requested to login into the VM, do it as “admin” without password and configure it. Next configure your new NAS (Do not accept automatic updates !!!).

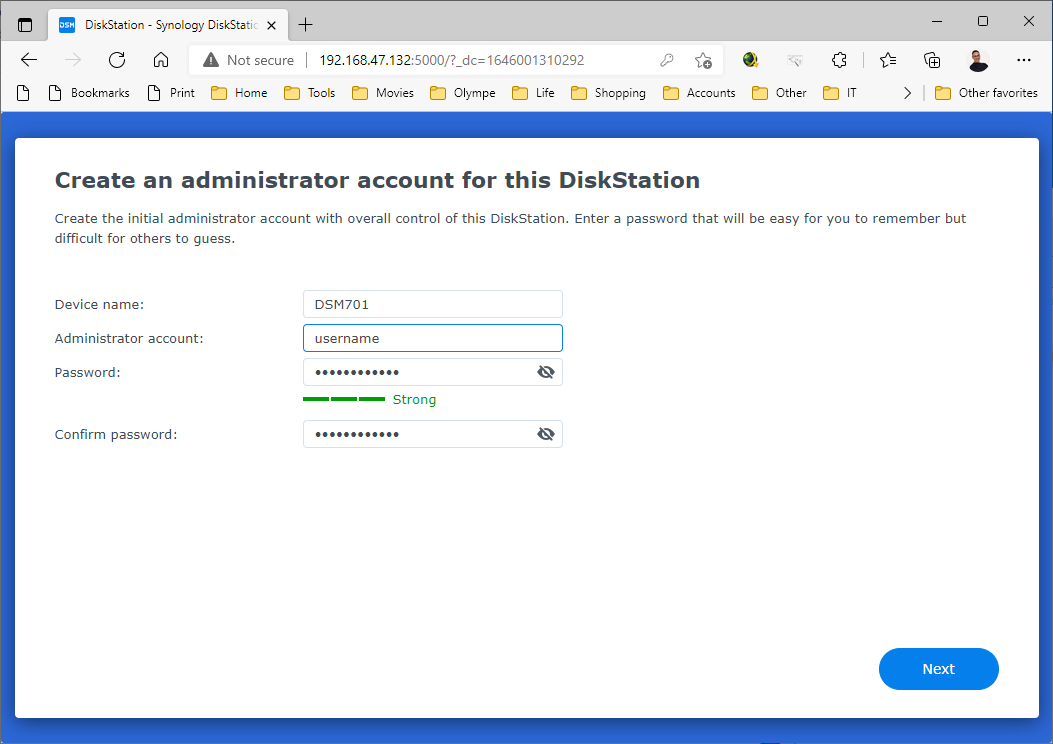
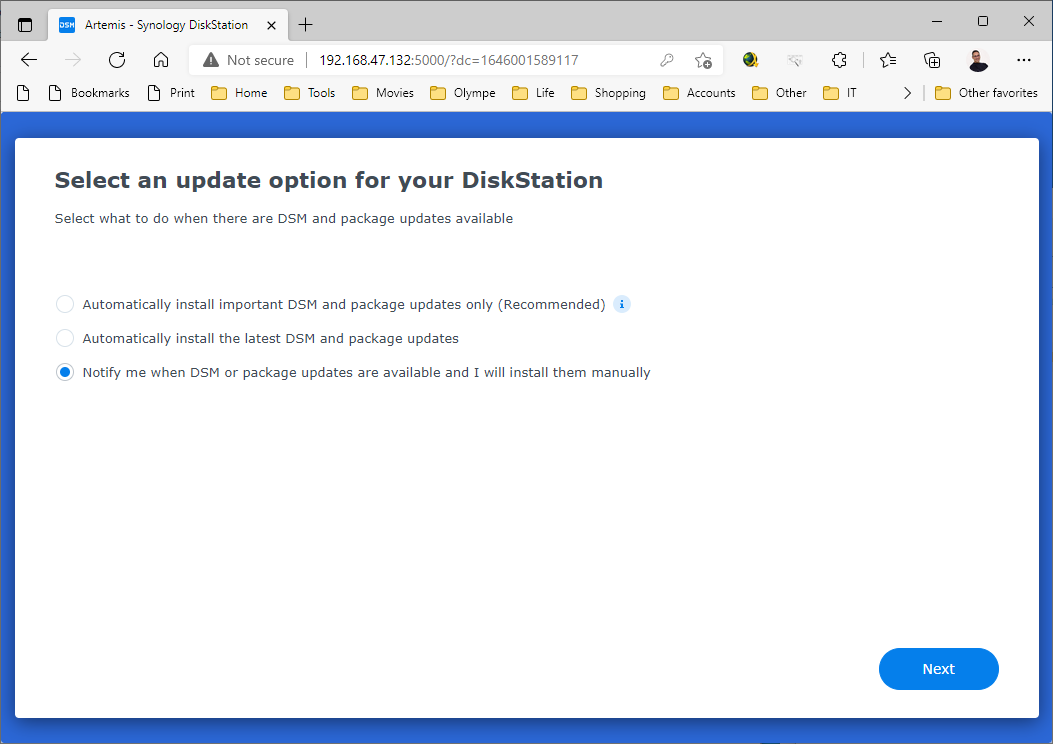


I did skip the creation of Synology account and didn’t agree on Device Analytics or the display of this Nas in the Web Assistant.
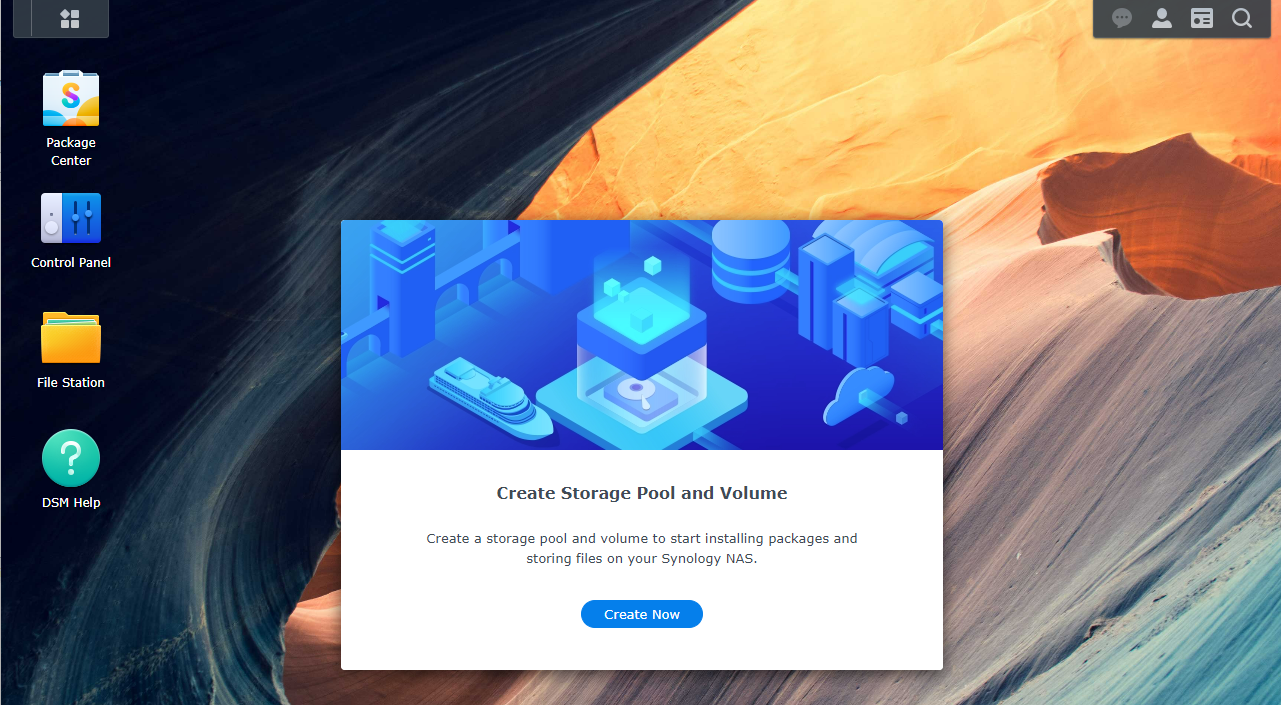
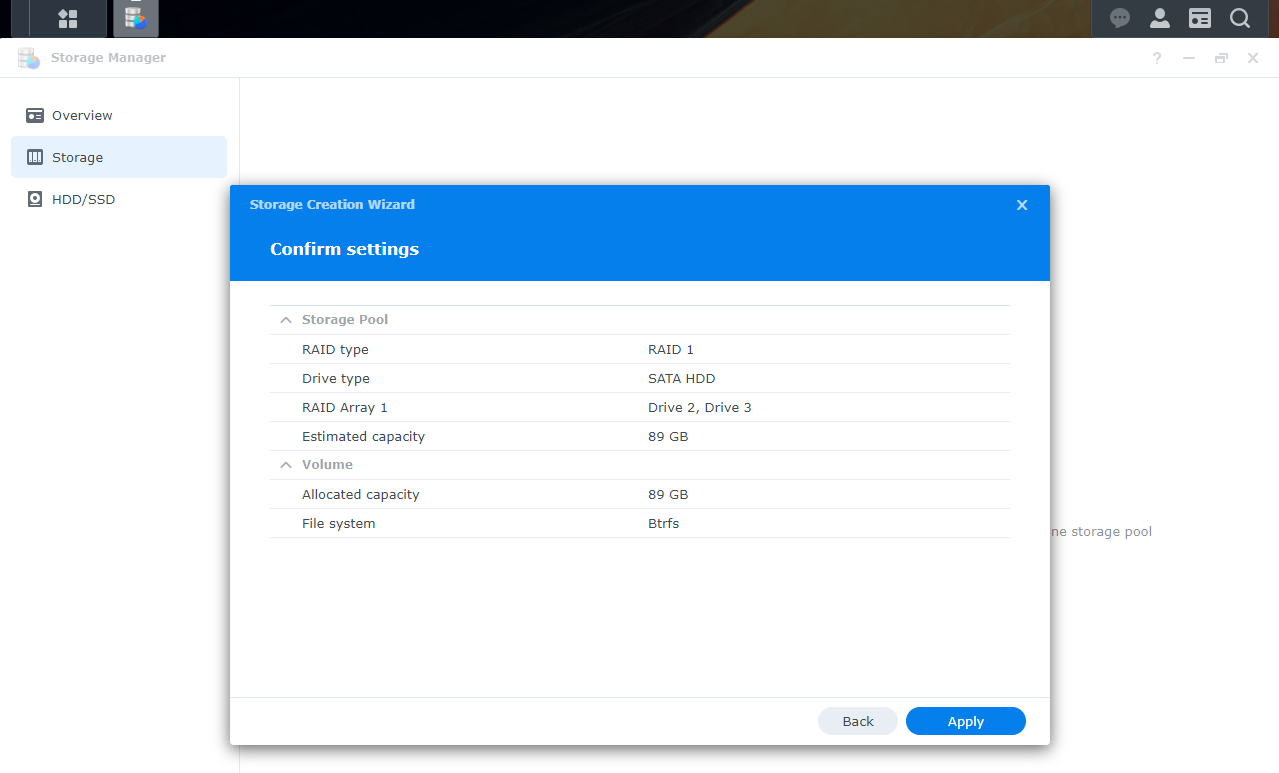
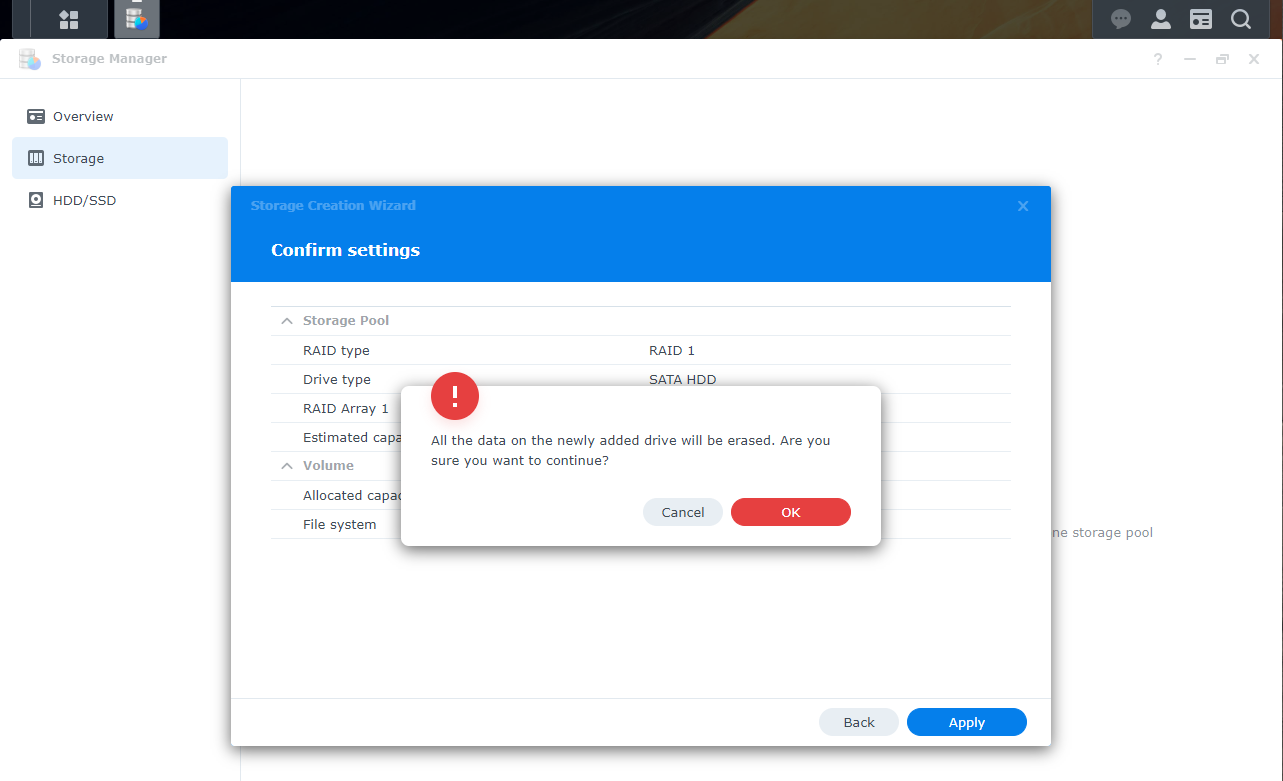
14: It’s now time to use the Hard Disk 2 and 3 to create a first Volume. Open the DSM Main Menu and start the Storage Manager (Then, it’s just a next, next, next journey depending on which Disk Array you want).


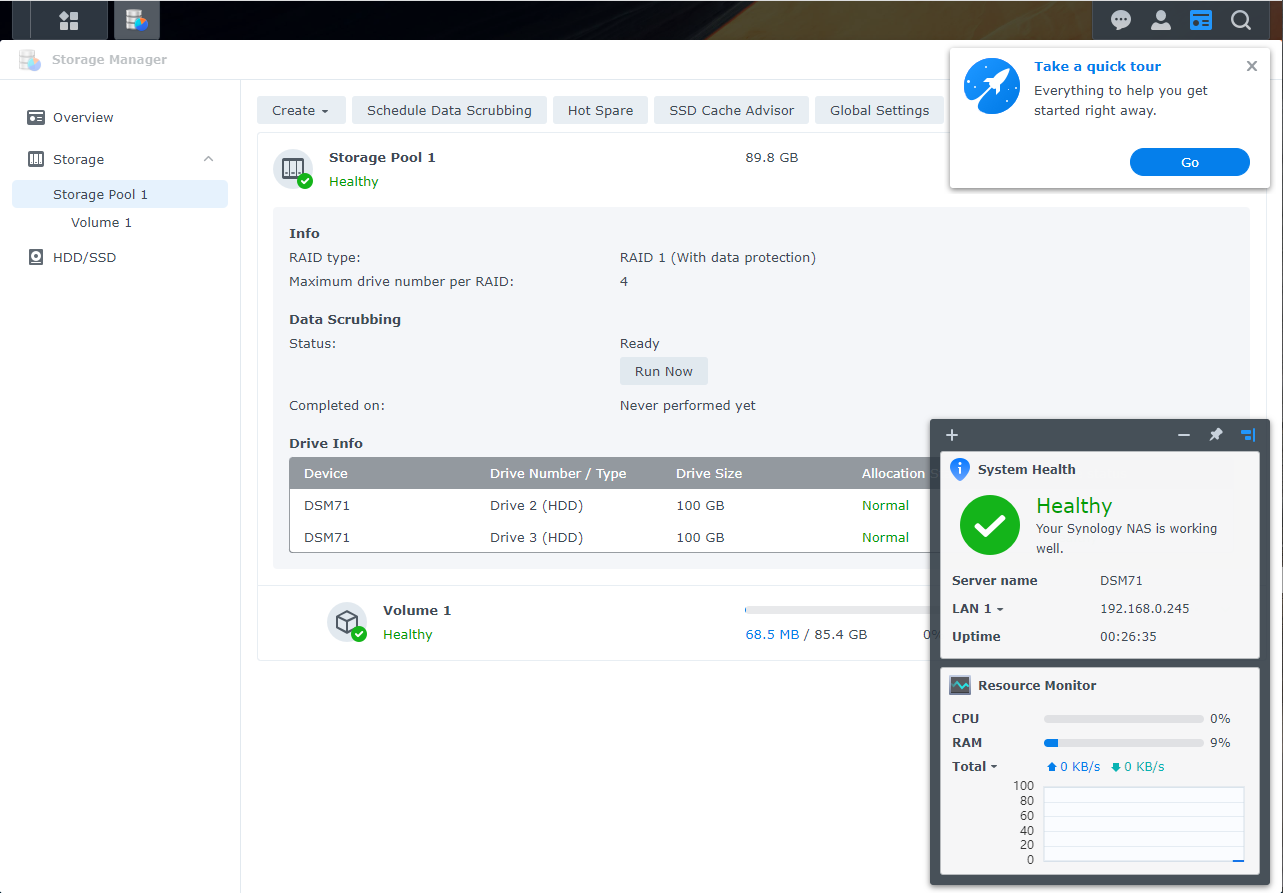
15: Et voila, you have now a brand new DS3266xs+ with the DSM 7.1-42661 (DO NOT UPGRADE !!! The NAS would go into a “Recoverable” and I have no resolution for that)

![]()
Leave a Reply