Month: January 2014

  • Crackling Sound in Center Speaker with Realtek Drivers (Analog)

    Since many years, as soon as I was installing Realtek Drivers for my audio chipset on my PC, I had crackling sounds in my center speaker (only) when the PC was starting/stopping to play a sound (I use the Analog plugs). I had no such issue with the native Microsoft Drivers. I finally spent a few hours during those last days to try ALL the settings and found a trick to get rid of that issue : Enable the “Stereo Mix” feature of Realtek and mute it.

    Click to Read More

    As said above, I had no issue at all (even with volume very high) when playing sounds on my PC if I was using the native drives installed with Windows.

    My Motherboard is an Asus P9X79 pro with a Realtek audio chipset.

    As I had no such issue with my HTPC Acer Idea 510 (which also comes with a chipset Realtek), I wrote to Asus to get help on that issue (instead of contacting Realtek). They answered (as they always did for others requests I had in the past) that :

    In this case it’s advisable to test the system with a different speaker set.

    The Realtek driver utilizes the full potential of the audio card.
    As a result it might be sending different types of signals that might nog be compatible/supported by the speakers resulting in a crackling sound.

    I was using initially a Surround EAX System: the Inspire 6.1 from Creative. So, I did replace it with my Surround THX System, a Gigaworks G550W from Creative, that was in use without any issue on my HTPC. But the crackling sound didn’t disappear.

    I read tips and tricks on probably more that 20 forum (not exaggerating) such as helpdeskgeek which was the most interesting. But without more success.

    So, I decided to test ALL the possible settings and combination during hours and hours… And I think I finally found a solution. Don’t ask why it works but it does the trick 😀

    Here is the configuration of my Speakers. Nothing here is important as the trick is not at that level, but I publish it anyway:

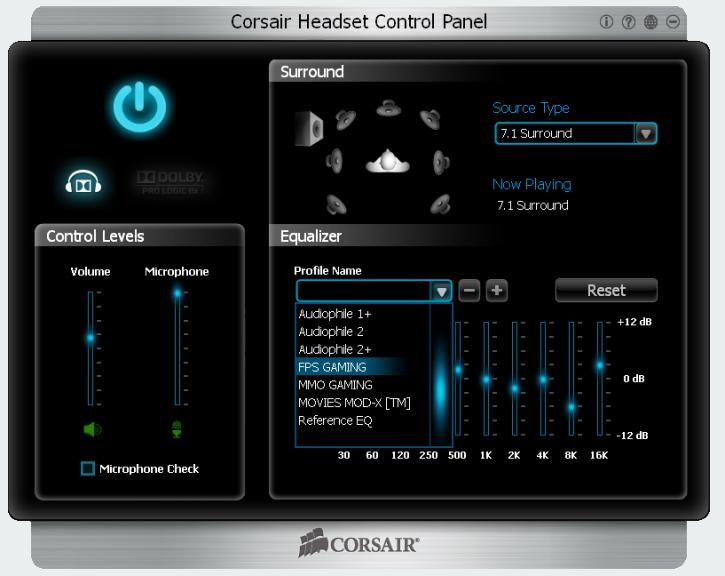
    • As far as the RealTek Drivers are installed, I use the HD Realtek Audio Manager to configure the speakers.
    • I have only a 5.1 system…
      • The cable of the Front Speakers is in the “Front” plug (seems obvious I presume)
      • The cable for the subwoofer and Center Speaker is in the “Ctr Bass” plug
      • I wanted to use the remaining speakers as rear speakers, But they don’t produce any sound if connected to the “Rear Spk” plug (whatever configuration I use : 5.1, 7.1, etc.. etc…) I had to plug them in the “Side Spk” plug. I presume the rear plug may only be used with 7.1 speaker systems.
    • However, I configured the speakers as a 7.1 system and unchecked the “rear pair” and as a result, I get sound from the rear speakers too. Concretely, when my PC play a sound for the side or the rear speakers, they both play in the speakers connected to the “Side Spk” plug
    • I am using Sound Effects, Room Correction and DTS Connect. But they don’t cause or stop the the crackling sound.

    Easy way to reproduce the problem:

    • Open the Windows “Sound” panel:
      1. Right click the “Windows Speaker” in the systray (not the “Realtek Speaker”)
      2. Select “Playback Device”
    • Select the “Speakers” currently used as “Default Device” in the “Playback” tab
    • Click “Properties” to open to the “Speakers Properties” window
    • Now, click on the “Sound” window which is behind the “Speakers Properties” windows. As this last one is a modal dialog, you may not access the “Sound” window ans Windows plays a “beep”. In addition to the “beep” you ear an horrible crackling sound…

    The trick:

    • Back to the “Sound” window you just open to reproduce the problem, go to the Recording tab
    • Select and Enable the “Stereo Mix”
    • Click “Properties” to access the “Stereo Mix Properties” window
    • In the “Listen” tab,
      • Check the option “Listen to this device”
      • Select “Speakers (Realtek High Definition Audio)” in the list bellow that option
    • In the “Levels” tab, mute the speaker. This is important otherwise you will have “feedback”, which is not at all the purpose (It’s useful to capture some audio output as explained on HowToGeek)
    • “Apply” if the button is enabled

    Now, reproduce the problem again. If the “Stereo Mix Properties” window is till open, simply click on the “Sound” window which is behind… You have a clear “beep” ? Gotcha !!!

    Notice: I have not disabled ANY Playback device or Recording Device, such as the “Line In”, etc…

    There is however a serious drawback. When “Stereo Mix” is enabled on “Speakers (Realtek High Definition Audio)”, the desktop takes more than 30 seconds to be accessible (On Windows 8, the Start Screen appears immediately. The problem will only be experienced if one switch to the Destkop quick after the login). It seems to me that Windows Audio Service has difficulties (?) to start or wait on another service. The Windows Speaker appears disabled in the systray for 1 or 2 minutes before finally becoming enabled. It’s not blocking me as I don’t often reboot. Instead, I use the “Sleep” mode. I guess that the Audio Service actually wait on the Realtek Speakers/Drivers to be ready as this issue does no occur if one enables “Stereo Mix” on other speakers… People not switching immediately between the Start Screen and the Destkop won’t notice the issue.

    Edit: 21/09/2014 I finally found the perfect solution:

    Click to Read More

    NB.: Many other Asustek’s users are reporting issues when connecting the Surround Speaker Pair on the Rear Speaker Jack in a “5.1 setup”. They don’t have any sound coming out of those Speakers.

    I read that using “Side Speakers” is the technically correct setting for 5.1. Unfortunately, connecting my Speakers in the “Side” connector with a 5.1 config never worked.

    As explained above, my trick was to plug my Rear Speakers as Side Speakers instead, and use a 7.1 config with rear speakers disabled… It works for playing 5.1 movies with MPC-HC or Windows Media Center for example, but not when using Plex Home Theater 🙁

    I finally found a solution as explained here

    I can now play 5.1 movies with a 5.1 config (instead of 7.1) and get sound via the Side Speakers. And icing on the cake, I don’t ear the crackling noise anymore, even without the trick presented above 😛

    Loading

  • Dolby 7.1 Wireless Headset “Corsair Vengeance 2100”

    I was missing a good microphone on my PC. And googling for that on the web, I actually found many headsets with a microphone. I have already 3 headphones at home… but none with support for high-fidelity, multi-channel Dolby audio. So, I did ask one to Santa Claus : the Corsair Vengeance 2100.

    Click to Read More

    Corsair Vengeance 2100
    Corsair Vengeance 2100

    I read a few serious reviews on that headset such as this one before concluding that it would fit my needs and expectations:

    • A wireless headset.
    • Closed
    • Circumaural
    • With a really good microphone with noise cancellation.
    • Cheaper than 150€
    • With enough positive (true/serious/motivated) reviews on the web
    • With a simple and light configuration interface (not like Realtek stuff)

    And I am very far from disappointed 😛

    Specifications

    Headphones:

    • Frequency Response: 20Hz to 20kHz
    • Impedance: 32 Ohms @ 1kHz
    • Sensitivity: 105dB (+/-3dB)
    • Drivers: 50mm
    • USB power consumption: 500mA
    • Connector: USB Type A
    • Wireless range: up to 12m (I was not able to test more than 12m as my corridor is not long enough)
    • Battery life: Up to 10 hours

    Microphone:

    • Type: Unidirectional noise-cancelling condenser with adjustable, rotating boom
    • Impedance: 2.2k Ohms
    • Frequency Response: 100Hz to 10kHz
    • Sensitivity: -37dB (+/-3dB)

    It took me a few hours, watching movies or playing games, to find the very best position on the head/ears as I am not used (anymore) to headphones. But with that adjustment, it’s really comfortable although used for hours.

    The main issue, as often with circumaural headphones, is that it is not designed to be used with glasses and especially not with 3D glasses which are thicker than standard glasses. It can even be bloody uncomfortable if like me you keep your standard glasses under the 3D glasses. The most valid option IMO would be to use the 3D glasses with a supra-oral headset, but I dislike those. Note that my nVidia 3D Vision 2 glasses have an increased flexibility to precisely ensure a better fit with gaming headphone (And I have to say that this is true as they are not uncomfortable with my good old Sennheiser HDR 65 – but this one is not a 7.1 headphone). But with the Corsair Vengeance, it’s not great.

    The quality of the microphone is really good. For testing purpose, you can ear yourself by ticking an option “Microphone check” in the configuration pane of the headset – this one must be downloaded from the corsair website and is really simple to use (There is no CD or user manual delivered with the headset):

    Corsair Vengeance Config
    Corsair Vengeance Config

    If you listen to music while talking to a friend, he will not ear it although you push the volume quite high… And you will still ear your friend :D.  The unidirectional noise-canceling seems to be very efficient based on the feedback I got about the quality.

    The microphone may be bent in order to come closer to the user’s mouth as the boom is flexible.

    There is no switch to mute the microphone, but it will turn off automatically once one swings it all the way upwards.

    As far as I am concerned, I keep “Source Type” on 7.1 and click on the blue “power” button to enable the Dolby Surround (a virtual surround as there are actually only two speakers). Doing so, it displays “Now playing”: “7.1 surround” and I can indeed really feel to 3D audio environment. From my own point of view, the audio performance is really impressive 😛 not only in games and movies, but also for stereo music. I am right now listening the Trance Top 1000 – 2013 and I really like the surround effect added on such kind of stereo sources. It makes the sound a bit “softer” (it’s not my purpose to become deaf anyway) but you are immerse in the music. Otherwise (without the Dolby effect, the sound seems to come from the top-front of the headphone – but is powerful !) Anyway, about sound quality, you have better read reviews written by specialist as I am not the best person to talk about audio.

    I noticed for the first time when trying this headset that music played within Chrome (E.g.: via my Synology Audio Station), is stopped if I change any settings related to the “playback device” currently used. I have to refresh the page to restart the music. It’s not an issue for me as I keep usually always the same settings, but this can be quickly quite annoying. There is no such issue (sound switched off when changing playback device’s settings) when playing music within IE (at least IE 11.0).

    After a few more tests with IE vs Chrome, I noticed that IE was up-mixing the stereo sources to fill all the speakers (although the “Speaker Fill” option was not enabled on the headset). That’s the reason why listening to stereo music sounds better within IE than  within Chrome. But as a consequence, true 5.1 or 7.1 sources played within IE sounds like crap, the volume being over-boosted. This can fortunately be fixed by enabling the option “Speaker Fill” in the Enhancement tab of the Corsair’s Speaker Properties (Right click the systray speaker icon > Playback Devices > select the Speakers Corsair Veangeance 2100 Headset > Properties > Enhancement). I really don’t get it but IE seems to fill automatically all the virtual speakers of the headset even without that option enabled. And once the option is enabled, it does it better ?! I spent a few hours playing around with all accessible Speakers’ properties and noticed a similar “up-mix” effect within IE when using my Realtek on-board sound card and its 6.1 speakers as a playback device . A behavior that I don’t experience within Chrome although I keep the very same speaker’s settings.

    You can also enable a “Loudness Equalization” if you like such an enhancement. Notice that those enhancements are not available from within the custom Corsair configuration pane.

    If you want to test a true 5.1 sources within Chrome, when “Source Audio” is set on 5.1 or 7.1 in the Corsair Configuration pane, try the samples from this site: HTML5 AAC Audio Playback Tests – Multichannel.

    If you want the ear how crap is the sound over-boosted by IE, when “Source Audio” is set on 5.1 or 7.1 in the Corsair Configuration pane, watch the video from this site: Dolby Digital Plus demo.

    The headset is linked with the PC via a USB dongle that has better be connected with the USB extension cable provided with the headset. Doing so, it can be placed on top of the desk and offers a better coverage (useful if, listening music, you move sometimes in the room).

    The volume is very easy to change thanks to the big inline volume controller. That was really a pain with my old Sennheiser as the control were not easy to locate with the finger once the headset on the head…

    Loading

  • Use Belgacom 3G USB Dongle (Vodaphone) on my Fuhu Nabi (Android) tablet

    I used to buy the 3G USB dongle of Belgacom to surf for free on the web with my laptop during the weekends. It’s a Vodaphone dongle (a “HUAWEI Mobile Connect – 3G Modem” inside). I was just wondering if I could use it on my Fuhi Nabi II tablet. The answer is YES if your tablet is rooted!

    Click to Read More

    My Tablet, a Fuhu Nabi II, is running Android 4.0.4. It has Bluetooth and Wi-Fi but no 3G. Since a few weeks, I have a “Belgacom Internet Partout Maxi” subscription, including mobile internet for free during the whole week (You have to go into your “e-Services” to modify your current “Mobile Internet Free Weekend” subscription and activate the “Mobile Internet laptop” as mentioned here). That’s why I was motivated to try my Belgacom dongle on my tablet.

    Belgacom's vodafone 3G dongle
    Belgacom’s vodafone 3G dongle

    First, I had to install PPP Widget on my Tablet.

    Next, I did add the Widget on the screen. At that time, you will see a status “Checking access” displayed by PPP Widget and you will be prompted to grant it root access. If you don’t grant it root access, you will see a status “No root access” displayed. I suggest you to re-add the widget on the screen and grant it access or you won’t be able to use it.

    The status displayed next by PPP Widget should be No modem found”. Click on its “Configure” button to set the Belgacom parameters:

    1. Acces Point Name: internet.proximus.be
    2. Username: (keep it blank)
    3. Password: (keep it blank)
    4. Dialing string: (keep it unchanged: *99***1#)
    5. Check and set PIN: checked
    6. Pin Code: enter the pin code of the SIM plugged into the dongle
    7. HTTP Proxy: (keep it bank)
    8. Disable USB device sleep: unchecked
    9. Auto-Start Connection: unchecked
    10. Automatic Re-Connection: unchecked
    11. Automatic device detection: checked
    12. Manual port selection: unchecked

    Then reboot the tablet to start from a clean situation. Once back:

    1. Disable the Wi-Fi.
    2. Connect a USB cable to the tablet.  I did use an official Samsung USB adapter I bought for my Galaxy SII.
    3. Connect the Vodaphone Dongle on the USB cable.
    4. The dongle’s led should start to blink “green”.
    5. When you are prompted by PPP Widget to “open PPP Widget when this USB devices is connected”, select “Use by default for this USB device” and click OK.
    6. Wait for a few seconds. If nothing happens, unplug and replug the dongle. You should soon see the following status displayed by PPP Widget:
      1. Prepare device…
      2. Seach for port…
      3. Setup modem…
      4. Disconnected (and the button “Connect” should now be enabled)
    7. Now, The dongle’s led should blink “blue”.

    The Connect button of the PPP Widget will become “enabled”. Click on that button. PPP Widget will display the status “Dialing out…”. If it fails to connect, the status “Disconnected” will displayed. Otherwise, you should see “Connected!” and the dongle’s led should stay fixed “blue”. Enjoy !

    If it does not succeed to connect, check that the dongle is still working on your laptop. Running the application “Vodaphone Mobile Connect Lite” on your Laptop, you will possibly get more details like “Sim card not found”, … Notice: I tried to use the latest version of the application “Vodaphone Mobile Connect Lite” on my Laptop (Windows 8.1) but got a message like “This program as compatibility issues”. I tried to run the Compatibility Troubleshooter, but it didn’t find a solution. Finally, although the application could start anyway, it didn’t detect the dongle. So I would recommend to use the software version available on the key itself.

    You can also enable the log within PPP Widget, via the Configure menu.

    Notice: if your tablet goes to sleep mode, you will be “disconnected” and the dongle will restart to blink “green”. When the tablet waked up, you should see PPP widget trying to re-detect the dongle and setup the modem. If it succeeds, you will be able to click on “Connect”. Otherwise, to unplug and replug the dongle.

    Loading

  • Configure Synology DNS + DD-WRT to access my blog from both Intranet and Internet

    My blog is hosted at home on my NAS and accessed using the fully qualified domain name www.beatificabytes.be. Configuring adequately the Synology’s DNS service and my Buffalo router running DD-WRT, I can access it both from Internet and my Intranet using that url.

    Click to Read More

    To make my blog accessible from Internet, I have configured the “DDNS” service of my Synology.  Thanks to this “DDNS” Service, “Synology” links a hostname like “myNas.Disktation.me” to the dynamic IP I get from my Internet Provider – currently “Belgacom”. Next, I have configured a CNAME “www.beatificabytes.be” at my Domain Provider “Servage.net” as an alias of this hostname “myNas.Disktation.me”.

    My VDSL Modem being the device physically accessible with the dynamic IP obtained from my Internet Provider, it is configured to forward incoming Internet traffic to my Buffalo router. And this one is forwarding the traffic for my blog to my NAS.

    It obviously works fine for accesses from Internet. But if I try to access my NAS with that hostname from my home network (my intranet), the VDSL Modem does not forward me to the NAS via the router. Instead, I am redirected by the DNS of my Internet Provider to a page (http://Intranet IP of my Modem/dns_error) displaying:

    Your internet connection is up, please close your browser and restart it again.
    
    Uw internetverbinding is hersteld, gelieve uw browser eerst te sluiten en
    daarna opnieuw te starten.
    
    Votre connection internet fonctionne correctement, veuillez fermer votre
    navigateur et le redémarrer.

    My previous solution was to define the hostname www.beatificabytes.be in the host file (under C:\Windows\System32\drivers\etc) of my PC. So, instead of being resolved into the dynamic IP got from my Internet Provider (reason why I was reaching my VDSL Modem), that hostname was resolved directly into the IP of my NAS.

    Using the host file is however a real pain as it must be completed and maintained manually on all the devices. Also, it only works fine for Windows machines and not for my Phone, my Tablet, etc… So, I wanted a more global solution.

    I found that I could configure a host file directly on my Buffalo Router as explained here: http://commonbits.wordpress.com/2013/03/26/using-dd-wrt-for-local-dns-and-dhcp/. More details here: http://www.dd-wrt.com/wiki/index.php/DNSMasq_as_DHCP_server.

    I could also simply configure my Buffalo Router to provide each DHCP client with the IP of the ppen DNS of Google (8.8.8.8. and 8.8.4..4) instead of the DNS of my Internet Provider.

    But I was interested in testing the DNS Server package of Synology. And I found that it’s not that hard to configure it to resolve the hostname locally instead of querying the DNS of my Internet Provider.

    First, configure the NAS like this:

    1. Install and run the DNS Server Package via the Package Center
    2. Open the DNS Server Panel via DSM Start > DNS Server
    3. Select the “Zones” tab
    4. Click on “Create” and select “Master Zone”
    5. Select a “Domain type”: forward zone
    6. In “Domain name”, enter the domain name used by the blog
    7. In “Master DNS server”, enter the IP address of the NAS
    8. Keep other settings as by default and click “Ok”.
    9. Double click the new entry to edit its content. You should see two prefilled records respectively of type “A” and “NS”.
    10. Click on “Create” and add a new record of type “A”
      1. Name: (leave blank)
      2. TTL: (use the default)
      3. IP address: type the IP address of the NAS
    11. Also add another record of type “A” with Name “www”.

    And that’s it for the DNS Server configuration. I didn’t change anything else, including in the “Resolution” tab, …

    Next, configure the DD-WRT like this:

    1. Go to the tab Services
      1. Set “Used Domain” = WAN
      2. Set “LAN Domain” = Any name you want. It does not need to be the domain name of the blog. I am using my “Workgroup” (Yes, I still use a that)
      3. Check that the NAS has a static IP configured in the “Static Leases” table
      4. Set “DNSMasq” = Disabled
    2. Go to the tab Setup > Basic Setup
      1. Set “Connection Type” = Automatic Configuration – DHCP
      2. Set “Router Name” = SomeName
      3. Set “Hostname” = Same name as above
      4. Set “Domain Name” = (I kept it blank as I am not really working with a domain at home)
      5. Set “Local IP Address” = x.x.x.x (E.g.: 192.168.0.1)
      6. Set “Subnet Mask” = 255.255.255.0
      7. Set “Gateway” = local IP of the VDSL Modem (E.g.: 192.168.1.1)
      8. Set “Local DNS” = local IP of my NAS
      9. Set “DHCP Type” = DHCP Server
      10. Set “DHCP Server” = Enabled
      11. Set “Static DNS 1” = 0.0.0.0 (Later, I did set here the IP of my Adsl Modem which is configured to forward the DNS request to my Internet provider. I could also have use Google DNS: 8.8.8.8 or 8.8.4.4)
      12. Set “Static DNS 2” = 0.0.0.0
      13. Set “Static DNS 3” = 0.0.0.0
      14. Set “WINS” = 0.0.0.0
      15. Set “Use DNSMasq for DHCP” = unchecked
      16. Set “Use DNSMasq for DNS” = unchecked

    This is working for me but DNSMasq being disabled, there is no caching on the DNS name resolution or even on the NetBios name (DNSMasq can intelligently add DHCP leases to its DNS database, providing local name lookups for any DHCP client, static or dynamic). And solving names seems to me precisely quite slow for the Browsers. So, I decided to try to enable DSNMasq.

    1. Back into the Tab “Services”,
      1. Set “DNSMasq” = Enabled
      2. Set “Local DNS” = Disabled (If I enable it, I lose access to the Synology DSN ?!)
      3. Set “No DNS Rebind” = Enable
      4. Set “Additional DNSMasq Options” = (I kept it blank but was hesitating to enforce a strict order on the DNS to be used to resolves name):
        1. strict-order
        2. dhcp-option=6,<NAS IP comes here>,8.8.8.8,8.8.4.4 (ex.: I use here the open DNS of Google).
    2. Finally, in the tab Setup > Basic Setup
      1. Set “Use DNSMasq for DHCP” = checked
      2. Keep “Use DNSMasq for DNS” = unchecked (If I check it, I lose access to the Synology DSN ?!)
      3. Set “DHCP-Authoritative” = checked.

    I am actually not convinced this is correct and improving the resolution in any way. So,”to be continued”… But in the meantime, I can access my blog with its fully qualified domain name from both my Intranet and Internet and now a bit more about DNS configuration :p

    Notice:  You can have a lot of troubles while testing the various settings on the DD-WRT as many values are cached either on the Synology, or on your PC. Ideally, you should reboot all the devices after each change in the router settings. At least, reset the network interface of your NAS (telnet as root and execute /etc/rc.network restart) and renew your PC network settings (ipconfig /release and ipconfig /renew). Best would be to do that after a Router reboot (telenet as root and execute reboot)

    Loading