Author: vletroye

  • Syntax highlighting in WordPress

    I am using the plugin “Syntax Highlighter Evolved” to color the code samples embedded in my posts.

    This one is based, as many others, on the code syntax highlighter developed in java-script by Alex Gorbatchev.

    Click to Read More

    Here is the list of supported syntaxes [syntax name: tag]:

    ActionScript3: as3, actionscript3
    Bash/shell: bash, shell
    ColdFusion: cf, coldfusion
    C#: c-sharp, csharp
    C++: cpp, c
    CSS: css
    Delphi: delphi, pas, pascal
    Diff: diff, patch
    Erlang: erl, erlang
    Groovy: groovy
    JavaScript: js, jscript, javascript
    Java: java
    JavaFX: jfx, javafx
    Perl: perl, pl
    PHP: php
    Plain Text: plain, text
    PowerShell: ps, powershell
    Python: py, python
    Ruby: rails, ror, ruby
    Scala: scala
    SQL: sql
    Visual Basic: vb, vbnet
    XML: xml, xhtml, xslt, html, xhtml

    The easiest it to use the tags here above as shortcode around your “code”, like this: [tag]my code[/tag] where tag can be php, vb, shell, ….

    Here is a sample from Alex G.’s website using the tag “php” as a shortcode:

    [php]// SyntaxHighlighter makes your code snippets
    // beautiful without tiring your servers.
    // http://alexgorbatchev.com
    var setArray = function(elems) {
    this.length = 0;
    push.apply(this, elems);
    return this;
    }[/php]

    There are various options than can be set using parameters: [tag parameter=”value”]my code[/tag]. Those options are listed in the “settings” page of the plugin (See via the WordPress admin dashboard).

    The various issues I found are:

    1. Although using the parameter gutter=”true”, I cannot remove the line numbering but keep the toolbar.
    2. Copy/Paste code from an IDE does not provide a nice output:
      • The indentation is lost,
      • some lines of code become formatted as “paragraphs” and extra blank lines appears therefore
    There is however a trick to keep the original formatting of the code when copy/pasting this one.
    1. Copy first your code from the IDE
    2. Next, in your post, select the HTML view
    3. Then, in this view, add your tags [tag][/tag]
    4. Finally, paste your code between those tags and switch back to the Visual view

    If you prefer to convert your code into HTML+CSS, the best online tool I found is Pygments (Python Syntax Highlighter) which supports for free much more languages than most others, has a simple interface and display not  advertisement.

    Loading

    ,
  • Synchronize with an array of disks

    Months ago, I did backup a very large disk of my PC (E:\) to multiple smaller disks connected one after one, using a e-sata cradle (G:\).

    Recently one of those small backup disk started to experience NTFS Errors and I did lost its content. To avoid restarting a complete backup of E:\, I had to find which data were lost to redo a backup of those only.

    Click to read more

    First, I did recreate the complete folder structure (i.e.: without the files) of the remaining backup disks in one folder of my PC (C:\Temp\Backups). I did reconnect the disks one after one via the e-sata Cradle and did execute each time the following command in a MS-DOS console:

    [powershell gutter=”true”] MkDir C:\Temp\Backups
    XCopy G:\ C:\Temp\Backups /T /E[/powershell]

    More details typing “XCopy /?” in your console:

    /T Creates directory structure, but does not copy files. Does not include empty directories or subdirectories. /T /E includes empty directories and subdirectories.

    The result was 22.036 folders – 0 bytes.

    Notice that the target folder (C:\Temp\Backups) must exists !

    Next, using BeyondCompare, I did a “Folder Compare” between “C:\Temp\Backups” and “E:\”.

    I did first select the option to see only the orphans, via the menu “View/Show Orphans“.

    And I did next add a “Filter” to “Exclude files”  with a name “*.*”, via the “glasses” icon (i.e.: I did exclude all the files – in order to only compare the directory structure and backup the missing ones. Otherwise, no folder in C:\Temp\Backups would have appeared as orphans as they are all empty while their equivalent folders on E:\ have content).

    Finally, in BeyondCompare, I did select all the orphan folders on E:\ and used the contextual menu “Copy To Folder…“. In the “Action” field of the “Copy to Folder” dialog box, I did pick G:\ as a destination folder.

    Et voilà.

    Loading

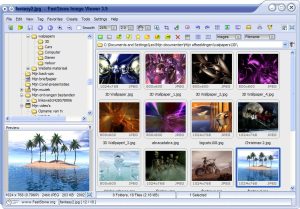
  • Image Browser: FastStone

    Faststone Image Viewer
    Faststone Image Viewer

    FastStone is from far my favorite Image Browser (since ACDSee started to become a monster pointlessly full over overkill features). It’s also a Freeware for non-commercial use.

    Click to Read More

    As an Image Browser, FastStone is really light and fast while supporting many graphic formats, including obvious ones (gif, jpeg, png, pcx, tiff) but also ico, camera raw files, …

    It comes with some other small pieces of software that I use each time I transfer photos from my camera to my NAS.

    • An ultra light and quick Image Viewer. I like this one as it opens in seconds (full screen or windowed, as configured) when double clicking an image in Windows Explorer. Next, moving the mouse to screen edges, menu appears with the most common actions such as cropping, resizing, opening the image with an external tools (ex.: Paint.Net :)), …
    • a batch Image Renamer supporting “expressions”, search & replace, renaming preview, …
    • a batch Image Converter supporting resizing, Lossless JPEG rotations, color adjustments, auto-rotate based on EXIF information…

    FastStone also offers Side-by-side Image Comparison, Red-Eye removal, musical slideshow with transitions, …

    Details: http://en.wikipedia.org/wiki/FastStone_Image_Viewer

    Download: http://www.faststone.org

    Loading

  • About This List of Softwares

    The purpose of this page is to keep track of all the programs I like, most of them being freewares.

    Click to Read More

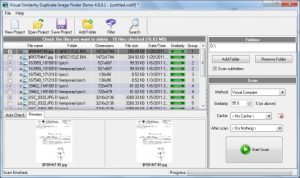
    Indeed, when re/installing a PC, I usually hardly remember the exact name of some tools I only use twice a year or “silent” services installed once years ago; ex.: Image Duplicate FInder, Software KVM, …

    My criteria to adopt a software is quite simple: it must help me (or my computer) to be more efficient and productive. And I observed that such a software match the following acronyms:

    • KISS: It must be very easy to use/understand (also for non IT users).
      • I am not afraid of command lines but prefer obviously user-friendly interfaces.
    • YAGNI: It may not have plenty of features not directly related to its main purpose.
    • DRY: It should not have overlaps with another software I like.

    Notice: I am using those programs on x64/x86 [Windows 7: not anymore] Windows 8 and [Server 2008 R2: not anymore] Server 2012 Essentials.

    Loading

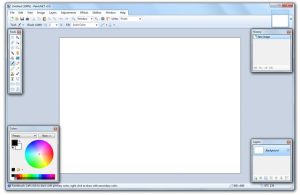
  • Photo Editor: Paint.net

    Paint.Net
    Paint.Net

    Just as notepad++ is a must-have to replace notepad, Paint.net is not only THE mandatory replacement for Paint, it’s also IMHO the little “free” brother of all those well known professional editors. It’s a indeed a freeware (Creative Commons License).

    Click to Read More

    I dislike to use “pro” editors as they are usually too complex for my needs, i.e.: full of over-killing features for a end-user like me. On the opposite, Paint.net offers a clear, pro but still simple interface with all the required powerful tools such the Magic Wand for selecting regions of similar color (ex.: grab clouds in order to remove them), and the Clone Stamp for copying or erasing portions of an image (ex.: rebuild a collapsed wall).

    I really use Paint.net a lot to completely remove elements from photos or rebuild their background as well as to simply make pictures’ background  transparent…

    I like also how simple I can replace a color with another one in a picture using the Recolor Tool.

    Tip: I was recently trying several free tools to determine the code of colors seen in web pages. Actually, the most stupid simple solution to get a color code is to take a screenshot (Using the “Prt Scr” key), to paste this screenshot in Paint.Net and grab Hex Codes using the Color Picker tool.

    Also, to automatically edit all images with Paint.Net instead of MS Paint, I did set “C:\Program Files\Paint.NET\PaintDotNet.exe” “%1” as Default value for the registry entry: HKEY_CLASSES_ROOT > SystemFileAssociations > image > shell > edit > command. Find attached to this post the reg file that can be used to update the registry.

    Details: http://en.wikipedia.org/wiki/Paint.NET

    Download: http://www.getpaint.net

    Loading

  • Software KVM: Input Director

    Input Director
    Input Director

    My favorite tools to share one Mouse and one Keyboard with Multiple PC through the network is nowadays Input Director. It’s free for personal non-commercial use only.

    Click to Read More

    Input Director allows the mouse of a host computer (“master”) to move onto the screen of slave computers, all connected together via a network. The keyboard of the “master” becomes active on the computer where the mouse cursor is currently located. The effect is similar to a computer connected to a plurality of screens.

    The configuration of the spatial position of each computer is done via a configuration software, which must be installed on each machine as a Windows Services (No need for a user to be logged in). Depending on that configuration, the mouse will go a computer or another when crossing the left/right/upper/lower edge of its screen.

    Download : http://www.inputdirector.com

    Years ago, I did use a now deprecated version of Synergy. I moved to Input Director due to lack of support in that version regarding UAC and Windows Services under Windows 7. The new latest version of Synergy has however now supports regarding those features. Synergy is a freeware (GPL) open source.

    Download: http://synergy-foss.org/

    In the future, I could be tempted to use Mouse Without Borders witch looks great and is free for non commercial use… It offers support to Copy/Paste between PC. But mouse may only move to the next PC through the left and right borders, not the top and bottom ones (how I am used to configure my current Software KVM).

    Download: https://www.microsoft.com/en-us/download/details.aspx?id=35460

    Loading

    ,
  • File Compare: Beyond Compare

    Beyond Compare
    Beyond Compare

    Beyond Compare is really my favorite file, folder and data comparison utility.

    Click to Read More

    • Compare files, folders/subfolders, data (grids) FTP sites or zip files side-by-side in a Explorer-like interface
    • Hide files or folders that don’t contribute to comparison and show only relevant results using display filters:
      • Show all, Just mismatches, Just matches,
      • Two-sided, Two-sided mismatches,
      • Orphans, Older, Newer
      • Ignore files or folders based on patterns
    • Powerful merge of changes between files with support for 3-way comparison
      • Manually alignment of the files to compare the correct records
      • In line Editing
      • Move to next difference or Move to next file comparisons
    • Folders Synchronization
    • Color highlighting of differences
    • Sort by Name, Type, Date Modified, Size, CRC
    • Multi-threaded operations:
      • Folders scanned in background
      • Files compared in background
      • Folders synchronized in background
    • Comparison based on various criteria:
      • Date modified
      • File size
      • Attributes
      • Binary content comparison
      • Rules-based content comparison (possibly ignoring minor differences like Case, Whitespace, Comments)
    • Support for Batch operations

    Details: http://en.wikipedia.org/wiki/Beyond_Compare

    Comparison: http://en.wikipedia.org/wiki/Comparison_of_file_comparison_tools

    Download: http://www.scootersoftware.com/

    Loading

  • Text Editor: Notepad++

    Notepad ++
    Notepad ++

    Notepad++ is my favorite text editor and source code editor for Windows as it has a lot of advantages over the built-in Windows text editor ‘Notepad’ and is a freeware (GPL) open source.

    Click to Read More

    General features include:

    • Tabbed document interface
    • Drag-and-drop
    • Split screen editing and synchronized scrolling
    • Spell checker (requires Aspell)
    • Supports various text encoding formats (UT8, Unicode, …) and file formats (Dos, Unix, …)
    • Search and Replace: with regular expressions (including multi-line); over multiple documents in subfolders; and marking/summary of occurrences
    • File comparison
    • Zooming

    Source code editing features include:

    • Auto-completion
    • Bookmarks
    • Syntax highlighting and syntax folding (C#, CSS, js, html, php, shell/dos scripts, xml, …)
    • Brace and indent highlighting
    • Smart highlighting
    • Macro recording and execution.
    • Various tools such as line sorting, text encoding conversion, text folding
    • File status auto-detection

    Details: http://en.wikipedia.org/wiki/Notepad%2B%2B

    Download: https://notepad-plus-plus.org/

    Loading

    ,
  • Schedule a Backup of all your MySQL databases on Synology

    It would be a good idea to schedule a daily backup of all the MySQL databases on your Synology. Those will indeed be wiped out if by accident, you have to reset your NAS (reinstall the firmware), ex.: if you lose a disk in your RAID 0.

    That can be done using a shell script and a cron job as described here after.

    How to Backup

    First, create a user with a local-read-only access on the databases. We will indeed have to let its password in the script, endangering the security. Using a local-read-only user will mitigate the risks.

    1. Go to the web administration interface (DSM) of your NAS.
    2. Install phpMYAdmin via the “Package Center” if not yet done.
    3. Open phpMyAdmin via the “Start Menu” (“Main Menu”).
      1. I am using the login ‘root’ with the password of Syno’s ‘admin’ user
    4. Open the “Users” tab in phpMyAdmin
    5. Click “Add User” (bellow the list of existing users)
    6. Enter the User Name. Ex.: backup
    7. Select “localhost” as an Host.
    8. Enter a password. Ex.: mysql
    9. Keep “none” as “Database for user”
    10. Grant the user with Global privileges: Select (in Data) and Reload, Show Databases and Lock Tables (in Administration)
    11. Click “Add User” at the botton of the page

    Next, create a shell scripts in a Shared Folder of the NAS (Ex.: \volume1\backup\backupMySql.sh). Working in a Shared Folder will make it easier for you to copy/open later the backups from your PC). Don’t forget to create a “Unix” file, either using the touch command in a Console or saving a file As a “Unix shell script” within Notepad++. Notice that a script created with NotePad++ and saved on the Shared Folder will belong to the user account accessing that Shared Folder (Most probably your Windows Account if like me you simply created a user on your NAS with the same login and password). A script created with “touch” in a Console will belong to the user accessing the NAS via telnet/SSH (Most probably the “root” account).

    [shell]#!/bin/sh
    #
    DIR=/volume1/backup/sqlbackup/
    DATESTAMP=$(date +%Y%m%d%H%M%S)
    DB_USER=backup
    DB_PASS=mysql
    
    # create backup dir if it does not exist
    mkdir -p ${DIR}
    
    # remove backups older than $DAYS_KEEP
    #DAYS_KEEP=30
    #find ${DIR}* -mtime +$DAYS_KEEP -exec rm -f {} \; 2> /dev/null
    
    # remove all backups except the $KEEP latest
    KEEP=5
    BACKUPS=`find ${DIR} -name 'mysqldump-*.gz' | wc -l | sed 's/\ //g'`
    while [ $BACKUPS -ge $KEEP ]
    do
      ls -tr1 ${DIR}mysqldump-*.gz | head -n 1 | xargs rm -f
      BACKUPS=`expr $BACKUPS - 1`
    done
    
    #
    # create backups securely
    #umask 006
    
    # dump all the databases in a gzip file
    FILENAME=${DIR}mysqldump-${DATESTAMP}.gz
    /usr/syno/mysql/bin/mysqldump --user=$DB_USER --password=$DB_PASS --opt --all-databases --flush-logs | gzip >> $FILENAME
    [/shell]
    

    NB: Since DSM 6.0, “/usr/syno/mysql/bin/mysqldump” has been moved to “/bin/mysqldump” !!!

    Possibly, type the following command in a Console (telnet/SSH) to set the user ‘root’ as owner of the script:

    [shell]chown root /volume1/backup/backupMySql.sh[/shell]

    IMPORTANT notice: I used to have “-u DB_USER” (with a blank space in between) in my script above and -“p$DB_USER” (without a blank) instead of –user and –password. But a reader (Fredy) reported that the script was not running fine for him unless removing the blank. As per documentation of mysqldump’s user parameter and password parameter, there should be a blank after -u but not after -p. However, samples on the web usually illustrate the use of mysqldump with “-uroot”. So, I decided to use the more explicit notation “–user=” and “–password=”. I did test this notation with a wrong username or password and the resulting dump is indeed empty. With the correct username and password, it works fine.

    Since DSM 4.2, the Task Scheduler can be used to run the script on a daily basis.

    1. Go to the Start Menu
    2. Open the Control Panel
    3. In the “Application Settings”, open the Task Scheduler
    4. Select “Create a User-Defined Script”
    5. Type a name for that “Task:”
    6. Keep the “User:” root
    7. In the “Run Command” pane, type:
      sh /volume1/backup/backupMySql.sh

    Don’t forget the “sh” in front of your command, otherwise, it does not work (although the sample provided by Synology is missing it ?!)

    If you don’t use the Task Scheduler, you can add a Cron Job to execute the script, e.g. every day at 0:01. Open a Console (Telnet/SSH) and type:

    [shell]echo "1       0       *       *       *       root    sh /volume1/backup/backupMySql.sh" >> /etc/crontab[/shell]

    FYI, a cron line syntax is “mm hh dd MMM DDD user task” where:

    • mm is the minute (0..59)
    • hh is the hour (0..23)
    • dd is the day in the month (1..31)
    • MMM is the month (jan, feb, … or 1..12)
    • DDD is the day in the week (sun, mon, … or 0..7 where 0 and 7 beeing both sunday)

    The following values can also be used:

    • * : a every unit (0, 1, 2, 3, 4…)
    • 5,8 : at unit 5 et 8
    • 2-5 : units 2 to 5 (2, 3, 4, 5)
    • */3 : every 3 units (0, 3, 6, 9…)
    • 10-20/3 : every 3 units, from 10th to 20th (10, 13, 16, 19)

    So, the script will start every day at 0:01h

    Finally, you must restart the cron daemon to activate the new job. To find the process id and send a SIGHUP signal to this one, type the following command line in a Console (Telnet/SSH):

    [shell]ps | grep crond | grep -v grep | awk '{print$1}' | xargs -t kill -HUP[/shell]

    It should display “Kill -HUP xxxx” where xxx is the pid of the cron daemon.

    Added on 03/01/2013

    Attention: if you copy paste the command to restart the cron daemon from this page into the telnet console, some symbols will be wiped out: the ‘{ and ‘ around print$1… you have to type them manually…

    Attention: if you upgrade the version of DSM, the changes made in the cron script are lost (at least, it’s what I have noticed after updating last month…). Reason why I recommend to use the new “Task Scheduler” feature available since DSM 4.2.

    Tip to edit the cron script: you can use the package “Config File Editor” available here. Once installed, you can access it via the Main Menu. Then, you have to edit the file named “Config File Editor” and add the following line:

    /etc/crontab,crontab

    Once this line is added and saved, … I don’t remember how to force the change to be taken into account :/. But restarting the DiskStation is enough 😀

    Finally, back into the Config File Editor, select the ‘crontab’ entry and modify this script, save your changes and restart the cron daemon.

    Tip to restart the cron daemon: you can use the package “MODS Web Console” available here. To install it, go to the Package Center and add the following url via the Settings > Package Sources : https://www.beatificabytes.be/sspks. Once this url added, go to the tab “Community” and click Install on the “MODS Web Console” icon.

    Run the Web Console via the Main Menu, log in with “admin”/”admin” (The defaults values if not changed) and type:

    synoservice --restart crond

    Added on 01/12/2013

    If you want a lazy solution to notify the Administrator about the success or failure of the backup, you can use the ‘synonotify’ command (See details here). A more advanced solution would be to configure the “Mail Server” and use its ‘sendmail’ command:  /volume1/@appstore/MailServer/sbin/sendmail…

    Added on 08/01/2017

    mysqldump has moved

    • DSM 6.0 : /usr/syno/mysql/bin/mysqldump
    • MariaDB 5: /volume1/@appstore/MariaDB/usr/bin/mysqldump
      MariaDB 10: /volume1/@appstore/MariaDB10/usr/local/mariadb10/bin/mysqldump

How to Restore

To do a full restore, simply:

  1. Copy the archive (.gz) you plan to restore on your local PC
  2. Go to “phpyMyAdmin” > “Import” > “Chose File” (next to Browse your computer).
  3. Select the .gz file to be restored
  4. Press “Go” at the bottom of the page (no need to change any settings)

Pay attention: this is a complete restore, I.e.: all databases are dropped and recreated from scratch.

If you want to be able to restore a subset of your databases you better have to change the script to backup specific databases instead of –all-database.

If you want to restore only one table ‘mytable’ from the backup ‘mysqldump-datetime.gz’:

  1. Unzip first the archive: gunzip mysqldump-datetime.gz
  2. Then extract the part that restore the desired table with this command: sed -n -e ‘/DROP TABLE.*mytable/,/UNLOCK TABLES;/p’ mysqldump-datetime > mytabledump

Download the script here.

Loading

  • Touch your scripts! Don’t be lazy…

    I have just created a new shell script for my NAS. But its behavior is really weird. It seems that concatenating strings is actually overwriting them. Ex.:

    #!/bin/bash
    A=abcd
    B=12
    echo $A$B
    

    results in: 12cd

    Click to read more

    Also, redirecting any output into a file results in a new folder and an new empty file, both with a weird name. Ex.:

    [shell] DIR=/volume1/sharedFolder/
    FILENAME=${DIR}outputFile
    echo Hello World > $FILENAME
    [/shell]

    results in a file named “outputFile” and a folder named “” ( beeing displayed as ‘dots’ in Windows Explorer!). Both are well located under /volume1/sharedFolder/ and visible in Windows Explorer. However the folder does not appear when executing ‘ls -la’ in a console on the NAS (only the file appears) and the only way to delete this folder is to execute ‘rm -R /volume1/sharedFolder’ in the console.

    I quickly realized that this behavior was a consequence of creating the file on a Shared Folder of the NAS using the Windows Explorer’s contextual menu “New”>”Text Document”… Creating an empty file with the command “touch” directly in a console on the NAS does not suffer the same issues.

    There is indeed at least one difference that I know between the file format of Unix and DOS: the return character which is 0x0A in Unix, while it is 0x0A, 0x0D in DOS (a.k.a /n in Unix and /r/n in DOS)

    I realized that this was the issue because each empty line in the script was resulting in an error: “: not founde x:”, x being the line number. Meaning that the “empty lines” were actually not empty (due to the /r).

    Notice that the magic “touch” only works because I use next Notepad++ to edit the file. Indeed, this great freeware preserve the Unix file format while NotePad, WordPad, etc…, do not.

    I did use the Windows Explorer’s contextual menu to create the empty file because I was too lazy to create a new file with notepad++ and browse next for the target subfolder on the NAS where I had to save it 🙁

    Otherwise, with the “Save As” of NotePad++, I would have been able to pick the right format: “Unix Script File” 🙂

    Loading

  • Tags


    Acer iDea 510 AirPlay Android Backup DD-WRT DNS DS209+ DS713+ DS1815+ FlexRaid Galaxy Galaxy S2 Galaxy S7 Google Assistant Google Home HTPC Kies MCE MySQL Nabi 2 Nvidia TV Shield One Plus One OnePlus One OpenHab Outlook Philips Hue Plex RAID Raspberry PI Remote Desktop Root Access Samsung Scripts Synology Team Build Visual Studio VMWare Wi-Fi Windows Windows 8 Windows 8.1 Windows 10 Windows Server 2012 XBMC Xpenology

    Categories


    Recent Posts