Here is how to connect onto a Synology and run a SSH console to, e.g., run linux commands, execute scripts, etc…
Click to Read More
Enable SSH
Log as admin into your Synology via the DSM web interface. If you don’t know its URL anymore, run the Synology Assistant on your PC (The setup can be found for your model on Synology’s download page) to find your NAS. Right-click on it to connect.
Notice that for illustration purpose, my NAS is named here “Hades” and has 192.168.0.200 as local IP.
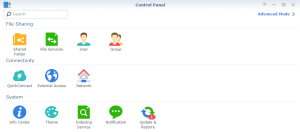
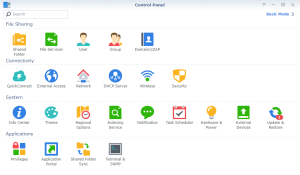
Once logged in DSM, open the Control Panel. If you see only three lines of icons (titled File Sharing, Connectivity and System), then click on the blue link “Advanced Mode” in the top-right corner.
You should see a dark “console” icon named Terminal & SNMP in a fourth section named Applications.
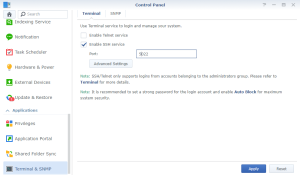
Click on that icon and in the tab Terminal appearing now, tick the option Enable SSH service. Configure the Port number that your want to use, E.g. 22, 5022, or any port still free.
Notice the message: only account in the administrators group will be able to log in SSH console. On the opposite, you won’t be able to log in with the root account.
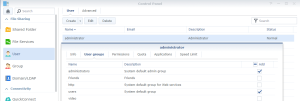
The System default user should be such an administrator account. But you can create another one and add it in the administrators User group. Ex. here after a user named “administrator”:
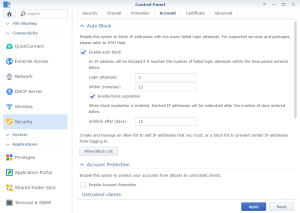
Also, as recommended, go next into the Security section of the Control Panel and enter the Account tab to tick the option Enable auto block. E.g.: you can block there any IP address which failed 3 times to log in during the last 15′. You can also tick the option Enable block expiration to unblock such IP after e.g. 15 days.
Notice: this “auto block” feature has been very useful for me when I started to use a VPN on my NAS to access internet. Many IP, mainly from Russia and China, have been blocked.
PS.: SSH is recommended over Telnet, as using encrypted communications. But if you really want, you can also enable it.
Install Putty and open a SSH console
Download Putty from here and install it on your PC. It’s an open source SSH and telnet client.
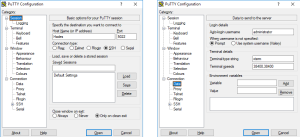
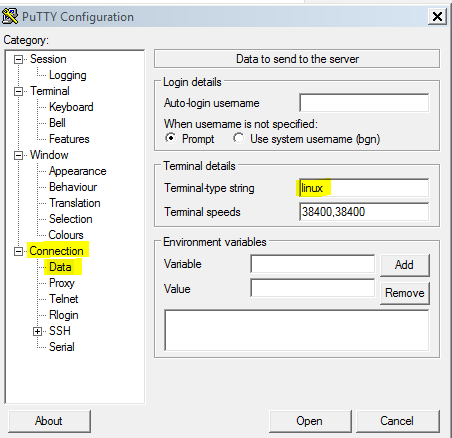
Run Putty and enter an administrator account in the Auto-login username of the category Connection > Data (as illustrated bellow in the right screenshot, I am user the user named “administrator” created previously and member of the User Group “Administrators”). Next enter your Host Name (or IP address) and Port in the Category Session (as illustrated bellow in the left screenshot). Check that the selected Connection Type is SSH.
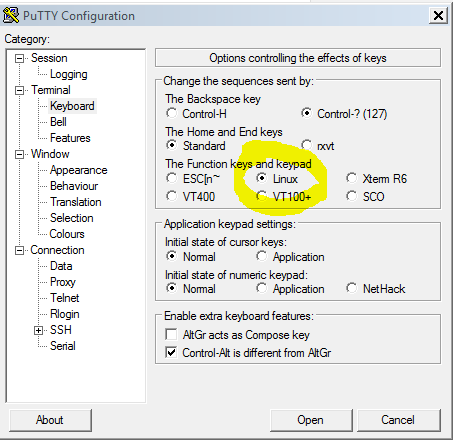
In order to avoid weird characters to be displayed on the console, when connecting to a linux, you have to also define the following settings (found here):
Terminal > Keyboard > The function Keys and Keypad = Linux
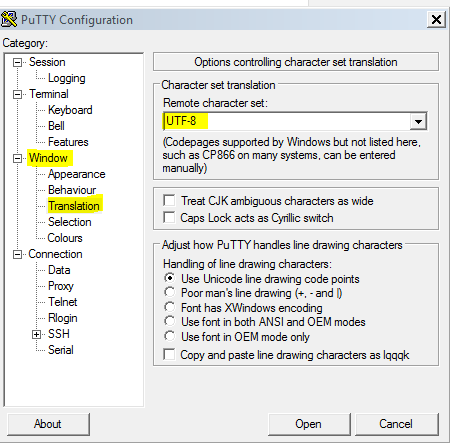
 Window > Translation > Remote Character Set = UTF-8
Connection > Data > Tarminal Type String = linux
Finally, select the Default Settings entry and click on the Save button next to it. This is important to keep your setting for the next time you will run Putty.
Now, click on the Open button and the bottom-right. This will start the SSH session with the preconfigured account “administrator”. You just have to type his password.
Notice: on the first use, Putty will display a warning message about the encryption. You have to accept it.
PS.: You can similarly open a Telnet session if you did enable it.
Enter root mode
Although you may not log in as root in a SSH console on your Synology, you may enter “root” mode by typing the following command:
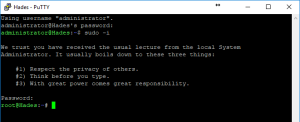
sudo -i
You will be prompted for a password. Type again the password of the administrator account.
Voilà, you are now connected on your NAS as a root.
Enjoy.
PS.: Here is the official Synology documentation to log on your NAS via SSH or Telnet.
![]()


Leave a Reply