Category: SmartHome

  • Configure OpenHab 2

    Once OpenHab 2 installed on Synology, it can be configured with :

    • its “Home Builder”  : this screen let you generate “settings” describing your house and its content. Those settings can be saved into a DB or copied into config files.
    • its “Paper UI” : this screen let you add all your connected devices into openHab. Once added, they can be linked with the content of your house described with the “Home Builder”.

    Click to Read More

    The “Home Builder”

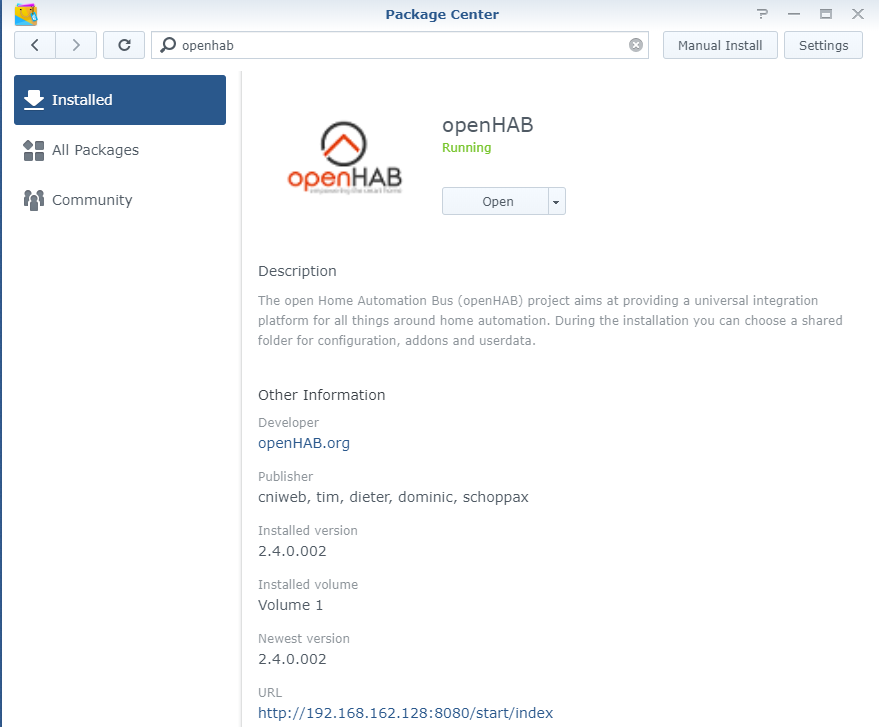
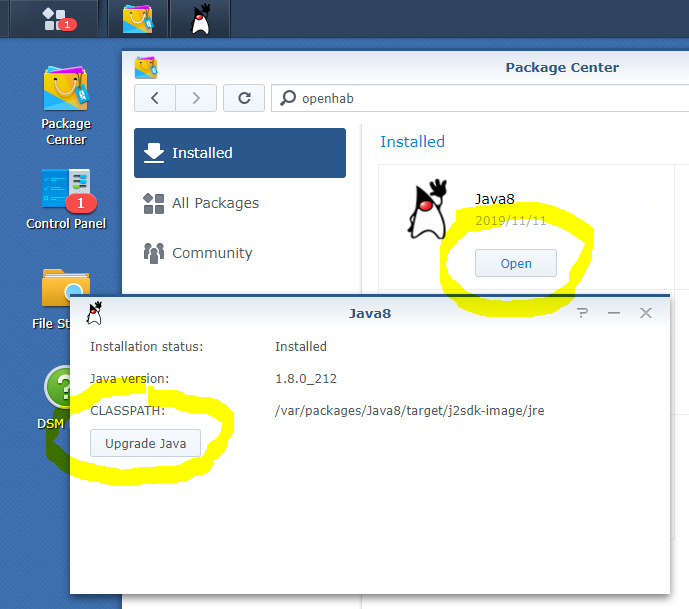
    Open the Package “openHAB” via the Package Center > Installed > OpenHAB and click on the “Url” at the bottom of the screen :

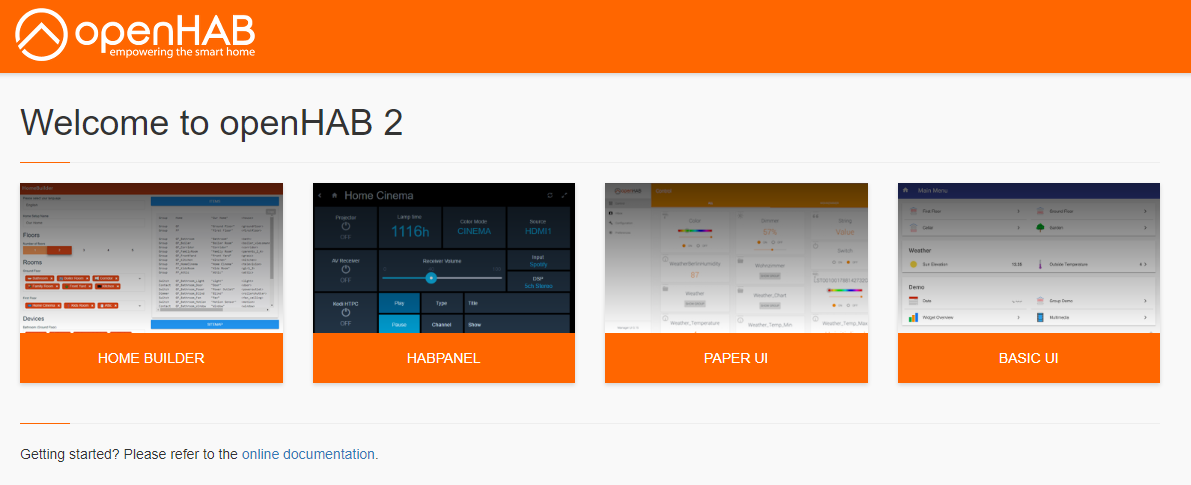
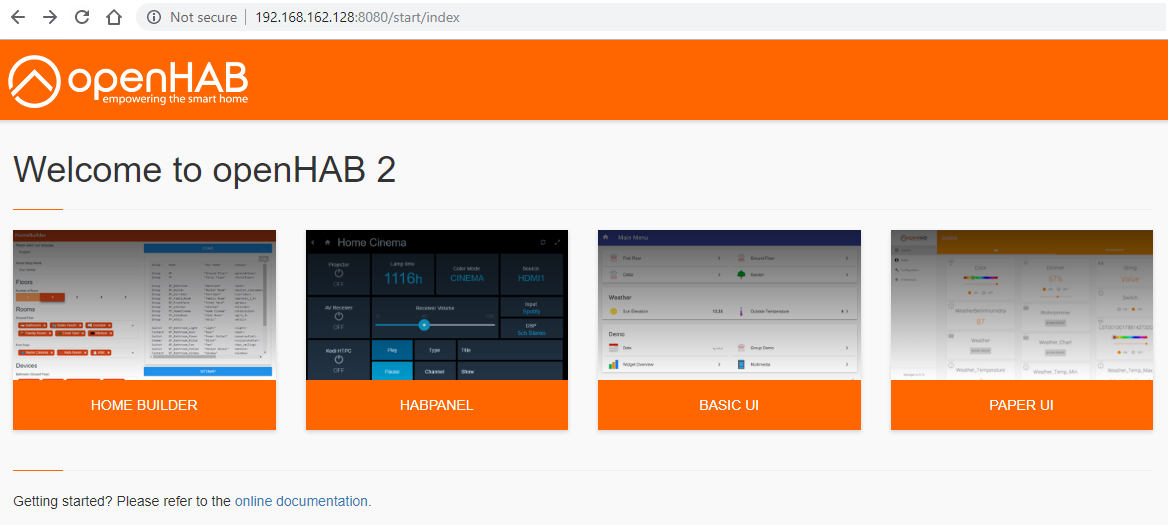
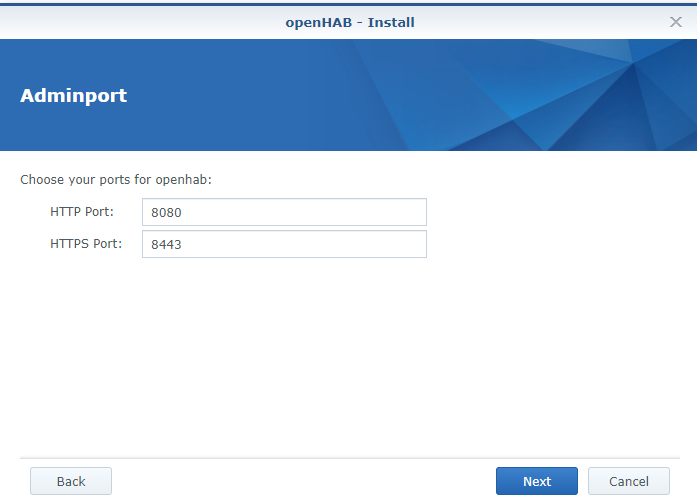
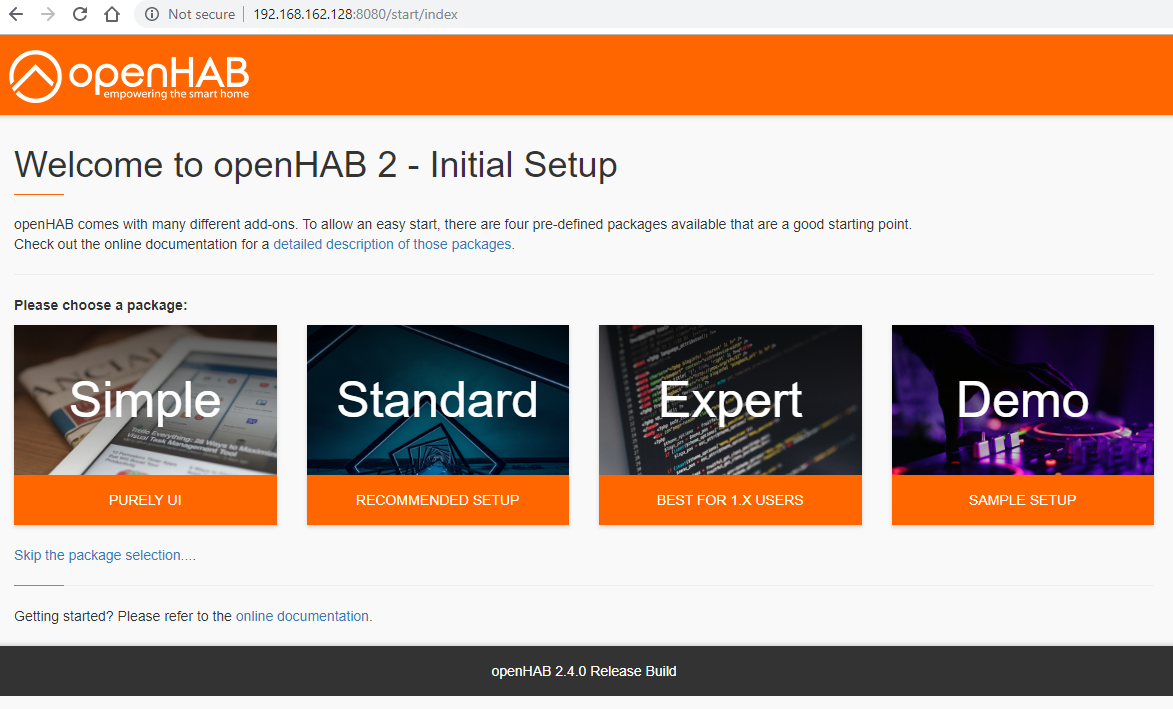
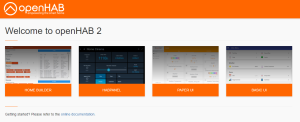
    A new tab should open with the “Welcome page” (To access it easily, simply type the http address of your Synology and the port 8080 or it https address and the port 8443 – or the ports you would have chosen during the installation of OpenHab)

    It the “Welcome page”, open the “Home Builder” :

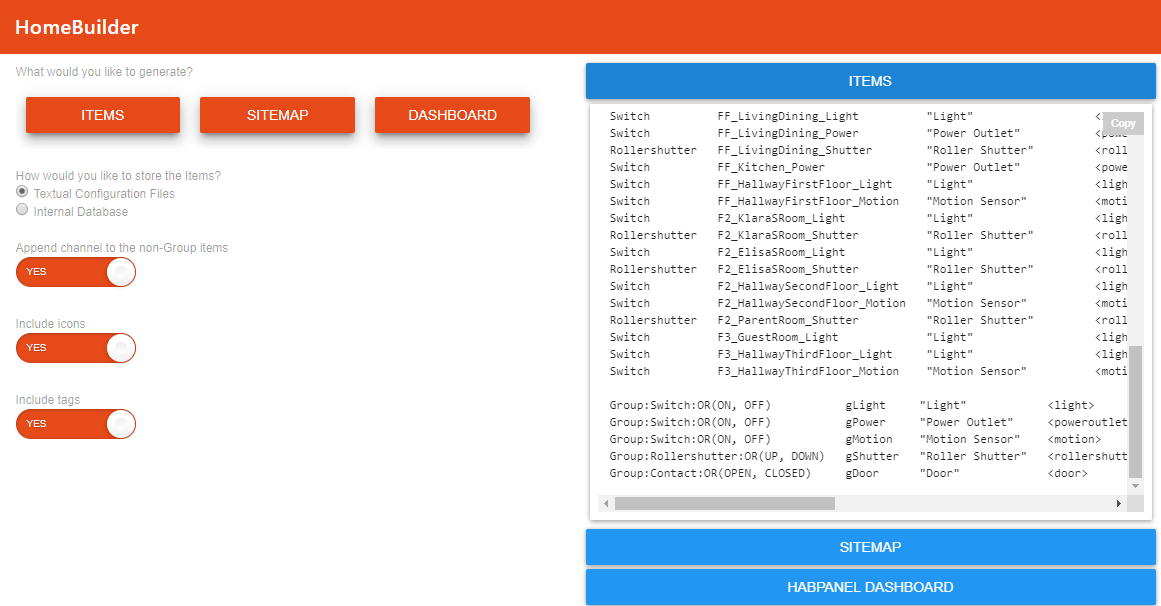
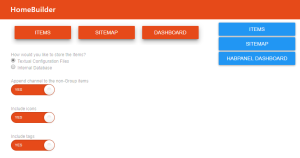
    In that “Home Builder”, you will recreate your house, with the various Floors, Rooms per Floor and Items (Object) per Room. Later you will link each of those items with the actual “Things” to be controlled in your house (Those Things belonging to your IoT).

    First, type a name for your home.

    Next select all the “Floors” existing in your home. If you want to add floors not available in the list, simply type their names. Here under,  the Floors “Cellar”,  “Ground  Floor”,  “First  Floor”, “Second Floor” and  “Third Floor” are already selected and I am going to pick Outside:

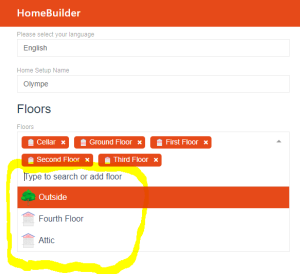
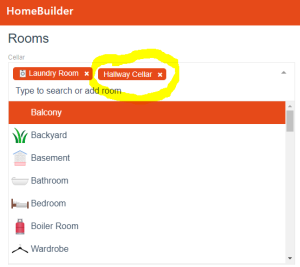
    Then, for each Floor added above, select the “Rooms” to be created. If you want to add a Rooms not available in the list, simply type their names. Here under, I already picked the Rooms “Laundry Room” and “Hallway Cellar” for the Floor “Cellar”, and I am going to pick the Room “Balcony” :

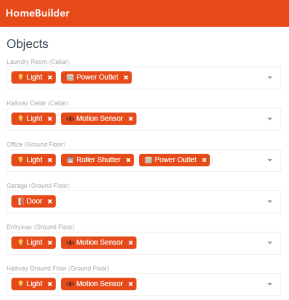
    Finally, for each Room added above, select the Items (Objects) to be created. You can here also create new Objects by typing their names. Here under, I added one “Light” and one “Power Outlet” in the “Laundry Room” on the Floor “Cellar”, one “Light” and one “Motion Sensor” in the “Hallway Cellar”  on the Floor “Cellar”, etc… :

    The settings of your home are now ready. They can be saved in an “internal DB” or in “text files”. I decided to save them in text files to be able to modify them manually more easily in the future.

    The “Items”

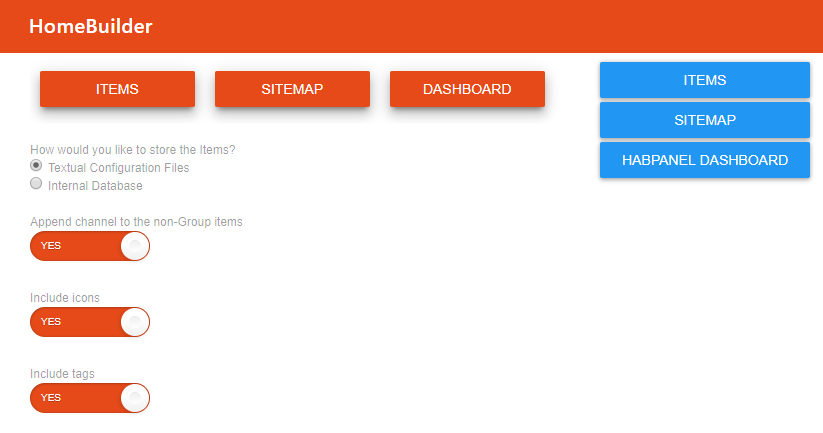
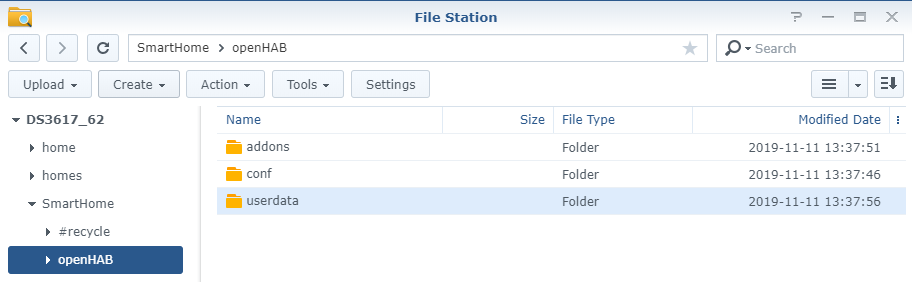
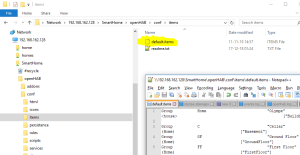
    To save the “Items” in a text file, click on the button “ITEMS”. The settings will be shown on the rights. Click on the floating button “Copy” in the top-right corner of the settings pane. Next, paste those settings in a file name “default.items” created (e.g. with notepad++) into the folder /openHAB/conf/items of the Shared Folder “SmartHome” :
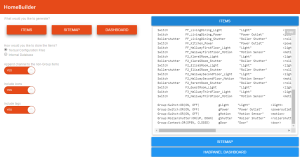
     

    The “Sitemap”

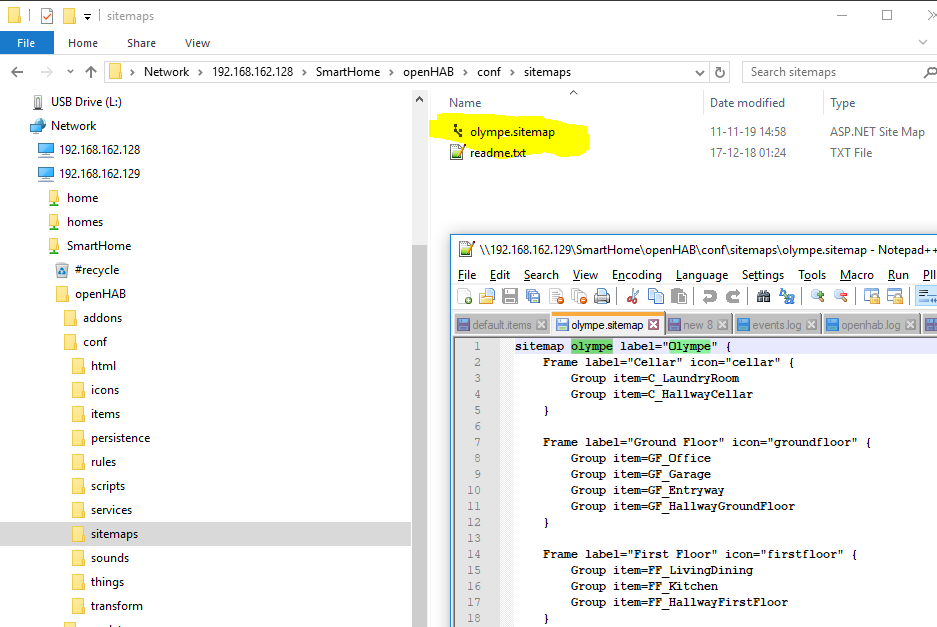
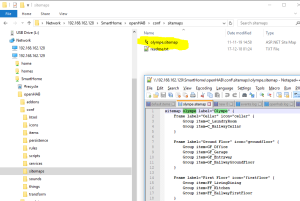
    Copy also the settings displayed when clicking on the button “SITEMAP” (These are the links between the Floors, the Rooms and the Items. They will be used to display a basic screen with all the items). Save them in a file named “xxx.sitemap” – were xxx is the name of your home, to be found in the settings of your sitemap (highlighted here under in green : “olympe”) :

    To see the outcomes, go back the the “Welcome page” :

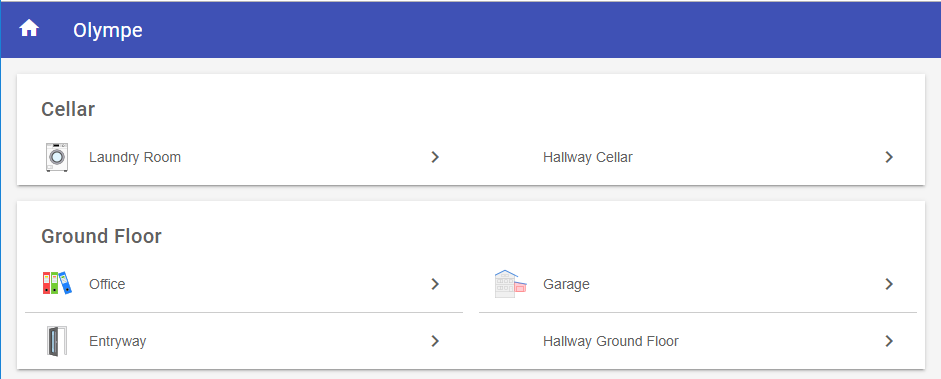
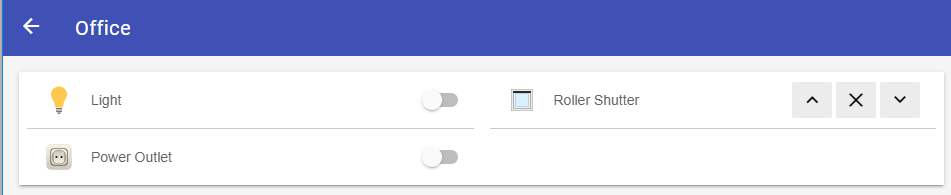
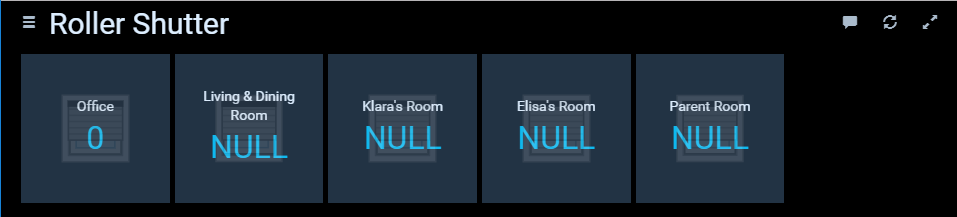
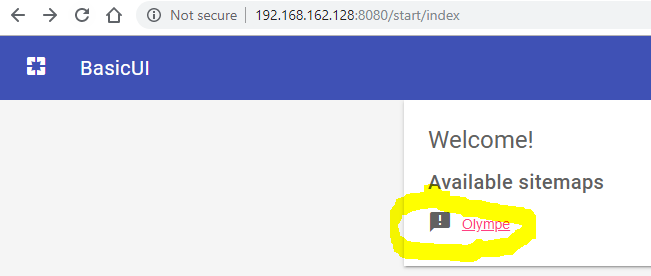
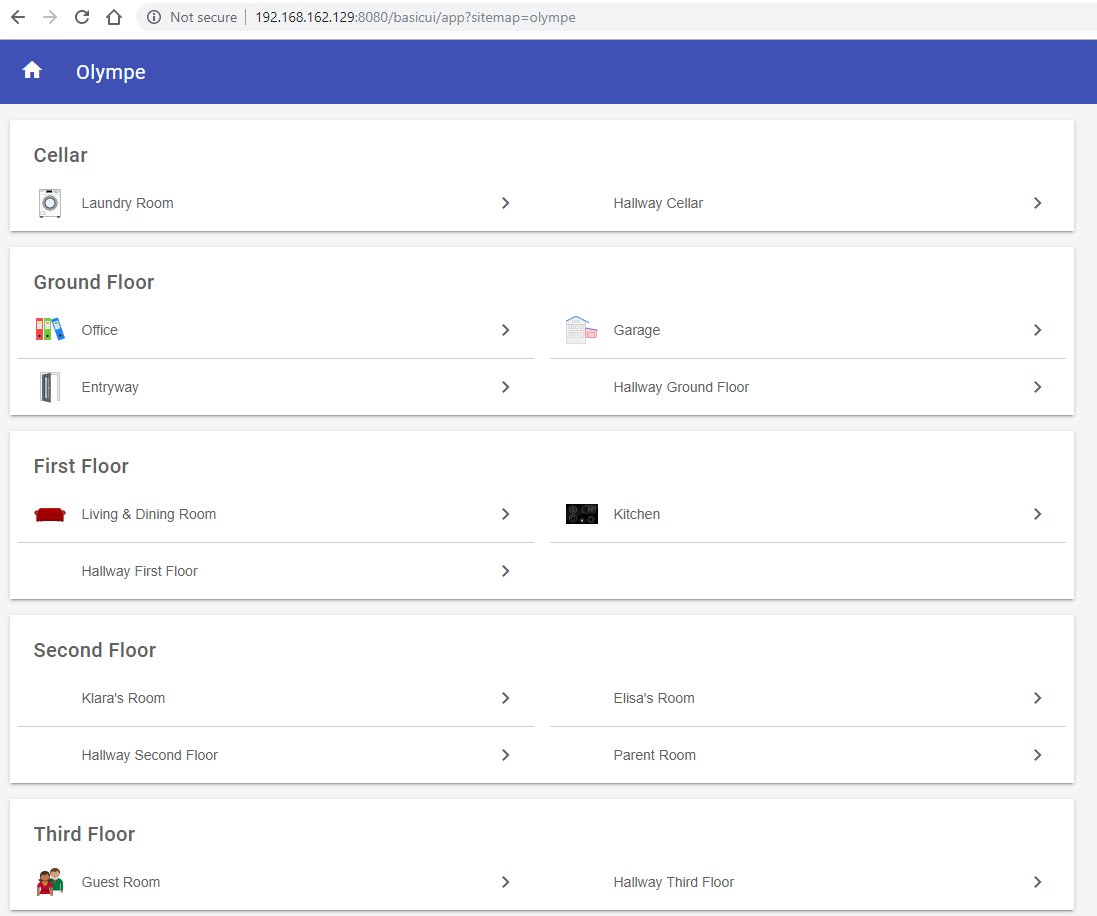
    And there, open the “Basic UI” where you will see your sitemap. Click on it to display your home :

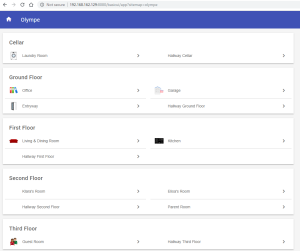
    When your “Items” will be linked to “Things” (as explained later), you will be able to click on them here to control them.

    The “HabPanel DashBoard”

    The HabPanel DashBoard is a advanced UI which can be highly customized to display screens much more sexy than the basic UI (See various samples created by end-users here). You can even create custom dashboards specific for each of your interfaces : Tablet, mobile, PC screen, …

    To create a dummy dashboard, click on the button “DASHBOARD” and copy the settings going to be displayed on the right :

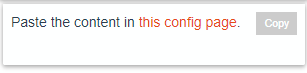
    You should see a link “”Paste the content in this config page” at the bottom of the settings.

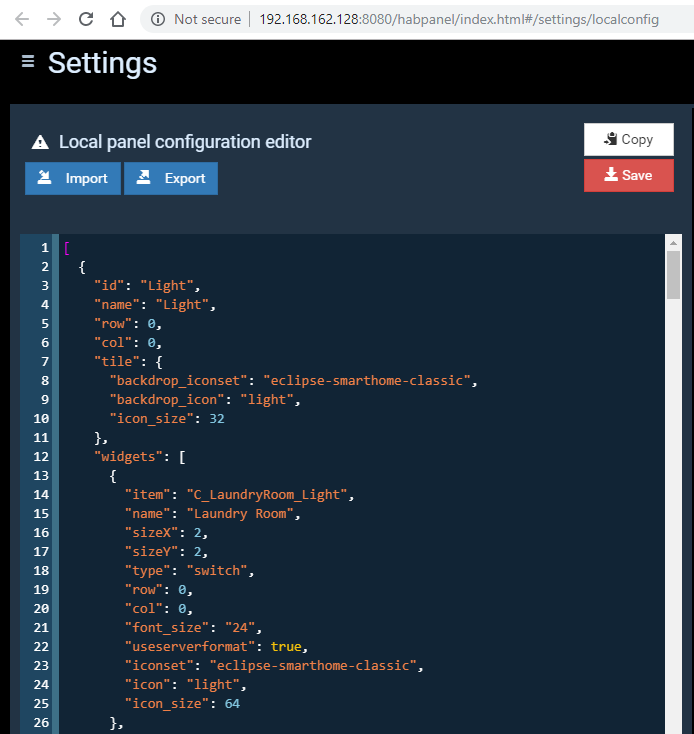
    Open that link and paste the settings there :


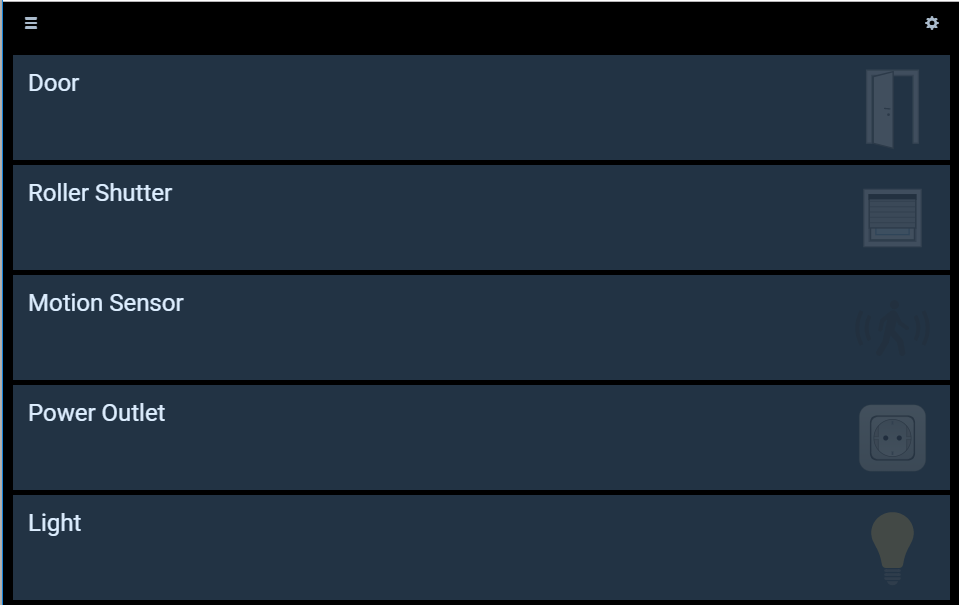
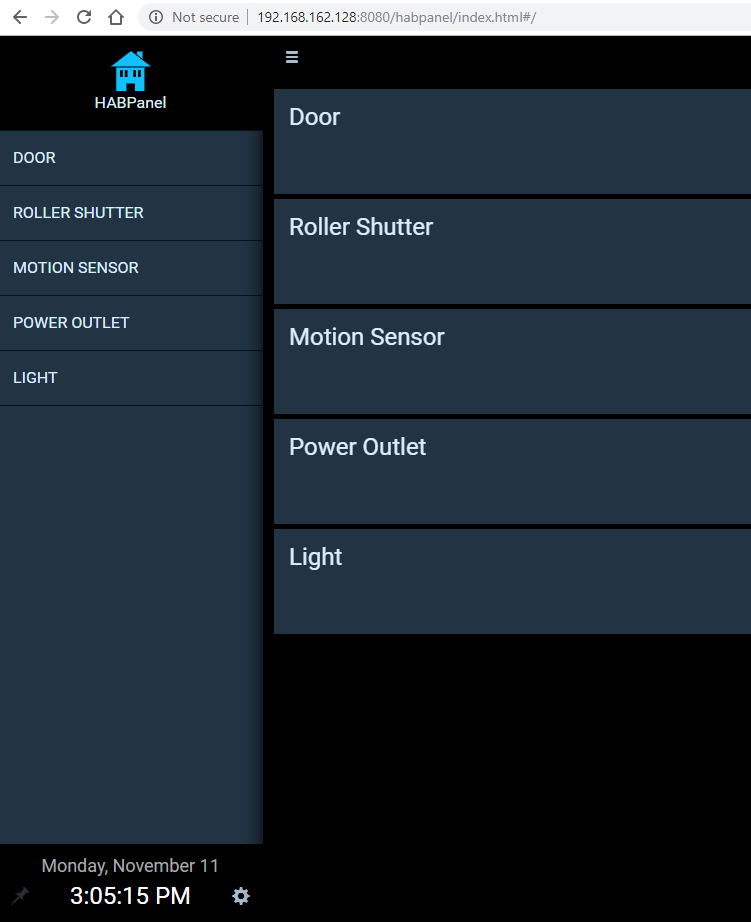
    Go back to the “Welcome page” and click on “HabPanel” to open it :

    I said that this is a dummy HabPanel because it is not useful at all IMO. You will for sure change it completely to offer a more relevant display.
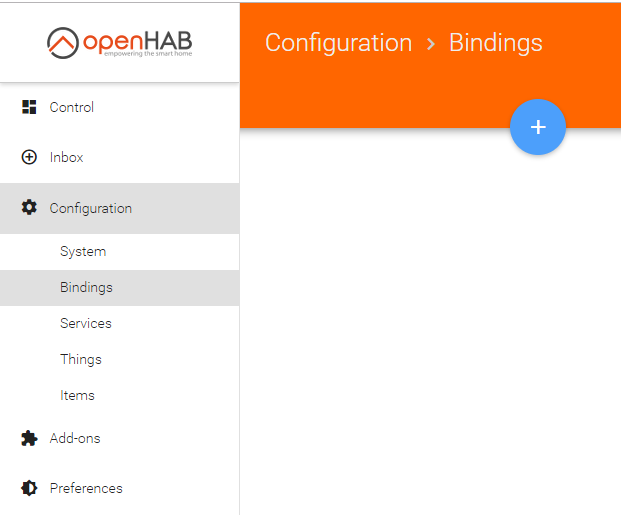
    The “Paper UI”

    Now that you have described your house (Floors and Rooms) and its content (Items), it’s time to link the “Items” with “Things”, the actual devices to be controlled.

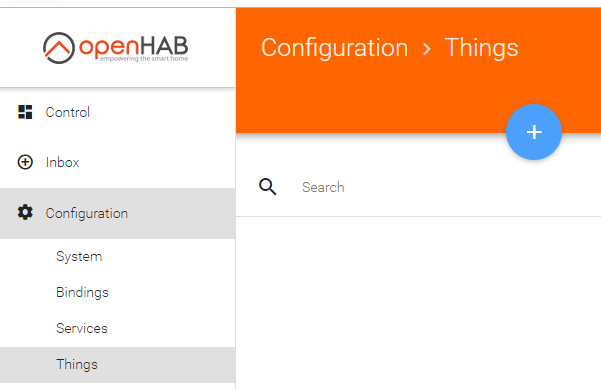
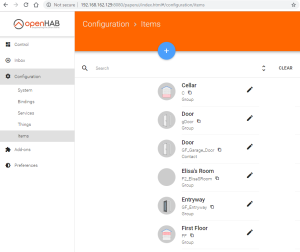
    Go to the “Welcome page” and select “Paper UI” :

    NB.: you can review all your Items under the entry Configuration > Items of that “Paper UI” :

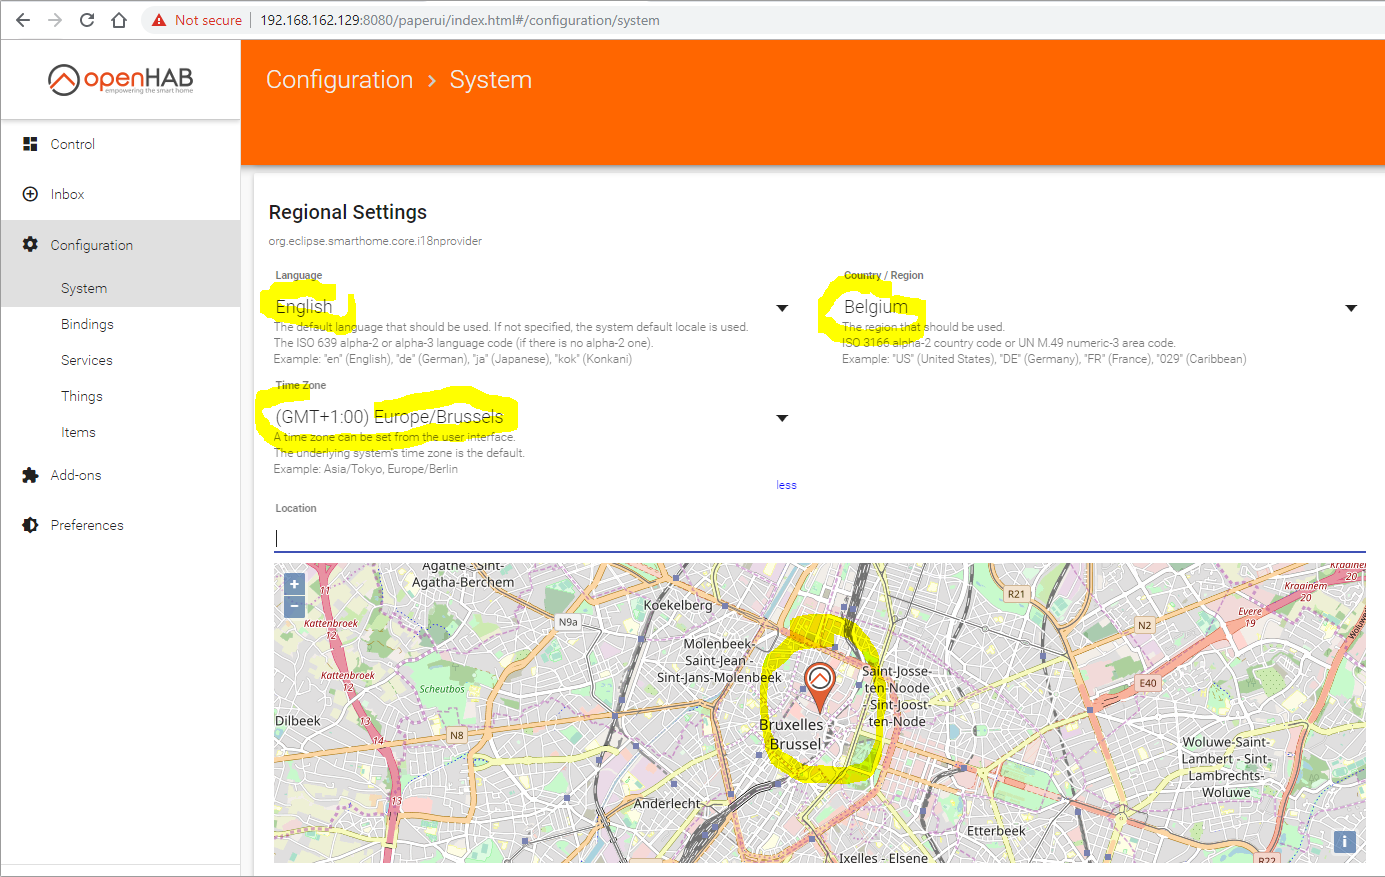
    NB.: you can also define your location under Configuration > System :


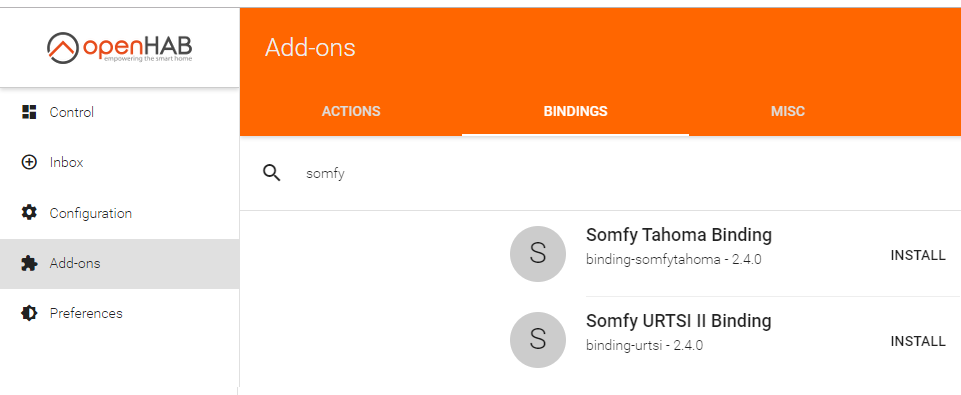
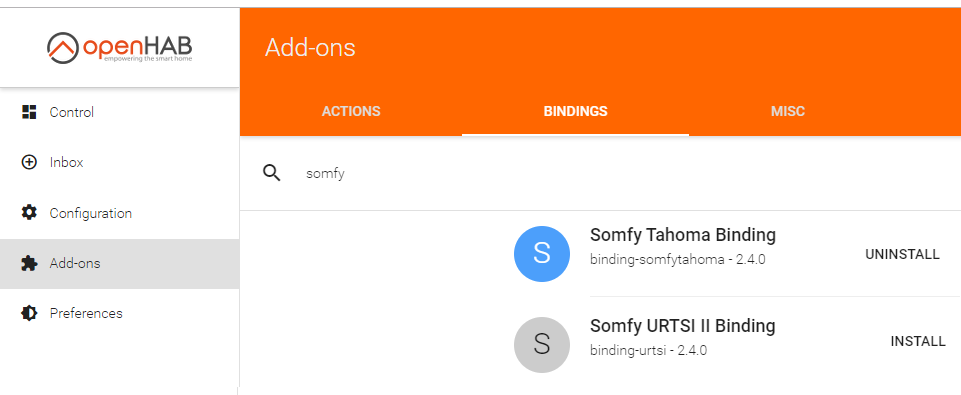
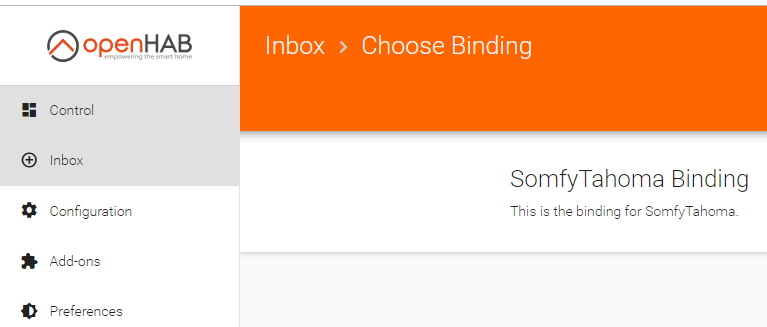
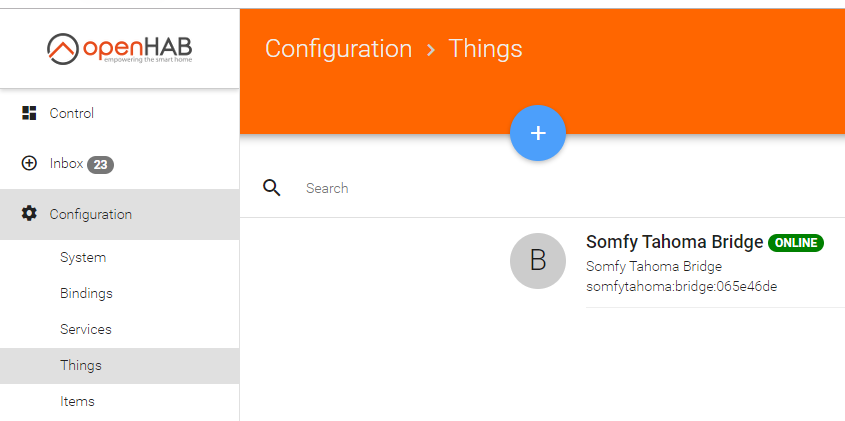
    The principle of the “Paper UI” is quite simple : you must install “Bindings” to be able to detect your devices. Ex.: a “Somfy Tahoma Binding” to detect your Somfy blinds, a “Hue Binding” to detect your Philips Hue bubbles, etc…

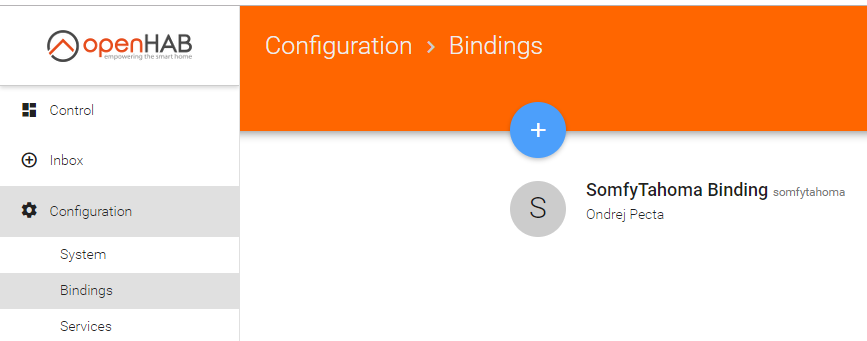
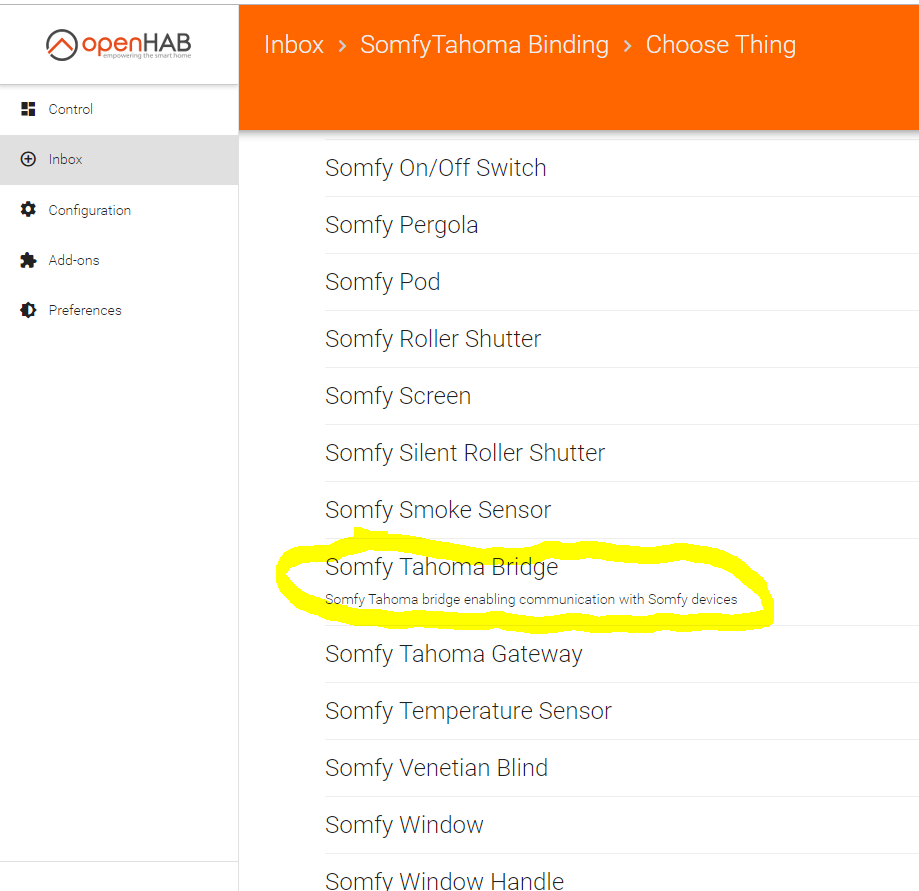
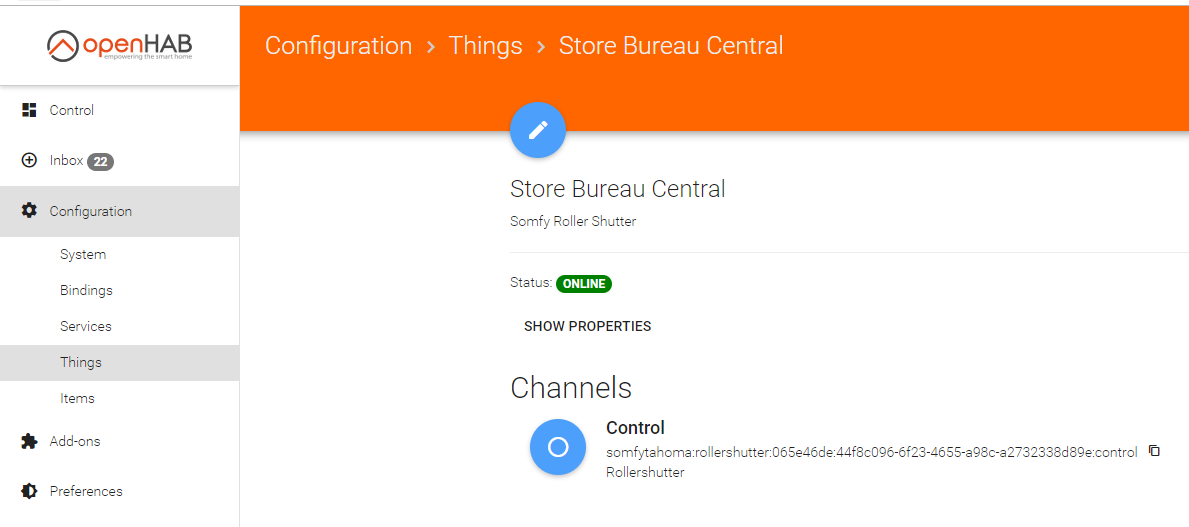
    Once a Binding installed, you can use it to add a “Thing” corresponding to the physical “Bridge” used to access your devices. Ex.: the Tahoma Bridge, the Hue Bridge, etc… 

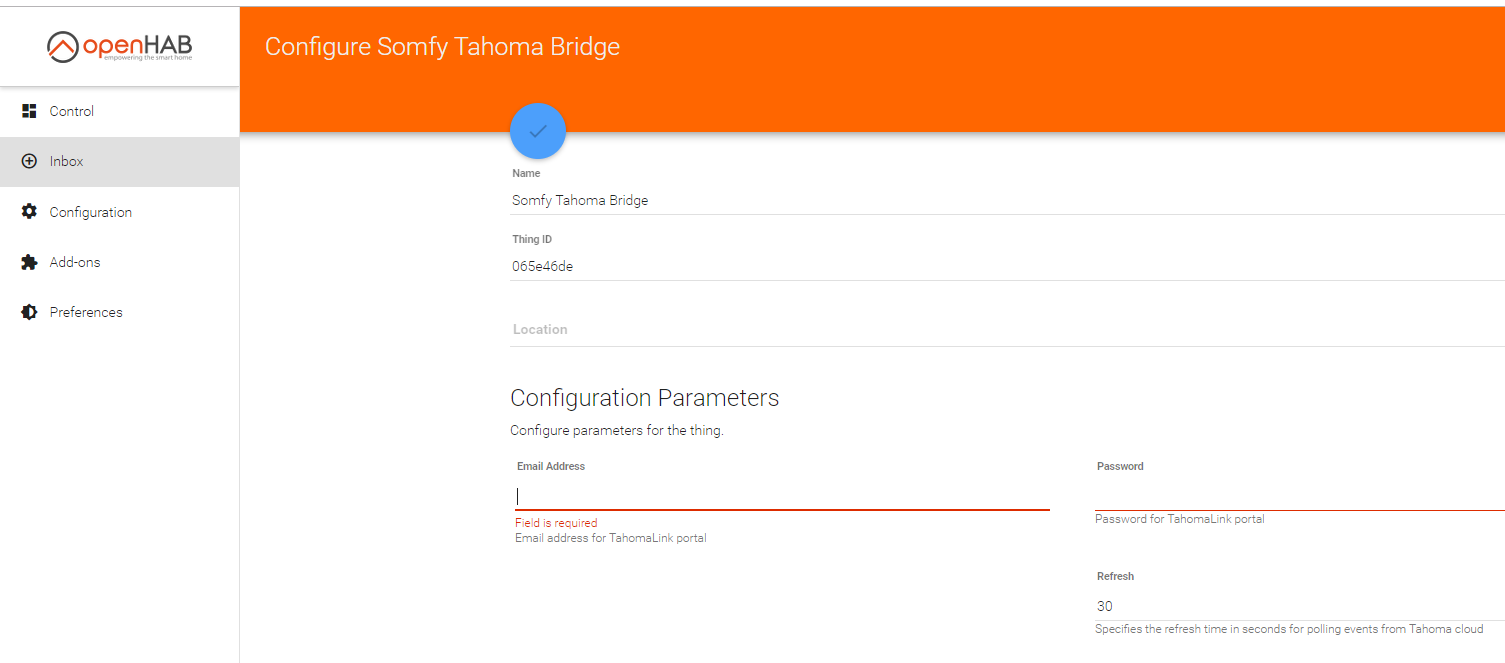
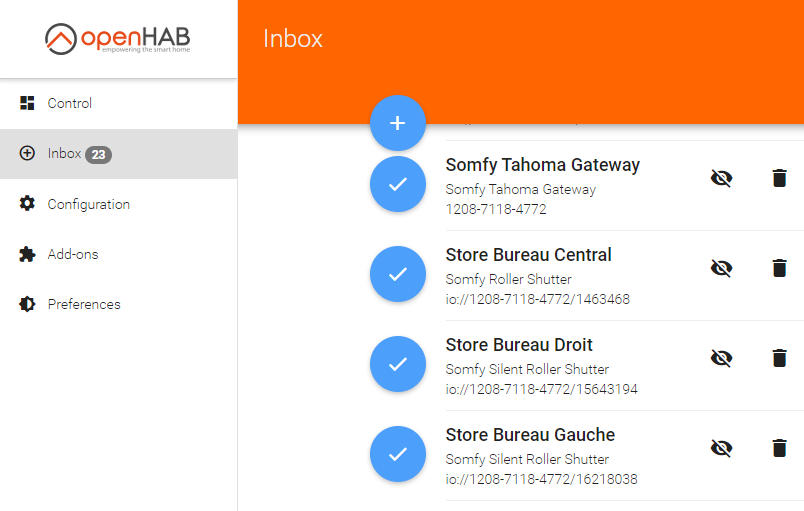
    This Bridge (Thing) must be configured to become accessible by openHab (Usually its IP address, your login/password, etc…). Once this configuration done, all the devices accessible via the Bridge will be detected and added into the “Inbox”. If some devices are not detected automatically, they can sometimes be added manually.

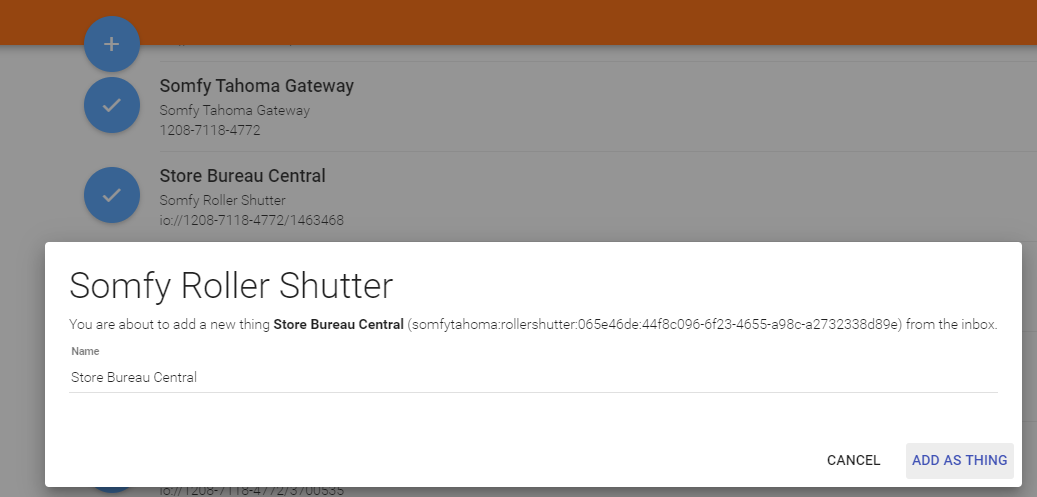
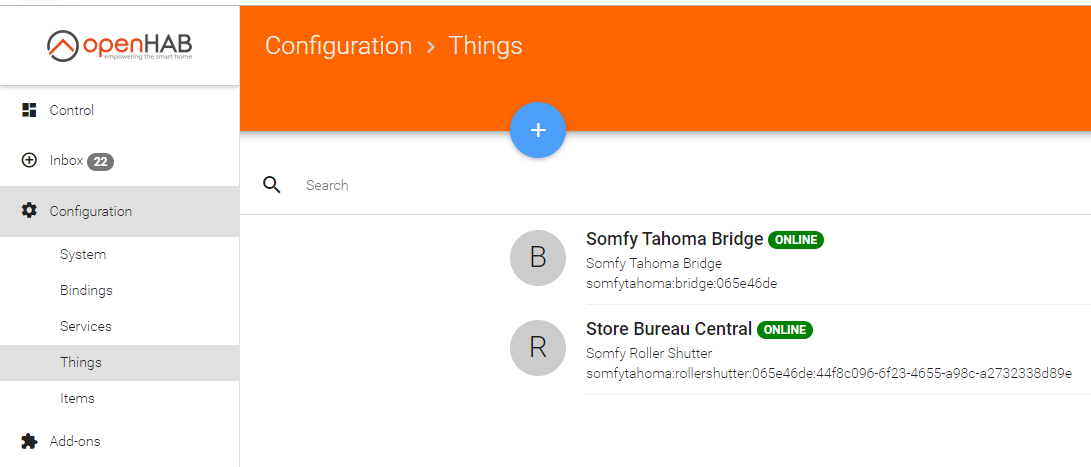
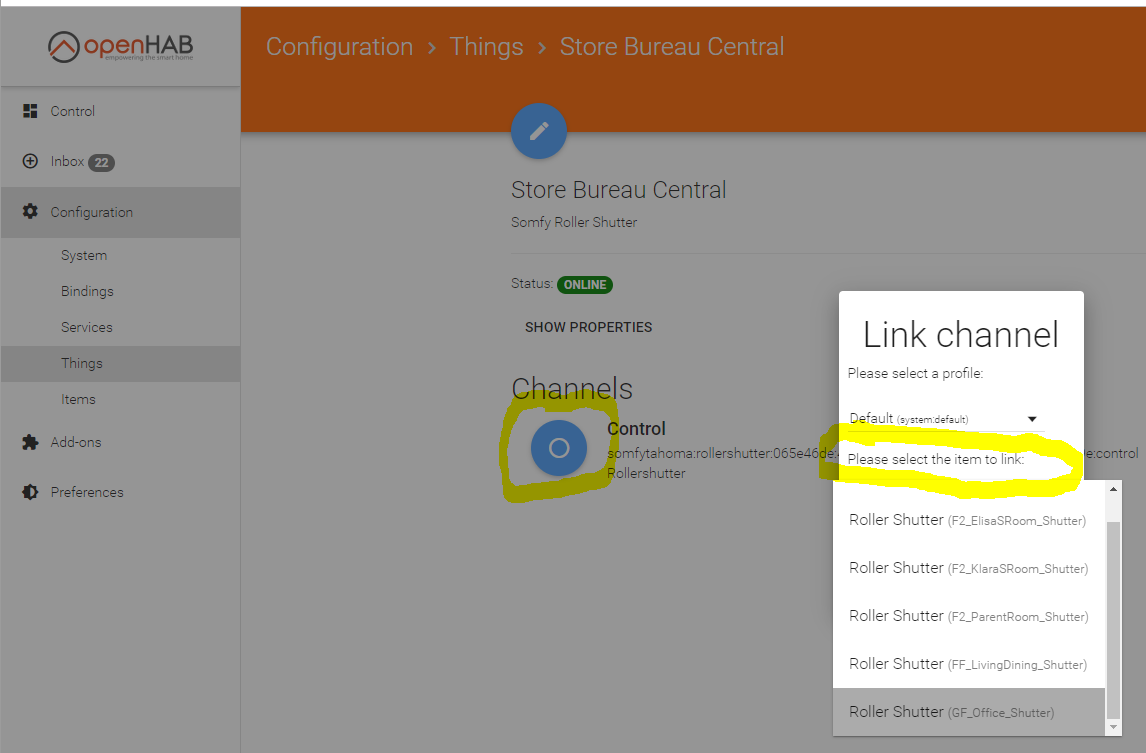
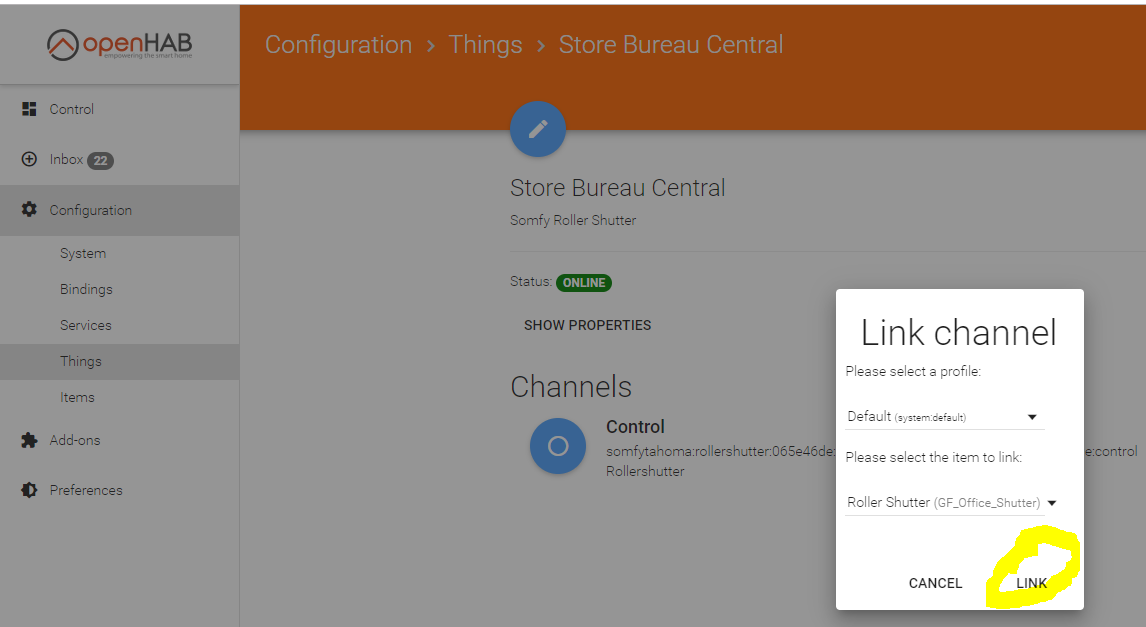
    Each device available in the “Inbox” can be added as a “Thing” and linked with an “Item”. As soon as an “Item” is linked with a “Thing”, it can be used to control the related device. What can be done exactly (Switch On/Off, Open/Close) depends on the type of “Item”.

    The type of each Item (“itemtype”) is defined in the config file “default.items” created previously (See the documentation of OpenHab here for the details). As far as the Bindings are managed here via the “Paper UI”, each item follows this pattern:

    itemtype itemname "labeltext [stateformat]" <iconname> (group1, group2, ...) ["tag1", "tag2", ...]

    An itemtype, as you can see in the documentation, can be Switch, a Dimer, a Color, a Rollershutter, an Image, a Contact, a String, a Number, a Group, etc…

    • A Switch can be turned on or off
    • The value of a Dimer can be set between 0% to 100%,
    • A Rollershutter can be open or closed completely or partially,
    • An Image can be set with a picture,
    • A Contact can have the status Opened or Closed depending on the position of a related Door or Window,
    • A String can be assigned with text such as the name of a radio or a song currently played by a device,
    • A Number can be assigned by a sensor (temperature, illuminance, …). Depending on the type of Number, it must be noted “Number:Illuminance”, “Number:Temperature”, …
    • The itemtype Group is used for the Floors and the Rooms. But not only. They can also be defined with this pattern:
      Group[:itemtype[:function]] groupname ["labeltext"] [<iconname>] [(group1, group2, ...)]
    • A Group can be used to calculate a sum or an average of values. Depending on the computation, it must be noted “Group:Number:AVG” or “Group:Number:SUM”
    • A Group can also be used to control several “Items” together. In such a case, the status of the Group must be defined as a function (AND, OR, NAND, …)  of the status of each Item. Ex.: Group:Switch:OR(ON, OFF), 
      Group:Rollershutter:OR(UP, DOWN), Group:Contact:OR(OPEN, CLOSED), …

    See for concrete samples on https://www.beatificabytes.be/tag/openhab/

    Loading

  • Install OpenHAB 2 on Synology

    I was looking for one local and single platform to control all my connected devices : Philips Hue, Somfy blinds, Fibaro Wall Plugs, IFTTT scenario, … OpenHab 2 can do that once installed on a Synology!

    Click to Read More

    To install OpenHab 2 on Synology, I did use the official doc and this great tutorial from Thomas Schwarz.

    Prerequisites

    First, install Java on your Synology. It is available as a package in the Package Center :

    Once installed, upgrade it to the latest version, to be downloaded directly from the Oracle web site :

    Next, “Enable user home service” via the Menu > Control Panel > User :

    Then, create a Shared Folder “SmartHome” via the Menu > Control Panel > Shared Folder (pay attention to the case!) :

    And finally, via the Menu > File Station, create a subfolder “openHAB” in the Shared Folder SmartHome (pay attention to the case!):

    Create next the 3 following sufolders under ‘openHAB’ : ‘addons’, ‘conf’ and ‘userdata’. If you don’t create those subfolders, they will be created in ‘/var/packages/openHAB/target’ and you won’t be able to access them via the Shared Folder SmartHome. Hence, you won’t be able to edit the configuration files easily later…

    Installation

    Download now the package “OpenHab 2” from its GitHub Repository :

    And install it manually via the Package Center :Use the subfolder “openHAB” created on the Shared folder “SmartHome :

    I did install the Z-Wave module as I have a Z-Wave key installed on my Synology :

    Once installed, check that you see the following content in the folder “openHAB” of the Shared Folder “SmartHome” :You should also have the following content in the folder “openHab” of the Shared Folder “homes” :Finally, check that openHab is running fine and finalize the setup by opening the Package “openHAB” via the Package Center > Installed > OpenHAB. There, click on the “Url” at the bottom of the screen :

    A new tab should open with a page where you can select a pre-defined configuration. I am using the “Standard” one :

    Et voilà :

    You can now proceed further with the configuration, as explained here.

    Loading

    ,
  • Remote control for electrical sockets (via ethernet)

    There are many different models of basic and cheap remote controls for electrical outlets. I have some from Chacon (the Zen model). But this kind of remote is usually limited to max 4 sockets.

    Power Outlets with remote control "Zen"
    Power Outlets with remote control “Zen”

    So, I am looking for something else.

    Click to Read More

    The best solution would be to control the sockets via Ethernet from a PC, an Android or an iOS. But as I don’t have an Ethernet plug next to each power outlet, I would love Devolo to develop a solution with support to switch on/off the power outlet via CPL… Unfortunately, they don’t have it (yet) 🙁

    Belkin has a solution named WeMo, a Wi-Fi enabled Switch that lets you turn a power outlet on/off from anywhere using an Android or a iOS. It’s however quite expensive: ~50€ for one outlet.

    Belkin WeMo
    Belkin WeMo

    There are also solutions based on X10, but to simply remotely control power outlets, it’s over-killed IMO.

    So a fallback solution, could be to combine a very old Devolo dLAN® 85 HSplus with a device like the EnerGenie EG-PMS2-LAN which is an advanced surge protector with power management features. It is possible to individually switch 4 sockets on/off via Ethernet (local network or Internet from a PC, an Android or an iOS), by timer schedule, or by programmable special events… I already have an old USB version of that device (it is more than 8 years old now but still supported on Windows 8.1)

    EnerGenie EG-PMS2-LAN
    EnerGenie EG-PMS2-LAN

    An alternative to the EnerGenie device could be the NetIO 230B from Koukaam. It does also allow control from a PC/Android or iOS device. The command interface via http is well documented.

    Koukaam NETIO-230B
    Koukaam NETIO-230B

    I am however still not convinced… and really hope Devolo will do something :p

    EDIT 01/04/2014  I wrote to DEVOLO and got an answer !!!

    Click to Read More

    I was far from expecting an answer but couldn’t resist to ask DEVOLO if something similar to the Belkin Wemo was planned for the coming months… If not, I was suggesting to introduce such a feature request to their R&D department…

    I was actually surprised to quickly get an answer from their support team. DEVOLO has some plan that will probably offer what I want and much more at a democratic price (compared to the current product on the market).

    http://www.devolo.com/en/Press/Press-Releases/2014/devolo-Home-Control-Home-automation-made-simple-devolo-announces-a-new-product-portfolio-for-greater-comfort-convenience-security-and-energy-efficiency

    I am very excited  😛

    EDIT 04/07/2015  I finally bought 10 Chacon Wi-Fi Neo, 25€ each, at MediaMarkt (Promo).

    Click to Read More

    More than one year after my email to Devolo, there is still no Home Control Solution in shops here. I can only see some products on German websites…

    So, I finally decided to buy the Chacon Wi-Fi Neo solution (also sold with the name Ankuoo) which works quite well although not perfect. It’s indeed sometimes not easy to configure it for the first time. And sometimes, the scheduler doesn’t work as expected (turn on/off the device on schedule)…

    Chacon WiFi Neo
    Chacon WiFi Neo (Belgian version)

    But to switch on/off a device remotely from a mobile device, it works very well!

    Details here. (The Belgian version is not available anymore)

    EDIT 07/06/2018  I have now replaced all my Chacon Wifi Neo by Somfy Plugs that can be controlled with my Google Assistant via the Somfy Tahoma portal. I am indeed using that system since I have installed Somfy shutters and blinds at home.

    EDIT 02/08/2019  I have now a set of Fibaro Plugs which can be controlled by my Z-wave bridge (installed for my Engie BOXX to control the power, gaz and water consumption at home). They are just amazing !!

    Loading

    , ,