Category: Synology

  • Synology: “DSM updating in process…” forever

    I recenlty tried to update my DSM 6.1.1-15101 from pacth 3 to 4. For some unknown reasons, the update never ends which results in various “issues”. The only solution I found to exit that situation was to kill the upgrade process.

    Click to Read More

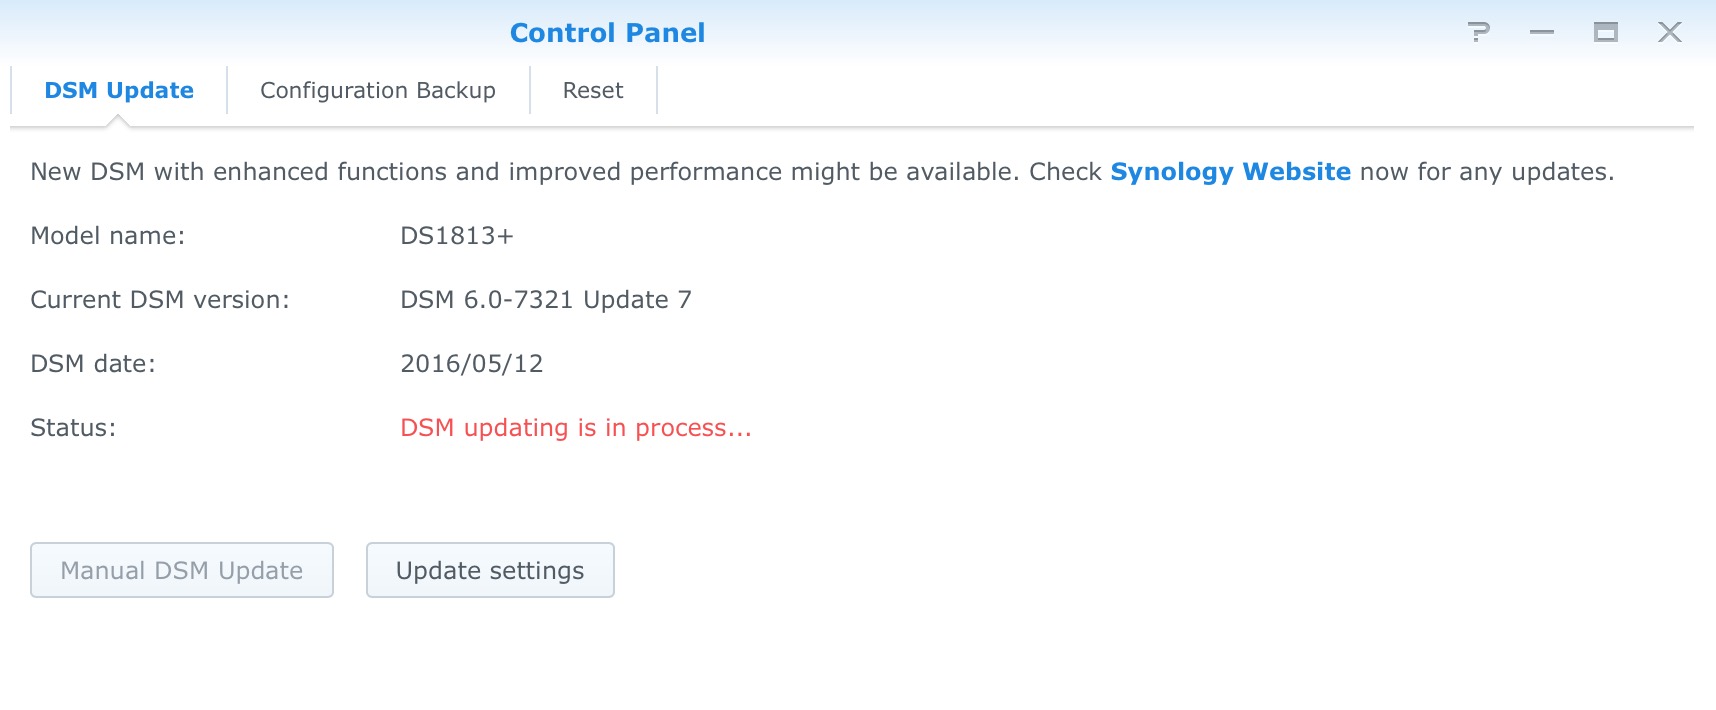
    Once the update started, the progress eventually appeared stuck…

    Updating Synology

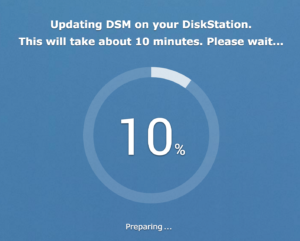
    After 2 hours, I decided to open the admin interface (http://<MySyno>:<adminPort>) and was able to log in. But back into the Control Panel, I saw the message “DSM updating is in process…”…

    DSM Updating

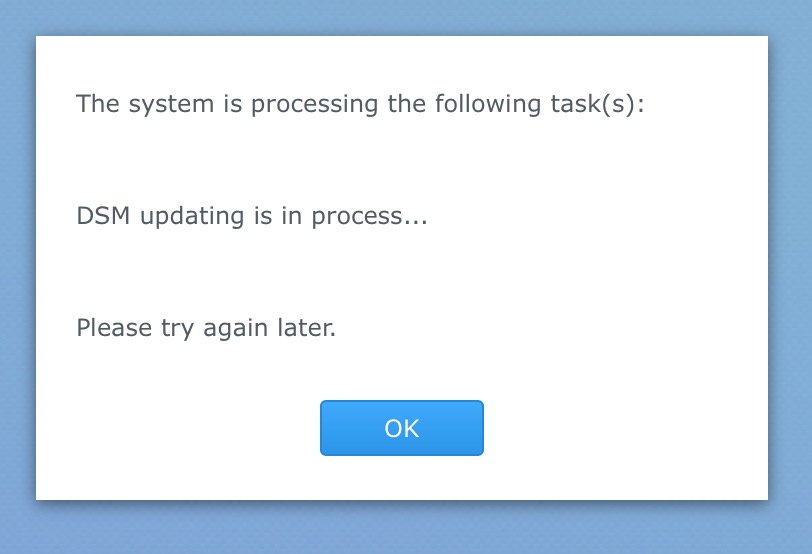
    It would not have been a big issue if it didn’t prevent me to update any packages. Trying to do so was resulting in a popup blocking any automatique on manual installation/update. I was also unable to restart or shutdown properly the NAS for the same reason.

    To solve this situation I had to kill the upgrade process:

    1. Open a SSH console using Putty to connect onto the NAS
    2. Login as administrator
    3. Enter the root mode using the command: sudo -i
    4. Kill the update processes typing the command: kill -9 $(ps aux | grep -e SYNO.Core.Ugrade |grep -v grep | awk ‘{ print $2 }’)

    I was next able to update other packages… I did next restart the NAS but for some reasons, it never rebooted completed (neither detected by the Synology Assistant nor accessible via the Admin webUI). I had therefore to do a hard reboot 🙁

    Now, although I am still unable to reboot properly or upgrade DSM, I can at least install (or update) packages, possibly to help me in backuping everything before a complete reset.

    NB.: I also tried to upgrade from SSH, without success.

    Using the feature auto, I got an error message:

    root@Hades:~# synoupgrade –check
    UPGRADE_CHECKNEWDSM
    Available update: DSM 6.1.2-15132, patch type: dsm, restart type: reboot, reboot type: now

    root@Hades:~# synoupgrade –download
    UPGRADE_DOWNLOADDSM
    New update has been downloaded

    root@Hades:~# ls -la /volume1/@autoupdate
    total 223684
    drwx—— 2 root root 4096 Jun 16 18:49 .
    drwxr-xr-x 37 root root 4096 Jun 16 18:49 ..
    -rw-r–r– 1 root root 229038080 Jun 14 11:50 DSM_DS1815%2B_15132.pat

    root@Hades:~# synoupgrade –check-pat ./DSM_DS1815+_15132.pat
    UPGRADE_CHECK_PAT
    Patch type is DSM
    ErrSysAvailSize

    root@Hades:~# synoupgrade –auto
    UPGRADE_AUTO
    New update has been downloaded
    Start DSM update…
    ServerUpgrade failed

    Using an explicit download or the explicit path of the patch auto-downloaded, I get no error:

    root@Hades:~# synoupgrade –patch /volume1/@autoupdate/DSM_DS1815%2B_15132.pat
    UPGRADE_PATCH
    Start DSM update…
    root@Hades:~#

    root@Hades:~# wget https://global.download.synology.com/download/DSM/release/6.1.2/15132/DSM_DS1815%2B_15132.pat
    –2017-06-16 18:34:22– https://global.download.synology.com/download/DSM/release/6.1.2/15132/DSM_DS1815%2B_15132.pat
    Resolving global.download.synology.com… 52.222.227.46, 52.222.227.228, 52.222.227.163, …
    Connecting to global.download.synology.com|52.222.227.46|:443… connected.
    HTTP request sent, awaiting response… 200 OK
    Length: 229038080 (218M) [binary/octet-stream] Saving to: ‘DSM_DS1815+_15132.pat’

    100%[==================================================================================================================>] 229,038,080 10.0MB/s in 30s

    2017-06-16 18:34:53 (7.23 MB/s) – ‘DSM_DS1815+_15132.pat’ saved [229038080/229038080]

    root@Hades:~# synoupgrade –check-pat /root/DSM_DS1815+_15132.pat
    UPGRADE_CHECK_PAT
    Patch type is DSM
    Check patch successfully

    root@Hades:~# synoupgrade –patch /root/DSM_DS1815+_15132.pat
    UPGRADE_PATCH
    Start DSM update…
    root@Hades:~#

    Fortunatelly, in all cases, the DSM is not suck in “updating in process”

    Loading

  • Synology Package Creator for shell scripts and php pages

    I did upgrade “Mods“, my Windows Tool used to create dummy packages adding shortcuts on DSM’s desktop to open web pages.

    Now, “Mods” is able to package shell scripts and php webpages…

    Mods
    Mods

    Click to Read More

    It is available here on GitHub.

    For example, you could package apps like Chris Hager’s Most Simple Ajax Chat Ever

    Simple Chat on DSM
    Simple Chat on DSM

    Or package a more advanced tool like php Server Monitor

    Server Monitor
    Server Monitor
    Server Monitor Running
    Server Monitor Running

    This Tool is available here on GitHub.

    Loading

  • Create a VPN to download from a Synology

    In order to hide my NAS, I wanted it to use its own VPN, while my public IP was still visible when surfing with any other devices in my LAN.

    To do so, I subscribed to HMA! (HideMyAss!) and applied their configuration procedure on my Synology. Et voilà.

    Click to Read More

    I did try both a L2TP and a OpenVPN VPN with success. Tricks:

    • For a L2TP VPN, use your PPTP password and NOT your account password
    • For a OpenVPN VPN, use your account password
    • Although using Port Forwarding to access my NAS from internet, I did not had to open the required ports !!!
      • L2TP: UDP 500, 4500 and 1701
      • Open VPN : 443 if using TCP, 553 is using UDL
    • If you are using a DDNS, go to the  Control Panel > External Access and Click Update to verify the public IP of your NAS. It must now be your VPN IP.
    • Check that downloading a torrent (with this procedure), your tracker IP is your VPN IP.
    • Check you IP calling ipify from your NAS.
      • A very simple way to do this is to call the following php page on your Web Station:
    <?php 
     $ip = file_get_contents('https://api.ipify.org');
     echo "My public IP address is: " . $ip;
    ?>
    • Soon after enabling the VPN, I started to be attacked on Telnet port! I am using Security’s Auto-Block feature to prevent brute force attacks.
    • On a mobile device (or anything else) connected directly to Internet (not via your LAN), type your VPN IP in a browser. You should see the default home page of your web station if this one is enabled.
      • I would recommend to replace this default page by a php page returning a header 404.
    <?php
     header("HTTP/1.0 404 Not Found");
    ?>
    • If you are using a DDNS on your NAS, you won’t be able to access your router and VDSL modem via that domain name. Indeed, only your NAS is accessible via this VPN IP. If possible, configure another DDNS on your VDSL modem or router.
      • Ex.: I am using duckdns.org for free. They have a great support page here with detailed configurations for many different devices.
      • Doing so, you can access your NAS and your router or modem via their own Domain name.
    • “Tested OK” both when accessed from LAN or from Internet:
      • Download Station via Synology Download Station for Chrome (https://www.download-station-extension.com)
      • JDownloader via Chrome extension and via https://my.jdownloader.org
      • Plex Server via App or via http://DDNS name:port/web or via http://plex.tv
      • DSM via its admin port
      • Apps: DS Cam, DS File, DS Audio, DS Get, DS Photo, DS Video, DS Cloud and DS Note are all wokring fine using Quick Connect (All those I tested via their DDNS name + custom port or DSM admin port worked too)
      • Cloud Sync (with Hubic)
      • FTP Server

    Loading

  • Synology’s Could Sync Consuming Internet Quota With Google Drive

    I noticed that between 50GB and 100Gb of my Internet Quota was consumed per day since two weeks. After investigation, I found it was due to the Cloud Sync service of my Synology Nas “looping” infinitely.

    Click to Read More

    The first step was to identify the device downloading some many Gb per day.

    I did enable the logging service on my router and turn on the logging of its firewall for all outgoing connections.

    I did export the log of the firewall into notepad++, cleaned up a bit the log to keep the source and destination IP only.

    I did copy that into Excel and created a pivot table to see which source was doing many connection and onto which external IP (eliminating known destinations as the DNS of google 8.8.8.8 and 8.8.4.4, the Synology’s KeepAlive service 118.163.30.162, Broadcast 192.168.0.255, …) I saw that most connections were onto 172.217.16.193, 172.217.21.202, 172.217.22.42, … from my NAS.

    Using a IP who IS service, I found that 172.217 belongs to Google. Why was my NAS connection to Google ? I did look all the packages installed on my NAS and “tilt”: Cloud Sync was configured to sync two google accounts… Having a quick look into the current status of Cloud Sync, I noticed it was “syncing” 1 file… apparently for ever.

    I did connect on my NAS via Telnet and looked into /var/log/cloudsync/daemon.log

    In there, I found that cloud sync was logging, in a loop, errors like:

    Dec 10 11:19:26 [ERROR] gd-pull-event-by-list-handler.cpp(89): ListDirectory: ListRemoteSubitems failed (retrying) [-1000] User rate limit exceeded
    Dec 10 11:19:26 [ERROR] gd-transport.cpp(2195): error reason: [rateLimitExceeded].
    Dec 10 11:19:26 [ERROR] gd-transport.cpp(2196): error message: [Rate Limit Exceeded].
    Dec 10 11:19:26 [ERROR] gd-transport.cpp(2238): Hit rate limitation.
    Dec 10 11:19:26 [ERROR] gd-transport.cpp(3082): [-1000] User rate limit exceeded. URL=’https://www.googleapis.com/drive/v2/files?fields=nextLink%2Citems%28id%2Ctitle%2CmimeType%2CfileSize%2CmodifiedDate%2Cmd5Checksum%2CdownloadUrl%2CalternateLink%2Cparents%28id%29%2Clabels%28trashed%29%29&q=trashed%20%3D%20false%20and%20%271QmcGFz7PI0P_0TUlaAJkNfzWRw%27%20in%20parents’

    I will look into a solution to this issue and temporarily unlinked the Google Drive account from Coud Sync…

    voilà voilà.

    Loading

    ,
  • Send Custom Notifications from scripts running on a Synology [new]

    This is an update of a old post written for DSM 4 and 5: how to use the native Notification Mechanism of Synology to sent custom notifications. It’s now tested on my DS1815+ with DSM 6.0.

    Click to Read More

    First, define the Notifications to be sent:

    1. Open a dos command prompt, and execute: telnet <YourSynoHostname>
      1. As an alternative, I am using the free telnet client “Putty” to open SSH Console.
    2. Login as administrator
    3. Once connected via telnet, enter the root mode with the command ‘sudo -i’, using here also the password of your administrator
    4. Execute next: cd /usr/syno/synoman/webman/texts/
    5. Execute: ls
    6. Now you see a list of folders for each language supported by your Synology. You must at least defined your custom notifications in the ‘enu’ version and next the version that match your language.
    7. Copy the file with the definition of the existing notifications in a shared folder to edit it easily: cp enu/mails /volume1/web/
      1. I presume here that the web station is enabled, otherwise, copy the file ‘mails’ in any other shared folder.
      2. As an alternative, you can use the Package “Config File Editor” to edit “/usr/syno/synoman/webman/texts/enu/mails”
    8. Edit now this file ‘mails’ (e.g.: with notepad++: \\<yourSynoHostname>\web\mails)
    9. Add your new custom “tags” at the end of the file with an adequate definition (see bellow for an example). You must specify a Title, a Subject, the text, and a Category with its priority. The category is used to group the Notifications in the DSM > Control Panel > Notification > Advanced Tab. For each Category, specify one of the possible values with a “Priority”, separated by a coma. The priority is used to filter the notifications in the “Advanced” tab (Look at existing tags in the file for illustration):
      1. Possible values for “Category”
        1. Backup/Restore: group under ‘Backup and Restoration’ in the “Advanced” tab
        2. CMS
        3. External Storage
        4. HA: grouped under ‘High-availability cluster’
        5. AHA: not displayed in the “Advanced” tab but related to External Storage
        6. Storage: grouped under ‘Internal Storage’
        7. USB Copy: not displayed in the “Advanced” tab but related to External Storage
        8. Power System: grouped under ‘Power supply’
        9. System
        10. PerfEvent: not displayed in the “Advanced” tab but related to System
      2. Possible values for “Priority”
        1. Important: displayed as Critical
        2. (no value): displayed as Informative
          Synology Notifications
          Synology Notifications
    10. Save your changes (E.g.: back to the telnet console, execute: cp /volume1/web/mails enu/mails)

    Examples:

    [MySqlBkpError]

    Category: Backup/Restore,Important
    Title: Database backup failed
    Subject: Database backup on %HOSTNAME% has failed

    Dear User,

    Database backup on %HOSTNAME% has failed.

    [MySqlBkpOK]

    Category: Backup/Restore
    Title: Database backup completed
    Subject: Database backup on %HOSTNAME% has succeeded

    Dear User,

    Database backup on %HOSTNAME% has successfully completed.

    Next, define how to sent those custom Notifications if and only if they are in a Category which does not appear in the “Advanced” tab of the “Control Panel” > “Notifications” pane > “Advanced” tab (Ex.: the categoryPerfEvent). It’s indeed via that Tab that you should to enable  the desired delivery modes: “email”, “sms”, …. which is obviously only possible for Notifications in a Category which is displayed.

    1. Go back to the telnet console and execute: cp /usr/syno/etc/notification/notification_filter.settings /volume1/web/

      1. As an alternative, you can use the Package “Config File Editor” to edit “/usr/syno/etc/notification/notification_filter.settings”
    2. Edit the file ‘notification_filter.settings’ (E.g. with notepad++)
    3. At the end of that file, insert a configuration line for each custom tag, specifying how the notification must be sent (Look at the other line for illustrations). Possible delivery mode are:
      1. mail
      2. sms
      3. mobile
      4. cms: this is the native popup notification mechanism of DSM, enabled by default for all notifications
      5. msn: not supported anymore since 17th July 2014
      6. skype: not supported anymore since 17th July 2014
    4. Copy the file back to its original location: cp /volume1/web/notification_filter.settings /usr/syno/etc/

    Examples:

    MySqlBkpOK=”mail”

    MySqlBkpError=”mail”

    Now, reboot your Synology

    It seems that in the past, I was able to apply my changes in those files without a reboot. But while testing this trick on DSM 6.x, I didn’t find how to do it without a reboot.

    Finally, modify your script to sent your notifications:

    1. Edit your script (E.g. with notepad++).
    2. Add where required the following command: /usr/syno/bin/synonotify <YourCustomTag>
    3. Save your changes.

    In the example here after, I sent notifications depending on the success or failure of the previous command:

    if [ $? -eq 0 ] then /usr/syno/bin/synonotify MySqlBkpOK
    else /usr/syno/bin/synonotify MySqlBkpError
    fi

    Finally, check that the “Notifications” are enabled on your Synology and tick options like emails, SMS, … for the new tags if required:

    1. In your DSM, go to “Control Panel” > “Notification” > “E-Mail”
    2. Tick the option “Enable e-mail notifications”.
    3. Complete all the fields in that tab. At least: SMTP server, SMTP port, SMTP authentication and Primary email.
    4. Send also a test mail from this tab to verify your settings.
    5. Go next to the “Advanced” tab
    6. Tick the “E-mail” option (and possibly others) for the new tags which appear now in the list.
      1. If the tags do not appear, close and reopen the control panel. restart your DSM!
      2. The tags appear with their Title under their Category
    Notifications Configuration
    Notifications Configuration

    And here are the outcomes: a popup message and an email

    Database Backup Email
    Database Backup Email
    Database Backup Custom Notification
    Database Backup Custom Notification

    Pay attention that the tags are case sensitive ! Also backup the changes you made in the file ‘mails’ and ‘notification_category’ as they will be overwritten for sure when you will update the DSM… Finally, delete the files ‘mails’ and ‘notification_category’ from your web folder…

    Notice: the user EConceptApplications suggested on Synology Forum to use a script as here under to automatically reinsert the notifications

    grep -q “MySqlBkpOK” /usr/syno/etc/notification/notification_filter.settings
    if [ $? -ne 0 ] then

    echo MySqlBkpOK=”mail” >> /usr/syno/etc/notification/notification_filter.settings

    fi

    Notice: a reader, k13tas, suggested that it was much easier to reuse an existing notification tag and customize its text via Control Panel > Notification > Advanced. Indeed, those changes are not lost after a DSM update.

    Notice: a reader, Rusmin, posted here that he found how to pass parameters to be used  in the notification message, via a hash json string. In his sample, one passes the value “value1” via a variable named %VAR1%. The value can obviously come from any variable of your shell script. Ex.: $PPID, $MyVariable, $$, etc…

    Usage: /usr/syno/bin/synonotify tag_event [hash_json_string]

    /usr/syno/bin/synonotify Tag_Name ‘{“[%VAR1%]”: “value1”, “[%VAR2%]”: “value2”}’

    NB: another reader, Paul Marcos, reports however that for him:

    this wouldn’t work with the brackets:

    /usr/syno/bin/synonotify Tag_Name ‘{“[%VAR1%]”: “value1”}’

    but this, without the brackets would:

    /usr/syno/bin/synonotify Tag_Name ‘{“%VAR1%”: “value1”}’

    Loading

  • Synolody DSM update: Insufficient free disk space to upgrade

    Since I have migrated from my DS713+ to a DS1815+, I can’t update seamlessly my DSM. Most of the time, my NAS pretends that I have “Not enough storage space”. This problem is due to large log files filling my system partition.

    Click to Read More

    After the migration top my new NAS, I have reinstalled JDownloader. This one is using a script to run a java application via “nohup”. Nohup’s log is growing fast and takes a lot of storage, preventing my NAS to download the DSM updates.

    I found it was the culprit via an ‘iterative’ procedure suggested by maxxfi on the forum of Synology:

    Use your admin password. Once authenticated as root, type:

    • cd /
    • du -ks [a-u]*

    That command will give you for each subdirectory whose name begins with a letter from a to u (so to avoid the volumeX) the total amount of disk space in use. Wait that it finishes and search for which directory shows the biggest numbers, and type:

    • cd <directory>
    • du -ks *

    Repeat the analysis going deeper into the directory tree until you are able to pinpoint the culprit. Finally, use the appropriate “rm <filenames>” command to delete the largest folder/files.

    In my case, the largest file was /root/nohup.out

    But in the past , I also had to deleted /var/log or /var/log/messages and reboot prior updating the DSM.

    In a Putty session, to know the free space in the system partition, type: df -k

    Loading

  • Synology upgrade to DSM 6.0

    A few notes about the upgrade from DSM 5 to 6

    Click to Read More

    • First, stop Plex (as it prevents DSM 6.0 to install)
    • Upgrade to DSM 6.0
    • Upgrade all the required Packages
    • Start Plex
    • Not working anymore:
      • Login in a telnet session as ‘root’
      • ‘homes’ link in /var/services is pointing at /volume1/@fake_home_link
        • open a ssh session as root,
        • do: rm homes
        • and: ln -s /volume1/homes homes
      • Access right to shared folders
        • admin has no access anymore to various shared folders. Ex.: /volume1/homes/admin
        • Go to DSM > Control Panel > User
        • Edit the ‘admin’ account and got the the ‘permissions’ tab
        • Reapply the access rights
      • Web Console.

        • Doesn’t open anymore… It must now be accessed under the web path /webman/3rdparty, via its url: http://hades:5050/webman/3rdparty/webconsole/wc.cgi.
        • I did a new package to start it automatically. See attachments at the bottom of this post. Once installed, open Web Console and change your password (default is “admin”) using the command:  #users modify admin
      • JDownloader (does not start anymore)
        • Java Manager not installed anymore. It is replaced by the new Java package for a more convenient installation procedure.
        • Edit the file S99jdownloader.sh to replace “/volume1/@appstore/JavaManager/Java/bin/java” by “/usr/local/bin/java”
        • In that file also change the path to create the pid file into a folder where admin is granted write access !
        • Login into a ssh session and enter the root mode (sudo -i)
        • Execute “rm /var/run/S99jdownloader.pid”
        • Check that all files in /volume1/@appstore/jdownloader belong to ‘admin’
        • Exit the root mode
        • Execute “sh S99downloader.sh start”
        • Check the output in the nohup.out file
      • Filebot does not run anymore
        • Reinstall the “Unofficial Java Installer”
      • FileBot Node does not start anymore
        • Uninstall filebot and filebot-node
        • Uninstall node.js and java 8
        • Delete all the old scheduled tasks related to filebot
        • Delete the input and the output folders (where media files to be renamed are located)
        • Recreate empty input and output folders (as admin – via the File Station, not as root)
        • CTRL-F5 in the browser to fully refresh DSM
        • Install the unofficial java installer of RedNoah + node.js v4
        • Install filebot (version from Package Center) and filebot-node (the version filebot-node-0.2.0-B1-noarch of RedNoah)
        • If it does still not run, test it via a SSH
          • login as admin
          • DO NOT RUN ANYTHING AS ROOT. So, don’t execute: sudo -i
          • cd /var/packages/filebot-node/target/
          • ./start
          • Check the errors returned by this command if any
          • Check also the logs: cat /var/log/messages
        • filebot-node is installed in /volume1/@appstore/filebot-node with
          • a sytmbolic link from /var/packages/filebot-node/target/ and
          • a symbolic link from /usr/local/filebot-node
          • filebot-node schedule a task to run its command /usr/local/filebot-node/task xxx where xxx is the id of a task defined into /volume1/@appstore/filebot-node/data/task/xxx.argsp
      • AcpiOnLan (DSM SSO login not working anymore)
        • the port to access DSM in admin mode (required to do a login via the page /webman/login.cgi) is not anymore stored in /etc/synoinfo.conf with the key secure_admin_port or admin_port respectively for http and https. AcpiOnLan was fetching the port in that file. Instead, AcpiOnLan must now fetches external_port_dsm_https or external_port_dsm_http
      • WordPress
        • After the update of WordPress, as usually, I had to save (although not changed) the current option selected in the “Settings” > “Permalink Settings” otherwise no page was accessible anymore via permalinks (as returned by google search).
        • The automated WordPress update failed to complete. I should have enabled ftp first. I did a manual upgrade.. But the problem was most probably with the owner of the files… (See next)
        • Upgrading plugins didn’t work either… But this problem was solved by executing, as root: chown -R http:http /volume1/web/wordpress

    Loading

  • Expand storage by migrating disks from Synology DS713+ to DS1815+

    The 2x3TB disks of my DS713+ were full. Being lazy, I decided to expand the storage by migrating the disk to a new DS1815+ with more bays (instead of doing a full backup and restore on larger disks). It was a piece of cake!

    Click to Read More

    1. Do first a backup of the configuration of your current Synology via Control Panel > Update & Restore menu > Configuration Backup tab > Back up configuration button
    2. Move the disks to the new Synology, keeping the very same order (disk in bay n must go into the bay n of the new Synology).
    3. Add a few other disks in the new Synology and create new Volumes
    4. Boot the new Synology and wait for the beep.
    5. Start the Synology Assistant, find your new Synology and click “Connect” on it.
    6. Use the Migration mode, keeping all your files. NB.: you should download the latest DSM for your new Synology and use that local copy during the installation process instead of letting the installation process download that file itself.
    7. Restore the Configuration backup on the new Synology
    8. If you were using the web station and php, enable it. This settings was lost in my case: Control Panel > Web Services menu > Web Services tab > Enable Web Station option
    9. Repair the packages one by one. Wait for each repair to be successful before repairing the next package otherwise you could be in troubles. Pay attention also that the behaviour of the UI can be weird when auto-refreshing after a repair. If clicking repair on a package, you see that the package repaired is not the one you clicked on (but one that was already repaired), close and reopen the Package Center. All my packages where successfully repaired (sometimes I had to skip one and retry later, IMO due to the dependencies…). Here are the packages I had to repair
      1. Audio Station. everything kept as-is, including the user-defined radio
        1. if music does not appear, go to Control Panel > Media Indexing and re-index the media files.
      2. Download Station: didn’t lose anything from its download queue
      3. Plex Media Server. I simply had to reenter my credentials which were expired
      4. DNS Server: all settings/zones still defined. Access to all services from intranet and internet working fine
      5. Maria DB: nothing lost. In particular my Worpress blog.
      6. Media Server: ok
      7. Video Station: all video and metadata accessible
      8. Photo Station: all albums still there and ok
      9. Python 3: I had to retry the repair but works fine
      10. Java Manager: ok (used to install Java 7)
      11. Surveillance Station: Licenses, settings, camera, recordings are all kept
      12. Time Backup: I had to retry the repair but backup tasks are ok, as wel as the timeline itself.
      13. Node.js
    10. Other Packages:
      1. My Custom packages were still there: iPKGui, AcpiOnLan, Mods (My Own Dsm Shorcuts), Unofficial Java Installer (Java 8)
      2. Custom Package Sources are still defined too
      3. Jdownloader was still installed and configured and I only had to restart it.
      4. Settings were lost for FileBot Node. After reconfiguring FileBot Node, it was not working (unable to access its onw port) I had to uninstall it and reinstall (including FileBot). Reconfigured settings were however not lost…
      5. WordPress was stopped. My blog was however well still accessible as I did reenable the Web Station
    11. Synology’s DDNS Service
      1. DDNS Service being linked to the old Synology, I had to go to https://account.synology.com/fr-fr/overview and unlink my DDNS name
      2. Next, I went to  Control Panel > External Access and did Edit my provider (Synology) to re-enabled the DDNS and re-introduced my login/password.
      3. It took a few minutes before being again connected.
    12. I finally moved a few Shared Folders to the new volumes by editing them via Control Panel > Shared Folder menu > Edit. I simply changed the location, picking the new Volume as a target. Attention, during the move, the Control Panel is not accessible anymore. If you need to access it, simply open a new browser 😉 (The only thing that cannot be done, is moving two Shared Folders simultaneously). Notice that the move can take ages as the new volume is probably still under validation (depends if you checked that option when you created the volume).

    Et voilà.

    Loading

  • Netgear JGS524E’s 802.3ad Link Aggregation And Synology

    Long time ago, I wanted to configured a Bond on my Synology to benefit the LAG feature of my Switch JGS524E (Netgear ProSafe® Plus). Unfortunately, it didn’t work. Being lazy, I never investigated further. It’s now done: I wrote to Netgear and they confirmed that only Static LAG is supported on JGS524E. Dynamic LAG, required to use Link Aggregation with Synology, is not.

    Click to Read More

    Concretely, Synology says in documentation that it requires IEEE 802.3ad (Dynamic) Link Aggregation (LACP, 802.1AX). While Netgear told me that the Switch ProSafe® Plus only supports static LAG. And that’s how I learned that static LAG is not LACP (Link Aggregation Control Protocol) :/

    Conclusion I did configure my Synology to use Adaptive Load Balancing and I did disable LAG on my Netgear…

    Loading

  • DNS name resolution not working anymore after Package update

    After updating my Synology with the latest version of the DNS Server, this one was not resolving my domain names anymore. I had to reset to “resolution service” to solve that issue.

    Click to Read More

    To access my blog, hosted on my NAS, from my intranet but using its public domain name, I had to define the same domain name on my DNS Server, with A records pointing to the NAS’ IP… (see details here).

    When my DNS Server does not run anymore, trying to access my blog from my intranet, using its domain name, I get the web page of my ADSL Modem. Is IP address is indeed the one obtained when resolving my domain name using a public DNS Server.

    To check if my DNS Server runs fine, I simply had to run a dos cmd prompt and type ping www.beatificabytes.be. If I get the local IP of my NAS, it works fine. If I get the public IP of my ADSL modem, there is something wrong…

    It’s not the first time that I have this issue after updating my DSM or the DNS Server. But each time, the solution is the same: I have to uncheck and recheck the options “Enable resolution services” in my Synology’s “Control Panel > DNS Server > Resolution” settings.

    NB.: I have next to reboot my mobile devices. on PC, possibly execute “ipconfig /release” and then “ipconfig /renew” in a command prompt.

    Loading

    ,