The purpose of this page is to keep track of all stuff I would like to buy, get or build.
NB.: This icon means that I got the item or at least something similar: ![]()
![]()
The Joys of Computing
The purpose of this page is to keep track of all stuff I would like to buy, get or build.
NB.: This icon means that I got the item or at least something similar: ![]()
![]()
I don’t use menus that simply display all posts from one category as one can do using a custom menu (to be created via the Dashboard > Appearance > Menus). Instead, I use pages with a “custom Template” that displays such post with futher flexibility.
Click to Read More
Here is the code of the page Template. Pay attention that I am using the theme ‘twentyeleven’:
[code language=”php”] <?php// if you are not using this in a child of Twenty Eleven, you need to replicate the html structure of your own theme.
get_header(); ?>
<div id="primary">
<div id="content" role="main">
<?php
$slug = basename(get_permalink());
$paged = (get_query_var(‘paged’)) ? get_query_var(‘paged’) : 1;
$args= array(
‘category_name’ => $slug, // Change these category SLUGS to suit your use. Ex.: "categ1, categ2"
‘paged’ => $paged
);
query_posts($args);
$category = get_category_by_slug($slug);
if(empty($category))
$name = $slug;
else
$name = $category->name;
if( have_posts() ) :?>
<?php twentyeleven_content_nav( ‘nav-above’ ); ?>
<?php /* Start the Loop */ ?>
<?php while ( have_posts() ) : the_post(); ?>
<?php get_template_part( ‘content’, get_post_format() ); ?>
<?php endwhile; ?>
<?php twentyeleven_content_nav( ‘nav-below’ ); ?>
<?php else : ?>
<article id="post-0" class="post no-results not-found">
<header class="entry-header">
<h1 class="entry-title"><?php _e( ‘Nothing Found in the Category "’.$name.’"’, ‘twentyeleven’ ); ?></h1>
</header><!– .entry-header –>
<div class="entry-content">
<p><?php _e( ‘Apologies, but no results were found for the requested archive. Perhaps searching will help find a related post.’, ‘twentyeleven’ ); ?></p>
<?php get_search_form(); ?>
</div><!– .entry-content –>
</article><!– #post-0 –>
<?php endif; ?>
</div><!– #content –>
</div><!– #primary –>
<?php get_sidebar(); ?>
<?php get_footer(); ?>
[/code]
![]()
So far, I didn’t configure anything special in WordPress to get my “Home” menu and my various “pages” displayed in the header. I only had to customize WordPress to display a dropdow menu “Categories”. But to sort those items, I add to create a menu via the “Dashboard” > “Appearance” Menu.
Click to Read More
Notice that using this feature, it’s easy to create one entry for each category. I don’t use this tip however to display all posts from one category. Instead, I create a custom page that displays only those posts. Doing so, I can customize further the display.
![]()
I don’t want my posts from categories “Softwares” and “Wishlist” to appear in the main thread of my blog. In the past, I had to add some code in the “functions.php” page of my theme (twentyeleven) to filter that posts from the home page. Now, I am using the plugin “WP Exclude From Homepage 1.1.2”.
Click to Read More
The code I used to add in \\<YourSynology>\web\wordpress\wp-content\themes\<YourTheme>\function.php was:
[code language=”php”]/**
* Excludes post in category "softwares" from the home page
*/
function exclude_cat_from_home($query) {
if ( $query->is_home) {
$acats = array();
foreach ( array(‘wishlist’,’softwares’) as $catName ) {
$cat = get_category_by_slug( $catName );
$acats[] = ‘-‘.$cat->cat_ID;
}
$cats = join(‘,’, $acats);
$query-> set(‘cat’,$cats);
}
return $query;
}
add_filter(‘pre_get_posts’,’exclude_cat_from_home’);
It was located at the very bottom of the file
![]()
I would like to replace my Logitech 7.1 speaker system used on my TV by a single soundbar. The only one which “sounds” to be really great is the Yamaha YSP 3300 Soundbar (and above – but too expensive for my purpose).
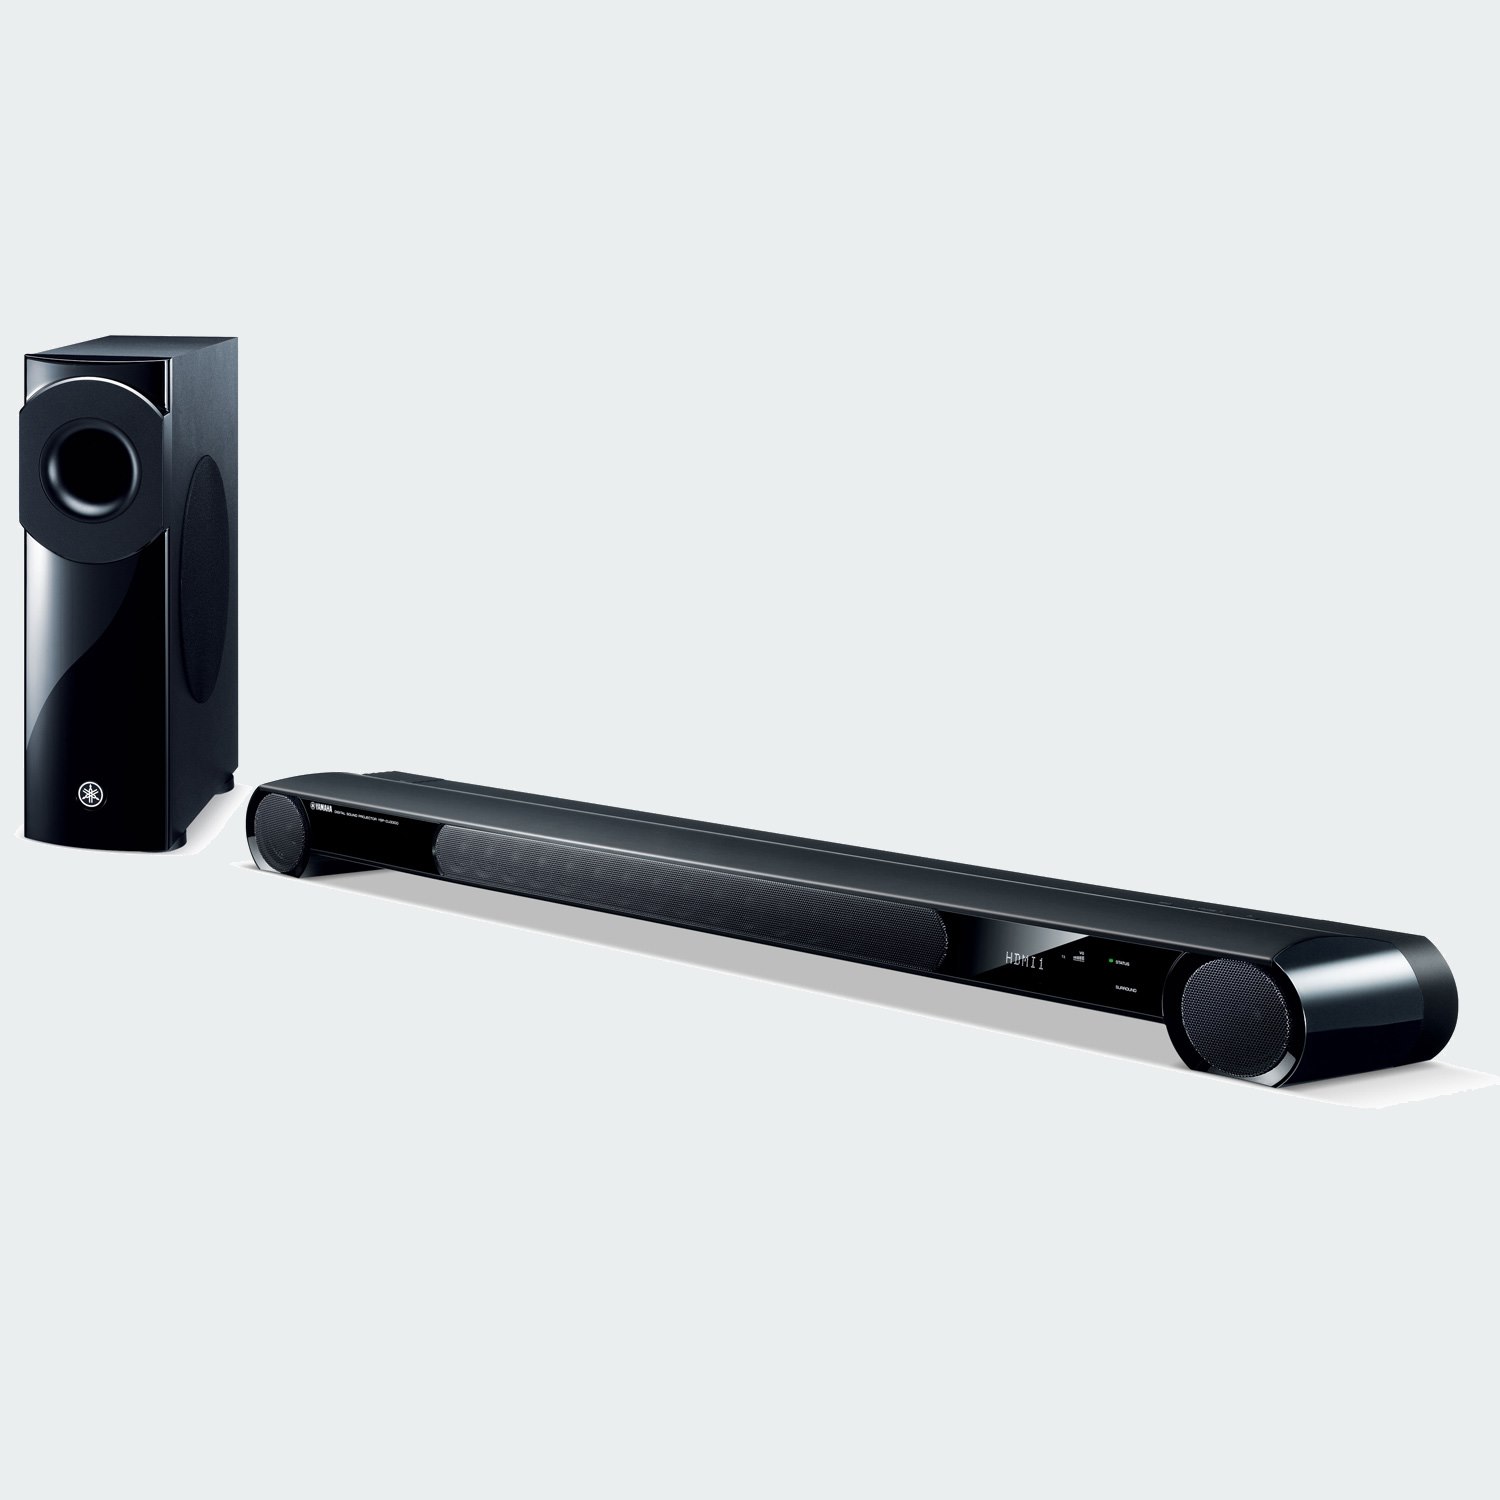
Click to Read More
It’s IMO the best soundbar in that range of price
I found the best price on www.amazon.de
EDIT 19/01/2014 Et voilà: I bought it on bestekeus.be for only 878€ vs 929€-1299€ on other websites. And BesteKeus has a shop very close to my location (Brussels) where I can go to pick and pay the device.
![]()
Looking for a really good device to scan my negatives, I found that Plustek offers good products such as the Plustek OpticFilm 7400.
However, for a quite similar price, the Reflecta CrystalScan 7200 seems to be an even better option as it comes with hardware based dust- and scratch correction.
To be investigated further…
EDIT 18/07/2014 Et voilà: Finally, I ordered an Epson Perfection V550 Photo. The best compromise between price (189€ on CameraNu.nl) and quality of output (Amazing ICE Technology that really removes dust marks). Excellent Review here. My own experience is available here.

![]()
I would like to upgrade my NAS. For sure, I don’t want to replace my current one (a Synology DS209+ II) by anything else than a Synology. Currently, I would chose a DS713+.
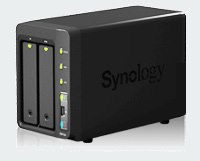
Click to Read More
The new version of DSM, 4.3, is not supporting anymore my old Synology DS209+ II, bought in mid-2009. But this is not really an issue as packages will continue to be updated on DSM 4.2.
I am mainly looking for an new NAS to increase access speed.
The DS713+ has 2 Gigabit Ethernet ports with support for nic teaming, Dual Core 2.13GHz, 1 GB DDR3, 1x USB 2.0, 2x USB 3.0, 1x eSata, Sata III, 88.6MB/s write and 55.7MB/s read speeds (Those are mean values as it depends a lot on the RAID config, disk type, size of the transferred files, link aggregation, …).
My old DS209+II had only 1 Gigabit Ethernet port, 1.06Ghz CPU, 512MB DDR2, 3x USB 2.0, 1x eSATA port X1, Sata II, 50 MB/s write, 60 MB/s read speeds.
Look here for DS713+ performances.
But the DS714 is coming soon… It will not be as fast as the DS713+, but using an Intel Atom CE5300 SoC , it will come with hardware HD-video transcoding capabilities, which is interesting if I want to run a media server similar to Plex. It will be a Dual Core 1,6GHz, 1GB DDR3, 3x USB 3.0, 1x HDMI, 2x Gigabit Ethernet ports.
I will wait until the DST174 is out to read the first reviews comparing that new model and the DS713+.
EDIT 31/01/2014 Et voilà: Finally, I ordered a DS713+ on RedCoon.be (the cheapest I found) as well a two Western Digital WD SE 2TB.
Click to Read More
I considered to buy Seagate ST2000VN000 (HDD Seagate NAS 2TB SATA 6GB 5900rpm) HDD’s as they are 40€ cheaper than the WD SE WD2000F9YZ (7200rpm) HDD’s. But I finally took the WD as the warranty is 5 years (instead of 3 for Seagate).
![]()
After reading quite a lot on the web to find a good IP camera that should be very well supported by my NAS (Synology), I want this one: a FOSCAM FI9826W White.
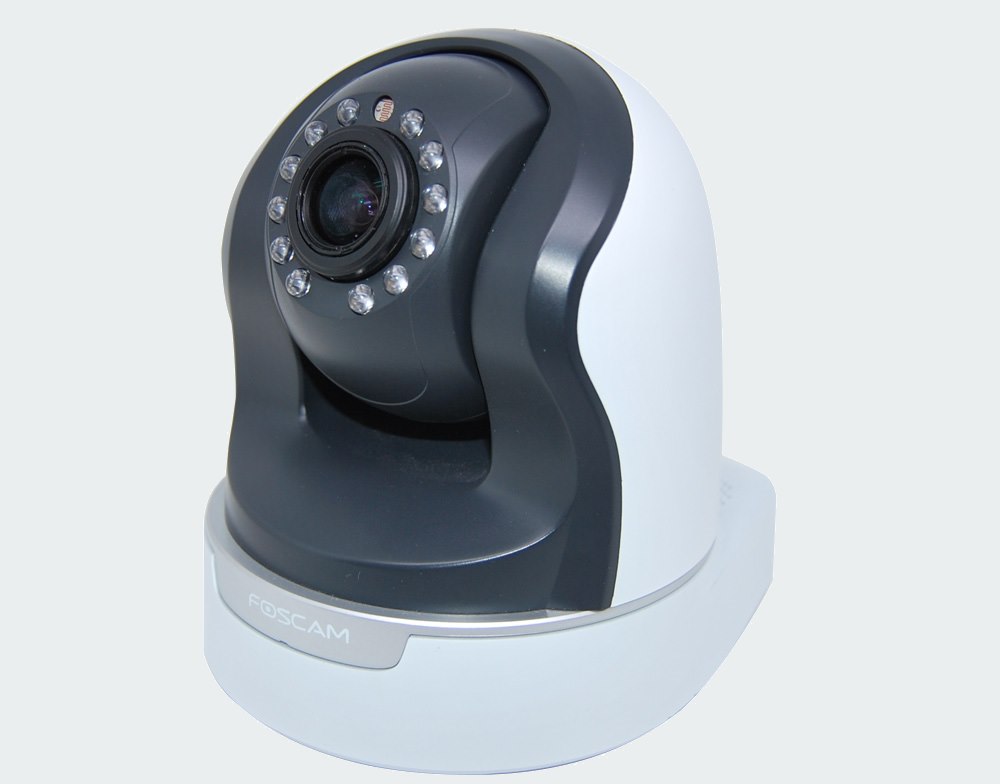
Click to Read More
It’s not yet officially supported by Synology and won’t be available on the EU market before 1st of November. But it will be supported for sure IMO, as most other Foscam IP Cam are. So, I will wait until it’s available to check that Synology does indeed support it. If they don’t, I will take my second or third choice as I expect their price to decrease.
I prefer the FI9826W than the very similar FI9831W because it has an optic zoom x 3. However, if FI9826W appears to not be supported by Synology, the FI9831W won’t be either IMO.
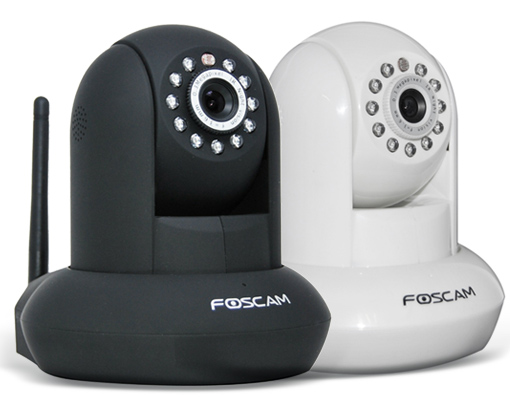
My second choice would a FI9821W (v2!). I did test the connection of my NAS with the demo cam available on the FOSCAM website. The connection works fine but after 2 seconds of playing, the video preview becomes blank. Foscam told me that it’s possibly because I am not connected as an administrator… No answer from Synology yet on that issue.
My third choice would be a FI8910W. This one is not HD but reported by many users as working very well with Synology. I prefer however the FI9821W as it has a much better Web Management interface.
FI8921W and FI8910W are similar from the design point of view:
Remarks:
I found the best prices on www.redcoon.nl,fr and de.
EDIT 16/11/2013 Et voilà: my wife offered two similar IP camera for “Saint-Nicolas” (we traditionally celebrate that Saint by offering gifts to the “kids” 🙂 It is still more popular than Santa Claus, here in Belgium).
Click to Read More
As the FI9826W is currently too expensive for my purpose, I bought two FI8910W.
The cheapest licenses to add one camera into Synology Surveillance Station are sold by “IooMobile” on eBay. They sent me the license key immediately by email (on my explicit request) and I got the licence card a few weeks later (from Honk-Kong to Belgium).
![]()
As mentioned in previous posts (here and here), I had to flash the bios of my two LSI SAS controllers (9201-16i and 9211-8i) in order to solve a compatibility issue with my Asus Striker II Formula. I did flash the bios of both LSI from my Asus P9X79Pro which didn’t suffer the same incompatibility. However, I have never been able to flash the firmware of the LSI using my Asus P9X79Pro… This may only be made from a UEFI shell but I didn’t find any which was able to run the “flash” application of LSI.
Click to Read More
The IR version of LSI’s firmware offers support for RAID features while the IT version is a more “basic” controller. It’s therefore a bit faster than the IR version. As I don’t need hardware RAID for my file server (I am using a software RAID), I have no valid reason to keep the IR version.
First, I tried to simply flash the firmware with an IT version using the sas2flash.exe for windows provided in the package P8 got from LSI (see previous post). I did use the IT version found in that package to be aligned with the bios already downgraded. Unfortunately, a downgrade of the firmware is not supported by LSI (as reported further in this post, there is a solution: clean first the existing firmware)
sas2flash.exe -o -f 2118it.bin
*******************************************************
LSI Corporation SAS2Flash Utility.
Version 8.00.00.00 (2010.11.01)
Copyright (c) 2009 – 2010 LSI Corporation. All rights reserved.
*******************************************************
Advanced Mode Set
Adapter Selected is a LSI SAS: SAS2008(B2)
Executing Operation: Flash Firmware Image
Firmware Image has a Valid Checksum.
Firmware Image compatible with Controller.
Valid NVDATA Image found.
ERROR: Cannot downgrade NVDATA version 0xd430005 to 0x7010003.
Firmware Image Validation Failed!
Due to error remaining commands will not be executed.
Unable to Process Commands.
Exiting SAS2Flash.
So, I tried to replace the current IR firmware with a more recent version of the IT firmware (found in the package P17)… Unfortunately, the message reported now that one may not “upgrade” from an IR version to an IT version (as reported further in this post, there is a solution: clean first the existing firmware):
sas2flash.exe -o -f 2118it.bin
*******************************************************
LSI Corporation SAS2Flash Utility.
Version 8.00.00.00 (2010.11.01)
Copyright (c) 2009 – 2010 LSI Corporation. All rights reserved.
*******************************************************
Advanced Mode Set
Adapter Selected is a LSI SAS: SAS2008(B2)
Executing Operation: Flash Firmware Image
Firmware Image has a Valid Checksum.
Firmware Image compatible with Controller.
Valid NVDATA Image found.
NVDATA Versions Compatible.
NVDATA Product ID and Vendor ID match verified.
Valid Initialization Image verified.
Valid BootLoader Image verified.
ERROR: Cannot Flash IT Firmware over IR Firmware!
Firmware Image Validation Failed!
Due to error remaining commands will not be executed.
Unable to Process Commands.
Exiting SAS2Flash.
So, looking a bit on LSI website, I quickly found I had to clean the firmware (and the bios) before trying to install the other one. Be really careful doing this as you won’t be able to boot anymore if the PC stops after the cleanup and before you had time to re-install a firmware and a bios!
Unfortunately, the command “sas2flash -o -e 6” required to clean the firmware failed to execute on my Asus P9X79Pro. It seems that this is quite common on motherboards with support for UEFI:
sas2flash.exe -o -e 6
*******************************************************
LSI Corporation SAS2Flash Utility.
Version 8.00.00.00 (2010.11.01)
Copyright (c) 2009 – 2010 LSI Corporation. All rights reserved.
*******************************************************
Advanced Mode Set
Adapter Selected is a LSI SAS: SAS2008(B2)
Executing Operation: Erase Flash
Erasing Flash Region…
Erase Flash Command not Supported on this platform.
Resetting Adapter…
Reset Successful!
Due to Exception Command not Executed. IOCStatus=0x1, IOCLogInfo=0x0
Finished Processing Commands Successfully.
Exiting SAS2Flash.
Based on the error message “Erase Flash Command not Supported on this platform”, I thought first that it was failing because running within Windows. So I tried next to execute this from DOS, booting on a USB key created with the great Rufus tool (which comes with a FreeDos. So you really don’t need anything else).
Unfortunately, it didn’t work either. The error was now:
ERROR: Failed to initialize PAL. Exiting Program
Again, one can find on the LSI knowledge base that as a workaround, you have to use the sas2flash version for UEFI: sas2flash.efi. It can be found easily in the download section. Indeed, firmware update via DOS is only possible when using H8 motherboards. With X9 motheroards an error message occurs during the writing process, due to the limited “option ROM”.
So, I did copy the file sas2flash.efi into the root of my USB key and did reboot my PC to enter in the UEFI bios system. Once in the advanced mode, I did click “Exit” in the top right corner and got a new menu with an option like “Launch EFI Shell from filesystem device”. This menu actually means that my Asus P9X79Pro does not have a built-in UEFI shell and that I have to provide one myself, e.g., on the USB Key. UEFI Shells can be found here. An adequate one (such as Precompiled x86_64 UEFI Shell v2 binary) must be copied into the root of the USB Key and renamed into Shellx64.efi. Without that shell on the USB key, the PC starts on the next boot disk (I.e.: Windows in my case)
It’s sometimes reported that one could have to copy the shell on the USB key in <USB>:/efi/boot/bootx64.efi instead ?! But it was not the case for me.
So once a Shellx64.efi on the root on my USB key, selecting “Launch EFI Shell from filesystem device” start a new interface where command can be typed. Ex.: “help -b” (without the quotes) to get the list of supported UEFI commands.
First, one has to switch onto the USB key to execute the LSI application sas2flash.efi. In my case, I only add to type “fs0:” (without the quotes) where fs0 is the default mount point of the USB key. Once there, I tried immediately “sas2flash.efi -o -e 6”, but I got “initshellapp: application not started from shell”.
For some unknown reasons, I can’t run that application and LSI support was not able to solve this issue. I still have to contact Asus to check if they can.
However, LSI support told me that I should try to flash the firmware from a motherboard without UEFI support. So I did move the controller back into my Asus Striker II Formula, which was now booting fine since the bios of the card was downgraded to a compatible version!
And on my Asus Striker II Formula, booting with the DOS Key, I did successfully clean the current IR firmware and flash the IT firmware instead.
sas2flsh.exe -o -e 6
*******************************************************
LSI Corporation SAS2Flash Utility.
Version 8.00.00.00 (2010.11.01)
Copyright (c) 2009 – 2010 LSI Corporation. All rights reserved.
*******************************************************
Advanced Mode Set
Adapter Selected is a LSI SAS: SAS2008(B2)
Executing Operation: Erase Flash
Erasing Flash Region…
Erase Flash Operation Successful!
Resetting Adapter…
Reset Successful!
Finished Processing Commands Successfully.
Exiting SAS2Flash.
sas2flsh.exe -o -f 2118it.bin -b mptsas2.rom
*******************************************************
LSI Corporation SAS2Flash Utility.
Version 8.00.00.00 (2010.11.01)
Copyright (c) 2009 – 2010 LSI Corporation. All rights reserved.
*******************************************************
Advanced Mode Set
Adapter Selected is a LSI SAS: SAS2008(B2)
Executing Operation: Flash Firmware Image
Firmware Image has a Valid Checksum.
Firmware Image compatible with Controller.
Valid NVDATA Image found.
Valid Initialization Image verified.
Valid BootLoader Image verified.
Chip is in RESET state. Attempting Host Boot…
Firmware Host Boot Successful !
MfgPage2 Mismatch Detected.
Writing Current MfgPage2 Settings to NVRam
Updated MfgPage2 !
Resetting Adapter…
Adapter Reset Completed.
Chip is in RESET state. Performing Host Boot…
Firmware Host Boot Successful !
Beginning Firmware Download…
Firmware Download Successful.
Resetting Adapter…
Adapter Successfully Reset.
Executing Operation: Flash BIOS Image
Validating BIOS Image…
BIOS Header Signature is Valid
BIOS Image has a Valid Checksum.
BIOS PCI Structure Signature Valid.
BIOS Image Compatible with the SAS Controller.
Attempting to Flash BIOS Image…
Flash BIOS Image Successful.
Finished Processing Commands Successfully.
Exiting SAS2Flash.
sas2flsh.exe -listall
*******************************************************
LSI Corporation SAS2Flash Utility.
Version 8.00.00.00 (2010.11.01)
Copyright (c) 2009 – 2010 LSI Corporation. All rights reserved.
*******************************************************
Adapter Selected is a LSI SAS: SAS2008(B2)
Num Ctlr FW Ver NVDATA x86-BIOS PCI Addr
———————————————————————
0 SAS2008(B2) 08.00.00.00 07.01.00.03 07.15.00.00 00:04:00:00
Finished Processing Commands Successfully.
Exiting SAS2Flash.
100% OK !!!
I did next upgrade the firmware from 08.00.00.00 to 17.00.00.00 on my two card (LSI SAS 9201-16i and LSI SAS 9211-8i) and entered the management console (CTRL-C) to disable boot support on both card (as I boot from disks attached on on-board sata controllers). And now, they both work like a charm on my Asus Striker II Formula 🙂
[EDIT]: Reading again about UEFI support on a french web site dedicated to ASUS laptops, I found that “x86_64 UEFI Shell 2.0” is not supported by some ASUS UEFI firmware because it does not have the minimum expected version (???). It’a said on that forum that “x86_64 UEFI Shell 1.0.” is however well supported. I am quite sure I did test it without success (I was not presented with the interface but got a black screen). But it might be worth a second try… Possibly copying the shell into /boot/efi/shellx64.efi instead of the root (as suggested on this site)
![]()
I already experienced a compatibility issue between a LSI SAS 9201-16i and my Asus Striker II Formula. But as the issues appeared to be solved once the LSI bios downgraded to 7.15.0.0, I decided to buy another LSI SAS controller and give it a try too. The same issue occurred and was solved in a similar way.
Click to Read More
Once the new SAS 9211-8i plugged in my Asus Striker II Formula, the PC didn’t boot anymore. It was “freezing” just at the end of the SAS controller initialization phase. The current bios was 07.25.00.00 and the firmware 13.0.0.57.00 (IR).
Just as I did for the SAS 9201-16i, I did plug next the new SAS controller in my other motherboard, an ASUS P9X79Pro. On that motherboard, the initialization phase passed successfully.
I did send next an email to LSI support to request their package version P8 (firmware & bios) for SAS 9211-8i, the version that made my SAS 9201-16i compatible with my Asus Striker II Formula. Again great support from LSI, I did get the package in less than 24h.
Using the sas2flash.exe for windows provided within the package P8, I did check the current version of the firmware and bios using the option “-listall”:
sas2flash.exe -listall
**********************************************************************************
LSI Corporation SAS2Flash Utility.
Version 8.00.00.00 (2010.11.01)
Copyright (c) 2009 – 2010 LSI Corporation. All rights reserved.
**********************************************************************************
Adapter Selected is a LSI SAS: SAS2008(B2)
Num Ctlr FW Ver NVDATA x86-BIOS PCI Addr
———————————————————————————
0 SAS2008(B2) 13.00.57.00 0d.43.00.05 07.25.00.00 00:03:00:00
Finished Processing Commands Successfully.
Exiting SAS2Flash.
I did backup the current firmware using the option “-ufirmware”
sas2flash.exe -ufirmware SAS9211-8i-backup.fw
**********************************************************************************
LSI Corporation SAS2Flash Utility.
Version 8.00.00.00 (2010.11.01)
Copyright (c) 2009 – 2010 LSI Corporation. All rights reserved.
**********************************************************************************
Adapter Selected is a LSI SAS: SAS2008(B2)
Executing Operation: Upload Firmware
Upload Successful!
Finished Processing Commands Successfully.
Exiting SAS2Flash.
I did next backup the current bios using the option”-ubios”
sas2flash.exe -ubios SAS9211-8i-backup.rom
**********************************************************************************
LSI Corporation SAS2Flash Utility.
Version 8.00.00.00 (2010.11.01)
Copyright (c) 2009 – 2010 LSI Corporation. All rights reserved.
**********************************************************************************
Adapter Selected is a LSI SAS: SAS2008(B2)
Executing Operation: Upload BIOS
Upload Successful!
Finished Processing Commands Successfully.
Exiting SAS2Flash.
Finally, I did flash the bios and only the bios as I knew this one was responsible of the freeze, based on my previous experience. I did use the options “-o -b”:
sas2flash.exe -o -b mptsas2.rom
****************************************************************************
LSI Corporation SAS2Flash Utility.
Version 8.00.00.00 (2010.11.01)
Copyright (c) 2009 – 2010 LSI Corporation. All rights reserved.
****************************************************************************
Advanced Mode Set
Adapter Selected is a LSI SAS: SAS2008(B2)
Executing Operation: Flash BIOS Image
Validating BIOS Image…
BIOS Header Signature is Valid
BIOS Image has a Valid Checksum.
BIOS PCI Structure Signature Valid.
BIOS Image Compatible with the SAS Controller.
Attempting to Flash BIOS Image…
Flash BIOS Image Successful.
Finished Processing Commands Successfully.
Exiting SAS2Flash.
Et voilà. Once re-plugged into the other PC, with the ASUS Striker II Formula, this one was now booting fine.
In a next post I will report on my experience trying to flash the firmware, in a attempt to replace the current IR firmware by an IT firmware.
![]()
Acer iDea 510 AirPlay Android Backup DD-WRT DNS DS209+ DS713+ DS1815+ FlexRaid Galaxy Galaxy S2 Galaxy S7 Google Assistant Google Home HTPC Kies MCE MySQL Nabi 2 Nvidia TV Shield One Plus One OpenHab Outlook Philips Hue Plex RAID Raspberry PI Remote Desktop Root Access Samsung Scripts Synology Team Build Visual Studio VMWare Wi-Fi Windows Windows 8 Windows 8.1 Windows 10 Windows Server 2012 XBMC Xpenology ZigBee