Month: November 2019

  • Basic Authentication in subfolders with nginx on Synology

    I am using nginx as default webserver on my Synology. Here is how to configure a login/password prompt on a subfolder of the WebStation.

    Click to Read More

    First, open a SSH console on your Synology and enter the root (See here)

    Notice that you cannot change the config file of nginx (/etc/nginx/nginx.conf). Even if you do so, your changes will be removed automatically. But in the config file of nginx, for the server listening on the port of your WebStation (port 80 by default), you can see it is loading extra config named www.*.conf under the folder /usr/syno/share/nginx/conf.d/

    include /usr/syno/share/nginx/conf.d/www.*.conf;

    So, go to that folder : cd /usr/syno/share/nginx/conf.d

    There, create a password file with your login and password

    Type : htpasswd -c -b .htpasswd YourLogin YourPassword

    the parameter -c is to create the file. Only use it if the file does not yet exist otherwise you will clean its current content!!

    Look at the content if the file: cat .htpasswd

    It should be similar to this: 

    YourLogin:$apr3$hUZ87.Mo$WUHtZHjtPWbBCD4jezDh72

    Now, create and edit a file name like : www.protected.conf (Ex.: using vi)

    Assuming that you want to protect a subfolder You/Sub/Folder existing in the root of your WebStation, you should theoretically this into www.protected.conf :

    location /Your/Sub/Folder {
    auth_basic “Any Prompt Message You Want”;
    auth_basic_user_file /usr/syno/share/nginx/conf.d/.htpasswd;
    }

    Next, you have to restart nginx with the command : nginx -s reload

    Or even better to be 100% sure: synoservicecfg –restart nginx


    But for some reason, this is not working on Synology (at least on mine ?!). It seems that the block location does not work without a modifier like = or ~

    It searched for hours why it was not working, without answer. 

    For example, I tested first that the following webpage was working fine on my NAS: http://MyNas/SubFolder/index.php

    Next, I edited the www.protected.conf with the following block before restarting nginx, deleting the cache ofh my browser and restarting my browser (THIS IS MANDATORY each time one changes the location):

    location /SubFolder/index.php {
    return 301 https://www.google.be/search;
    }

    But opening http://MyNas/SubFolder/index.php didn’t return me to Google.

    Next, I tried with :

    location = /SubFolder/index.php {
    return 301 https://www.google.be/search;
    }

    And this was working! So, I thought that the path used as location was possibly was incorrect. To see the path capture as location I tried next with 

    location ~ (/SubFolder/index.php) {
    return 301 http://Fake$1;
    }

    Opening now http://MyNas/SubFolder/index.php, I got the (unvailable) page  http://Fake/SubFolder/index.php

    So, the path /SubFolder/index.php was definitively correct. 

    I think that my directive is included before another one which overwrite it. Possibly this one, found in /etc/nginx.nginx.conf:

    location / {
    rewrite ^ / redirect;
    }

    So, I have no choice but use the modifier = (exact match) or ~ (matching a regular expression). Unfortunately, doing so, another problem arise… the php pages are not reachable anymore 🙁

    If you look at the log file of nginx: cat /var/log/nginx/error.log

    You see:

    2019/11/30 21:22:12 [error] 25657#25657: *50 open() “/etc/nginx/html/SubFolder/index.php” failed (2: No such file or directory), client: 192.168.0.1, server: _, request: “GET /SubFolder/index.php HTTP/1.1”, host: “MyNas”
    This is because nginx is using its default root folder /etc/nginx/html/ instead of inheriting the one define for the WebStation.

    The solution is to simply specify the root in the location block : root /var/services/web;

    But now, instead of being executed, the php script is downloaded.. Harg !

    The following location works, by redefining the execution of the php page:

    location = /SubFolder/index.php {
      root /var/services/web;

      try_files $uri /index.php =404;
      fastcgi_pass unix:/var/run/php-fpm/php73-fpm.sock;
      fastcgi_index index.php;
      include fastcgi.conf;
    }

    Pay attention, corrupting the config of nginx will make you DSM unable to run anymore ! Always check that your config is correct with the command : nginx -t


    Ok, now, to handle both folders and php pages, one can use this variant of the location above:

    location ~ /SubFolder/ {
      root /var/services/web;

      location ~ \.php$ {
        try_files $uri /index.php =404;
        fastcgi_pass unix:/var/run/php-fpm/php73-fpm.sock;
        fastcgi_index index.php;
        include fastcgi.conf;
      }
    }

    In the sub-location above, use php73-fpm.sock, php70-fpm.sock, php50-fpm.sock, etc… according to the version of php used by default with your nginx in your WebStation !

    This is more or less working fine… I still have issues as some server variables are not passed to the php pages… But it’s working enough for my purpose. We are now only missing the basic authentication !!! Here is the final location block:

    location ~ /You/Sub/Folder/ {
      root /var/services/web;

      location ~ \.php$ {
        try_files $uri /index.php =404;
        fastcgi_pass unix:/var/run/php-fpm/php73-fpm.sock;
        fastcgi_index index.php;
        include fastcgi.conf;
      }

      auth_basic “Any Prompt Message You Want”;
      auth_basic_user_file /usr/syno/share/nginx/conf.d/.htpasswd;

    }

    Once in place, nginx restarted, your browser cleaned and restarted too, you finally got the prompt for your login and password.

    If you type a wrong login or password, you could see the error in the nginx log file: cat /var/log/nginx/error.log

    2019/11/30 17:51:47 [error] 12258#12258: *145 user “mystery” was not found in “/usr/syno/share/nginx/conf.d/.htpasswd”, client: 192.168.0.1, server: _, request: “GET /err/You/Sub/Folder/ HTTP/1.1”, host: “MyNas”

    2019/11/30 17:59:52 [error] 20130#20130: *3 user “mystery”: password mismatch, client: 192.168.0.1, server: _, request: “GET /You/Sub/Folder/ HTTP/1.1”, host: “MyNas”

    Et voilà… Not perfect, not clear why it’s not wokring out of the box as documented here… But 

    Loading

  • Configure Hue devices in OpenHab 2

    Here is how to add the Philips Hue Bridge in OpenHab and control the Hue devices (more doc here).

    Click to Read More

    Add first the Bridge Philips Hue

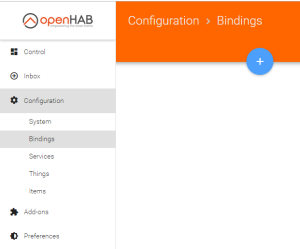
    Go to Paper UI’s Configuration > Bindings and click on the blue “+” (or go directly to Configuration > Add-ons, in the tab “Bindings”) :
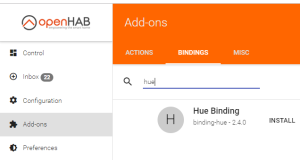
    In the Search box, type “Hue” to filter the “Bindings”. Click on the “Install” link on the right of the “Hue Binding” to install it :

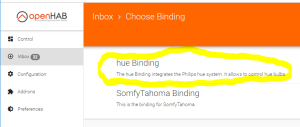
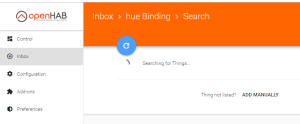
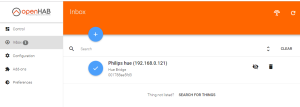
    With the Hue Binding, you can now add a “Hue Bridge”. Go to your physical “Bridge” Philips and press the button on the top as you do to pair Hue devices with the Bridge. Go next to Configuration > Things and click on the Blue “+”. Then select “Hue Binding”. OpenHab will find the “Hue Bridge” :

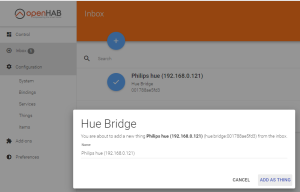
    Select the “Hue Bridge” and click on “Add as Thing” :

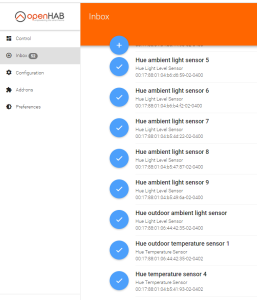
    If everything worked fine, you should see all your Hue Devices in the “Inbox”.

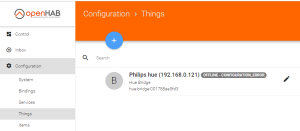
    Otherwise, you will probably see the “Hue Bridge” as “Offline – Configuration_Error”. This is probably due to an issue during the pairing with the physical “Bridge” Philips. OpenHab has not been authorized to access it.

    It’s possible to set the authorization manually (See Here). First, find the IP address of your “Philips Bridge” by opening the page https://discovery.meethue.com  

    You should see something like:  [{“id”:”001788fffeae5fd3″,”internalipaddress”:”xxx.xxx.xxx.xxx”}]

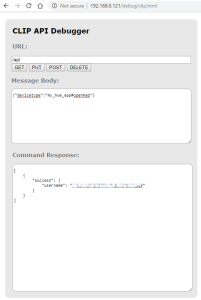
    Next, using the internalipaddress above, open the page http://xxx.xxx.xxx.xxx/debug/clip.html and before pressing the button “POST”, type :

    • /api/ in the “URL”
    • “{“devicetype”:”my_hue_app#openhab”}” in the “Message Body”

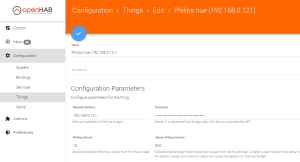
    In the “Command Response”, copy the value of the “username”. Go to Configuration > Things, edit the Bridge (click on the pen) and paste the value in the field “Username”

    Configure next each Philips Hue device

    You can select any of the Philips Hue devices appearing in the Inbox. Each selected device is added as a Thing (under Configuration > Things). There, you can link them with Items that you have previously defined as described here

    Extended Color Light

    If you want to configure a Thing of type “Extented Color Light”, you can look what are its supported features in the official openHab documentation for Philips Hue (here). 

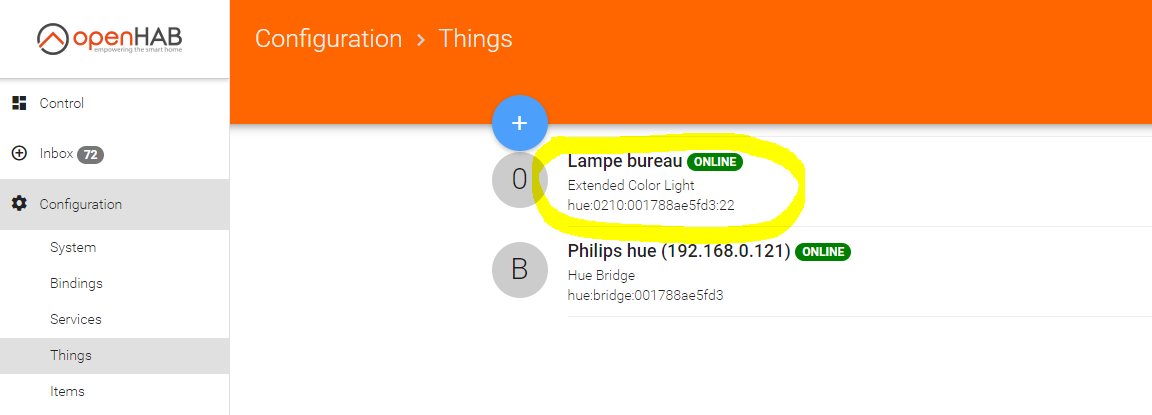
    As you can see on your Thing , it has an ID like “hue:0210:001788ae5fd3:4″

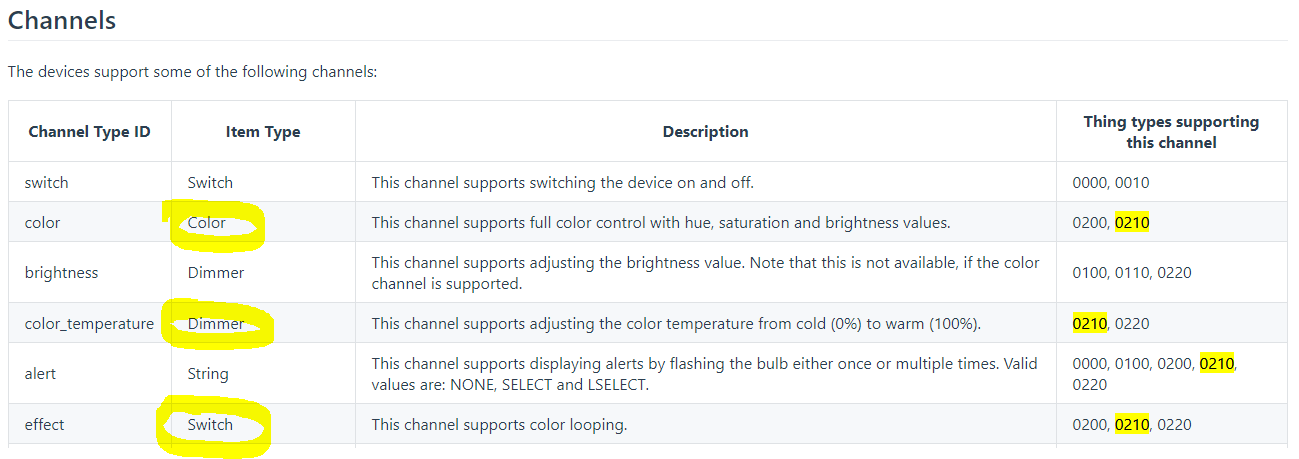
    You can search for 0210 on the documentation page to find that it supports changing the color, the color temperature and being switched on/off:
     
    These features can be controlled via “Channels” (See openHab’s concepts). A distinct channel is used to control each distinct feature of a Thing. Contretely, you have to link your Thing, via the various channels, onto Items. Which kind of item must be used is also described on the documentation page :

    What is not clear in the documentation of the Channels, for example with the color Channel is that you can link not only a Color Item with it, but also a Dimmer and a Switch.

    Personnaly, if I define all my Items within a file (as described here), I configure my Devices by creating Links between my Items and my Things directly within the Paper UI interface.

    For a Extended Color Light, my Items file (default.items) will contain:

    Switch GF_Office_Light "Lampe Bureau" <light>
    Dimmer GF_Office_Light_Dim "Lampe Bureau Dim" <light>
    Color GF_Office_Light_Clr "Lampe Bureau Color" <light>
    Dimmer GF_Office_Light_Temp "Lampe Bureau Temperature" <light>

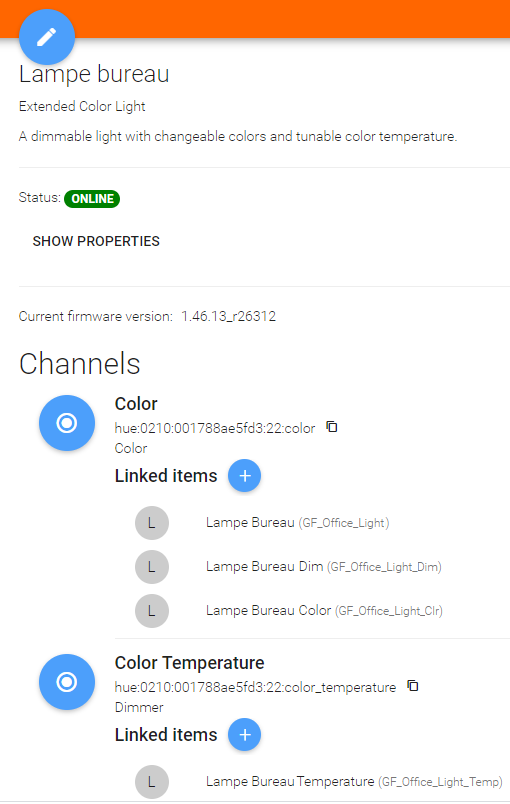
    And I configure the Links between the Thing and those Items like this :

    Finally, in my Sitemap, I will use:

    sitemap default label="Olympe Home" {
      Frame label="Rooms" icon="group" {
        Text label="Bureau" icon="groundfloor" {
          Switch item=GF_Office_Light label="Switch" icon="light"
          Slider item=GF_Office_Light_Dim label="Dim" icon="slider"
          Colorpicker item=GF_Office_Light_Clr label="Color"
          Slider item=GF_Office_Light_Temp label="Temperature" icon="slider"
        }
      }
    }

    And here is the outcome:

    Loading

  • Configure Somfy devices in OpenHab 2

    Here is how to add the SomfyTahoma Bridge in OpenHab and control the Somfy devices (more doc here).

    Click to Read More

    Go to Paper UI’s Configuration > Bindings and click on the blue “+” (or go directly to Configuration > Add-ons, in the tab “Bindings” – indeed, “Bindings” are installed using “Add-ons” developed by the community) :

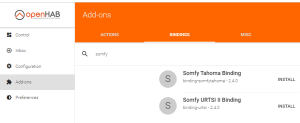
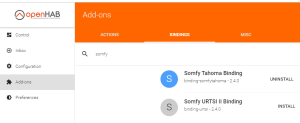
    In the Search box, type “Somfy” to filter the “Bindings” and find those available for this type of devices. Click on the “Install” link on the right of the one to be installed :

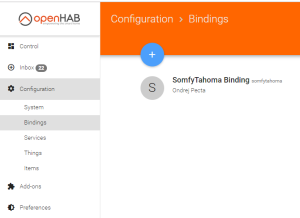
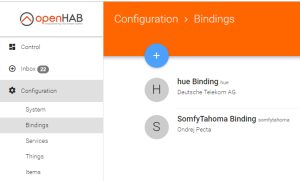
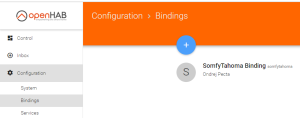
    Once the Add-on installed, you can check that the Bindings is available in the Configuration > Bindings :

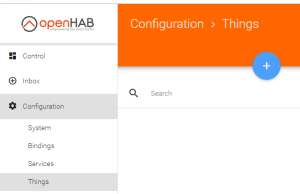
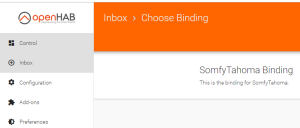
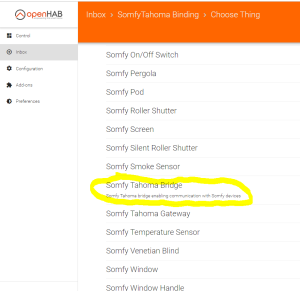
    With the Somfy Binding, you can now add a “SomfyTahoma Bridge”. Go to Configuration > Things and click on the Blue “+”. Then select “SomfyTahoma Binding” and next “Somfy Tahoma Bridge” :

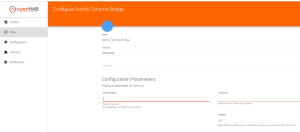
    You must now configure the Bridge with your Somfy account (Email Address and Password). You can also define the “location” (Room) where it is placed in your house :

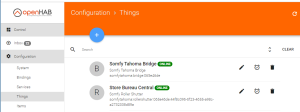
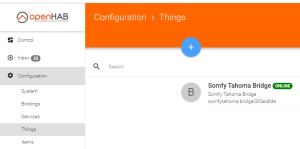
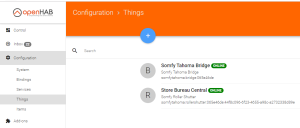
    Once done, the Bridge appears as “Online” in Configuration > Things

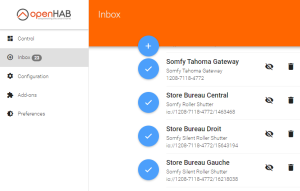
    And the “Somfy devices” will appear in the “Inbox” :

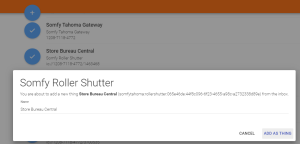
    Each device in the “Inbox” can now be linked with an “Item” previously configured via the “Home Builder” (and saved in the file “default.items”). For example, select a Roller Shutter by clicking on the blue “V”  and click next on “Add as Thing” :

    Go to Configuration > Things were the “Roller Shutter” appears now as “Online” : 

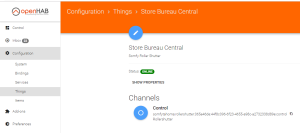
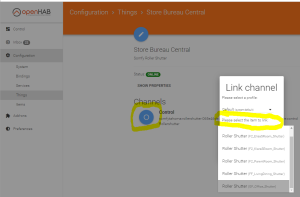
    Click on the “Roller Shutter” to configure it (For each “Thing”, when you configure it, you see one or several blue circles. Each one can be used to configure the links with the various features of the devices) :

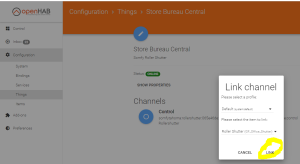
     In the case of a Somfy Roller Shutter, there is not a lot to configure. You can only select the “Item” to be used to control the “Roller Shutter” :

    Once selected, click on “Link” :

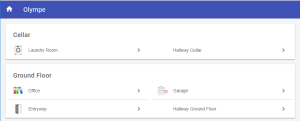
    Here above, I configured the link with a “Item” located in the Room “Office”. So, going to the “Basic UI” via the “Welcome page”, and opening the “Office” (member of the “Ground Floor”), you can now click on the arrows “Up” and “Down” next to the “Roller Shutter” to control it :

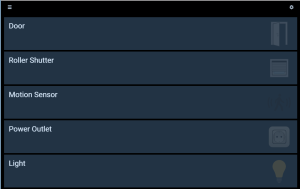
    You can also do it via the “HabPanel DashBoard” :

    Loading

  • Configure OpenHab 2

    Once OpenHab 2 installed on Synology, it can be configured with :

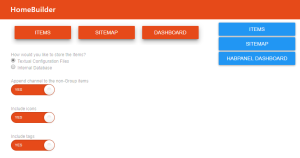
    • its “Home Builder”  : this screen let you generate “settings” describing your house and its content. Those settings can be saved into a DB or copied into config files.
    • its “Paper UI” : this screen let you add all your connected devices into openHab. Once added, they can be linked with the content of your house described with the “Home Builder”.

    Click to Read More

    The “Home Builder”

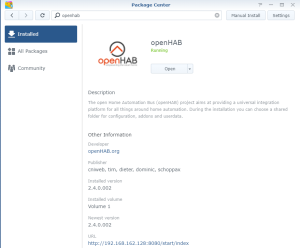
    Open the Package “openHAB” via the Package Center > Installed > OpenHAB and click on the “Url” at the bottom of the screen :

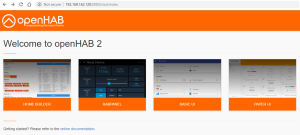
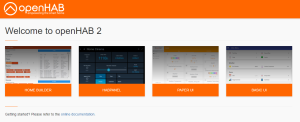
    A new tab should open with the “Welcome page” (To access it easily, simply type the http address of your Synology and the port 8080 or it https address and the port 8443 – or the ports you would have chosen during the installation of OpenHab)

    It the “Welcome page”, open the “Home Builder” :

    In that “Home Builder”, you will recreate your house, with the various Floors, Rooms per Floor and Items (Object) per Room. Later you will link each of those items with the actual “Things” to be controlled in your house (Those Things belonging to your IoT).

    First, type a name for your home.

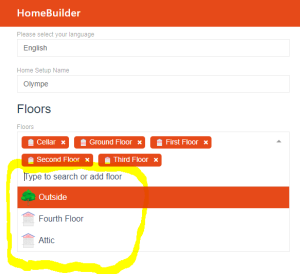
    Next select all the “Floors” existing in your home. If you want to add floors not available in the list, simply type their names. Here under,  the Floors “Cellar”,  “Ground  Floor”,  “First  Floor”, “Second Floor” and  “Third Floor” are already selected and I am going to pick Outside:

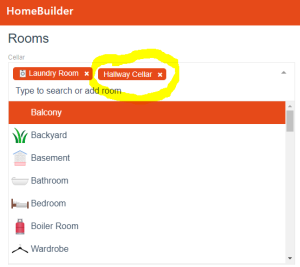
    Then, for each Floor added above, select the “Rooms” to be created. If you want to add a Rooms not available in the list, simply type their names. Here under, I already picked the Rooms “Laundry Room” and “Hallway Cellar” for the Floor “Cellar”, and I am going to pick the Room “Balcony” :

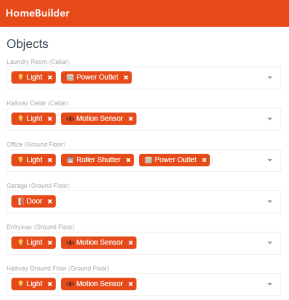
    Finally, for each Room added above, select the Items (Objects) to be created. You can here also create new Objects by typing their names. Here under, I added one “Light” and one “Power Outlet” in the “Laundry Room” on the Floor “Cellar”, one “Light” and one “Motion Sensor” in the “Hallway Cellar”  on the Floor “Cellar”, etc… :

    The settings of your home are now ready. They can be saved in an “internal DB” or in “text files”. I decided to save them in text files to be able to modify them manually more easily in the future.

    The “Items”

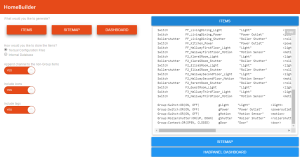
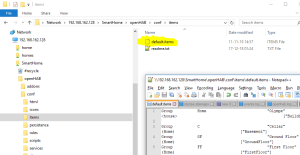
    To save the “Items” in a text file, click on the button “ITEMS”. The settings will be shown on the rights. Click on the floating button “Copy” in the top-right corner of the settings pane. Next, paste those settings in a file name “default.items” created (e.g. with notepad++) into the folder /openHAB/conf/items of the Shared Folder “SmartHome” :


    The “Sitemap”

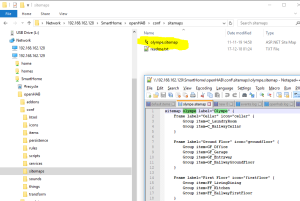
    Copy also the settings displayed when clicking on the button “SITEMAP” (These are the links between the Floors, the Rooms and the Items. They will be used to display a basic screen with all the items). Save them in a file named “xxx.sitemap” – were xxx is the name of your home, to be found in the settings of your sitemap (highlighted here under in green : “olympe”) :

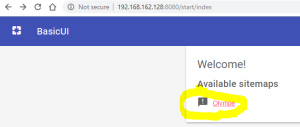
    To see the outcomes, go back the the “Welcome page” :

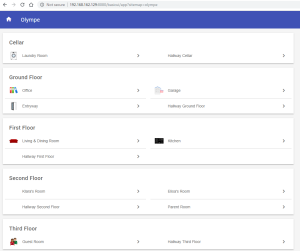
    And there, open the “Basic UI” where you will see your sitemap. Click on it to display your home :

    When your “Items” will be linked to “Things” (as explained later), you will be able to click on them here to control them.

    The “HabPanel DashBoard”

    The HabPanel DashBoard is a advanced UI which can be highly customized to display screens much more sexy than the basic UI (See various samples created by end-users here). You can even create custom dashboards specific for each of your interfaces : Tablet, mobile, PC screen, …

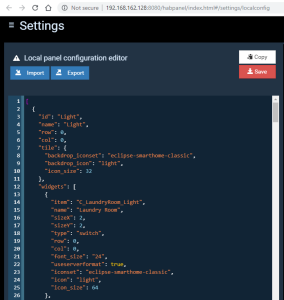
    To create a dummy dashboard, click on the button “DASHBOARD” and copy the settings going to be displayed on the right :

    You should see a link “”Paste the content in this config page” at the bottom of the settings.

    Open that link and paste the settings there :


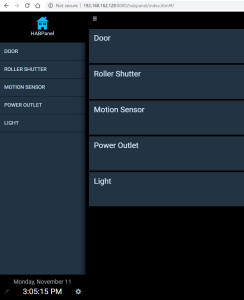
    Go back to the “Welcome page” and click on “HabPanel” to open it :

    I said that this is a dummy HabPanel because it is not useful at all IMO. You will for sure change it completely to offer a more relevant display.

    The “Paper UI”

    Now that you have described your house (Floors and Rooms) and its content (Items), it’s time to link the “Items” with “Things”, the actual devices to be controlled.

    Go to the “Welcome page” and select “Paper UI” :

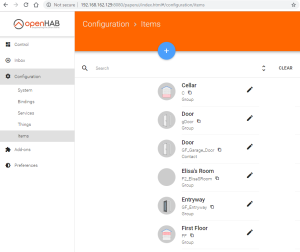
    NB.: you can review all your Items under the entry Configuration > Items of that “Paper UI” :

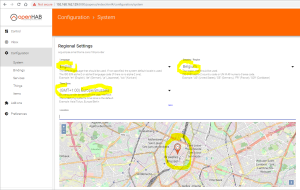
    NB.: you can also define your location under Configuration > System :


    The principle of the “Paper UI” is quite simple : you must install “Bindings” to be able to detect your devices. Ex.: a “Somfy Tahoma Binding” to detect your Somfy blinds, a “Hue Binding” to detect your Philips Hue bubbles, etc…

    Once a Binding installed, you can use it to add a “Thing” corresponding to the physical “Bridge” used to access your devices. Ex.: the Tahoma Bridge, the Hue Bridge, etc… 

    This Bridge (Thing) must be configured to become accessible by openHab (Usually its IP address, your login/password, etc…). Once this configuration done, all the devices accessible via the Bridge will be detected and added into the “Inbox”. If some devices are not detected automatically, they can sometimes be added manually.

    Each device available in the “Inbox” can be added as a “Thing” and linked with an “Item”. As soon as an “Item” is linked with a “Thing”, it can be used to control the related device. What can be done exactly (Switch On/Off, Open/Close) depends on the type of “Item”.

    The type of each Item (“itemtype”) is defined in the config file “default.items” created previously (See the documentation of OpenHab here for the details). As far as the Bindings are managed here via the “Paper UI”, each item follows this pattern:

    itemtype itemname "labeltext [stateformat]" <iconname> (group1, group2, ...) ["tag1", "tag2", ...]

    An itemtype, as you can see in the documentation, can be Switch, a Dimer, a Color, a Rollershutter, an Image, a Contact, a String, a Number, a Group, etc…

    • A Switch can be turned on or off
    • The value of a Dimer can be set between 0% to 100%,
    • A Rollershutter can be open or closed completely or partially,
    • An Image can be set with a picture,
    • A Contact can have the status Opened or Closed depending on the position of a related Door or Window,
    • A String can be assigned with text such as the name of a radio or a song currently played by a device,
    • A Number can be assigned by a sensor (temperature, illuminance, …). Depending on the type of Number, it must be noted “Number:Illuminance”, “Number:Temperature”, …
    • The itemtype Group is used for the Floors and the Rooms. But not only. They can also be defined with this pattern:
      Group[:itemtype[:function]] groupname ["labeltext"] [<iconname>] [(group1, group2, ...)]
    • A Group can be used to calculate a sum or an average of values. Depending on the computation, it must be noted “Group:Number:AVG” or “Group:Number:SUM”
    • A Group can also be used to control several “Items” together. In such a case, the status of the Group must be defined as a function (AND, OR, NAND, …)  of the status of each Item. Ex.: Group:Switch:OR(ON, OFF), 
      Group:Rollershutter:OR(UP, DOWN), Group:Contact:OR(OPEN, CLOSED), …

    See for concrete samples on https://www.beatificabytes.be/tag/openhab/

    Loading

  • Install OpenHAB 2 on Synology

    I was looking for one local and single platform to control all my connected devices : Philips Hue, Somfy blinds, Fibaro Wall Plugs, IFTTT scenario, … OpenHab 2 can do that once installed on a Synology!

    Click to Read More

    To install OpenHab 2 on Synology, I did use the official doc and this great tutorial from Thomas Schwarz.

    Prerequisites

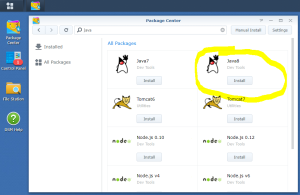
    First, install Java on your Synology. It is available as a package in the Package Center :

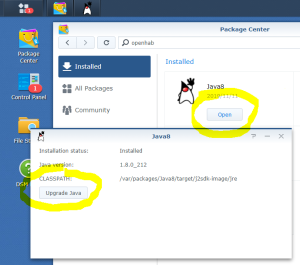
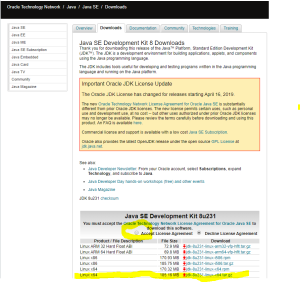
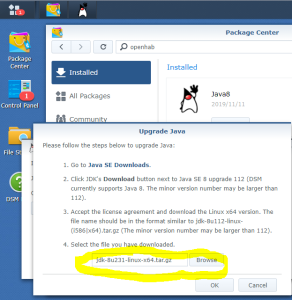
    Once installed, upgrade it to the latest version, to be downloaded directly from the Oracle web site :

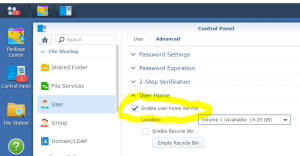
    Next, “Enable user home service” via the Menu > Control Panel > User :

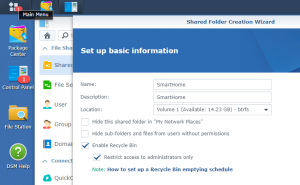
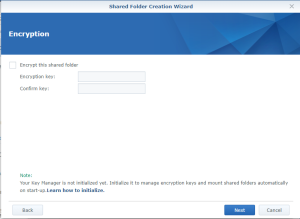
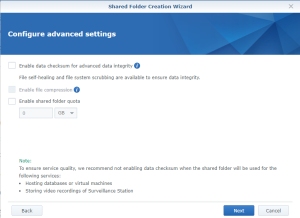
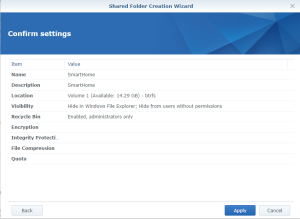
    Then, create a Shared Folder “SmartHome” via the Menu > Control Panel > Shared Folder (pay attention to the case!) :

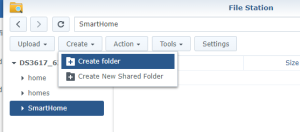
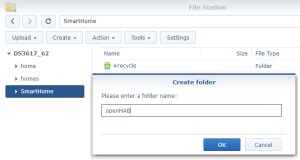
    And finally, via the Menu > File Station, create a subfolder “openHAB” in the Shared Folder SmartHome (pay attention to the case!):

    Create next the 3 following sufolders under ‘openHAB’ : ‘addons’, ‘conf’ and ‘userdata’. If you don’t create those subfolders, they will be created in ‘/var/packages/openHAB/target’ and you won’t be able to access them via the Shared Folder SmartHome. Hence, you won’t be able to edit the configuration files easily later…

    Installation

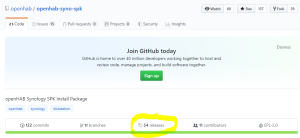
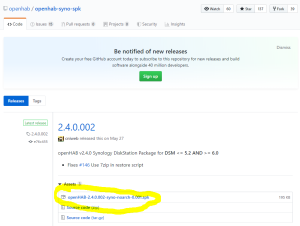
    Download now the package “OpenHab 2” from its GitHub Repository :

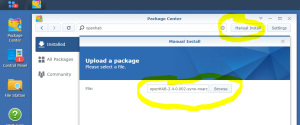
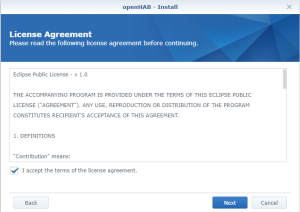
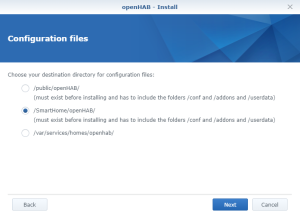
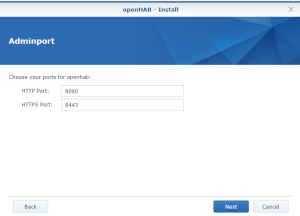
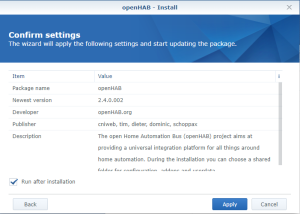
    And install it manually via the Package Center :Use the subfolder “openHAB” created on the Shared folder “SmartHome :

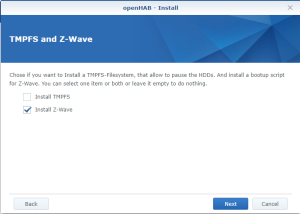
    I did install the Z-Wave module as I have a Z-Wave key installed on my Synology :

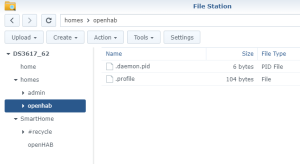
    Once installed, check that you see the following content in the folder “openHAB” of the Shared Folder “SmartHome” :You should also have the following content in the folder “openHab” of the Shared Folder “homes” :Finally, check that openHab is running fine and finalize the setup by opening the Package “openHAB” via the Package Center > Installed > OpenHAB. There, click on the “Url” at the bottom of the screen :

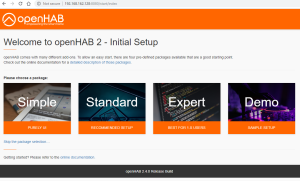
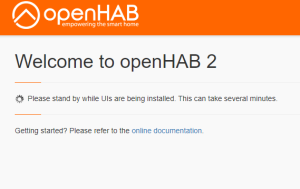
    A new tab should open with a page where you can select a pre-defined configuration. I am using the “Standard” one :

    Et voilà :

    You can now proceed further with the configuration, as explained here.

    Loading

    ,