Category: Synology

  • How to Add Multiple Hosts in phpMyAdmin on Synology

    On Google, one can easily find how to add servers in the list presented on the login page of phpMyAdmin. But the results don’t apply if you are using the package ‘phpMyAdmin’ for Synology. With that package, one must edit the synology_server_choice.json file.

    Click to Read More

    If you are connected on your NAS via a SSH console, the file to be edited is located in /var/services/web/phpMyAdmin/synology_server_choice.json.

    But you should also be able to access it from a Windows PC on \\<YourNAS>\web\phpMyAdmin\synology_server_choice.json on DSM 6.x or \\<YourNAS>\web_packages\phpmyadmin on DMS 7.x\synology_server_choice.json

    To add a server, simply duplicate the first statement of the json file, separated with a comma:

    [
    {"verbose":"Server 1","auth_type":"cookie","host":"localhost","connect_type":"socket","socket":"\/run\/mysqld\/mysqld10.sock","compress":false,"AllowNoPassword":false},
    {"verbose":"Server 2","auth_type":"cookie","host":"192.168.0.20","connect_type":"socket","socket":"\/run\/mysqld\/mysqld10.sock","compress":false,"AllowNoPassword":false},
    {"verbose":"Server 3","auth_type":"cookie","host":"192.168.0.100","connect_type":"socket","socket":"\/run\/mysqld\/mysqld10.sock","compress":false,"AllowNoPassword":false}
    ]

    Et voilà.

    Loading

  • Shrink a SHR Volume and remove disks from a Synology

    I wanted to try this since years… I finally did it successfully in a virtual Synology with an array of 5 disks in a single volume using btrfs (See here for VM and btfrs).

    Click to Read More

    This is a summary of my attempts. It is based on various posts found on the web:

    • https://superuser.com/questions/834100/shrink-raid-by-removing-a-disk
    • https://unix.stackexchange.com/questions/67702/how-to-reduce-volume-group-size-in-lvm#67707
    • https://blog.reboost.net/manually-removing-a-disk-from-a-synology-raid/

    Notice that xfs File System only supports “extend” and not “reduce”. So, I only tried with etx4 and btrfs.

    Although I used a DSM with a video station, a photo station, the web station and wordpress, this was not a “real case” (most of the data were still on the first sectors of the disks). So, I would really not recommend to do this on a real NAS !!!


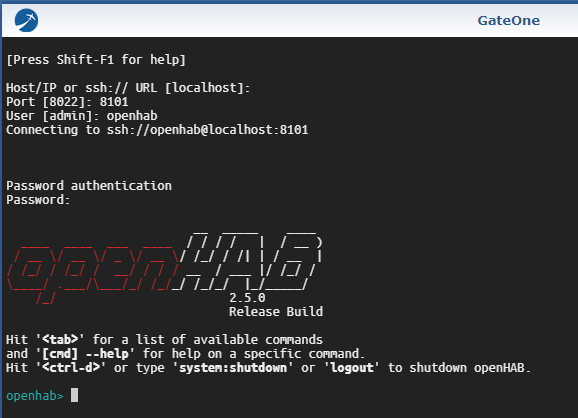
    Open a SSH console and enter root mode (sudo -i) to execute the commands here after.

    To identify which process is accessing a volume, we possibly need lsof (only if umount fails)

    Install OPKG : See https://www.beatificabytes.be/use-opkg-instead-of-ipkg-on-synology/

    Install lsof: /opt/bin/opkg install lsof

    Layout of the Physical Volume/Volume Group/ Logical Volumes :

    Find the Filesytem of /volume1:

    df -h

    Filesystem      Size  Used Avail Use% Mounted on
    /dev/md0        2.3G 1016M  1.2G  46% /
    none            2.0G     0  2.0G   0% /dev
    /tmp            2.0G  536K  2.0G   1% /tmp
    /run            2.0G  3.2M  2.0G   1% /run
    /dev/shm        2.0G  4.0K  2.0G   1% /dev/shm
    none            4.0K     0  4.0K   0% /sys/fs/cgroup
    cgmfs           100K     0  100K   0% /run/cgmanager/fs
    /dev/vg1000/lv   14G  3.2G  9.9G  25% /volume1

    • Show Physical Volume: pvdisplay
    • Show Volume Group: vgdisplay
    • Show Logical Volume: lvdisplay
    • Show Disks: fdisk -l

    Check if one can umount the volume1 :

    umount /dev/vg1000/lv

    umount: /volume1: target is busy
           (In some cases useful info about processes that
            use the device is found by lsof(8) or fuser(1).)

    Stop all services :

    synopkg onoffall stop

    /usr/syno/etc.defaults/rc.sysv/S80samba.sh stop

    /usr/syno/etc.defaults/rc.sysv/S83nfsd.sh stop

    /usr/syno/etc.defaults/rc.sysv/pgsql.sh stop

    /usr/syno/etc.defaults/rc.sysv/synomount.sh stop

    check which daemons are still using volume1 :

    /opt/bin/lsof | grep volume1

    COMMAND    PID  TID     USER  FD        TYPE                          DEVICE SIZE/OFF       NODE NAME
    s2s_daemo 10868         root    8u      REG               0,30    11264        608 /volume1/@S2S/event.sqlite
    synologan  8368         root  3u        REG               0,30       3072        654 /volume1/@database/synologan/alert.sqlite
    synoindex  8570         root  mem       REG               0,28                  7510 /volume1/@appstore/PhotoStation/usr/lib/libprotobuf-lite.so (path dev=0,30)
    synoindex  8570         root  mem       REG               0,28                 30143 /volume1/@appstore/VideoStation/lib/libdtvrpc.so (path dev=0,30)
    lsof       8585         root  txt       REG               0,30     147560      32161 /volume1/@entware-ng/opt/bin/lsof

    Kill those daemons :

    initctl list | grep synoindex

    synoindexcheckindexbit stop/waiting
    synoindexd start/running, process 11993

    killall synoindexd

    initctl list | grep synologan

    synologand start/running, process 8368

    killall synologand

    This is not working… synologand  restart immediately ☹

    chmod u-x /usr/syno/sbin/synologand

    killall synologand 

    killall s2s_daemon

    Shrink the ext2 or ext4 Filesystem :

    Only do the steps here under if using ext2 or ext4 instead of btfrs

    Resize the File System :

    umount -d /dev/vg1000/lv

    e2fsck -C 0 -f /dev/vg1000/lv

    e2fsck 1.42.6 (21-Sep-2012)
    Pass 1: Checking inodes, blocks, and sizes
    Pass 2: Checking directory structure
    Pass 3: Checking directory connectivity
    /lost+found not found. Create<y>? yes
    Pass 4: Checking reference counts
    Pass 5: Checking group summary information

    1.42.6-23739: ***** FILE SYSTEM WAS MODIFIED *****
    1.42.6-23739: 30742/889440 files (0.7% non-contiguous), 734048/3553280 blocks

    NB. If you want to stop e2fsck : killall -USR2 e2fsck
    NB. If you want to get a progress from e2fsck : killall -USR1 e2fsck

    resize2fs -p -M /dev/vg1000/lv

    resize2fs 1.42.6 (21-Sep-2012)
    Resizing the filesystem on /dev/vg1000/lv to 702838 (4k) blocks.
    The filesystem on /dev/vg1000/lv is now 702838 blocks long.

    If you see the error message here under, you possibly have another file system than ext2 or ext4 (E.g.: btfrs, …):

    resize2fs: Bad magic number in super-block while trying to open /dev/vg1000/lv
    Couldn't find valid filesystem superblock.

    If you have this error message although having ext2 or ext4, try: lvm lvchange –refresh /dev/vg1000/lv

    Check the results :

    mount /dev/vg1000/lv /volume1
    df -h

    Filesystem Size Used Avail Use% Mounted on
    /dev/md0 2.3G 968M 1.3G 44% /
    none 2.0G 0 2.0G 0% /dev
    /tmp 2.0G 512K 2.0G 1% /tmp
    /run 2.0G 3.0M 2.0G 1% /run
    /dev/shm 2.0G 4.0K 2.0G 1% /dev/shm
    none 4.0K 0 4.0K 0% /sys/fs/cgroup
    cgmfs 100K 0 100K 0% /run/cgmanager/fs
    /dev/vg1000/lv 2.6G 2.5G 0 100% /volume1

    Resize the Logical Volume :

    Resize the logical volume a bit larger than the file system (See the outcome of df -h above)

    umount /dev/vg1000/lv
    lvm lvreduce -L 2.7G /dev/vg1000/lv

    Rounding size to boundary between physical extents: 2.70 GiB
    WARNING: Reducing active logical volume to 2.70 GiB
    THIS MAY DESTROY YOUR DATA (filesystem etc.)
    Do you really want to reduce volume_1? [y/n]: y
    Size of logical volume vg1/volume_1 changed from 13.55 GiB (3470 extents) to 2.70 GiB (692 extents).
    Logical volume volume_1 successfully resized.

    NB: to get a progress, use : LV=/dev/vg1000/lv; echo `lvdisplay -v $LV | grep current | wc -l` `lvdisplay -v $LV | grep stale | wc -l` | awk ‘{printf ( “%3d percent Complete \n”, 100-$2/$1*100) }’

    Shrink a BTRFS File System :

    Only do the steps here under if using btfrs

    Resize the File System :

    btrfs filesystem resize 2.7G /volume1

    You can restore max size if required: btrfs filesystem resize max /volume1

    df -h

    Filesystem      Size  Used Avail Use% Mounted on
    /dev/vg1000/lv  2.6G 2.5G  1.4G  71% /volume1

    Resize the Logical Volume:

    umount -d /dev/vg1000/lv

    lvm lvreduce -L 2.7G /dev/vg1000/lv


    Next steps :

    The steps here under are both for ext2/ext4 and btfrs

    Resize the Physical Volume :

    Look for the device and if blocks must be moved:

    pvdisplay -C

    PV VG Fmt Attr PSize PFree
    /dev/md2 vg1 lvm2 a-- 13.57g 10.85g

    pvs -v –segments /dev/md2

        Using physical volume(s) on command line.
       Wiping cache of LVM-capable devices
    PV         VG     Fmt  Attr PSize  PFree   Start SSize LV   Start Type   PE Ranges
    /dev/md2   vg1000 lvm2 a--  14.00g 440.00m     0  3473 lv       0 linear /dev/md2:0-3472
    /dev/md2   vg1000 lvm2 a--  14.00g 440.00m  3473   110          0 free

    If there is a bloc trailing after the “free” part (I had not), use:

    lvm pvmove –alloc anywhere /dev/md2:xxx-xxx


    Resize the device a bit larger than the logical volume. If you don’t use a sufficient size, you will get an error message:

    pvresize –setphysicalvolumesize 2.7G /dev/md2

    /dev/md2: cannot resize to 691 extents as 695 are allocated.
    0 physical volume(s) resized / 1 physical volume(s) not resized

    pvresize –setphysicalvolumesize 2.8G /dev/md2

    Physical volume "/dev/md2" changed
    1 physical volume(s) resized / 0 physical volume(s) not resized


    Resize the array to use less disks:

    Reduce the array to use 3 disks (-n3)

    mdadm –grow -n3 /dev/md2

    mdadm: this change will reduce the size of the array.
          use --grow --array-size first to truncate array.
          e.g. mdadm --grow /dev/md2 --array-size 7114624

    You have first to reduce the array size.

    mdadm –grow /dev/md2 –array-size 7114624

    mdadm –grow -n3 /dev/md2 –backup-file /root/mdam.md2.backup &


    Monitor the progress of the resizing with:

    cat /proc/mdstat

    Personalities : [linear] [raid0] [raid1] [raid10] [raid6] [raid5] [raid4] [raidF1]md2 : active raid5 sdak5[4] sdaj5[3] sdai5[2] sdah5[1] sdag5[0]7114624 blocks super 1.2 level 5, 64k chunk, algorithm 2 [3/3] [UUU][======>..............] reshape = 31.7% (1129600/3557312) finish=0.3min speed=112960K/sec

    md1 : active raid1 sdak2[4] sdaj2[3] sdai2[2] sdah2[1] sdag2[0]2097088 blocks [12/5] [UUUUU_______]
    md0 : active raid1 sdak1[4] sdaj1[3] sdag1[0] sdah1[1] sdai1[2]2490176 blocks [12/5] [UUUUU_______]
    unused devices: <none>

    This can take a lot of time, but you can continue (I did wait 😉 )

    Finalize

    pvresize /dev/md2

    Physical volume "/dev/md2" changed
    1 physical volume(s) resized / 0 physical volume(s) not resized

    lvextend -l 100%FREE /dev/vg1000/lv

    Size of logical volume vg1/volume_1 changed from 2.70 GiB (692 extents) to 4.07 GiB (1041 extents).
    Logical volume volume_1 successfully resized.

    for btrfs:

    btrfs filesystem resize max /volume1

    for ext2/ext4:

    e2fsck -f /dev/vg1000/lv

    e2fsck 1.42.6 (21-Sep-2012)
    Pass 1: Checking inodes, blocks, and sizes

    Running additional passes to resolve blocks claimed by more than one inode...
    Pass 1B: Rescanning for multiply-claimed blocks
    Multiply-claimed block(s) in inode 13: 9221
    Pass 1C: Scanning directories for inodes with multiply-claimed blocks
    Pass 1D: Reconciling multiply-claimed blocks
    (There are 1 inodes containing multiply-claimed blocks.)

    File /@tmp (inode #13, mod time Sat May 23 23:00:14 2020)
    has 1 multiply-claimed block(s), shared with 0 file(s):
    Multiply-claimed blocks already reassigned or cloned.

    Pass 2: Checking directory structure
    Pass 3: Checking directory connectivity
    Pass 4: Checking reference counts
    Pass 5: Checking group summary information
    1.42.6-23739: 30742/179520 files (0.7% non-contiguous), 685397/720896 blocks

    Hope that no nodes are corrupted. Otherwise… well… accept to fix them.

    resize2fs /dev/vg1000/lv

    resize2fs 1.42.6 (21-Sep-2012)
    Resizing the filesystem on /dev/vg1/volume_1 to 1065984 (4k) blocks.
    The filesystem on /dev/vg1/volume_1 is now 1065984 blocks long.

    mount /dev/vg1000/lv /volume1

    Restart services:

    /usr/syno/etc.defaults/rc.sysv/S80samba.sh start

    /usr/syno/etc.defaults/rc.sysv/S83nfsd.sh start

    /usr/syno/etc.defaults/rc.sysv/pgsql.sh start

    /usr/syno/etc.defaults/rc.sysv/synomount.sh start


    synopkg onoffall start


    Remove the new  spare disks from the volume

    mdadm –detail –scan

    ARRAY /dev/md0 metadata=0.90 UUID=3b122d95:7efea8ff:3017a5a8:c86610be

    ARRAY /dev/md1 metadata=0.90 UUID=bd288153:d00708bf:3017a5a8:c86610be

    ARRAY /dev/md2 metadata=1.2 spares=2 name=DS3617_62:2 UUID=875ad2d6:956306b7:8c7ba96b:4287f6e6


    mdadm –detail /dev/md2

    /dev/md2:
           Version : 1.2
    Creation Time : Sat May 23 14:00:02 2020
        Raid Level : raid5
        Array Size : 7114624 (6.79 GiB 7.29 GB)
    Used Dev Size : 3557312 (3.39 GiB 3.64 GB)
      Raid Devices : 3
    Total Devices : 5
       Persistence : Superblock is persistent

        Update Time : Sat May 23 18:54:30 2020
             State : clean
    Active Devices : 3
    Working Devices : 5
    Failed Devices : 0
    Spare Devices : 2

             Layout : left-symmetric
        Chunk Size : 64K

               Name : DS3617_62:2  (local to host DS3617_62)
              UUID : 875ad2d6:956306b7:8c7ba96b:4287f6e6
            Events : 56

        Number   Major   Minor   RaidDevice State
          0       8        5        0      active sync   /dev/sda5
          1       8       37        1      active sync   /dev/sdc5
          2       8       53        2      active sync   /dev/sdd5
          3       8       69        -      spare   /dev/sde5
          4       8       85        -      spare   /dev/sdf5

    Here above, we see that sde5 and sdf5 are unused


    mdadm –fail /dev/md2 /dev/sde5

    mdadm: set /dev/sde5 faulty in /dev/md2

    mdadm –fail /dev/md2 /dev/sdf5

    mdadm: set /dev/sdf5 faulty in /dev/md2

    mdadm –remove /dev/md2 /dev/sde5

    mdadm: hot removed /dev/sde5 from /dev/md2

    mdadm –remove /dev/md2 /dev/sdf5

    mdadm: hot removed /dev/sdf5 from /dev/md2


    Et voilà.

    Loading

  • Add Support for SHR on Synology DS3617xs

    I wanted to test a procedure to shrink a SHR volume on a virtual Synology DS3617. Unfortunately, SHR is not an available option on the high end models of Synology. But it can be enabled easily 😉

    Click to Read More

    DS3617xs is a model where SHR is not enabled:

    0KenZdg.png

    To enable it:

    1. Open a SSH console and enter root mode.
    2. Edit the file  /etc.defaults/synoinfo.conf
    3. At the end, you should find: supportraidgroup=”yes”
    4. Comment that line with a #
    5. Next to it, add a new line with: support_syno_hybrid_raid=”yes”
    6. Reboot your Synology

    You can use “vi” to edit the file: sudo vi /etc.defaults/synoinfo.conf,

    • Press i or the insert key to make your modifications, then “Esc” to end the modifications.
    • After that type :x! to save and exit. Ot :q! to exit without saving.

    Et voilà, your DS3617xs offers now the option for SHR

    Loading

  • Backup Synology to Unraid

    The easiest way to backup a Synology NAS to Unraid Server is to use Hyper Backup on Synology and rsync on Unraid.

    Click to Read More

    First, enable rsync on your Unraid Server. It is preinstalled but not running as a daemon.

    Create a file /boot/custom/etc/rsyncd.conf with the following content:

    uid             = root
    gid             = root
    use chroot      = no
    max connections = 4
    pid file        = /var/run/rsyncd.pid
    timeout         = 600
    
    [backups]
        path = /mnt/user/backups
        comment = Backups
        read only = FALSE

    Here above:

    • The name “backups” between brackets will be visible as “backup module” from the Synology. You can create several blocks like this one.
    • The “path” (here /mnt/user/backups) must exist on your Unraid server (create this one as a shared folder, to be able to access the backup later from any PC)
    • Notice: the folder /boot should exist. But you could possibly have to create the subfolders /custom/etc


    Next, create a file /boot/custom/etc/rc.d/S20-init.rsyncd with the following content:

    #!/bin/bash
    
    if ! grep ^rsync /etc/inetd.conf > /dev/null ; then
    cat <<-EOF >> /etc/inetd.conf
    rsync   stream  tcp     nowait  root    /usr/sbin/tcpd  /usr/bin/rsync --daemon
    EOF
    read PID < /var/run/inetd.pid
    kill -1 ${PID}
    fi
    
    cp /boot/custom/etc/rsyncd.conf /etc/rsyncd.conf

    Finally, add the following line in the file /boot/config/go :

    #!/bin/bash
    bash /boot/custom/etc/rc.d/S20-init.rsyncd


    Now, either reboot or execute: bash /boot/custom/etc/rc.d/S20-init.rsyncd


    Go now on your Synology and open “Hyper Backup” to Create a new Data Backup Task:

    Select rsync as Backup Destination:

    And Create the backup Task with “rsync-compatible server” as Server Type:

    In order to access the backup and retrieve files from a PC, use the application “Hyper Backup Explorer” from Synology and open the backup file .bkpi located under \\<YourServer>\backups\<Yourbackup>.bkp\

    Loading

  • GateOne not opening anymore on Synology as being “unsafe” due to an expired certificate.

    There are many many reasons why sometimes GateOne does not open correctly on Synology. One of those is the expiration of your certificate.

    Click to Read More

    Notice that I am using my own packaging of GateOne for Synology (to be found here). In order to run properly, GateOne needs a copy of the certificates of your Synology. My Package is taking care of that during the installation. But if the system certificate expired or is renewed, GateOne will be in trouble as long as you don’t copy yourself the renewed certificate into its setup folder. The symptoms are:

    If you open GateOne in a DSM window, you get this: “The webpage at xxx might be temporarily down”

    If you open GateOne in a new window, you get this: “Your Connection is not private”, ERR_CERT_DATE_INVALID

    If you click on Advanced, you see that “this server could not prove it is xxx : its security certificate expired xxx days ago”:

    If you click on “Proceed to xxx (unsafe)”, GateOne will open in a new window. But if opened in the DSM, it will display the following messages:

    To solve this, if you didn’t renew your certificates yet, do it ! Go to the “Control Panel” > “Security” > “Certificate”. Select your certificates one by one and open the “Add” menu + select “Renew certificate”

    An alternative is to open a SSH console (See here) and execute the command: /usr/syno/sbin/syno-letsencrypt renew-all -vv

    Once the certificates are renewed, in a SSH console, execute:

    • cp /usr/syno/etc/certificate/system/default/cert.pem /var/packages/MODS_GateOne/target/ssl/cert.pem
    • cp /usr/syno/etc/certificate/system/default/privkey.pem /var/packages/MODS_GateOne/target/ssl/privkey.pem
    • /usr/syno/bin/synopkg restart MODS_GateOne

    Notice: the path “/var/packages/MODS_GateOne/target” is only valid for GateOne installed with my own package. The path of the official package is probably “/usr/local/gateone/ssl/”.

    Loading

  • List of sites hosting Synology Packages

    Here is my own list of Synology Packages Servers.

    Click to Read More

    This list is now reduced to the minimum as I use the following search engine for third-party packages to Synology’s DSM : https://search.synopackage.com/home

    Here are the servers not referenced by the search engine:


    Loading

  • Change password of OpenHab Console on Synology

    To change the OpenHab Console password, you have to edit the /userdata/etc/users.properties file.

    Click to Read More

    First, open a SSH console on your Synology as root (See here).

    Then, create a hashed password with the following command (replace ThisIsMyNewPassword with yours) :

    echo -n ThisIsMyNewPassword | sha256sum

    It should output someting like this :

    8fda687cf4127db96321c86907cbea99dabb0b13aa4bf7555655e1df45e41938 -

    If you installed openHab as explained here, the file to be edited is /openHAB/userdata/etc/users.properties in the share /SmartHome of your Synology. Copy the hashed string above (without the dash and the blank) between the {CRYPT} tags:

    # This file contains the users, groups, and roles.
    # Each line has to be of the format:
    #
    # USER=PASSWORD,ROLE1,ROLE2,...
    # USER=PASSWORD,_g_:GROUP,...
    # _g_\:GROUP=ROLE1,ROLE2,...
    #
    # All users, groups, and roles entered in this file are available after Karaf startup
    # and modifiable via the JAAS command group. These users reside in a JAAS domain
    # with the name "karaf".
    #
    openhab = {CRYPT}8fda687cf4127db96321c86907cbea99dabb0b13aa4bf7555655e1df45e41938{CRYPT},_g_:admingroup
    _g_\:admingroup = group,admin,manager,viewer,systembundles

    To test the new password, open a SSH console on openHab. As by default it may only be accessed from the localhost, the best option is to use GateOne (See here). Once logged in GateOne on your Synology, execute :

    ssh -p 8101 openhab@localhost

    You should be prompted to enter your password and, if correct, you will see:

    Type Ctrl-D to exit the openHab console.


    NB.: instead of logging in GateOne as admin, you can directly connect on openHab using the port ‘8101’ and the login ‘openhab’ in GateOne:

    Loading

    ,
  • Backup & Restore openHab 2.x on Synology

    In order to upgrade from openHab 2.4 to 2.5, I had to backup the configuration of openHab, uninstall the v2.4, install the v2.5 and restore the configuration.

    Click to Read More

    If you installed OpenHab as explained here, you can copy all the folders under /openHAB in the share /SmartHome of your Synology.

    OpenHAB 2.x currently has two different ways of setting up things:

    • Either through textual configuration (in /SmartHome/openHAB/conf folder) or
    • through the user interface which saves to a “jsonDB” database (in /SmartHome/openHAB/userdata folder).

    Both the textual configuration files and the database folders must be backuped (See here).

    OpenHab 2.x comes now with scripts to backup and restore its configuration and database. They are availabe in the folder /runtime/bin. You can access them via a SSH Console on your Synology, under /var/packages/openHAB/target/runtime/bin/ (equivalent to /volume1/@appstore/openHAB/runtime/bin)

    These scripts take care of backuping not only the files that you have manually edited in the folder /conf (items, things, scripts, …), but also everything configured via the paperUI or HABPanel and stored in the folder /userdata (habmin, jsondb,…)

    Attention, these scripts do not take care of:

    • backuping the jar files that you have installed manually. Ex.: in /addons
    • backuping the DB you would be using for, e.g., persistence, …
    • adding the openHAB user (‘openhab’) to the dialout and tty groups if you did this previously

    First, prepare your Synology

    1. Open a SSH console on your Synology as root (See here)
    2. Install the Synology Gear’s tools, required to have the command pgrep used by the restore script of openHab, typing the command :
      synogear install
    3. Modify the script ‘/runtime/bin/restore’ to replace unzip (not available anymore on Synology) by 7zip. Concretelly, replace:

    command -v unzip >/dev/null 2>&1 || {
    echo "'unzip' program was not found, please install it first." >&2
    exit 1
    }

    with

    command -v 7z >/dev/null 2>&1 || {
    echo "'7z' program was not found, please install it first." >&2
    exit 1
    }

    and 

    unzip -oq "$InputFile" -d "$TempDir" || {
    echo "Unable to unzip $InputFile, Aborting..." >&2
    exit 1
    }

    with

    7z x -y -o"$TempDir" "$InputFile" > /dev/null || {
    echo "Unable to unzip $InputFile, Aborting..." >&2
    exit 1
    }

    Next, use the following commands to backup your configurations:

    1. sudo -i
    2. cd /var/packages/openHAB/target
    3. synoservice –stop pkgctl-openHAB
    4. ./runtime/bin/backup
    5. synoservice –start pkgctl-openHAB

    You should see something like this as output:

    #########################################
    openHAB 2.x.x backup script
    #########################################

    Using '/volume1/@appstore/openHAB/conf' as conf folder...
    Using '/volume1/@appstore/openHAB/userdata' as userdata folder...
    Using '/volume1/@appstore/openHAB/runtime' as runtime folder...
    Using '/volume1/@appstore/openHAB/backups' as backup folder...
    Writing to '/volume1/@appstore/openHAB/backups/openhab2-backup-19_12_25-12_27_33.zip'...
    Making Temporary Directory if it is not already there
    Using /tmp/openhab2/backup as TempDir
    Copying configuration to temporary folder...
    Removing unnecessary files...
    Zipping folder...
    Removing temporary files...
    Success! Backup made in /volume1/@appstore/openHAB/backups/openhab2-backup-19_12_25-12_27_33.zip

    Before uninstalling openHab, if you intend to install a new version, copy the backup into a safe folder, like the tmp folder :

    cp /volume1/@appstore/openHAB/backups/openhab2-backup-19_12_25-12_27_33.zip /tmp/openhab2-backup.zip

    Finally, use the following commands to restore your configurations:

    1. sudo -i
    2. cd /var/packages/openHAB/target
    3. synoservice –stop pkgctl-openHAB
    4. ./runtime/bin/restore /tmp/openhab2-backup.zip
    5. synoservice –start pkgctl-openHAB

    You should see an output like this:

    ##########################################
    openHAB 2.x.x restore script
    ##########################################

    Using '/volume1/@appstore/openHAB/conf' as conf folder...
    Using '/volume1/@appstore/openHAB/userdata' as userdata folder...
    Making Temporary Directory
    Extracting zip file to temporary folder.

    Backup Information:
    -------------------
    Backup Version | 2.5.0 (You are on 2.4.0)
    Backup Timestamp | 19_12_25-12_27_33
    Config belongs to user | openhab
    from group | users

    Your current configuration will become owned by openhab:users.

    Any existing files with the same name will be replaced.
    Any file without a replacement will be deleted.

    Okay to Continue? [y/N]: y
    Moving system files in userdata to temporary folder
    Deleting old userdata folder...
    Restoring system files in userdata...
    Deleting old conf folder...
    Restoring openHAB with backup configuration...
    Deleting temporary files...
    Backup successfully restored!


    If opening openHab weg page immediatly, you will see that it’s restoring the UI:

    Please stand by while UIs are being installed. This can take several minutes.

    Once done, you will have access to your PaperUI, BasicUI, HabPanel, etc…

    Loading

    ,
  • Web Consoles to execute bash commands on Synology

    I am using two different Web Consoles to execute commands on my Synology : the Web Console of Nickolay Kovalev and GateOne.

    Click to Read More

    Such Web Consoles are a bit easier to launch than a ssh console via Putty (See here). They can be opened directly from the DSM of your Synology. Another advantage is that the Web Console is still valid (opened) when the PC goes to out of sleep/hibernation state.

    To use the Web Console of Nickolay Kovalev, install my Synology Package “MODS_Web_Console” available on my SSPKS server or on my GitHub

    It is very convenient to execute basic commands. But you can’t use it to run vi, ssh, and otehr commands which interact with the display, the keyboard, etc…

    To use the more advanced Web Console GateOne, install my Synology Package “MODS_GateOne” available on my SSPKS server or on my GitHub

    It is really powerful and secure. You can use it to open multiple ssh sessions, edit files with vi, etc…

    Loading

  • Basic Authentication in subfolders with nginx on Synology

    I am using nginx as default webserver on my Synology. Here is how to configure a login/password prompt on a subfolder of the WebStation.

    Click to Read More

    First, open a SSH console on your Synology and enter the root (See here)

    Notice that you cannot change the config file of nginx (/etc/nginx/nginx.conf). Even if you do so, your changes will be removed automatically. But in the config file of nginx, for the server listening on the port of your WebStation (port 80 by default), you can see it is loading extra config named www.*.conf under the folder /usr/syno/share/nginx/conf.d/

    include /usr/syno/share/nginx/conf.d/www.*.conf;

    So, go to that folder : cd /usr/syno/share/nginx/conf.d

    There, create a password file with your login and password

    Type : htpasswd -c -b .htpasswd YourLogin YourPassword

    the parameter -c is to create the file. Only use it if the file does not yet exist otherwise you will clean its current content!!

    Look at the content if the file: cat .htpasswd

    It should be similar to this: 

    YourLogin:$apr3$hUZ87.Mo$WUHtZHjtPWbBCD4jezDh72

    Now, create and edit a file name like : www.protected.conf (Ex.: using vi)

    Assuming that you want to protect a subfolder You/Sub/Folder existing in the root of your WebStation, you should theoretically this into www.protected.conf :

    location /Your/Sub/Folder {
    auth_basic “Any Prompt Message You Want”;
    auth_basic_user_file /usr/syno/share/nginx/conf.d/.htpasswd;
    }

    Next, you have to restart nginx with the command : nginx -s reload

    Or even better to be 100% sure: synoservicecfg –restart nginx


    But for some reason, this is not working on Synology (at least on mine ?!). It seems that the block location does not work without a modifier like = or ~

    It searched for hours why it was not working, without answer. 

    For example, I tested first that the following webpage was working fine on my NAS: http://MyNas/SubFolder/index.php

    Next, I edited the www.protected.conf with the following block before restarting nginx, deleting the cache ofh my browser and restarting my browser (THIS IS MANDATORY each time one changes the location):

    location /SubFolder/index.php {
    return 301 https://www.google.be/search;
    }

    But opening http://MyNas/SubFolder/index.php didn’t return me to Google.

    Next, I tried with :

    location = /SubFolder/index.php {
    return 301 https://www.google.be/search;
    }

    And this was working! So, I thought that the path used as location was possibly was incorrect. To see the path capture as location I tried next with 

    location ~ (/SubFolder/index.php) {
    return 301 http://Fake$1;
    }

    Opening now http://MyNas/SubFolder/index.php, I got the (unvailable) page  http://Fake/SubFolder/index.php

    So, the path /SubFolder/index.php was definitively correct. 

    I think that my directive is included before another one which overwrite it. Possibly this one, found in /etc/nginx.nginx.conf:

    location / {
    rewrite ^ / redirect;
    }

    So, I have no choice but use the modifier = (exact match) or ~ (matching a regular expression). Unfortunately, doing so, another problem arise… the php pages are not reachable anymore 🙁

    If you look at the log file of nginx: cat /var/log/nginx/error.log

    You see:

    2019/11/30 21:22:12 [error] 25657#25657: *50 open() “/etc/nginx/html/SubFolder/index.php” failed (2: No such file or directory), client: 192.168.0.1, server: _, request: “GET /SubFolder/index.php HTTP/1.1”, host: “MyNas”

    This is because nginx is using its default root folder /etc/nginx/html/ instead of inheriting the one define for the WebStation.

    The solution is to simply specify the root in the location block : root /var/services/web;

    But now, instead of being executed, the php script is downloaded.. Harg !

    The following location works, by redefining the execution of the php page:

    location = /SubFolder/index.php {
      root /var/services/web;

      try_files $uri /index.php =404;
      fastcgi_pass unix:/var/run/php-fpm/php73-fpm.sock;
      fastcgi_index index.php;
      include fastcgi.conf;
    }

    Pay attention, corrupting the config of nginx will make you DSM unable to run anymore ! Always check that your config is correct with the command : nginx -t


    Ok, now, to handle both folders and php pages, one can use this variant of the location above:

    location ~ /SubFolder/ {
      root /var/services/web;

      location ~ \.php$ {
        try_files $uri /index.php =404;
        fastcgi_pass unix:/var/run/php-fpm/php73-fpm.sock;
        fastcgi_index index.php;
        include fastcgi.conf;
      }
    }

    In the sub-location above, use php73-fpm.sock, php70-fpm.sock, php50-fpm.sock, etc… according to the version of php used by default with your nginx in your WebStation !

    This is more or less working fine… I still have issues as some server variables are not passed to the php pages… But it’s working enough for my purpose. We are now only missing the basic authentication !!! Here is the final location block:

    location ~ /You/Sub/Folder/ {
      root /var/services/web;

      location ~ \.php$ {
        try_files $uri /index.php =404;
        fastcgi_pass unix:/var/run/php-fpm/php73-fpm.sock;
        fastcgi_index index.php;
        include fastcgi.conf;
      }

      auth_basic “Any Prompt Message You Want”;
      auth_basic_user_file /usr/syno/share/nginx/conf.d/.htpasswd;

    }

    Once in place, nginx restarted, your browser cleaned and restarted too, you finally got the prompt for your login and password.

    If you type a wrong login or password, you could see the error in the nginx log file: cat /var/log/nginx/error.log

    2019/11/30 17:51:47 [error] 12258#12258: *145 user “mystery” was not found in “/usr/syno/share/nginx/conf.d/.htpasswd”, client: 192.168.0.1, server: _, request: “GET /err/You/Sub/Folder/ HTTP/1.1”, host: “MyNas”

    2019/11/30 17:59:52 [error] 20130#20130: *3 user “mystery”: password mismatch, client: 192.168.0.1, server: _, request: “GET /You/Sub/Folder/ HTTP/1.1”, host: “MyNas”

    Et voilà… Not perfect, not clear why it’s not wokring out of the box as documented here… But 

    Loading