• JDownloader and Filebot on Synology

    I never spent time trying to run JDownloader and Filebot on my Synology. It’s however a must-have for those who download e.g. series, so I decided to give it a try. And it rocks !

    Click to Read More

    First, you need Java installed on your NAS. Currently Jave SE 7 for JDownloader and Java SE 8 for Filebot.  [EDIT 2017] Both JDownloader and Filebot are now using Java SE 8.

    Java 7

    1. Install the Package “Java Manager” from Oracle available via “Package Center” > “Utilities”
    2. Run that “Java Manager” and click on the button “Install Java”
    3. Follow the instructions:
      1. Download the .jar.gz file for Java SE 7 (Ex.: version 1.7.0_79 for my DS713+ is jdk-7u79-linux-i586.tar.gz) and
      2. Browser to pick that jar within the Java Manager and click OK

    Java 8

    1. Open the “Settings” of the “Package Center” and go to the tab “Package Sources”.
    2. Add a new entry named “Filebot” with the following url: https://get.filebot.net/syno/
    3. Go next to the section “Community” and install the Package “Unofficial Java Installer” (If you don’t see it, click the Refresh button in “Package Center” or close and reopen it)
      1. Do not use the official Package “Java8 (Development Toos)” located in the “All Packages” section or the “Java SE Embedded 8 (Oracle)” located in the “Community” section. Filebot can’t find them…

    Filebot

    It comes with several packages, such as those for its web interface, Filebot node and node.js, and Filebot itself. Install and configure them as explained here. Do not forget to Trust “Any Publisher” in the Package Center > Settings > General Tab.

    My.JDownloader.Org

    You need a free account on my.jdownloader.org to be configured in jdownloader (see here after).

    JDownloader 2.0

    The idea is basically very simple:

    1. Install JDownloader on your computer, configure it to run “unattended”
      1. Press Ctrl-P or Go to the menu Settings > Settings
      2. Click the icon “User Interface” and under the “Window Management” section, check “silent mode”,
      3. Click the icon “Bubble Notify” and set Show “Bubbles if…” = “Never”,
      4. Disable the icon “Tray Icon”.
    2. Add your accounts if any
      1. Click the icon “Account Manager”, etc…
    3. Configure your MyJDownloader Account created previously
      1. Press Ctrl-M or Go to the menu Settings > MyJDownloader, fill the MyAccount under “Setup & Login”
      2. Define also a Device Name (Ex.: the Nickname of your NAS 😉 )
    4. Exit JDownloader.
    5. Copy next the installation folder (C:\Users\<User>\AppData\Local\JDownloader 2.0) on your NAS as described here.
      1. jdownloader will be in  /volume1/@appstore/jdownloader
    6. Once installed, go to my.jdownloader.org to configure it.

    Very useful detailed information (in Italian) are also available here: http://www.synologyitalia.com/guide-tips/installare-jdownloader-2-0-beta-su-nas-synology-t5796.html)

    Trick:

    • Copy only the folders: Captchas, cfg, extensions, java, jd, libs, licences, logs, themes, tmp, tools, translations, update
    • Copy only the following files from the root: build.json, Core.jar, JDownloader.jar, license.txt
    • You will need to create a file S99jdownloader.sh. Do it with the command “touch” in a telnet/ssh session (or via the web console) and not with notepad on your PC, as it would not have the right encoding to be used on Linux.
    • Set the security on those folders and files (chmod 777 /volume1/@appstore/jdownloader).
    • The settings related to the access via my.jdownloader.org are located in /cfg/org.jdownloader.api.myjdownloader.MyJDownloaderSettings.json
      • among others, you may change in there the name of the device (i.e.: set the name of your NAS instead of the PC from which you copied the files)
    • If jdownloader  is not started, in a telnet/ssh session
      • try first: sh /usr/local/etc/rc.d/S99jdownloader.sh start
      • and try next, in the /volume1/@appstore/jdownloader folder: java -Djava.awt.headless=true -jar JDownloader.jar
    • Pay attention: the download path may not be like \\YourNas\OneShare (or \\\\YourNas\\OneShare).
      • It would result in storing downloaded files in /volume1/@appstore/jdownloader/\\YourNas\OneShare/
      • It must be like /volume1/OneShare
      • You may configure this in the “Settings” of my.jdownloader.org

    I did change a bit the file S99jdownloader.sh to get more info:

    [shell]
    
    #!/bin/sh
    #
    # Startup script for jdownloader2
    #
    # Stop myself if running
    PIDFILE=/volume1/<some log share>/S99jdownloader.pid
    #
    start() {
    sleep 1
    if [ -f ${PIDFILE} ];
    then
    echo "JDownloader is already running"
    exit 1
    else
    nohup java -Djava.awt.headless=true -jar /volume1/@appstore/jdownloader/JDownloader.jar > /dev/null &
    # write pidfile
    echo $! > $PIDFILE
    echo "JDownloader started within process" `cat ${PIDFILE}`
    fi
    }
    #
    stop() {
    if [ -f ${PIDFILE} ];
    then
    kill `cat ${PIDFILE}`
    echo "JDownloader running within process" `cat ${PIDFILE}` "has been stopped"
    # remove pidfile
    rm -f $PIDFILE
    else
    echo "JDownloader is not running"
    exit 1
    fi
    }
    #
    case "$1" in
    start)
    start
    ;;
    stop)
    stop
    ;;
    restart)
    stop
    sleep 1
    start
    ;;
    *)
    echo "Usage: $0 (start|stop|restart)"
    exit 1
    ;;
    esac
    # End
    
    [/shell]

    To troubleshot filebot, look at the “log” file in “/usr/local/filebot-node/data”

    Think about configuring your OpenSubtitles account by executing as root (in a Putty console with sudo -i): filebot -script fn:configure

    [Updated on 25/09/2017]

    Loading

  • Netgear JGS524E’s 802.3ad Link Aggregation And Synology

    Long time ago, I wanted to configured a Bond on my Synology to benefit the LAG feature of my Switch JGS524E (Netgear ProSafe® Plus). Unfortunately, it didn’t work. Being lazy, I never investigated further. It’s now done: I wrote to Netgear and they confirmed that only Static LAG is supported on JGS524E. Dynamic LAG, required to use Link Aggregation with Synology, is not.

    Click to Read More

    Concretely, Synology says in documentation that it requires IEEE 802.3ad (Dynamic) Link Aggregation (LACP, 802.1AX). While Netgear told me that the Switch ProSafe® Plus only supports static LAG. And that’s how I learned that static LAG is not LACP (Link Aggregation Control Protocol) :/

    Conclusion I did configure my Synology to use Adaptive Load Balancing and I did disable LAG on my Netgear…

    Loading

  • Audio track not available in Netflix on Chromecast


    Although a French audio track was available for my movie, in Netflix, on my mobile (Android), it was not anymore once I started to cast that movie on my chromecast.

    Click to Read More

    NB: French audio track are available here in Belgium as in France.

    The really weird thing is that this issue wasn’t occuring for all the movies and series. I noticed it for the serie “Merlin”, season 5. At the same time it was running fine for the serie “The 4400” for example (French audio track was well available in Netflix both on my mobile and on Chromecast for those).

    To fix it, I started the App Chromecast and went into the tab Devices. In the Settings of my Chromecast, I set French as language.

    If the problem comes back, using the same App Chromecast, reboot the device. It’s a command available in the menu of the device’s Settings. Next, start the movie with the right audio track on your mobile and then cast it to your Chromecast.

    Et voilà.

    Loading

  • Lego Harry Potter years 1-4: crashing when starting

    I just installed Lego: Harry Potter, Years 1-4 on my PC and it crashed immediately when starting, before displaying any screen…

    Root cause: Advanced Speaker Properties’s default format set to Studio Quality.

    Solution: set maximum DVD Quality (16bit, 48000 Hz).

    Loading

  • Netflix Sound continuously interrupting for 0.5s on Samsung TV

    Since a few weeks, when kids watch Netflix on our Samsung TV, the sound is continuously interrupting for an half second (I would say about every 60 seconds although something more frequently). I did fix it by switching from Audio Format “Dolby Digital” to “DTS Neo 2:5”.

    Click to Read More

    I noticed that the issue was not occurring when using TV’s built-in speakers. It was only occurring when using my Sound Bar Yamaha YSP3300 as audio output, and with some movies. The sound-bar had short term pauses (< 1 sec) in sound every once in a while.

    Googling for similar issues, I found that Dolby Digital was not well supported by the combination Samsung/SmartHub/Netflix/Soundbar/5.1 movies…

    • http://www.cnet.com/forums/discussions/samsung-soundbar-skips-audio-when-streaming-netflix-601070/
    • https://help.netflix.com/en/node/24846
    • http://www.myce.com/news/netflix-removes-dolby-digital-5-1-supports-from-apps-for-samsung-tvs-73052/

    So, I did change the audio format via TV’s Menu > Sound > Additional Parameters > Audio

    Et voilà 😉

    NB: it works both with DTS Neo and PCM…

    Loading

  • Smart Apps don’t run, update or install anymore on Samsung TV

    Yesterday, I discovered that Plex, DS Video and a few other Apps didn’t run anymore on my Samsung Smart TV. I was also unable to install new Apps. After looking for solutions, I finally decided to reset the TV. It solved the problem.

    Click to Read More

    Most of the Apps installed (except Youtube and Netflix) refused to start. Trying to start an App only resulted in a spinning wheel… spinning for minutes… the TV finally exiting the Smart Hub without having opened the App.

    I tried to uninstall some of the Apps and reinstall them next. But it appeared that it was impossible to install any new or previously installed Apps.

    I was also unable to update installed Apps although an update was available.

    However, network connection was fine (I did use the diagnostic menu of the TV to check it).

    Finally, I decided to reinitialize the TV, also using the diagnostic menu. During the reconfiguration, the TV got an update of its system. After the reconfiguration, all preinstalled Apps appeared to work fine. And I was also able to install new Apps and run them.

    NB.: Maybe updating the TV system without doing a full reset would have been enough to solve the problem…

    Loading

  • Projector losing Raspberry Pi 2’s HDMI signal

    When I am watching a movie played with RasPlex (on my Raspberry Pi 2), it happens from time to time (possibly several times during a movie) that my projector loses the HDMI signal. The signal comes back quite immediately but this is a real annoyance. I solved the problem by boosting the HDMI signal in Raspberry Pi 2’s config file.

    Click to Read More

    I had no issue when playing a movie with my PC or with my ChromeCast, both of them being however connected on the same home cinema amplifier (a Yamaha HTR-4067) as the Raspberry PI 2 and, from there, on the projector (a Benq W1070+) via a long HDMI cable.

    The problem became especially unsupportable with 3D movies as not only the signal was lost, but also the projector was coming back in 2D mode. So, I had to set it back in 3D when the signal was recovered.

    It was sometimes mentioned on various blogs or forums that the problem could have been with the HDMI cable, with the power supply of the Raspberry Pi 2, with the HDMI port of the amplifier, … But I found the true solution here: boost the HDMI signal in the config file of the Raspberry Pi 2.

    While already being in the config file to solve the problem, I took the opportunity to also overclock a bit the Raspberry as documented here. And finally, as I noticed that there was no specific memory size set for the GPU on my Raspberry, which has 1Gb Ram, if fixed that too. It seems to me that the config file used by RasPlex is not fully optimized for the Raspberry Pi 2.

    To edit the “config.txt” file, I simply put the SD card of the Raspberry Pi 2 into my Windows PC and opened that file with Notepad++ (it’s located on the root of the card). I ended with a config file like this one (changes are in bold):

    #########################################################################
    # This file is part of OpenELEC – http://www.openelec.tv
    # Copyright (C) 2009-2012 Stephan Raue (stephan@openelec.tv)
    # Inspired and partly copied from:
    # http://youresuchageek.blogspot.fr/2012/09/howto-raspberry-pi-openelec-on.html
    #
    # This Program is free software; you can redistribute it and/or modify
    # it under the terms of the GNU General Public License as published by
    # the Free Software Foundation; either version 2, or (at your option)
    # any later version.
    #
    # This Program is distributed in the hope that it will be useful,
    # but WITHOUT ANY WARRANTY; without even the implied warranty of
    # MERCHANTABILITY or FITNESS FOR A PARTICULAR PURPOSE. See the
    # GNU General Public License for more details.
    #
    # You should have received a copy of the GNU General Public License
    # along with OpenELEC.tv; see the file COPYING. If not, write to
    # the Free Software Foundation, 51 Franklin Street, Suite 500, Boston, MA 02110, USA.
    # http://www.gnu.org/copyleft/gpl.html
    #################################################################
    # Bootloader configuration – config.txt
    #################################################################

    #################################################################
    # Memory (System/GPU configuration )
    #################################################################

    # default GPU memory split (do not change if you do not know what you are doing)
    gpu_mem=128

    # SDRAM size based GPU memory split, uncomment and setup to override ‘gpu_mem’
    gpu_mem_256=64
    gpu_mem_512=128
    gpu_mem_1024=256

    #################################################################
    # Overclocking settings
    # WARNING: Do not change/enable if you do not know what you are doing!
    # The System may become unstable or you can have data corruption or
    # you can loose your warranty if you set wrong settings
    #
    # please read: http://elinux.org/RPi_config.txt#Overclocking_configuration
    #################################################################

    # Overclock mode settings.
    #
    # default recommended values are: arm_freq | core_freq | sdram_freq | over_voltage
    # no overclocking : 700 | 250 | 400 | 0
    # mode ‘Modest’ : 800 | 300 | 400 | 0
    # mode ‘Medium’ : 900 | 333 | 450 | 2
    # mode ‘High’ : 950 | 450 | 450 | 6
    # mode ‘Turbo’ : 1000 | 500 | 500 | 6

    #arm_freq=900
    core_freq=500
    sdram_freq=500
    over_voltage=2

    # set to ‘force_turbo=1’ to disable dynamic overclocking (you can lose your warranty!)
    force_turbo=0

    # If you have any data corruption using Turbo Mode and overclocking
    # try with this setting uncommented
    # If this still fails, try to use Medium mode without “over_voltage=2”
    # If it ultimately keeps failing, forget about this until it gets fixed
    # Use a more conservative mode that will works fine in any cases:
    # initial_turbo=30

    #################################################################
    # Overscan settings
    #################################################################

    # Make display smaller to stop text spilling off the screen
    # see also http://www.raspberrypi.org/phpBB3/viewtopic.php?f=67&t=15700
    # overscan_scale=1
    # disable_overscan=1

    # Adapt overscan values to your needs
    # overscan_left=57
    # overscan_right=59
    # overscan_top=20
    # overscan_bottom=20

    #################################################################
    # various settings see also: http://elinux.org/RPi_config.txt
    #################################################################

    # Force HDMI even if unplugged or powered off
    # hdmi_force_hotplug=1

    # Uncomment to force a console size. By default it will be display’s size minus
    # overscan.
    # framebuffer_width=1280
    # framebuffer_height=720

    # Uncomment to force a specific HDMI mode (this will force VGA).
    # hdmi_group=1
    # hdmi_mode=1

    # Uncomment to force an HDMI mode rather than DVI. This can make audio work in
    # DMT (computer monitor) modes.
    # hdmi_drive=2

    # Uncomment to increase signal to HDMI, if you have interference, blanking, or
    # no display. Max value = 7
    config_hdmi_boost=4

    # Uncomment for composite PAL
    # sdtv_mode=2

    # Uncomment to overclock the ARM. 700 MHz is the default.
    # arm_freq=800

    #################################################################
    # License keys to enable GPU hardware decoding for various codecs
    # to obtain keys visit the shop at http://www.raspberrypi.com
    #################################################################

    # decode_MPG2=0x00000000
    # decode_WVC1=0x00000000
    # decode_DTS=0x00000000
    # decode_DDP=0x00000000

    #################################################################
    #
    # >>>>>>>> RasPlex default settings override <<<<<<<<<
    #
    #################################################################

    hdmi_force_hotplug=1
    hdmi_drive=2
    gpu_mem_256=64
    gpu_mem_512=256
    gpu_mem_1024=256
    dtoverlay=lirc-rpi
    #################################################################
    # End of default configuration
    # all values below this line were inserted from config.txt.bk (your old config)
    # and can be merged with the above values
    #################################################################

    Loading

  • Put Windows PC’s display to sleep immediately

    Wizmo
    Wizmo

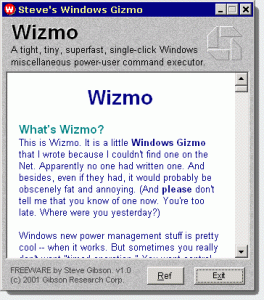
    When I watch a movie, I like to be in the complete dark… But if my PC is running, the screens are sources of light… Here is how to create a keyboard shortcut turning the screens off immediately, using “Wizmo”.

    Click to Read More

    As I am lazy and don’t want to turn off the monitors manually using their power button, I looked for a solution to put the screens to sleep immediately – without waiting for the screen saver to turn off the display as configured in the Control Panel > Power Options > Plan Settings… – using a keyboard shortcut.

    I found a a first solution based on “NirCmd“: Download it and create a desktop shortcut (assigned with a keyboard shortcut) to: nircmd.exe cmdwait 1000 monitor off

    That solution didn’t work fine for me. Indeed, after a few minutes, the screens were always turning back on magically… I didn’t find for sure the reason why, but it could be that my wireless mouse (Logitech) is not 100% quite although untouched…

    So, I looked for an alternative and found “Wizmo“. Download it and use it in a desktop shortcut (also assigned with a keyboard shortcut) to: wizmo.exe monoff shake=99

    This will eliminate the minor mouse “shake” that a wireless mouse seems to have and which is turning the monitor back on, while allowing you to still wiggle the mouse a bit to turn your monitor back on. (Notice: Wizmo won’t run if you copy it into %WinDir%\System32 !)

    Loading

  • Play a movie on multiple devices via WiFi-Direct

    When going to travel for hours by car with my kids, I usually copy some cartoons on their tablets before leaving. A question which arose recently was: how to play a movie from one tablet on the others, while there is no network in the car. Answer: using BubbleUPnP and Wifi-Direct.

    Click to Read More

    The question arose as I forgot once to copy cartoons on one of the tablets. Being in the car, I had no Wi-Fi network to connect the devices (no wireless router). And I didn’t want to use a mobile data connection as, being in a foreign country, the cost would have been excessive. So I had to find another solution.

    Looking on internet how to share media or files between two devices without Wi-Fi access point, I found that the modern way to go was: wifi-direct.

    Connecting devices via wifi-direct was easy as natively supported by Android, as well as iOS (one can find many how-to on internet). But next, how to access the media on other devices was more tricky.

    Usually, on mobile devices, I am using:

    • Plex connected via internet to play media from my NAS.
    • Plex to play media synced locally on the device.
    • Plex to play media synced on another device with Plex «advertised» on the LAN, by that device, as a server (see settings of Plex on the mobile device).
    • Archos Video to play media available locally (internal or external strorage) or via FTP, SMB shares or UPnP.
    • Possibly MX Player to play media while directly browsing the storage of the device.

    I also used to play media via UPnP with MediaHouse as, just like Plex and Archos Video, it is managing libraries of movies with metadata automatically fetched from internet. But that was before getting support for UPnP within Archos Video.

    As Archos Video and Plex are IMO, the very best apps to manage libraries of movies, my hope was to use them. Unfortunately, none of them was able to access media on the other devices using Wi-Fi direct… Plex didn’t see the Plex servers running on the other devices, and Archos Video didn’t even display any menu to access media via network. I think that none of them was aware there was actually a network (WLAN Direct).

    As I read that UPnP over Wi-Fi direct was very well supported (it’s now a standard), I thought that a solution could be to use an upnp server/client. My favorite being BubbleUPnP, I gave it a try. And good news, it works like a charm. I was able to play the same cartoon simultaneously on three devices without any hiccup (with MX Video as a player).

    That being said, I wrote to the developer of Archos Video and on the Plex forum to ask if playing video with their app via wifi Direct was actually supported (with a trick) or would be soon or later…

    Loading

  • DNS name resolution not working anymore after Package update

    After updating my Synology with the latest version of the DNS Server, this one was not resolving my domain names anymore. I had to reset to “resolution service” to solve that issue.

    Click to Read More

    To access my blog, hosted on my NAS, from my intranet but using its public domain name, I had to define the same domain name on my DNS Server, with A records pointing to the NAS’ IP… (see details here).

    When my DNS Server does not run anymore, trying to access my blog from my intranet, using its domain name, I get the web page of my ADSL Modem. Is IP address is indeed the one obtained when resolving my domain name using a public DNS Server.

    To check if my DNS Server runs fine, I simply had to run a dos cmd prompt and type ping www.beatificabytes.be. If I get the local IP of my NAS, it works fine. If I get the public IP of my ADSL modem, there is something wrong…

    It’s not the first time that I have this issue after updating my DSM or the DNS Server. But each time, the solution is the same: I have to uncheck and recheck the options “Enable resolution services” in my Synology’s “Control Panel > DNS Server > Resolution” settings.

    NB.: I have next to reboot my mobile devices. on PC, possibly execute “ipconfig /release” and then “ipconfig /renew” in a command prompt.

    Loading

Tags


Acer iDea 510 AirPlay Android Backup DD-WRT DNS DS209+ DS713+ DS1815+ FlexRaid Galaxy Galaxy S2 Galaxy S7 Google Assistant Google Home HTPC Kies MCE MySQL Nabi 2 Nvidia TV Shield One Plus One OpenHab Outlook Philips Hue Plex RAID Raspberry PI Remote Desktop Root Access Samsung Scripts Synology Team Build Visual Studio VMWare Wi-Fi Windows Windows 8 Windows 8.1 Windows 10 Windows Server 2012 XBMC Xpenology ZigBee

Categories


Archives