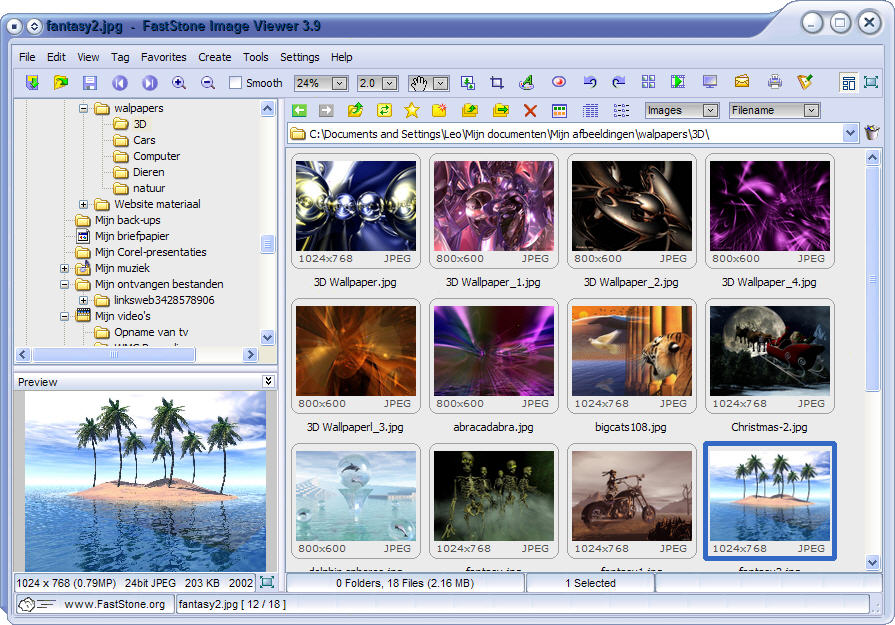
FastStone is from far my favorite Image Browser (since ACDSee started to become a monster pointlessly full over overkill features). It’s also a Freeware for non-commercial use.
Click to Read MoreClick to Close
As an Image Browser, FastStone is really light and fast while supporting many graphic formats, including obvious ones (gif, jpeg, png, pcx, tiff) but also ico, camera raw files, …
It comes with some other small pieces of software that I use each time I transfer photos from my camera to my NAS.
An ultra light and quick Image Viewer. I like this one as it opens in seconds (full screen or windowed, as configured) when double clicking an image in Windows Explorer. Next, moving the mouse to screen edges, menu appears with the most common actions such as cropping, resizing, opening the image with an external tools (ex.: Paint.Net :)), …
The purpose of this page is to keep track of all the programs I like, most of them being freewares.
Click to Read MoreClick to Close
Indeed, when re/installing a PC, I usually hardly remember the exact name of some tools I only use twice a year or “silent” services installed once years ago; ex.: Image Duplicate FInder, Software KVM, …
My criteria to adopt a software is quite simple: it must help me (or my computer) to be more efficient and productive. And I observed that such a software match the following acronyms:
KISS: It must be very easy to use/understand (also for non IT users).
I am not afraid of command lines but prefer obviously user-friendly interfaces.
YAGNI: It may not have plenty of features not directly related to its main purpose.
DRY: It should not have overlaps with another software I like.
Notice: I am using those programs on x64/x86 [Windows 7: not anymore] Windows 8 and [Server 2008 R2: not anymore] Server 2012 Essentials.
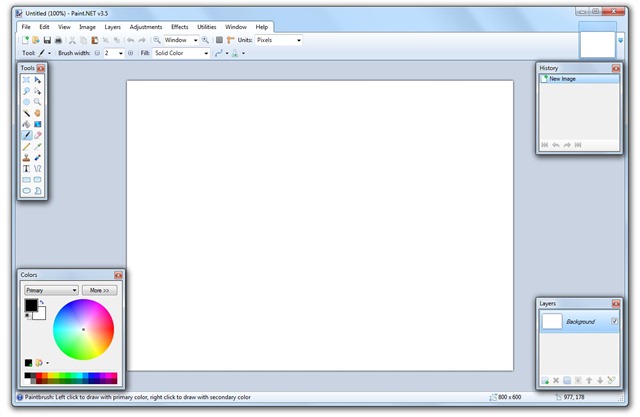
Just as notepad++ is a must-have to replace notepad, Paint.net is not only THE mandatory replacement for Paint, it’s also IMHO the little “free” brother of all those well known professional editors. It’s a indeed a freeware (Creative Commons License).
Click to Read MoreClick to Close
I dislike to use “pro” editors as they are usually too complex for my needs, i.e.: full of over-killing features for a end-user like me. On the opposite, Paint.net offers a clear, pro but still simple interface with all the required powerful tools such the Magic Wand for selecting regions of similar color (ex.: grab clouds in order to remove them), and the Clone Stamp for copying or erasing portions of an image (ex.: rebuild a collapsed wall).
I really use Paint.net a lot to completely remove elements from photos or rebuild their background as well as to simply make pictures’ background transparent…
I like also how simple I can replace a color with another one in a picture using the Recolor Tool.
Tip: I was recently trying several free tools to determine the code of colors seen in web pages. Actually, the most stupid simple solution to get a color code is to take a screenshot (Using the “Prt Scr” key), to paste this screenshot in Paint.Net and grab Hex Codes using the Color Picker tool.
Also, to automatically edit all images with Paint.Net instead of MS Paint, I did set “C:\Program Files\Paint.NET\PaintDotNet.exe” “%1” as Default value for the registry entry: HKEY_CLASSES_ROOT > SystemFileAssociations > image > shell > edit > command. Find attached to this post the reg file that can be used to update the registry.
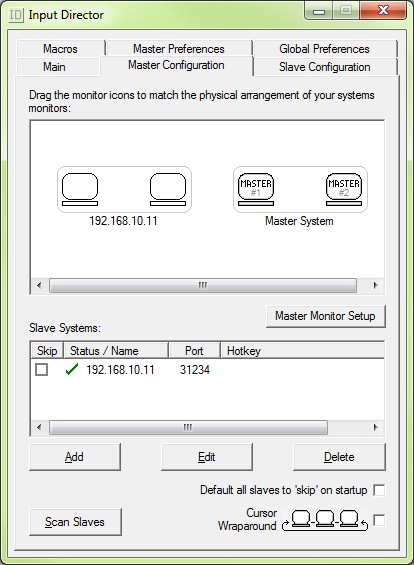
My favorite tools to share one Mouse and one Keyboard with Multiple PC through the network is nowadays Input Director. It’s free for personal non-commercial use only.
Click to Read MoreClick to Close
Input Director allows the mouse of a host computer (“master”) to move onto the screen of slave computers, all connected together via a network. The keyboard of the “master” becomes active on the computer where the mouse cursor is currently located. The effect is similar to a computer connected to a plurality of screens.
The configuration of the spatial position of each computer is done via a configuration software, which must be installed on each machine as a Windows Services (No need for a user to be logged in). Depending on that configuration, the mouse will go a computer or another when crossing the left/right/upper/lower edge of its screen.
Years ago, I did use a now deprecated version of Synergy. I moved to Input Director due to lack of support in that version regarding UAC and Windows Services under Windows 7. The new latest version of Synergy has however now supports regarding those features. Synergy is a freeware (GPL) open source.
In the future, I could be tempted to use Mouse Without Borders witch looks great and is free for non commercial use… It offers support to Copy/Paste between PC. But mouse may only move to the next PC through the left and right borders, not the top and bottom ones (how I am used to configure my current Software KVM).
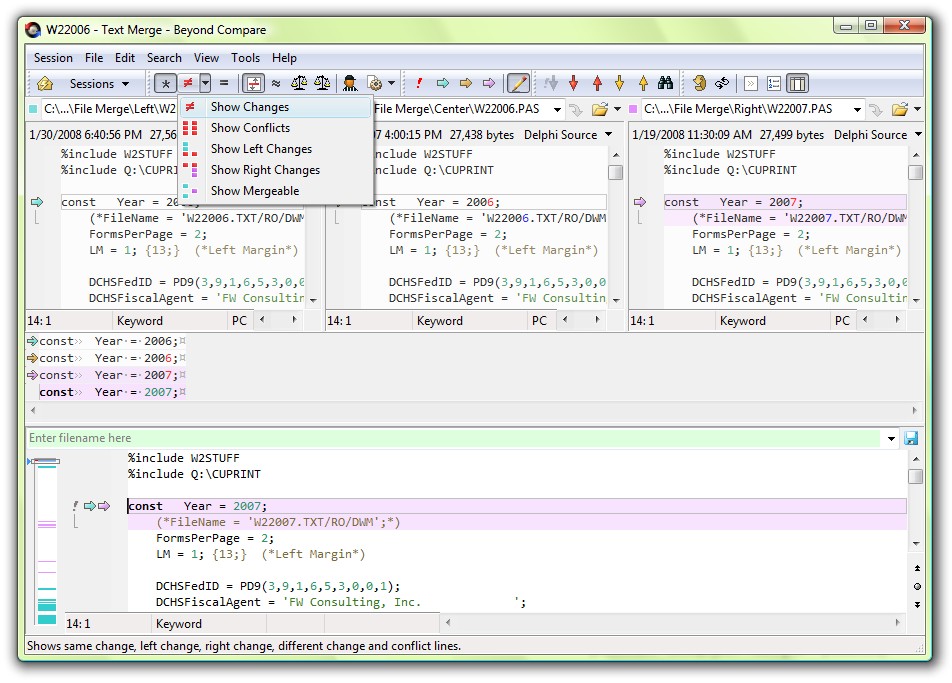
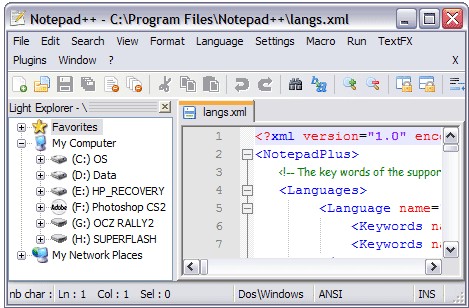
Notepad++ is my favorite text editor and source code editor for Windows as it has a lot of advantages over the built-in Windows text editor ‘Notepad’ and is a freeware (GPL) open source.
Click to Read MoreClick to Close
General features include:
Tabbed document interface
Drag-and-drop
Split screen editing and synchronized scrolling
Spell checker (requires Aspell)
Supports various text encoding formats (UT8, Unicode, …) and file formats (Dos, Unix, …)
Search and Replace: with regular expressions (including multi-line); over multiple documents in subfolders; and marking/summary of occurrences
It would be a good idea to schedule a daily backup of all the MySQL databases on your Synology. Those will indeed be wiped out if by accident, you have to reset your NAS (reinstall the firmware), ex.: if you lose a disk in your RAID 0.
That can be done using a shell script and a cron job as described here after.
How to BackupClick to close
First, create a user with a local-read-only access on the databases. We will indeed have to let its password in the script, endangering the security. Using a local-read-only user will mitigate the risks.
Go to the web administration interface (DSM) of your NAS.
Install phpMYAdmin via the “Package Center” if not yet done.
Open phpMyAdmin via the “Start Menu” (“Main Menu”).
I am using the login ‘root’ with the password of Syno’s ‘admin’ user
Open the “Users” tab in phpMyAdmin
Click “Add User” (bellow the list of existing users)
Enter the User Name. Ex.: backup
Select “localhost” as an Host.
Enter a password. Ex.: mysql
Keep “none” as “Database for user”
Grant the user with Global privileges: Select (in Data) and Reload, Show Databases and Lock Tables (in Administration)
Click “Add User” at the botton of the page
Next, create a shell scripts in a Shared Folder of the NAS (Ex.: \volume1\backup\backupMySql.sh). Working in a Shared Folder will make it easier for you to copy/open later the backups from your PC). Don’t forget to create a “Unix” file, either using the touch command in a Console or saving a file As a “Unix shell script” within Notepad++. Notice that a script created with NotePad++ and saved on the Shared Folder will belong to the user account accessing that Shared Folder (Most probably your Windows Account if like me you simply created a user on your NAS with the same login and password). A script created with “touch” in a Console will belong to the user accessing the NAS via telnet/SSH (Most probably the “root” account).
[shell]#!/bin/sh
#
DIR=/volume1/backup/sqlbackup/
DATESTAMP=$(date +%Y%m%d%H%M%S)
DB_USER=backup
DB_PASS=mysql

# create backup dir if it does not exist
mkdir -p ${DIR}

# remove backups older than $DAYS_KEEP
#DAYS_KEEP=30
#find ${DIR}* -mtime +$DAYS_KEEP -exec rm -f {} \; 2> /dev/null

# remove all backups except the $KEEP latest
KEEP=5
BACKUPS=`find ${DIR} -name 'mysqldump-*.gz' | wc -l | sed 's/\ //g'`
while [ $BACKUPS -ge $KEEP ]
do
  ls -tr1 ${DIR}mysqldump-*.gz | head -n 1 | xargs rm -f
  BACKUPS=`expr $BACKUPS - 1`
done

#
# create backups securely
#umask 006

# dump all the databases in a gzip file
FILENAME=${DIR}mysqldump-${DATESTAMP}.gz
/usr/syno/mysql/bin/mysqldump --user=$DB_USER --password=$DB_PASS --opt --all-databases --flush-logs | gzip >> $FILENAME
[/shell]
NB: Since DSM 6.0, “/usr/syno/mysql/bin/mysqldump” has been moved to “/bin/mysqldump” !!!
Possibly, type the following command in a Console (telnet/SSH) to set the user ‘root’ as owner of the script:
IMPORTANT notice: I used to have “-u DB_USER” (with a blank space in between) in my script above and -“p$DB_USER” (without a blank) instead of –user and –password. But a reader (Fredy) reported that the script was not running fine for him unless removing the blank. As per documentation of mysqldump’s user parameter and password parameter, there should be a blank after -u but not after -p. However, samples on the web usually illustrate the use of mysqldump with “-uroot”. So, I decided to use the more explicit notation “–user=” and “–password=”. I did test this notation with a wrong username or password and the resulting dump is indeed empty. With the correct username and password, it works fine.
Since DSM 4.2, the Task Scheduler can be used to run the script on a daily basis.
Go to the Start Menu
Open the Control Panel
In the “Application Settings”, open the Task Scheduler
Select “Create a User-Defined Script”
Type a name for that “Task:”
Keep the “User:” root
In the “Run Command” pane, type:
sh /volume1/backup/backupMySql.sh
Don’t forget the “sh” in front of your command, otherwise, it does not work (although the sample provided by Synology is missing it ?!)
If you don’t use the Task Scheduler, you can add a Cron Job to execute the script, e.g. every day at 0:01. Open a Console (Telnet/SSH) and type:
FYI, a cron line syntax is “mm hh dd MMM DDD user task” where:
mm is the minute (0..59)
hh is the hour (0..23)
dd is the day in the month (1..31)
MMM is the month (jan, feb, … or 1..12)
DDD is the day in the week (sun, mon, … or 0..7 where 0 and 7 beeing both sunday)
The following values can also be used:
* : a every unit (0, 1, 2, 3, 4…)
5,8 : at unit 5 et 8
2-5 : units 2 to 5 (2, 3, 4, 5)
*/3 : every 3 units (0, 3, 6, 9…)
10-20/3 : every 3 units, from 10th to 20th (10, 13, 16, 19)
So, the script will start every day at 0:01h
Finally, you must restart the cron daemon to activate the new job. To find the process id and send a SIGHUP signal to this one, type the following command line in a Console (Telnet/SSH):
It should display “Kill -HUP xxxx” where xxx is the pid of the cron daemon.
Added on 03/01/2013Click to Close
Attention: if you copy paste the command to restart the cron daemon from this page into the telnet console, some symbols will be wiped out: the ‘{ and ‘ around print$1… you have to type them manually…
Attention: if you upgrade the version of DSM, the changes made in the cron script are lost (at least, it’s what I have noticed after updating last month…). Reason why I recommend to use the new “Task Scheduler” feature available since DSM 4.2.
Tip to edit the cron script: you can use the package “Config File Editor” available here. Once installed, you can access it via the Main Menu. Then, you have to edit the file named “Config File Editor” and add the following line:
/etc/crontab,crontab
Once this line is added and saved, … I don’t remember how to force the change to be taken into account :/. But restarting the DiskStation is enough 😀
Finally, back into the Config File Editor, select the ‘crontab’ entry and modify this script, save your changes and restart the cron daemon.
Tip to restart the cron daemon: you can use the package “MODS Web Console” available here. To install it, go to the Package Center and add the following url via the Settings > Package Sources : https://www.beatificabytes.be/sspks. Once this url added, go to the tab “Community” and click Install on the “MODS Web Console” icon.
Run the Web Console via the Main Menu, log in with “admin”/”admin” (The defaults values if not changed) and type:
synoservice --restart crond
Added on 01/12/2013Click to Close
If you want a lazy solution to notify the Administrator about the success or failure of the backup, you can use the ‘synonotify’ command (See details here). A more advanced solution would be to configure the “Mail Server” and use its ‘sendmail’ command: /volume1/@appstore/MailServer/sbin/sendmail…
Copy the archive (.gz) you plan to restore on your local PC
Go to “phpyMyAdmin” > “Import” > “Chose File” (next to Browse your computer).
Select the .gz file to be restored
Press “Go” at the bottom of the page (no need to change any settings)
Pay attention: this is a complete restore, I.e.: all databases are dropped and recreated from scratch.
If you want to be able to restore a subset of your databases you better have to change the script to backup specific databases instead of –all-database.
If you want to restore only one table ‘mytable’ from the backup ‘mysqldump-datetime.gz’:
Unzip first the archive: gunzip mysqldump-datetime.gz
Then extract the part that restore the desired table with this command: sed -n -e ‘/DROP TABLE.*mytable/,/UNLOCK TABLES;/p’ mysqldump-datetime > mytabledump
I have just created a new shell script for my NAS. But its behavior is really weird. It seems that concatenating strings is actually overwriting them. Ex.:
#!/bin/bash
A=abcd
B=12
echo $A$B
results in: 12cd
Click to read moreClick to close
Also, redirecting any output into a file results in a new folder and an new empty file, both with a weird name. Ex.:
[shell]
DIR=/volume1/sharedFolder/
FILENAME=${DIR}outputFile
echo Hello World > $FILENAME
[/shell]
results in a file named “outputFile” and a folder named “” ( beeing displayed as ‘dots’ in Windows Explorer!). Both are well located under /volume1/sharedFolder/ and visible in Windows Explorer. However the folder does not appear when executing ‘ls -la’ in a console on the NAS (only the file appears) and the only way to delete this folder is to execute ‘rm -R /volume1/sharedFolder’ in the console.
I quickly realized that this behavior was a consequence of creating the file on a Shared Folder of the NAS using the Windows Explorer’s contextual menu “New”>”Text Document”… Creating an empty file with the command “touch” directly in a console on the NAS does not suffer the same issues.
There is indeed at least one difference that I know between the file format of Unix and DOS: the return character which is 0x0A in Unix, while it is 0x0A, 0x0D in DOS (a.k.a /n in Unix and /r/n in DOS)
I realized that this was the issue because each empty line in the script was resulting in an error: “: not founde x:”, x being the line number. Meaning that the “empty lines” were actually not empty (due to the /r).
Notice that the magic “touch” only works because I use next Notepad++ to edit the file. Indeed, this great freeware preserve the Unix file format while NotePad, WordPad, etc…, do not.
I did use the Windows Explorer’s contextual menu to create the empty file because I was too lazy to create a new file with notepad++ and browse next for the target subfolder on the NAS where I had to save it 🙁
Otherwise, with the “Save As” of NotePad++, I would have been able to pick the right format: “Unix Script File” 🙂
I have so many devices and services on my LAN that I can’t remember all their Urls: IP Camera, VDSL modem, Network Printer, Router, File Server, Backup Server, VMWare Server, NAS, Blog, etc… So, I did create an administration page (php) on my NAS to list them with their intranet or internet address depending on the variable $_SERVER[‘SERVER_NAME’].
Unfortunately, when clicking on the link to my Router’s web interface (a Buffalo WZR-HP-G300NH with DD-WRT v24SP2), this one returns the message “Cross Site Action detected”.
As the purpose is not for me to copy the Url manually, I did look how to disable this protection on the Buffalo and here is the tip: Click to read moreClick to close
Run a telnet or ssh console
Log on as ‘root’ even if you changed the default username via the web interface (the default password is ‘admin’ but I hope you did change it).
And type the following commands:
nvram set no_crossdetect=1
nvram commit
That’s it.
P.S.: more information on SSH/Telnet and the CLI here.
Although all Plugins’ files can be edited directly within WordPress, you may sometimes prefer to open them with your favorite editor. Also, you could desire to edit some sources of WordPress…
And if it is quite easy to find the files to be modified under the share folder “web” (\\<SynologyHostname>\web), you will quickly notice that you may not save any change…
This is simply because the folder ‘wordpress’ and its content (on Synology) belong by default to the user “nobody”. Click to read the solutionClick to close
To save your changes, you will first have to change the owner:
Check that Telnet is enabled on your Synology (Start Menu/Control Panel => Terminal)
Start the command (in a MS-Dos prompt): Telnet <SynologyHostname>
Log in with the root account and its password (same password as the Synology “admin” account)
Go to the physical folder associated to the shared folder “web”: cd /volume1/web/
Take ownership of WordPress’s whole content: chown -R <YourAccount> wordpress
For sure, <YourAccount> must exist on Synology, be the same as your windows account (I.e.: same name and same password) and have privileges on the folder “web”. Otherwise, create such an account (Synology’s Start Menu/Control Panel => User) and don’t forget to grant him Read/Write access on “web” (Via the Synology User’s tab “Privileges Setup”)
Once your changes saved, never forget to give back the ownership to “nobody”(*) otherwise WordPress won’t be able to update its plugins, themes, etc… automatically anymore.
(*) Indeed, by default and for security reasons, the httpd demon of apache runs with the account “nobody”. All folders/files created by httpd (a.o.: during the installation of WordPress) belong therefore to “nobody”. All changes executed by https (e.g.: files editing) are executed with the credentials of “nobody”…