• WordPress really slow when accessed on LAN via its Domain Name

    Since a few weeks, WordPress is really slow when I access it from my LAN with it’s domain name http://beatificabytes.be

    The problem was with the name resolution on my PC.

    Click to Read More

    My blog is hosted on my NAS, that I usually accessed via its netbios name or via its local IP address. But to make it easier for me, I also defined a domain ‘beatificabytes.be’ on my NAS’ DNS Server, with a A Records for www, pointing on the IP of the NAS.

    So, I can access my blog locally with either the domain name ‘beatificabytes.be’ (if I am lazy) or with the fully qualified name ‘www.beatificabytes.be’.

    The problem is that the actual URL of my blog, defined in WordPress’ settings, is ‘www.beatificabytes.be’. So, many pages of the blog are referencing scripts and images hosted on on that address ‘www.beatificabytes.be’.

    And, a few weeks ago, for some unclear reason, my PC started to fail to access my NAS via the url ‘www.beatificabytes.be’. I was only able to access it with its netbios name, its IP or the domain name ‘beatificabytes.be’ (without www).

    The reason was an issue with the name resolution on my PC (I thought it was an issue with the “DNS” Server but it was actually due to Avast’s feature ‘Secure DNS’).

    Therefore, each page trying to load resources from www.beatificabytes.be was getting timeouts, making the rendering very slow (without any visual notification!)…

    I did fix the name resolution issue and I can now access again my blog ‘full speed’.

    Conclusion, open the Debug window of your browser to look at possible network or script errors 😉

    Loading

  • Chaos reincarnation

    Although I did upgrade some parts of my old PC Chaos, built end of December 2012, it’s suffering of his age. I have various issues with the power management, the USB ports, the sound, … So, I have decided to migrate its OS to a new hardware using Acronis Universal Restore.

    [Edit 1/1/2020] Minor update

    Click to Read More

    The new hardware includes:

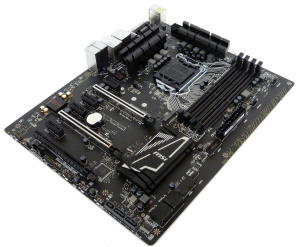
    • 1 x motherboard MSI Z270 Gaming Pro Carbon (to replace the previous one which burned: MSI Z170A Gaming Pro Carbon) LGA 1151
      • CPU:  Intel socket LGA 1151 (for Core i7)
      • Chipset: Intel Z270
      • RAM : 4 x DDR4-3866+ (max 64GB) – Dual Channel Architecture
      • Storage: 6 x SATA 6Gb/s ports, 2 x M.2 ports
      • Slots: 3 x PCIe x16 (Support SLI and CrossFire), 3 x PCIe x1
      • LAN: 1 x Intel I219-V Gigabit
      • Audio: Realtek ALC1220 Codec, 7.1 Channel HD with S/PDIF output
      • Video:
        • HDMI (4096×2160@30Hz, 4096×2160@24Hz, 2560×1600@60Hz)
        • DVI (1920×1200@60Hz)
        • Support CrossFire and SLI
      • USB:
        • ASMedia® ASM2142 Chipset
          • 2 x Rear USB 3.1 Gen2 (SuperSpeed USB 10Gbps) – 1 x Type-C, 1 x Type-A
        • Intel® Z170 Chipset
          • 2 x Rear USB 3.1 Gen1 (SuperSpeed USB) ports
          • 4 x connectors USB 3.1 Gen1 (SuperSpeed USB) ports
          • 4 x back USB 2.0 (High-speed USB) ports
          • 4 x connectors USB 2.0 (High-speed USB) ports
    • 1 x cpu Intel Core i7-6700K (Skylake) at 4.4GHz.
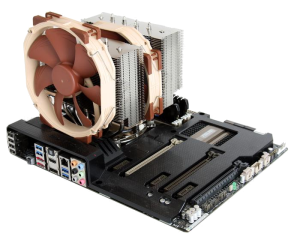
    • 1x Air Cooler Noctua NH-D15.
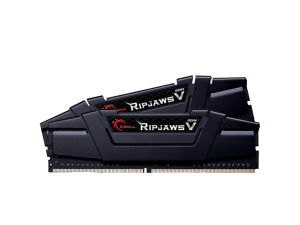
    • 2 x 16GB Ram DDR4 at 1.20GHz (16-18-18-38-2N at 3200MHz) Gskill RipjawsV in Dual Channel mode (F4-3200C16D-32GVK).
    • 1 x SSD Samsung 850 PRO 256GB (MZ-7KE256BW).
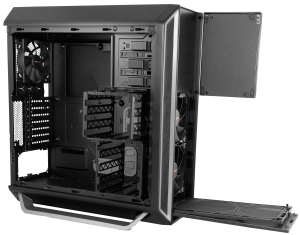
    • 1 x case Be Quiet! Silent Base 800 High End ATX Tower PC (BG002).
      • Performing slightly better than the Be Quiet! Dark Rock Pro3 (BK019) according to various reviews, but more expensive.
    • 1 x PSU Corsair HX850i (850W) 80 Plus Platinum
      • A bit less performing than the Be Quiet! Dark Power Pro 11, but cheaper, guarantee twice longer (10 years), with manual and temperature-controlled fans, Semi-passive, consuming 0.00 W when Off and coming with Flat cables.
      • The choice between this one and the Corsair RM850i was very hard has the second one is nearly as efficient (although it’s only Gold) but ~18% cheaper. The HX comes however with 2 more connectors…
      • Don’t do the same mistake as I did. Air is suck into the PSU. Mount the PSU with the fan sucking the air from the bottom of the tower (if possible) instead of sucking air from inside the tower.
    • 2 x PCI Carte with 5 external USB 3.0 Ports and 1 internal USB 3.0 connector Inateck 
    • 2 x Icy Dock Trayless 3.5” SATA HDD Mobile Rack for 5.25 bay TurboSwap MB171SP-B with a fan cooler
      • To use SSD into those Racks, I use an Icy Dock MB982SP-1S 2.5” to 3.5” Full Metal SATA HDD and SSD Converter.

    Power Supply Calculator (from MSI): https://us.msi.com/power-supply-calculator

    BeQuiet! Silent Base 800
    BeQuiet! Silent Base 800
    MSI Z170A Gaming Pro Carbon
    MSI Z170A Gaming Pro Carbon
    MSI Z270 Gaming Pro Carbon
    MSI Z270 Gaming Pro Carbon
    Noctua NH-D15
    Noctua NH-D15
    G Skill Ripjaws V
    G Skill Ripjaws V
    USB Switch Aten US424
    USB Switch Aten US424
    Card Reader Kingston FCR-HS4
    Card Reader Kingston FCR-HS4
    Logitech Wireless Gamepad F710
    Logitech Wireless Gamepad F710
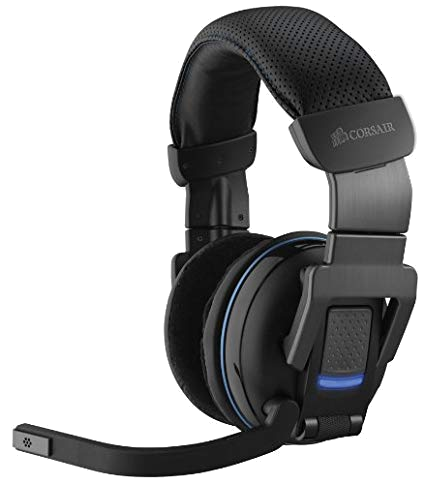
    Corsair Headset Vengeance 2100
    Corsair Headset Vengeance 2100
    Rapoo Wireless Keyboard and Mouse
    Rapoo Wireless Keyboard and Mouse
    HTC Vive Pro
    HTC Vive Pro

    Loading

  • Boot Windows 10 into Safe Mode when it does not start anymore and F8 is not enabled

    Many tutorials explain how to reboot in Safe Mode. But they usually need you to already be in a Windows session for that. What if Windows doesn’t start well anymore and the usual F8 doesn’t work? Well, you can enable the classic Boot Menu via the Command Prompt of a Recovery Drive.

    Click to Read More

    In my case, the Graphic Cards’ drivers were corrupted. So Windows was actually still booting but I couldn’t do anything as not having access to the UI. I had to restart in safe mode to remove those drivers and reinstall them. But without a UI, impossible to change Windows’s Startup Options…

    Typing F8 during Windows boot didn’t gave me access to the Boot Menu as, since Windows 8, the boot so fast that there is no way to interrupt it anymore – except if you have enabled F8 explicitly, sacrificing a couple of seconds during startup. This can be done by opening an elevated Command Prompt and executing:

    • bcdedit /set {default} bootmenupolicy legacy

    To undo this reopen the elevated Command Prompt and type:

    • bcdedit /set {default} bootmenupolicy standard

    If F8 is not enabled, you can force Windows to present you the Boot Menu using a Recovery Drive (or USB Key):

    • If you don’t have a Recovery drive yet,
      • Go to another Windows 10 PC (a x64 if your PC is a X64, or x86 otherwise)
      • Search for “Recovery Drive” in the Windows Start Menu/Screen
      • And Select “Create a Recovery Drive” (No need to back up system files to the recovery drive).
    • Boot your other PC on that Key (depending on you BIOS, you can use F8, F12, … to access to Device Boot Menu. See a list here).
    • Select your Keyboard and enter the “Troubleshoot” Menu.
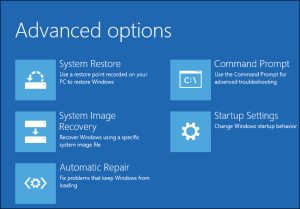
    • Enter next the “Advanced Options” Menu.
      • Notice that with this Windows Recovery Drive, you won’t have the “Startup Settings” menu in the “Advanced Options”. This one is only available when you reboot your PC with the “Advanced Startup” Options or when Windows failed to boot twice and enter the Repair mode automatically (NB.: You can obviously use that trick to access the Startup Settings and boot is Safe Mode: boot the PC and switch it off when Windows is starting).
    Recovery Advanced Options
    Recovery Advanced Options with Startup Settings
    • So, no choice here but enter the “Command Prompt” menu
    • In there, type: bcdedit /set {bootmgr} displaybootmenu yes
    • Type next: exit
    • And shutdown completely before rebooting your PC.
    • You should now be prompted to select your OS. Press F8 there to access other Boot options 😉

    Et voilà.

    Once everything is back to normal with your Windows, run a command Prompt as Admin and disable the Boot Menu by typing:

    • bcdedit /set {bootmgr} displaybootmenu no

    Loading

  • Windows 10 Search can’t find any applications

    I am a big fan of Windows’ search feature since Windows 7. So, I was really frustrated when searching stopped to work this morning on my Windows 10. Fortunately, I have been able to fix it easily by deleting a key of the registry.

    Click to Read More

    1. Open a Run prompt by typing Win + R
    2. Execute “Regedit” via that run Prompt
    3. Open the Task Manager by typing Ctrl + Shift + Esc
    4. In the Task Manager, open the tab “Details”
    5. Kill all “Explorer.exe”
    6. In “Regedit”, locate and delete the entry: HKEY_LOCAL_MACHINE\SOFTWARE\Microsoft\Windows\CurrentVersion\Explorer\FolderTypes\{ef87b4cb-f2ce-4785-8658-4ca6c63e38c6}\TopViews\{00000000-0000-0000-0000-000000000000}
    7. In the Task Manager, open the menu File > Run new task, and type “Explorer”

    Et voilà, the Search feature should now work fine again.

    Loading

  • How to connect a bluetooth headset with a samsung tv UE48H6500

    Yes, this is possible. But you have to enable the support for «Bluetooth headphones» via a hidden menu.

    Click to Read More

    To access the samsung hidden menu:
    – Switch off the tv with your remote
    – Press the key «Info»
    – Press the key «Menu»
    – Press the key «Mute»
    – Switch on the tv and wait for a few seconds

    The hidden menu is now appearing on the screen. With the keys «up» and «down» you navigate between entries (submenus or settings). With the key «ok» (Enter) you enter a selected submenu or edit a setting. With the key «Return» you exit the submenu or the edit mode. With the keys «Left» and «Right» you change the value of a setting in edit mode.

    To enable the support for «Bluetooth headphones»:
    – select the entry «Option»
    – select the entry «MRT option»
    – select the setting «BT support»
    – change the value of that setting to set: ON
    – exit that setting
    – exit the submenu
    – select now the entry «Engineer Option»
    – select the setting «BT_AUDIO_ON_OFF»
    – change the value of that setting to set: ON

    And now switch off the tv. Voilà. The feature should be enabled. To access it, switch on the tv and press the key Menu. Then go to > Sound > Speaker Settings > Bluetooth headphones. From there you can search for Bluetooth devices and pair them.

    Later, to reconnect a Bluetooth which is already paired, use the key «tools» and in «Speaker Select», pick «Bluetooth headset». If it does not connect immediately, switch off and on your headphone and retry changing the “Speaker Select”. Notice that you must do this before starting any application like Plex or Netflix in the SmartHub.

    Loading

  • Boot from USB Key on a Toshiba Satellite to reinstall Windows

    It can be tricky… And here is the trick: disable the Secure Boot and use CSM Boot mode instead of UEFI. Once you don’t need to boot from the key anymore, reset those settings.

    Click to Read More

    Ccomplete details are available here: https://aps2.toshiba-tro.de/kb0/TSB2B03F30002R01.htmNotice also: while the “TOSHIBA” logo appears once the laptop powerd on,

    • Press [F2] key to enter the BIOS Setup Menu.
    • Press [F12] key to access the boot menu.

    I did need that to reinstall Windows 7 x64 SP1 on a old Toshiba as the CD/DVD reader is broken.

    I did create the bootable USB Key using Rufus 2.9: https://rufus.akeo.ie/

    Within Rufus, I did use a “MBR Partition Scheme for Bios or UEFI”.

    Finally, I had issue to install Windows with the key connected on the USB 3.0 port (the one which is blue) : “A required CD/DVD driver is missing”. I did solve that issue plugging the key on a USB 2.0 port and restarting the PC.

    Loading

  • Proximus BBOX: Open port 80, 443 and 23

    I recently installed a new BBOX 3 to access Internet via Proximus and wanted to open the port 80. Once configured via “My Proximus” (via your Services), don’t forget to reboot your modem!

    Click to Read More

    1. Connect your modem and wait until all the Leds turn blue and stop blinking (see the installation guide)
    2. Open the webpage ww.proximus.be and log in
      Proximus Login
      Proximus Login
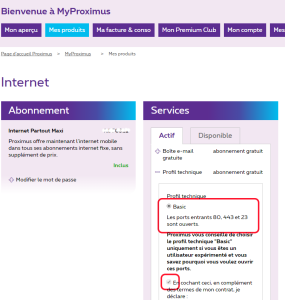
    3. Go to the My Products > Internet … >  Services >Teclnica Profile
    4. Select Basic (to open the ports 80, 443 and 23), tick the option to agree with the disclaimer and confirm
      Proximus Profile
      Proximus Profile
    5. REBOOT next your modem otherwise the changes done via Proximus’ website won’t apply !!!

    Et voilà.

    Loading

  • Cannot access port 80 on my NAS from Internet

    From time to time, I can’t access any web page anymore on my NAS’ port 80 from the web. The solution is to reboot the my modem (BBOX2) or reset its internal firewall. It’s never an issue with my NAS (Synology DS1815+)

    Click to Read More

    When this issue occurs, I can still access web pages on specific port like Plex  (e.g.: on port 32000) or my NAS’ admin console on his own port (e.g.: on port 8080). Also the “Cloud Sync” service of my NAS is still  able to sync files with Google, DropBox and Hubic. Finally, JDownloader which is installed also installed on my NAS, is still able to download.

    To reboot my modem takes time but solve the problem. Another option is to reset the firewall:

    • open a telnet sessin on the modem,
    • log as ‘admin’ with your password (I did change mine. The default is possibly BGCVDSL2 or your MAC Address)
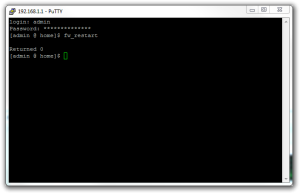
    • execute: fw_restart
    fw_restart BBOX2
    fw_restart BBOX2

    The problem comes from a NAT table full, most probably due to JDownloader or Cloud Sync. But I don’t know how to check which one is the culprit.

    Info about B-BOX-2 of Belgacom/Proximus: http://setuprouter.com/router/belgacom/b-box-2/

    Loading

  • Synolody DSM update: Insufficient free disk space to upgrade

    Since I have migrated from my DS713+ to a DS1815+, I can’t update seamlessly my DSM. Most of the time, my NAS pretends that I have “Not enough storage space”. This problem is due to large log files filling my system partition.

    Click to Read More

    After the migration top my new NAS, I have reinstalled JDownloader. This one is using a script to run a java application via “nohup”. Nohup’s log is growing fast and takes a lot of storage, preventing my NAS to download the DSM updates.

    I found it was the culprit via an ‘iterative’ procedure suggested by maxxfi on the forum of Synology:

    Use your admin password. Once authenticated as root, type:

    • cd /
    • du -ks [a-u]*

    That command will give you for each subdirectory whose name begins with a letter from a to u (so to avoid the volumeX) the total amount of disk space in use. Wait that it finishes and search for which directory shows the biggest numbers, and type:

    • cd <directory>
    • du -ks *

    Repeat the analysis going deeper into the directory tree until you are able to pinpoint the culprit. Finally, use the appropriate “rm <filenames>” command to delete the largest folder/files.

    In my case, the largest file was /root/nohup.out

    But in the past , I also had to deleted /var/log or /var/log/messages and reboot prior updating the DSM.

    In a Putty session, to know the free space in the system partition, type: df -k

    Loading

Tags


Acer iDea 510 AirPlay Android Backup DD-WRT DNS DS209+ DS713+ DS1815+ FlexRaid Galaxy Galaxy S2 Galaxy S7 Google Assistant Google Home HTPC Kies MCE MySQL Nabi 2 Nvidia TV Shield One Plus One OnePlus One OpenHab Outlook Philips Hue Plex RAID Raspberry PI Remote Desktop Root Access Samsung Scripts Synology Team Build Visual Studio VMWare Wi-Fi Windows Windows 8 Windows 8.1 Windows 10 Windows Server 2012 XBMC Xpenology

Categories


Archives