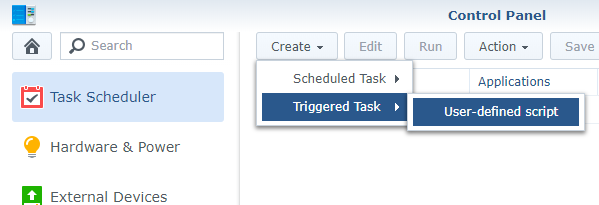
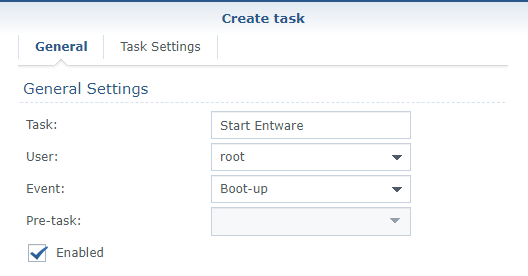
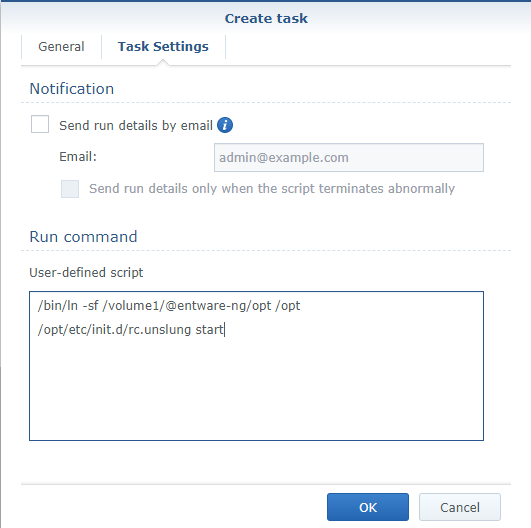
Here is a step by step “How-To create a Virtual Machine to emulate a DS3617xs running DSM 6.2.2” using VMWare and Xpenology
Xpenology is a bootloader for Synology’s operating system which is called DSM. It can be used to setup DSM on a PC or in a Virtual Machine like VirtualBox or VMWare.
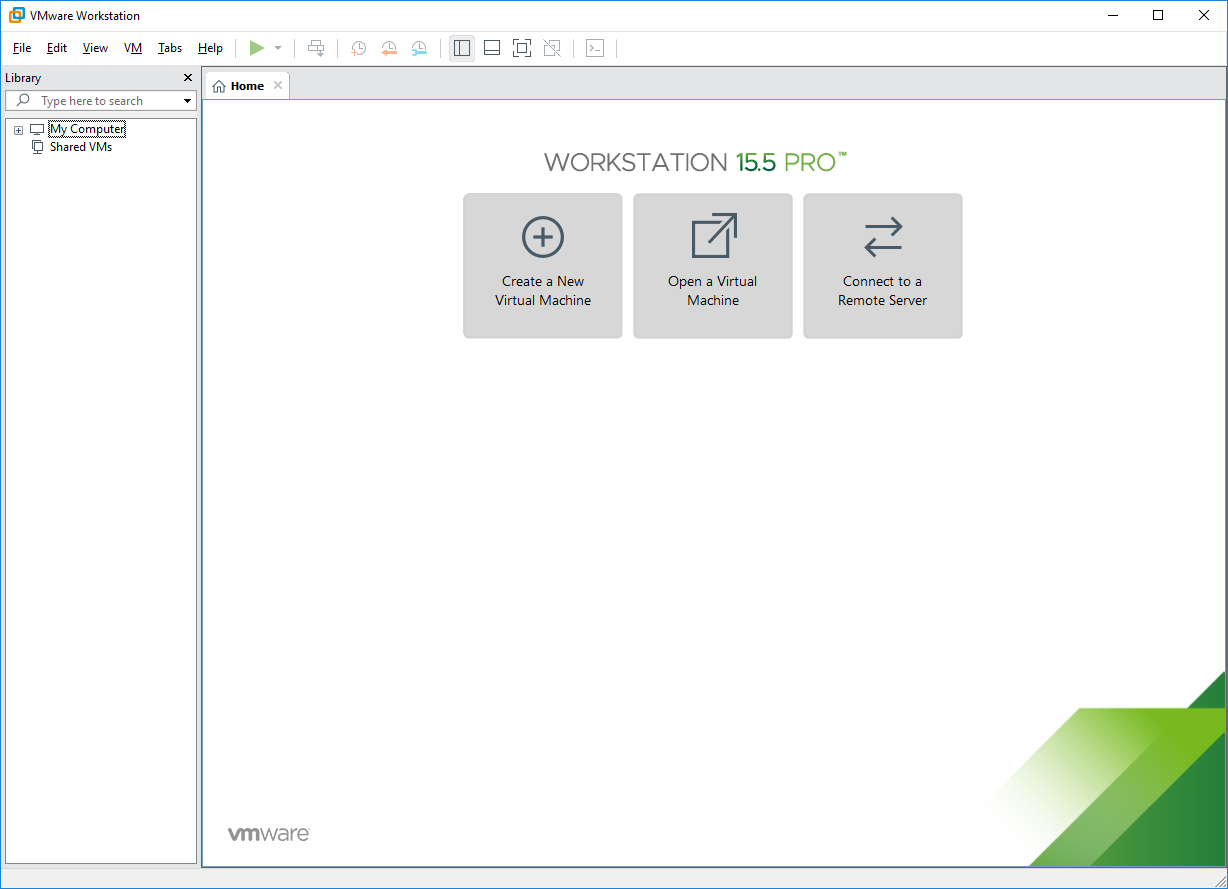
I am using VMWare 15. But any version from VMWare 11 should work.
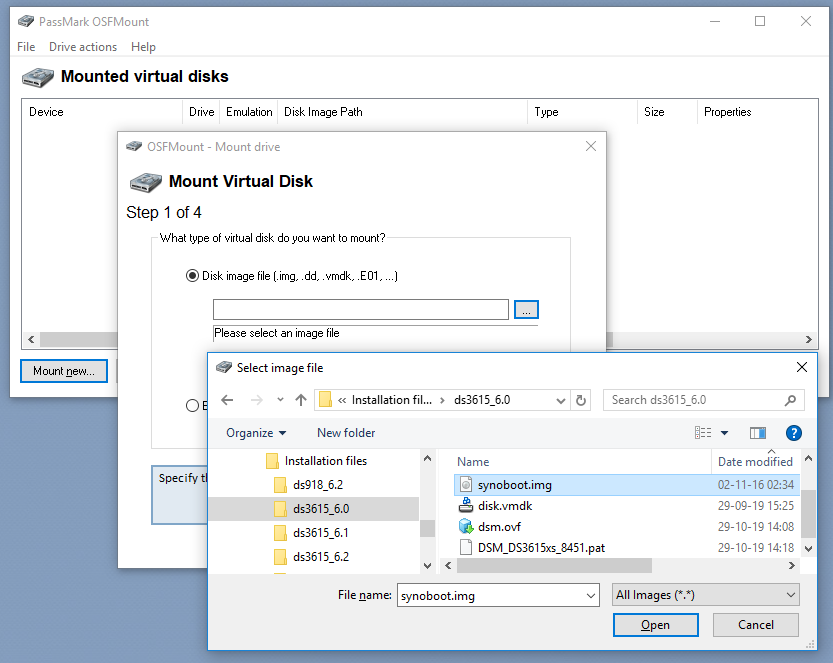
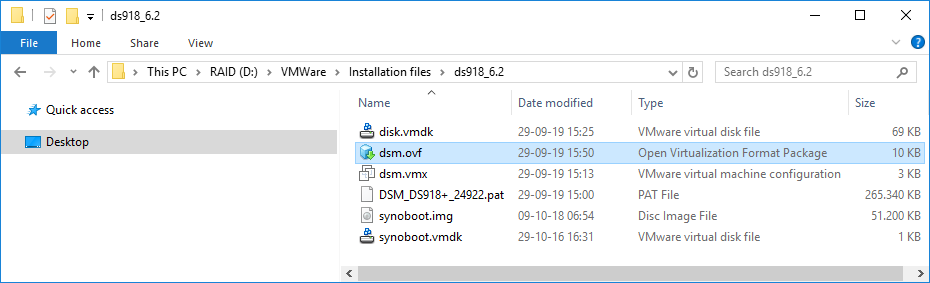
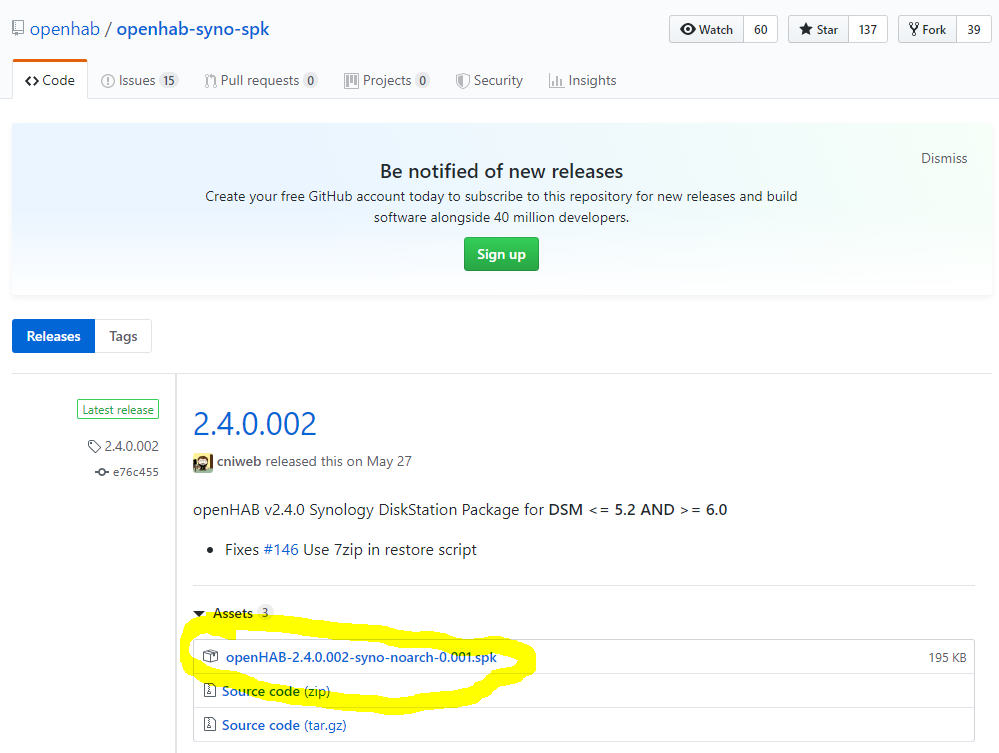
1: Download and unzip this package, containing:
- the configuration of the virtual machine (dsm.ovf, dsm.vmx, disk.vmdk and synoboot.vmdk),
- the xpenology boot file for DS3617xs (synoboot.img) and
- the image of the DSM 6.2.2 for DS3617xs (DSM_DS3617xs_23739.pat)
Notice that only the image “23739” is compatible with the boot file (Jun’s loader 1.03b).
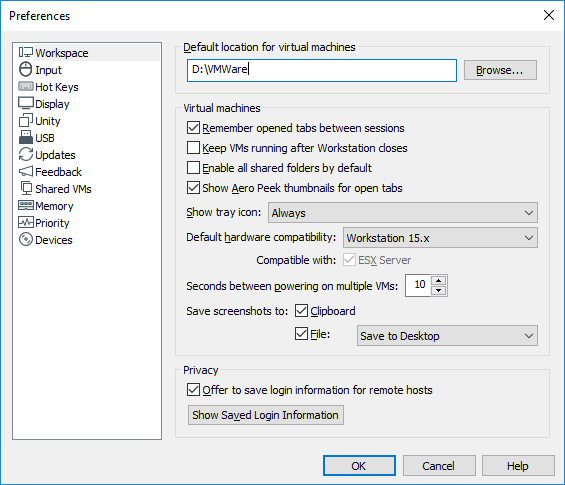
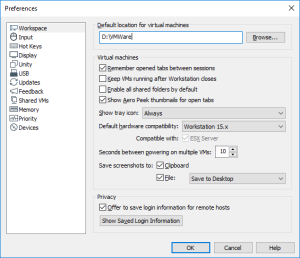
2: Open VMWare Workstation. If you never configured the default location where you want to create your Virtual Machines, press CTRL-P to open the “Preferences” panel. There, set this default location (I am using D:\VMWare).

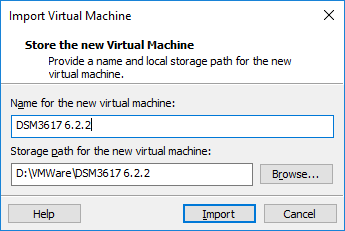
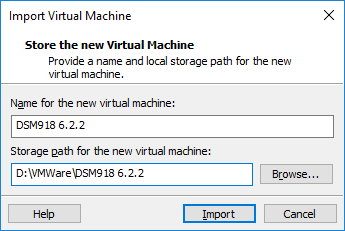
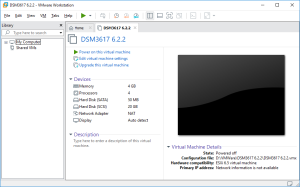
3: Go next to “Windows Explorer”, in the folder where you have unzipped the package, and double click dsm.ovf. This is going to import the VM into VMWare. Type a name for the new virtual machine (I am using DSM3617 6.2.2) and click “Import”.


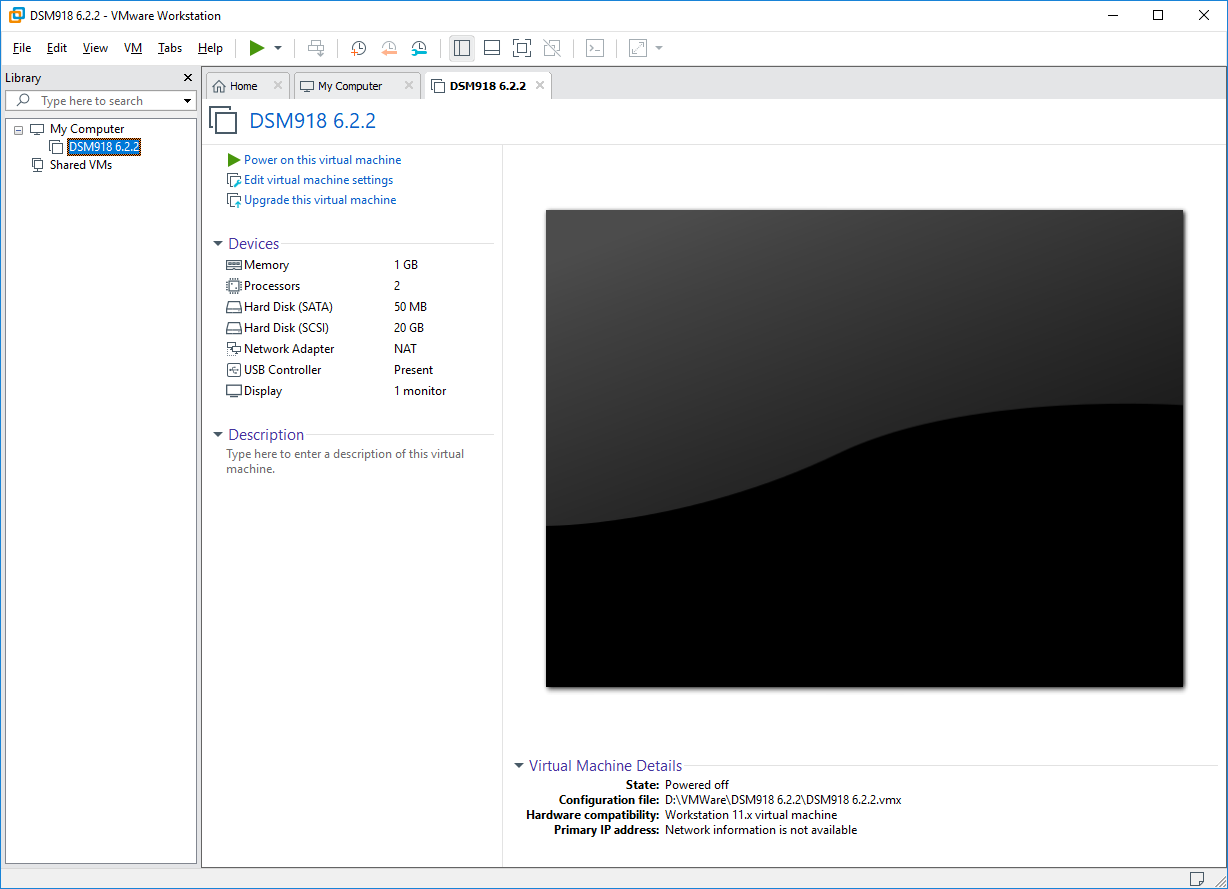
4: Here is the outcome to the importation. You can now click on “Power on this virtual machine”. But first, be ready to type F2 in the console to enter the Bios. You will have only 2 seconds to do so!
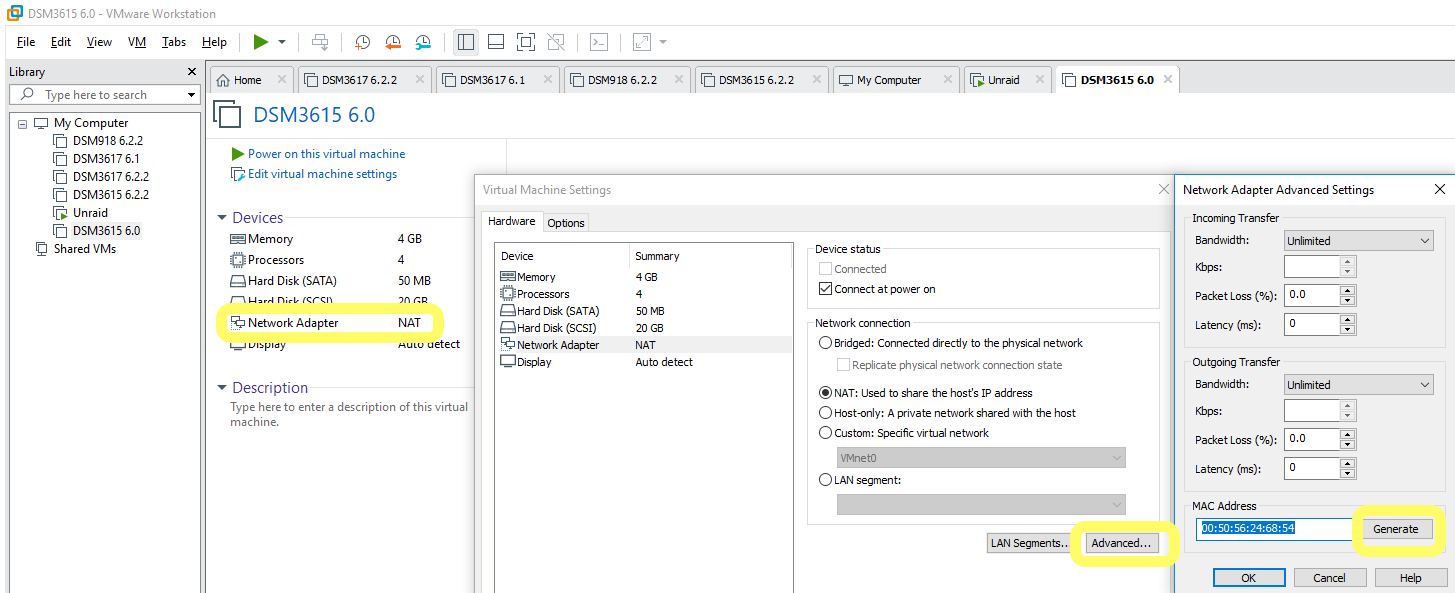
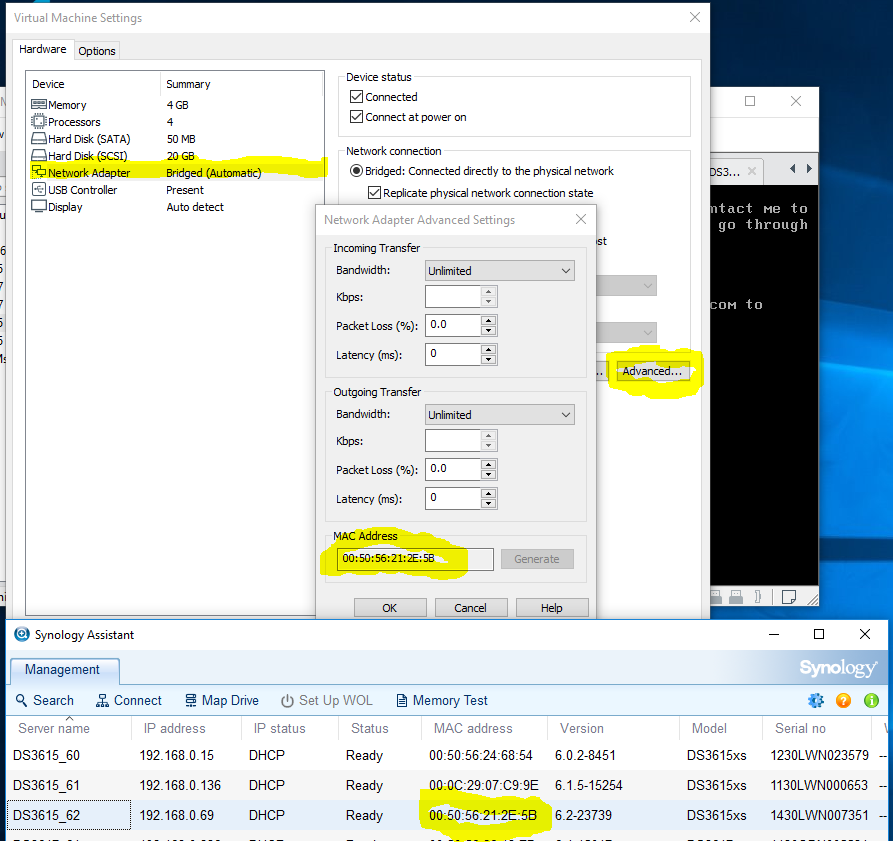
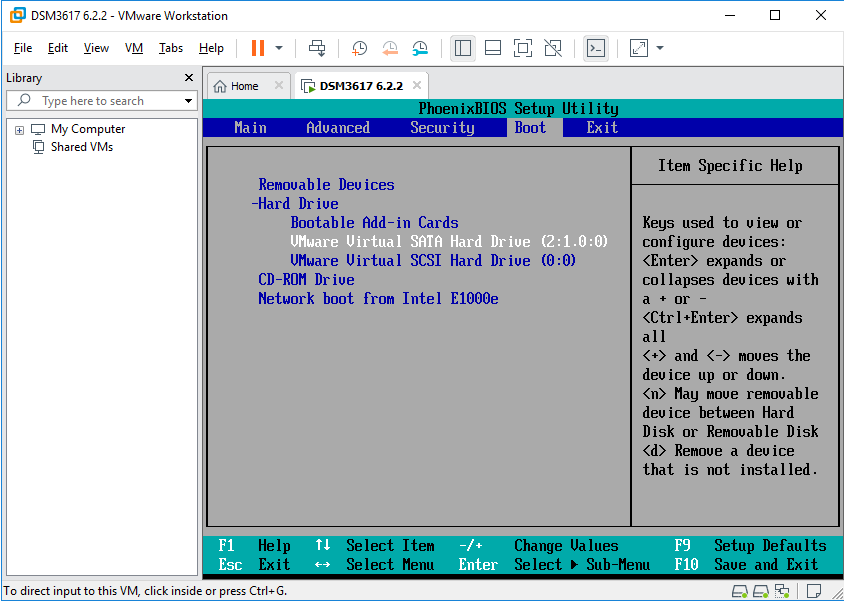
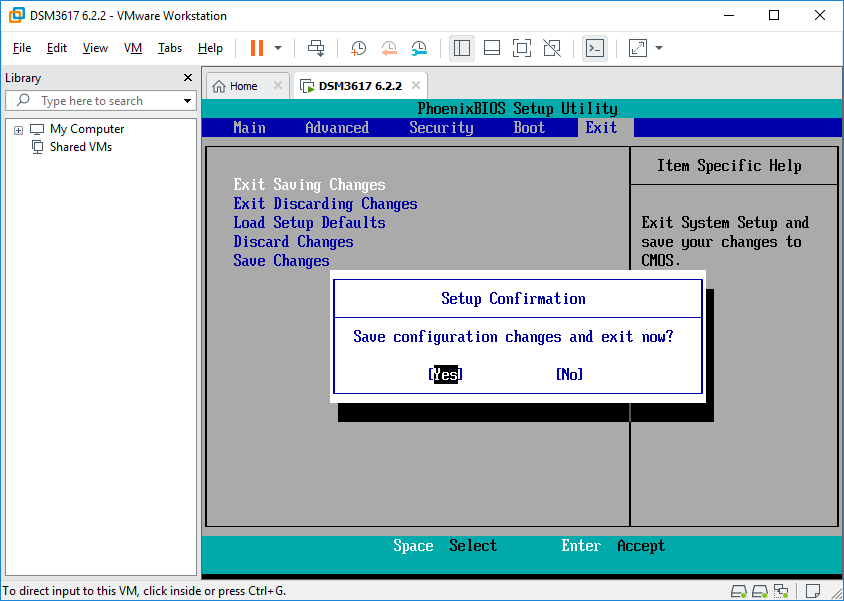
5: As soon as you have run the VM, click into it to capture the keyboard, and press “F2”. If you missed it, the VM will try to boot from the network. In such a case restart the VM and try again! Once in the Bios, go to the Boot tab and swap the SATA Hard Disk with the SCSI Hard disk. The VM has indeed to boot with the SATA disk containing the boot loader. Finally, Save and Exit the Bios. The VM will reboot.


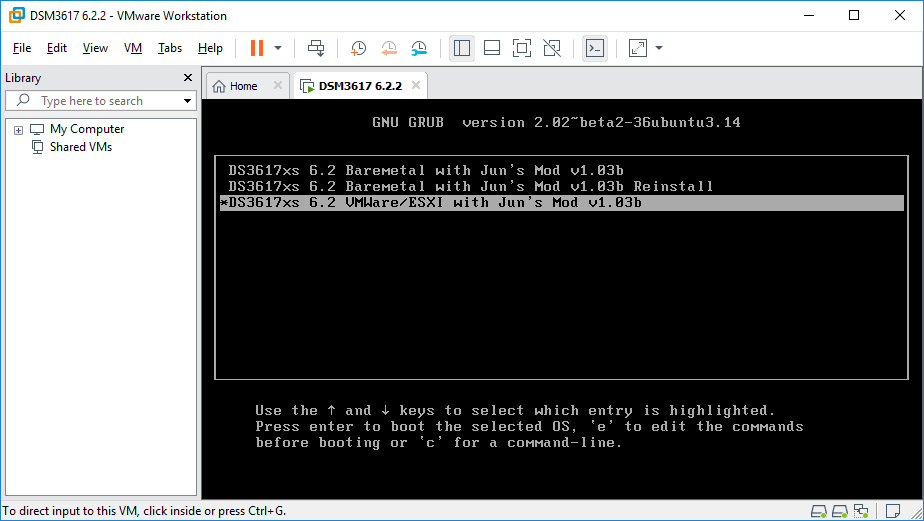
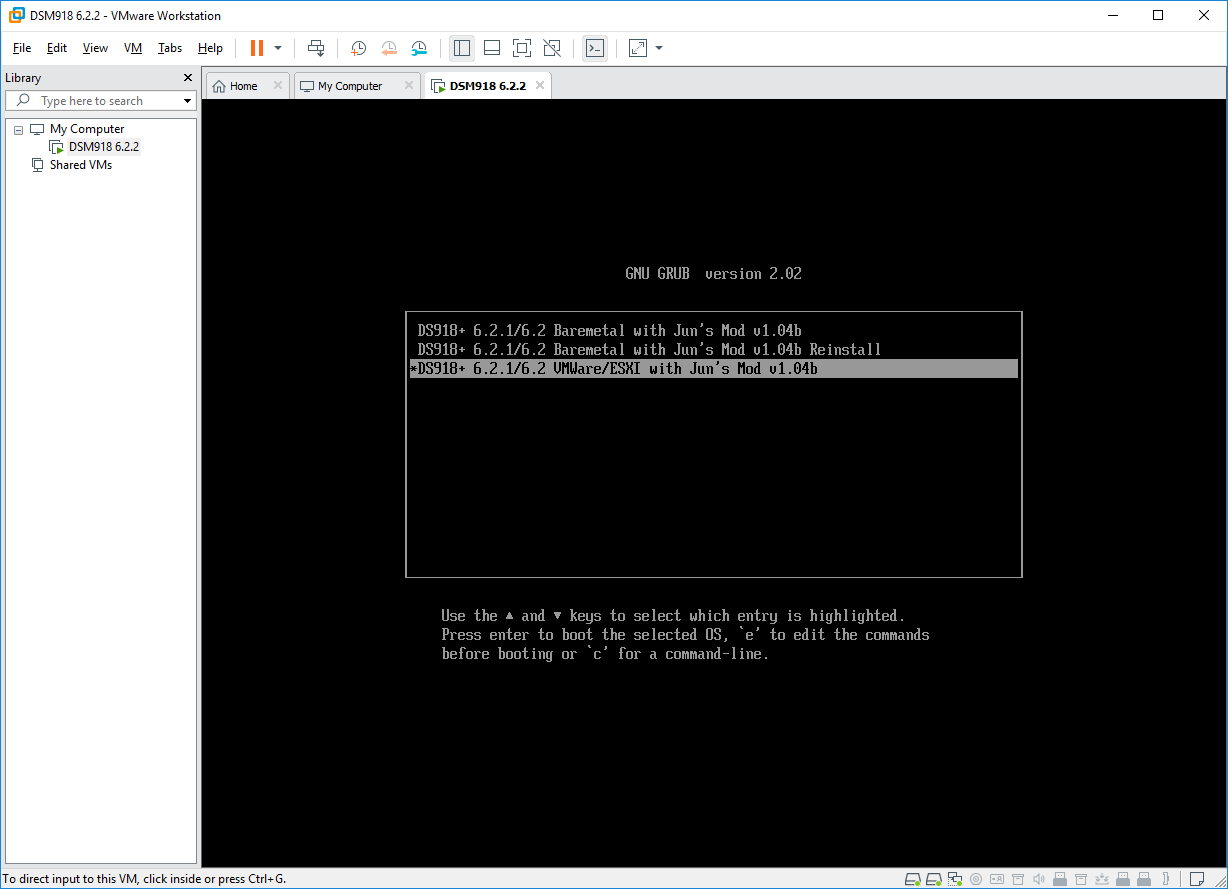
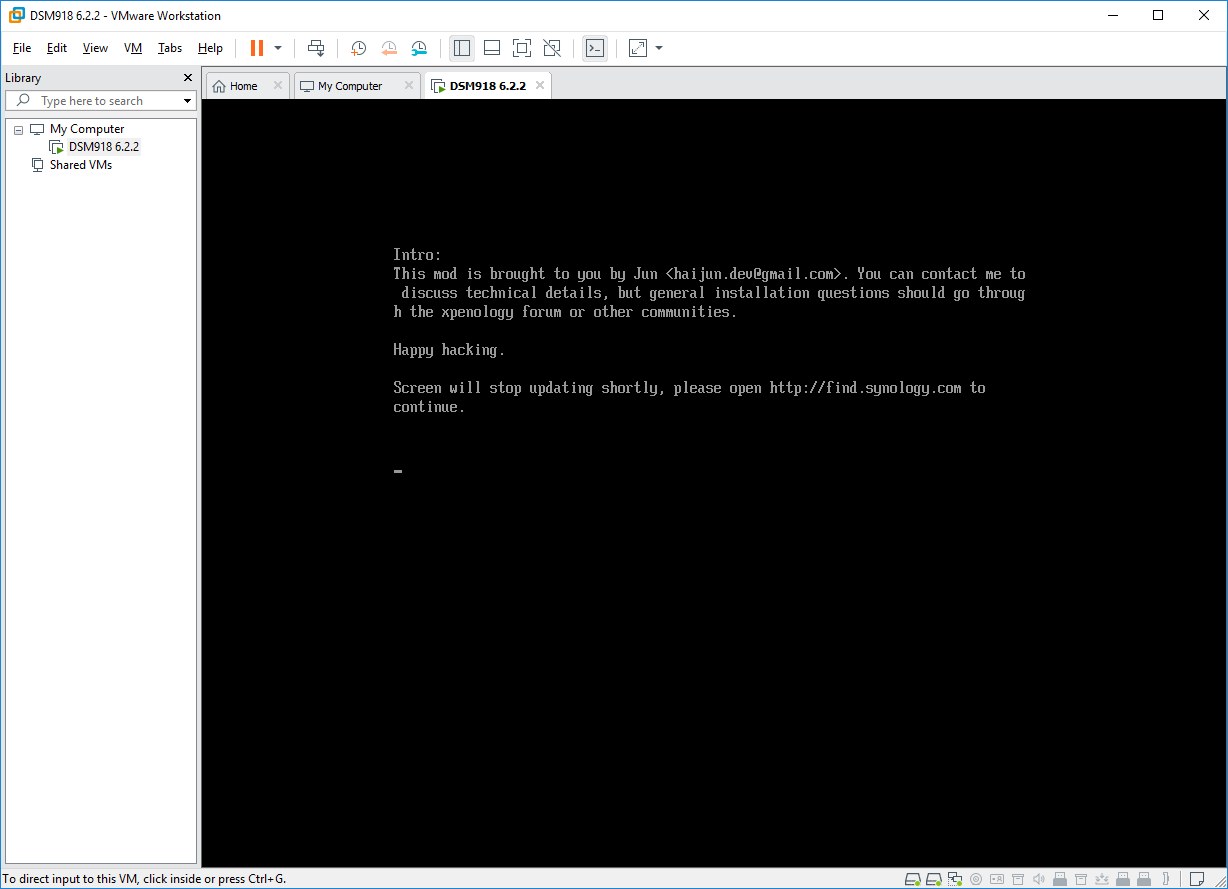
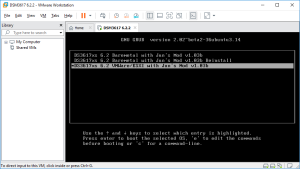
6: Again, quickly click into it to capture the keyboard and press the “down arrow” to select the loader for “VMWARE/ESXI” (attention, you don’t have a lot of time to start the selection). Press next Enter and the boot will load. The VM is ready to install the DSM image.
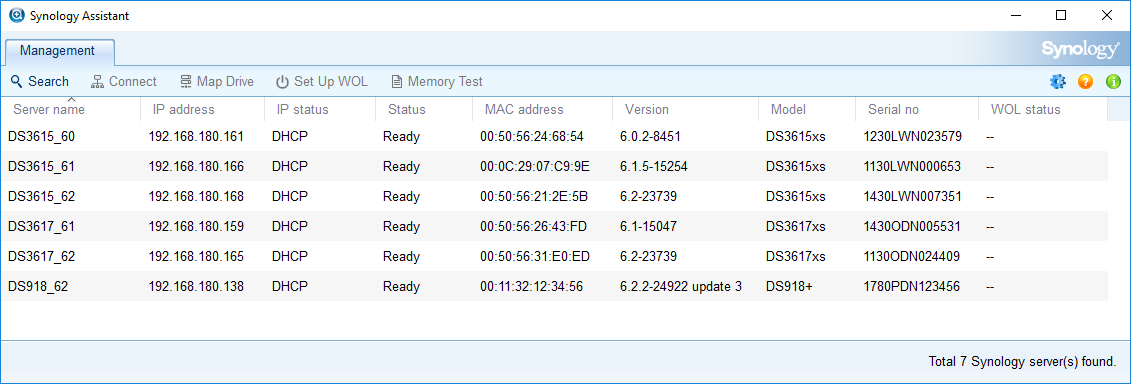
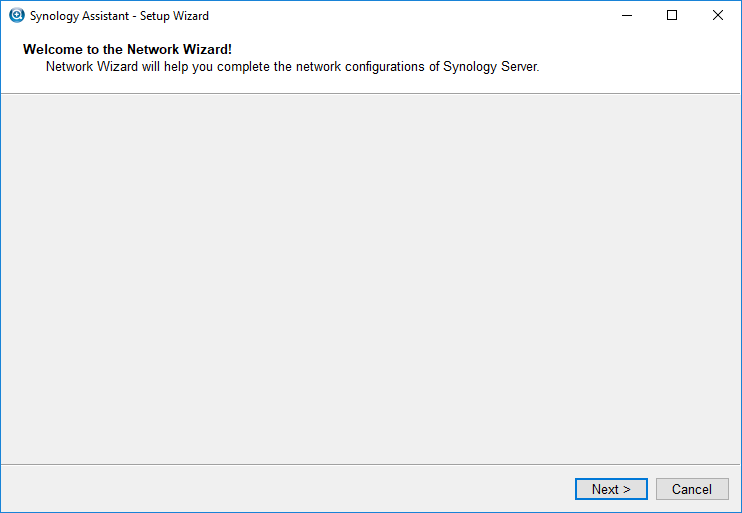
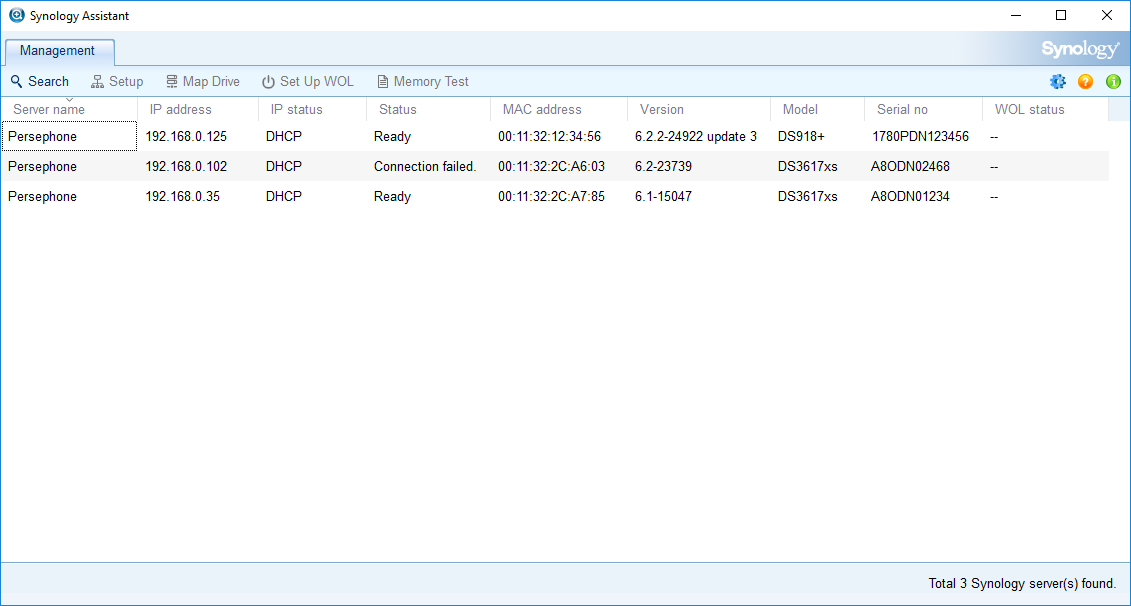
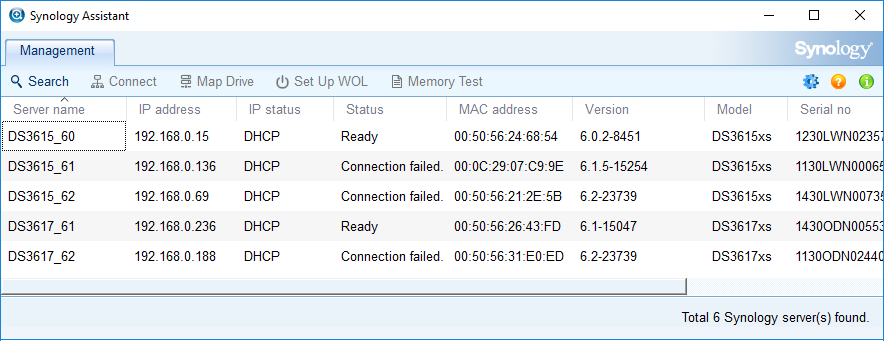
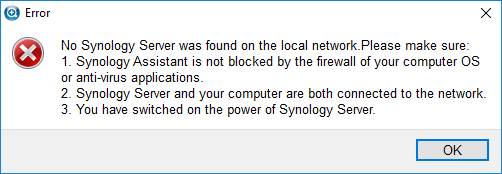
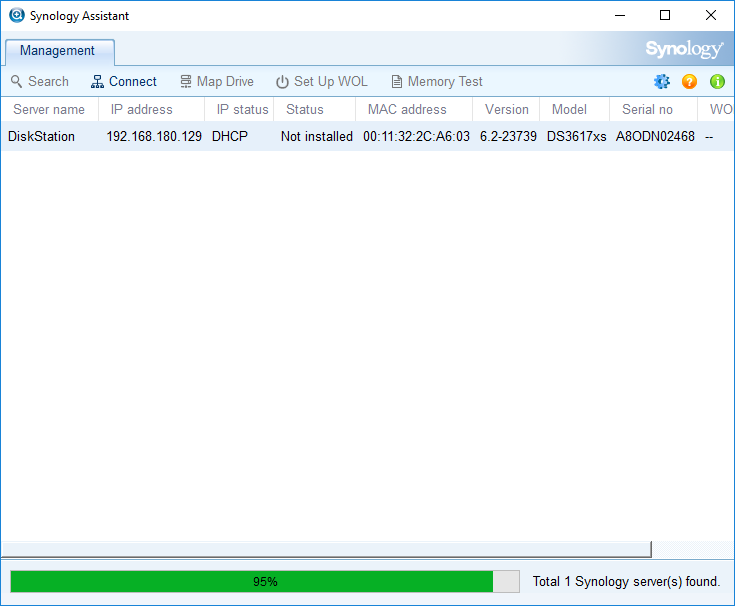
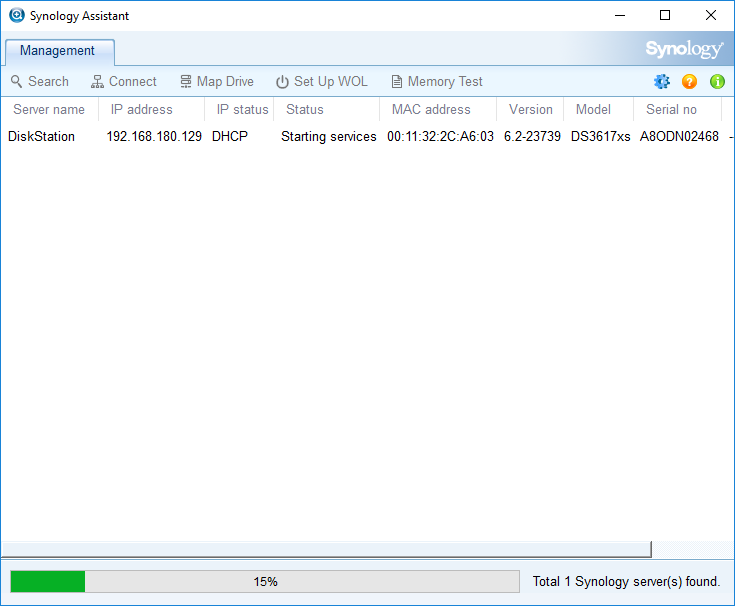
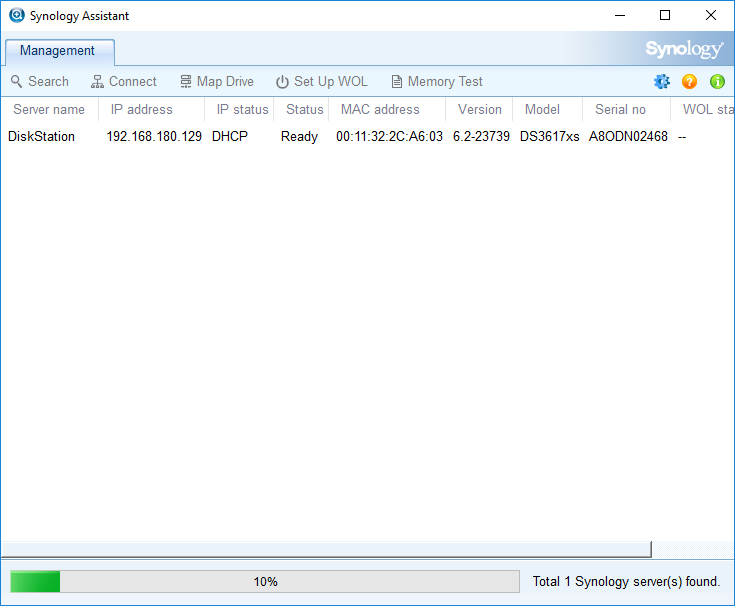
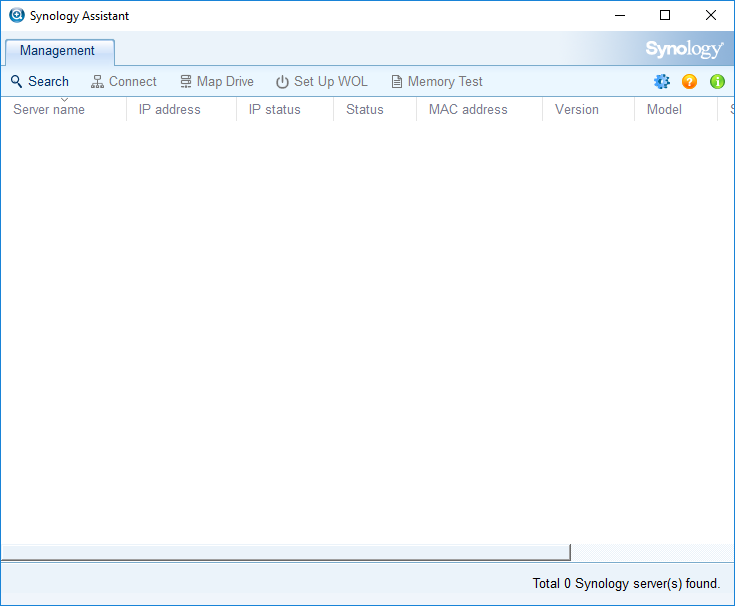
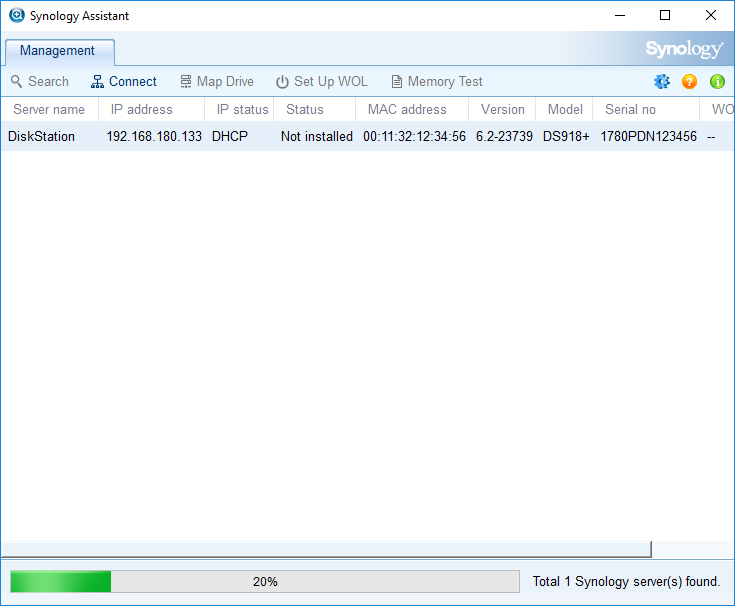
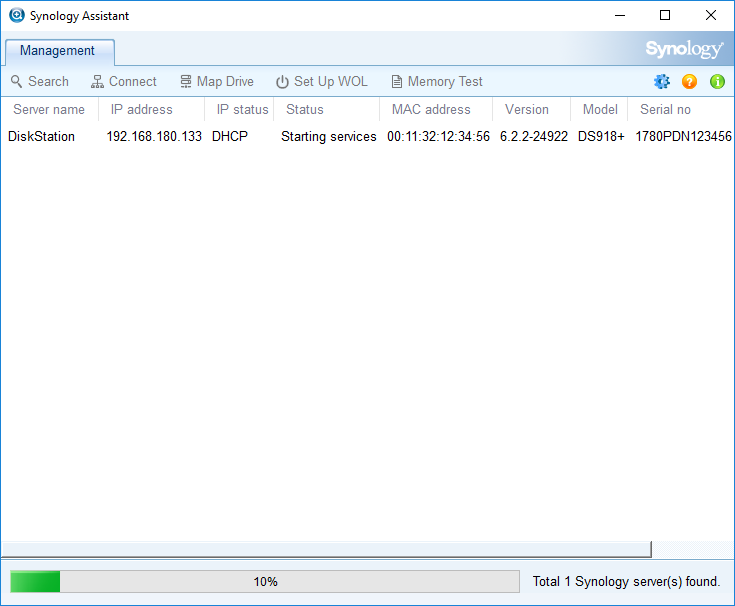
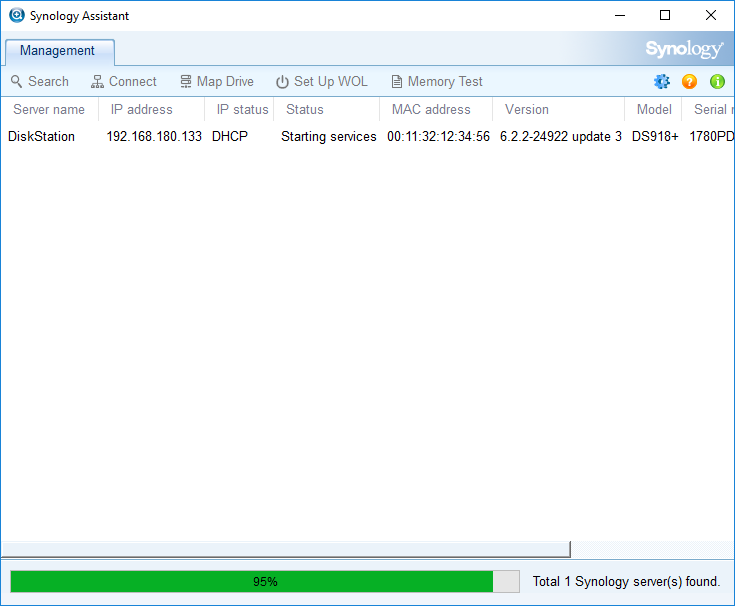
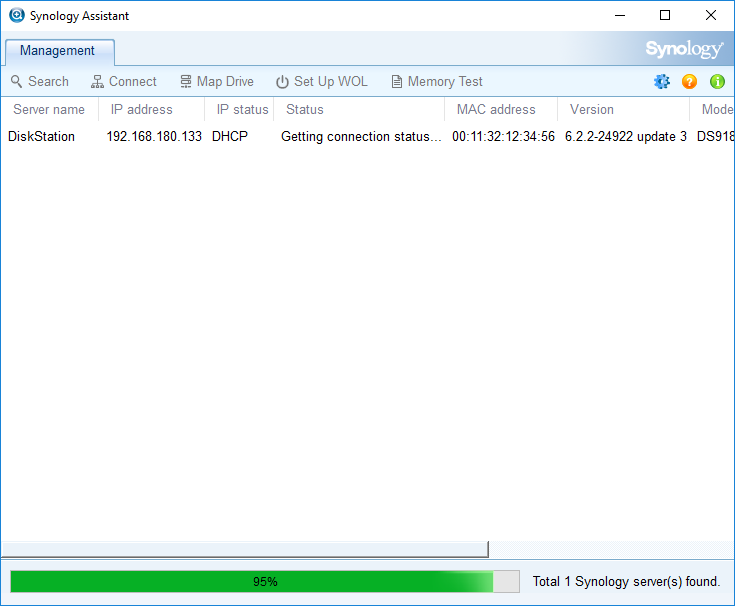
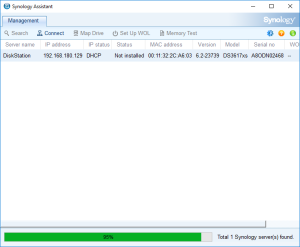
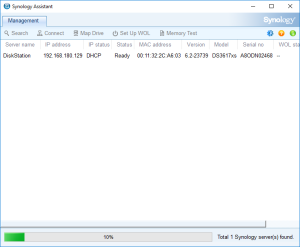
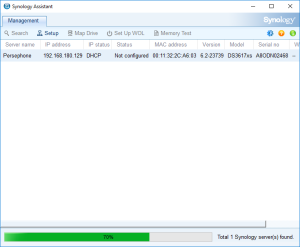
7: Open the “Synology Assistant”, which is more efficient than the page http://find.synology.com to find your VM, and after 1 minute click on “Search”. If you didn’t wait long enough, you will see an Error message (In such a case, click Search “Again”. I never had to do this more than 3 times).


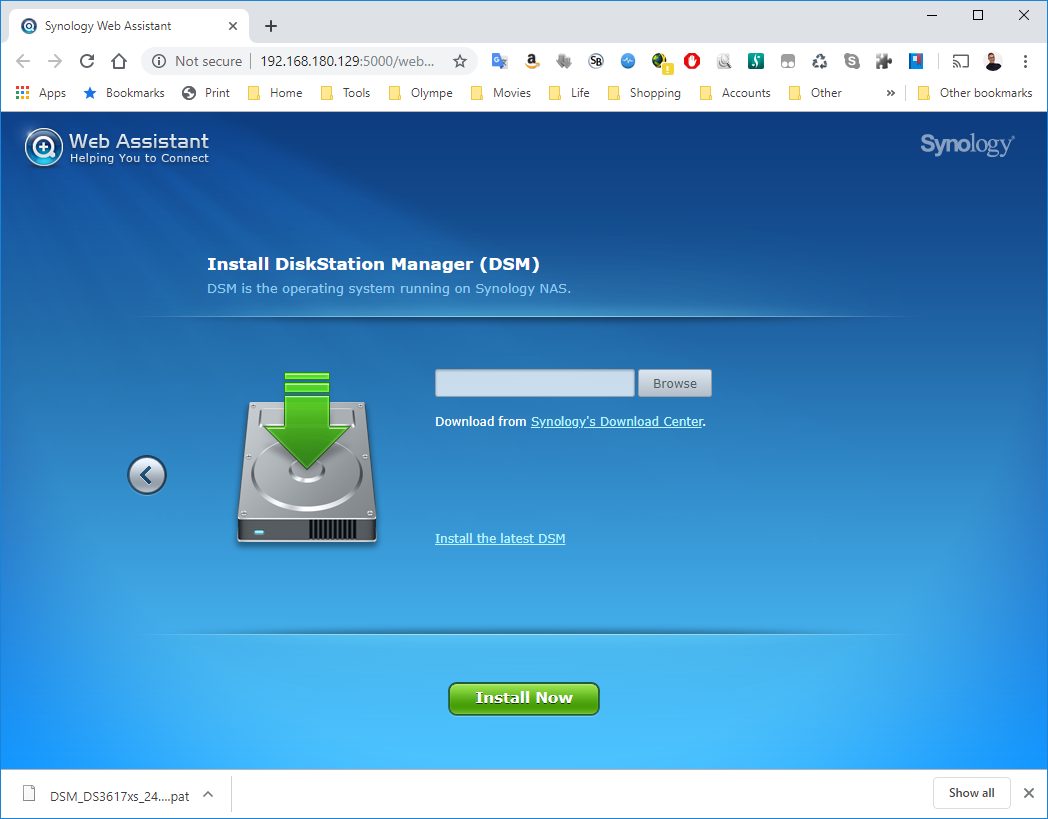
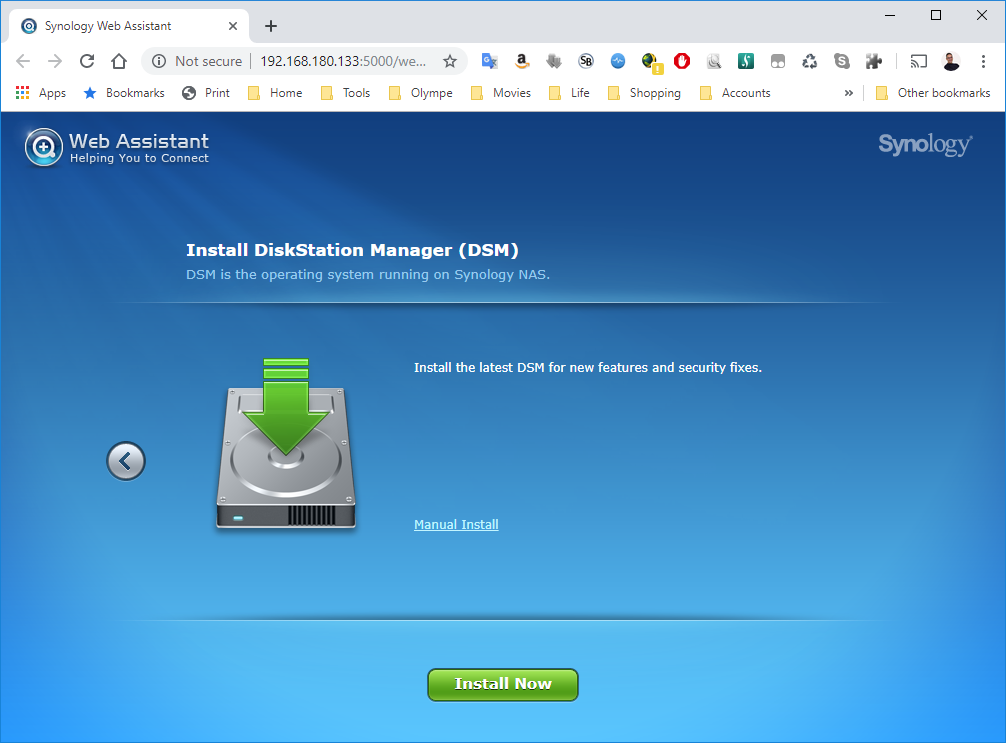
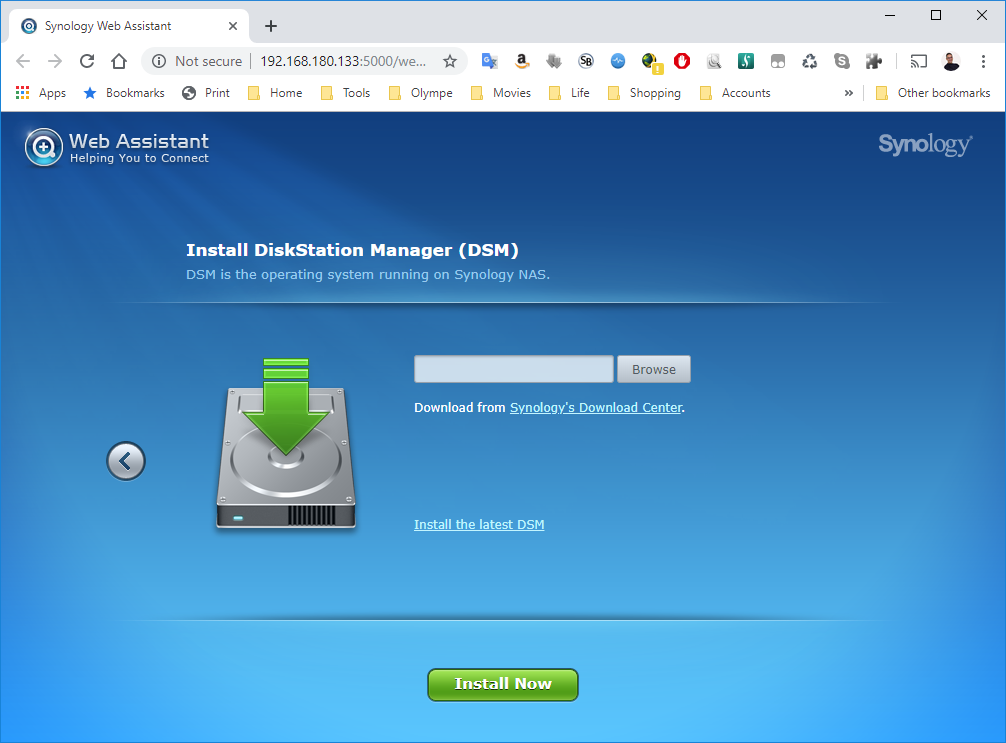
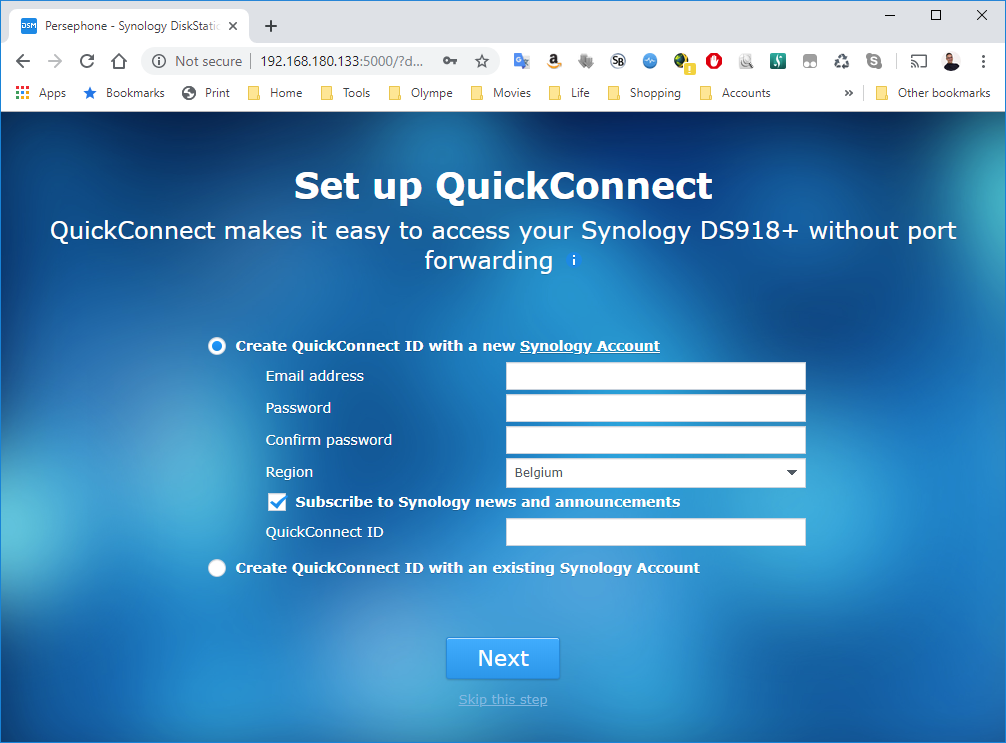
8: Finally, the Assistant will find your VM. A webpage should automatically open (Otherwise, right click on the VM and select “Install”). Click on “Set up” in that page.

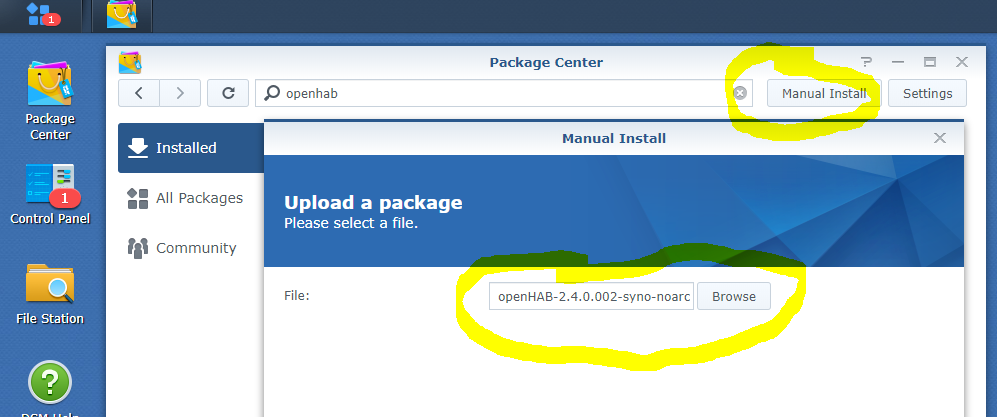
9: Click next on the link “Manual Install”.
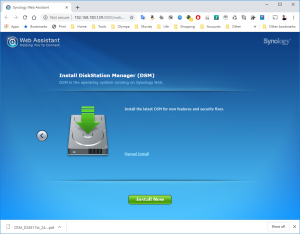
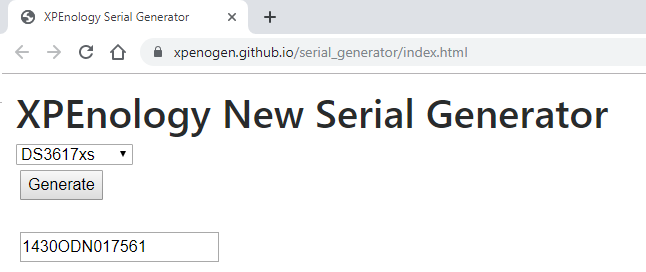
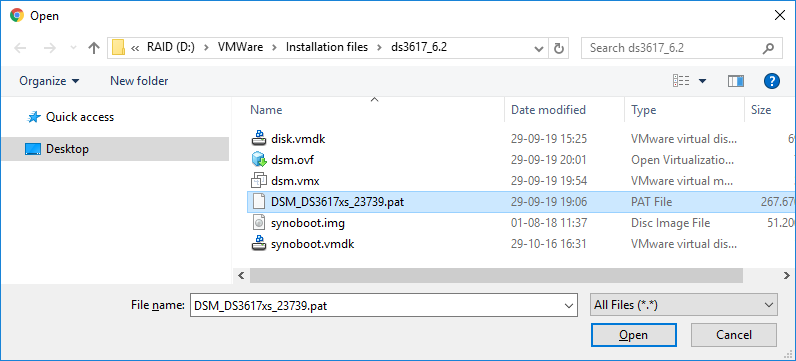
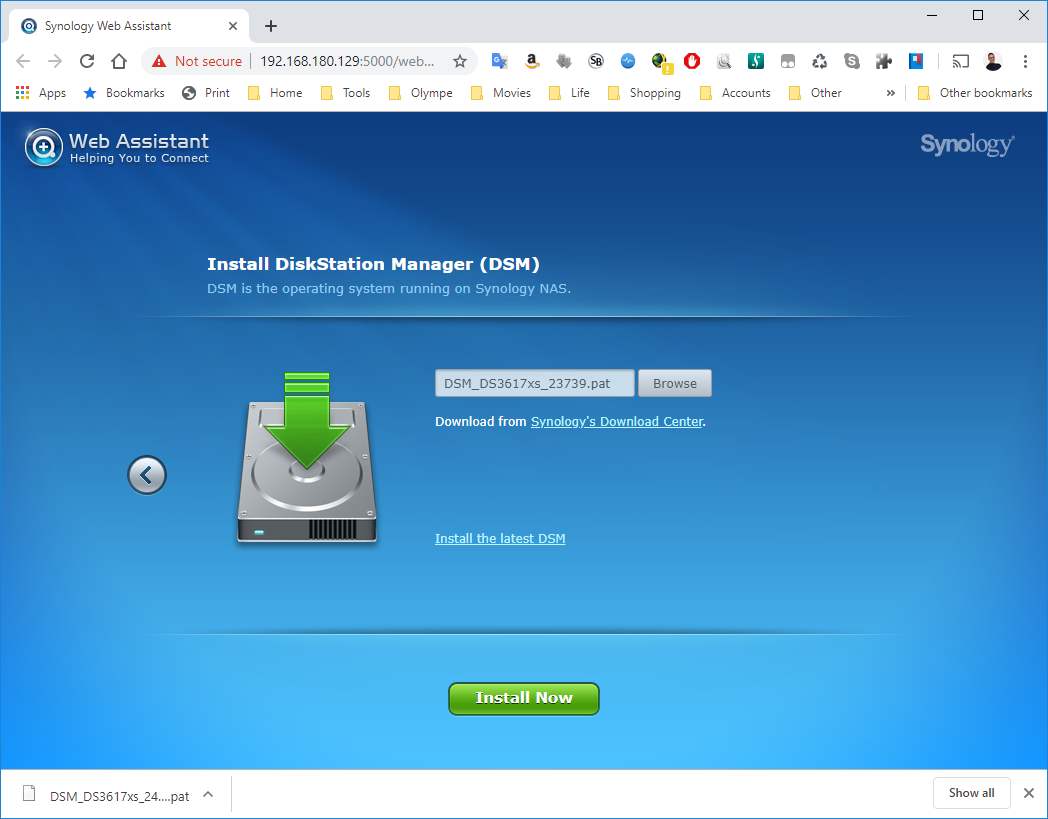
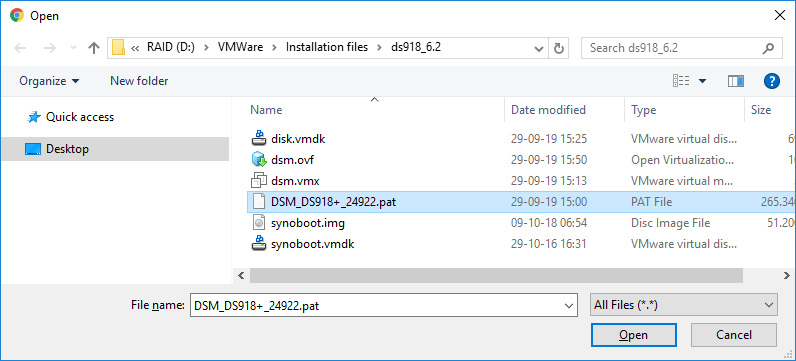
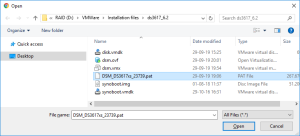
10: Click on Browse to select the image of the DSM 6.2.2 for DS3617xs and select the file “DSM_DS3617xs_23739.pat” in the folder when you unzipped the package downloaded here previously.

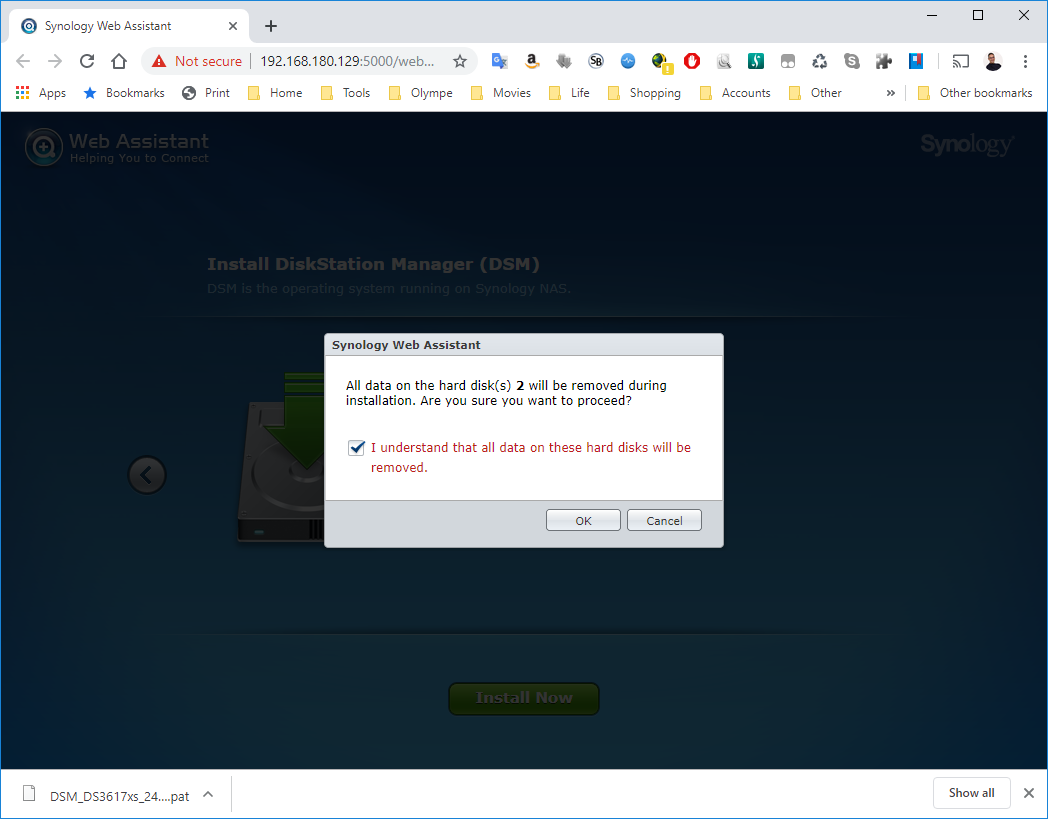
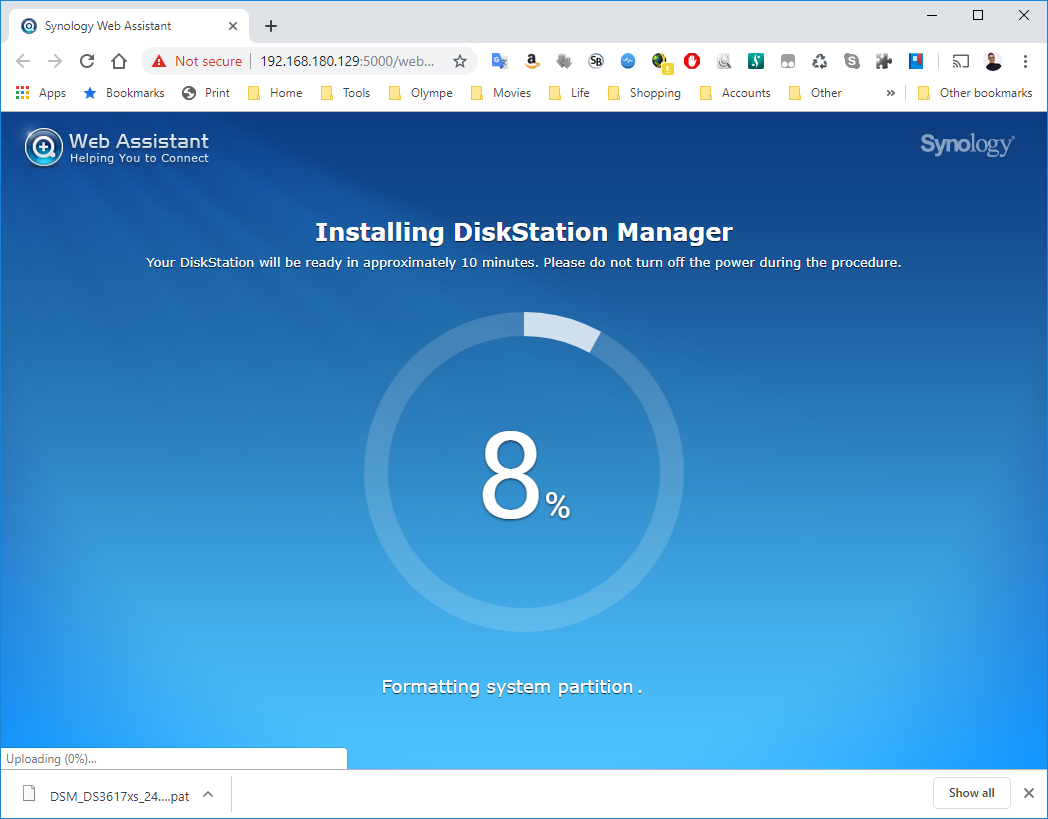
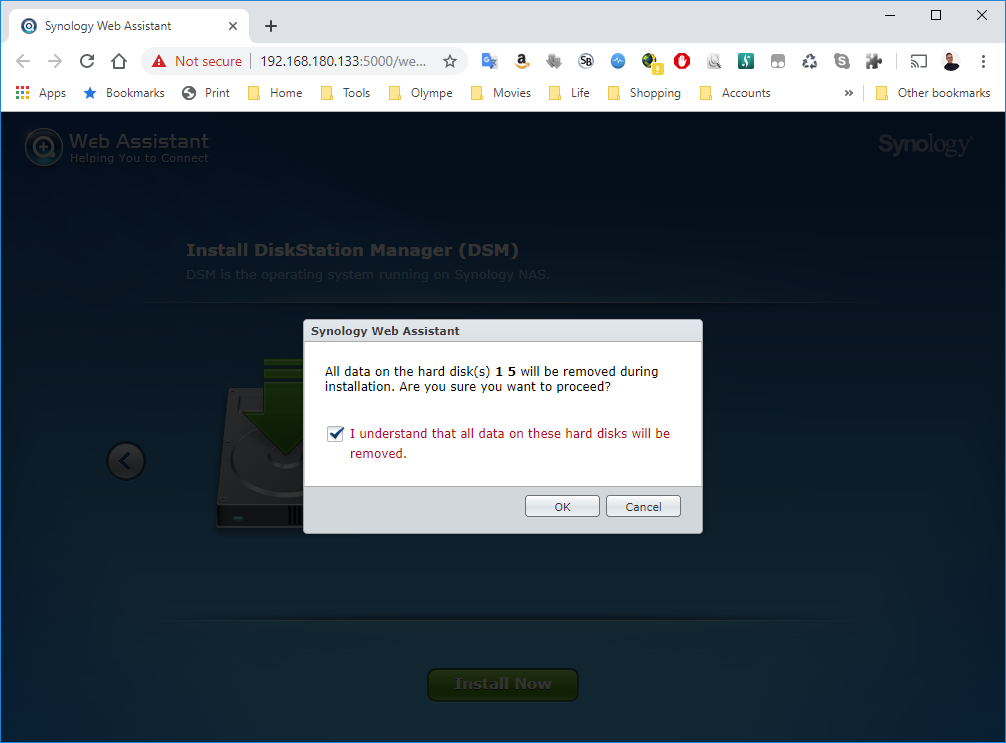
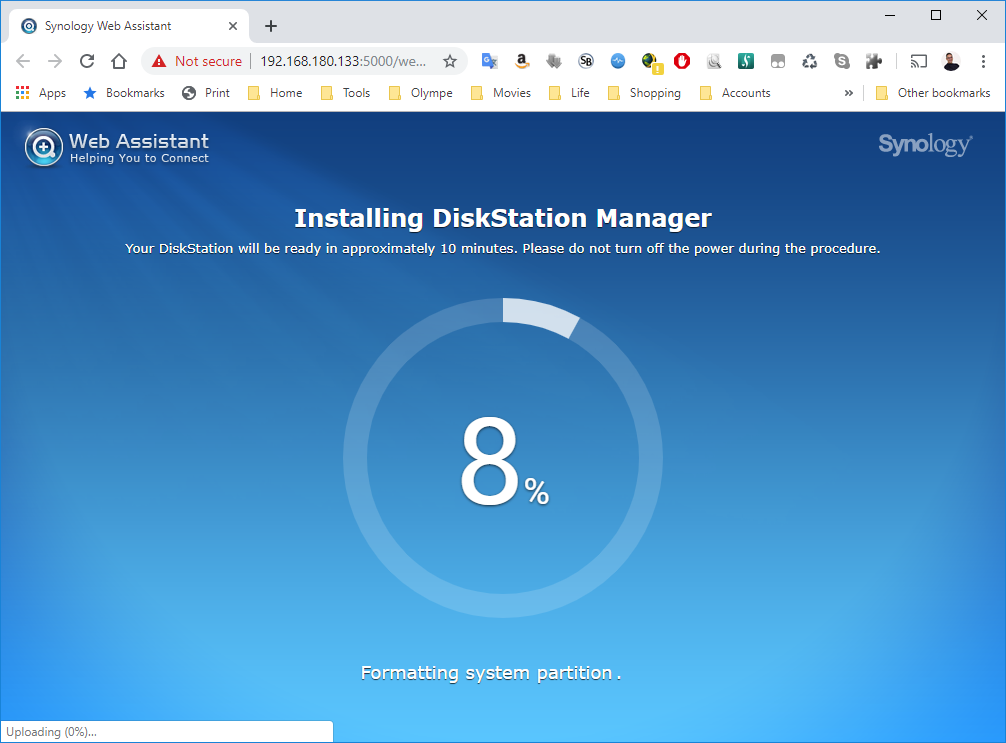
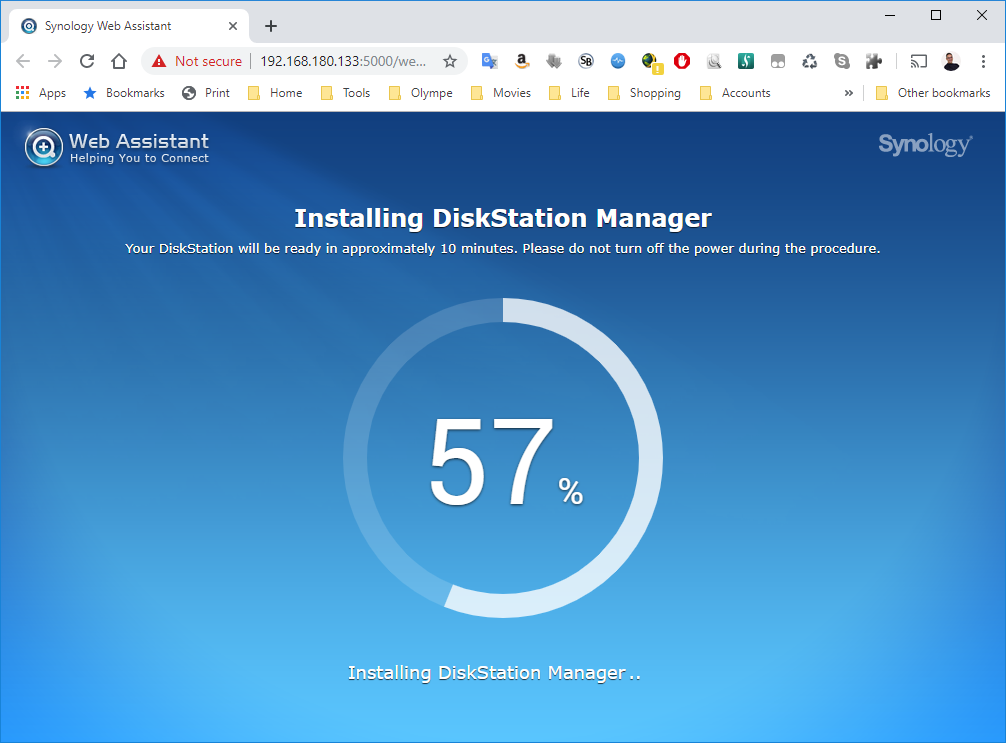
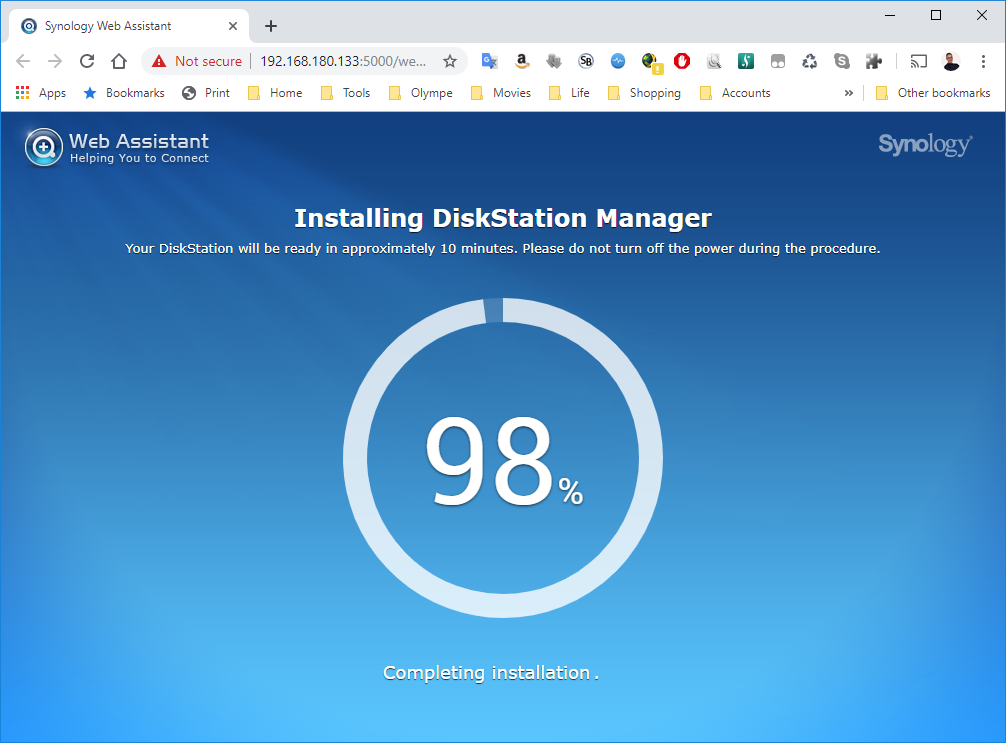
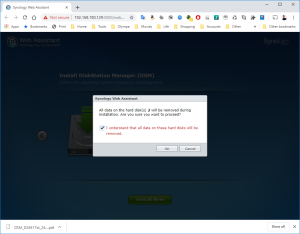
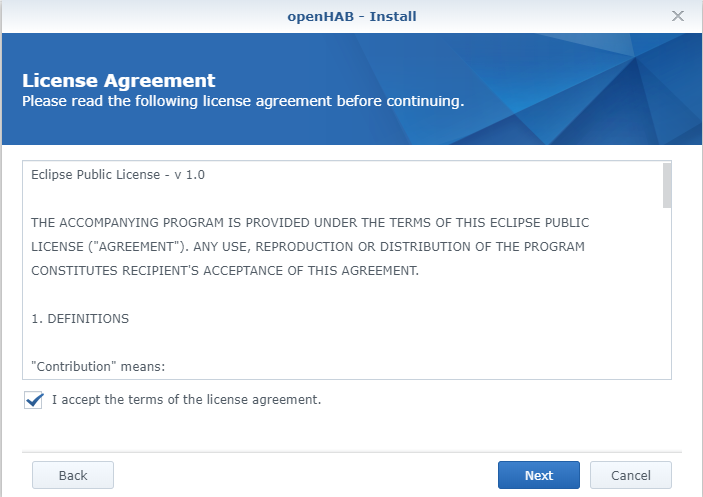
11: Finally, click on “Install Now” and confirm that the installation can override the disk… it’s the virtual SCSI Hard Disk member of the VM. No worry 😉

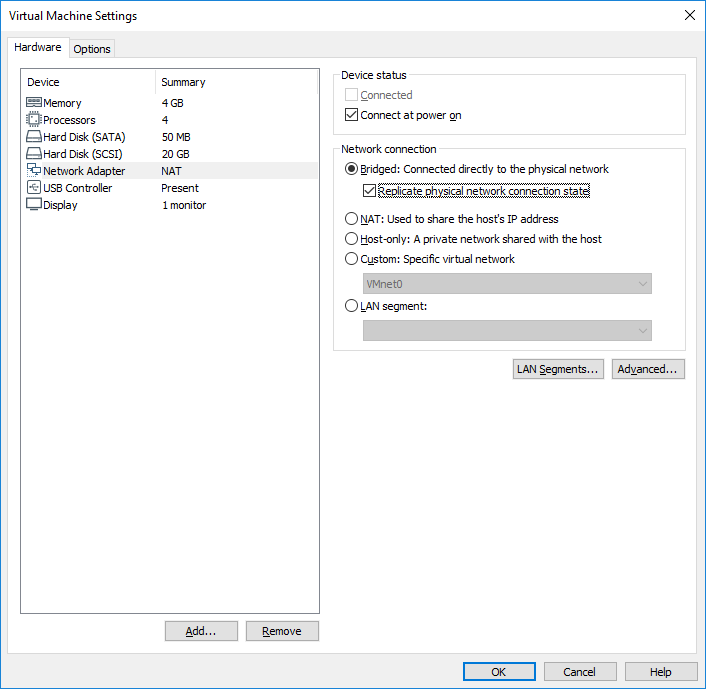
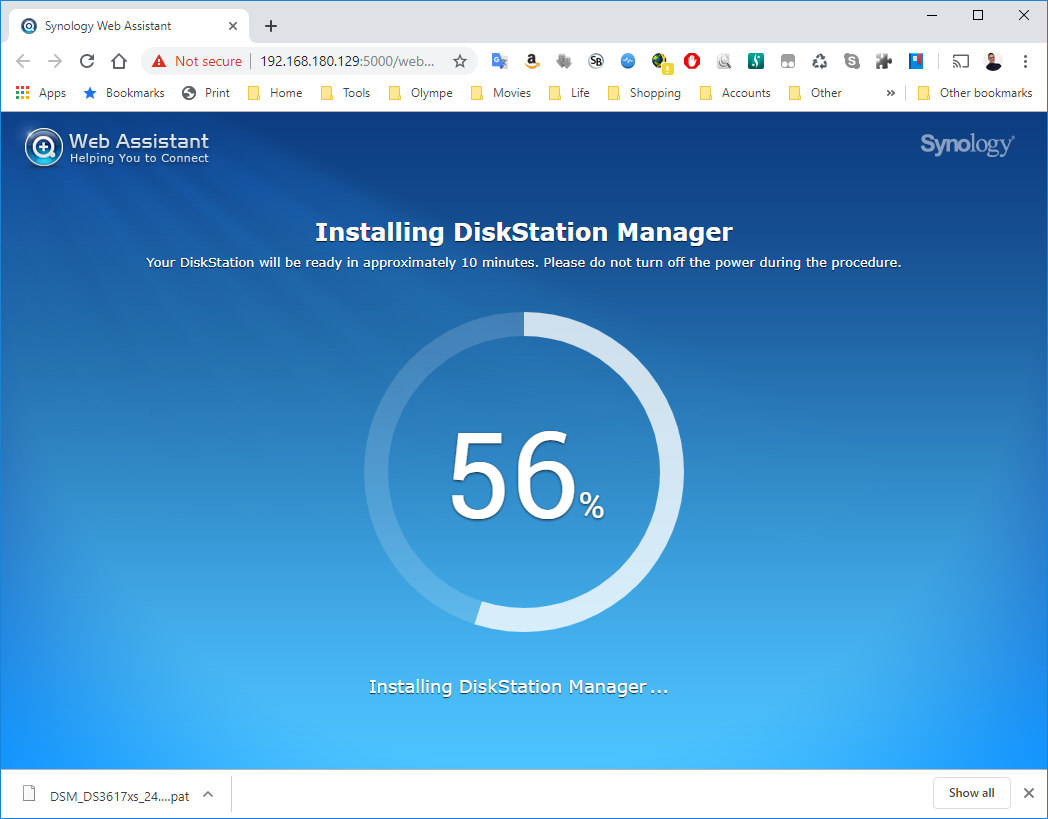
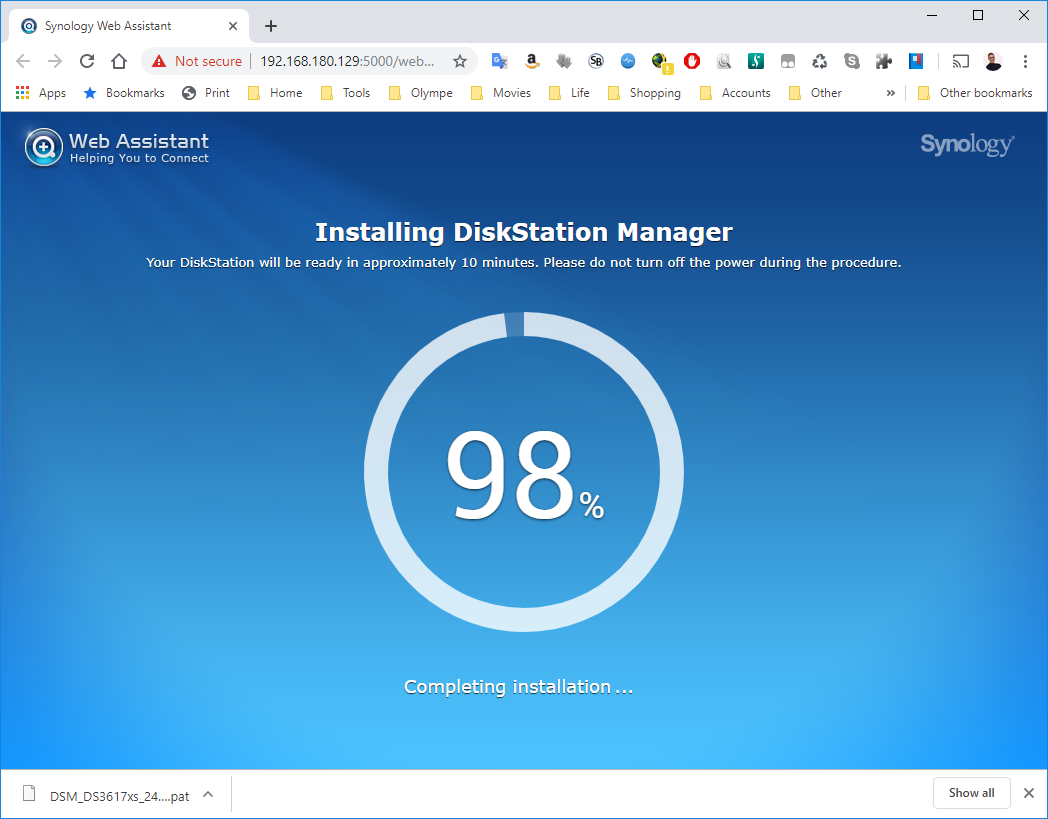
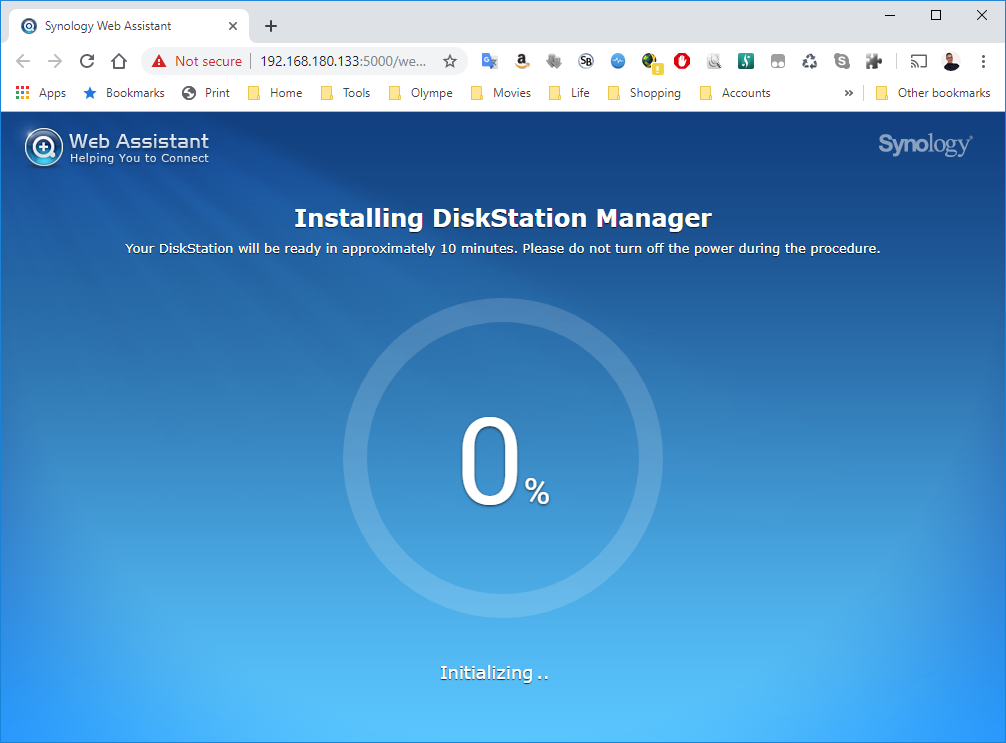
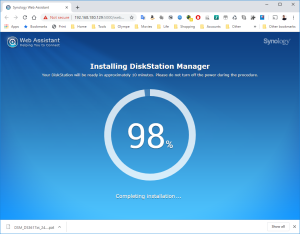
12: The installation will take a few minutes and once completed, you will see in the VMWare Workstation that the VM is rebooting.


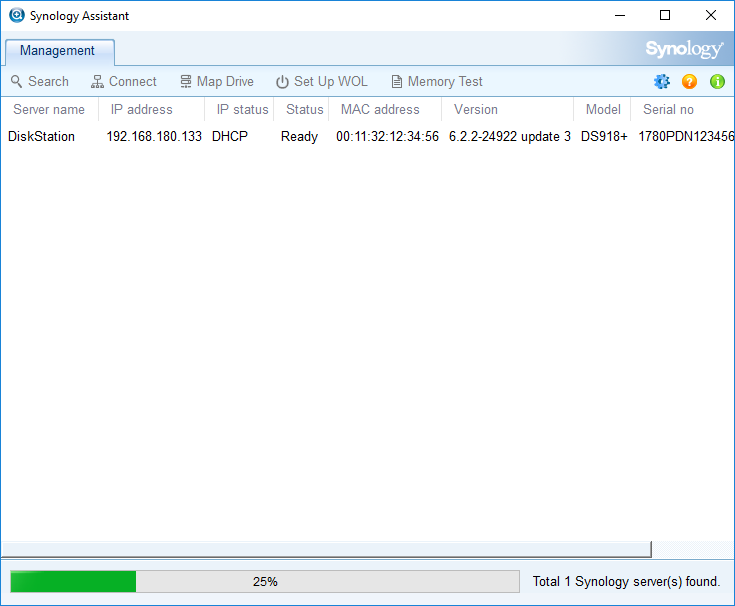
13: On the installation page, you see a count down. If you want to check the status of the VM, you can go back to the Synology Assistant and Click Search. You should see that it’s restarting, etc… and is finally ready. At that moment, you can select the VM and click Connect.

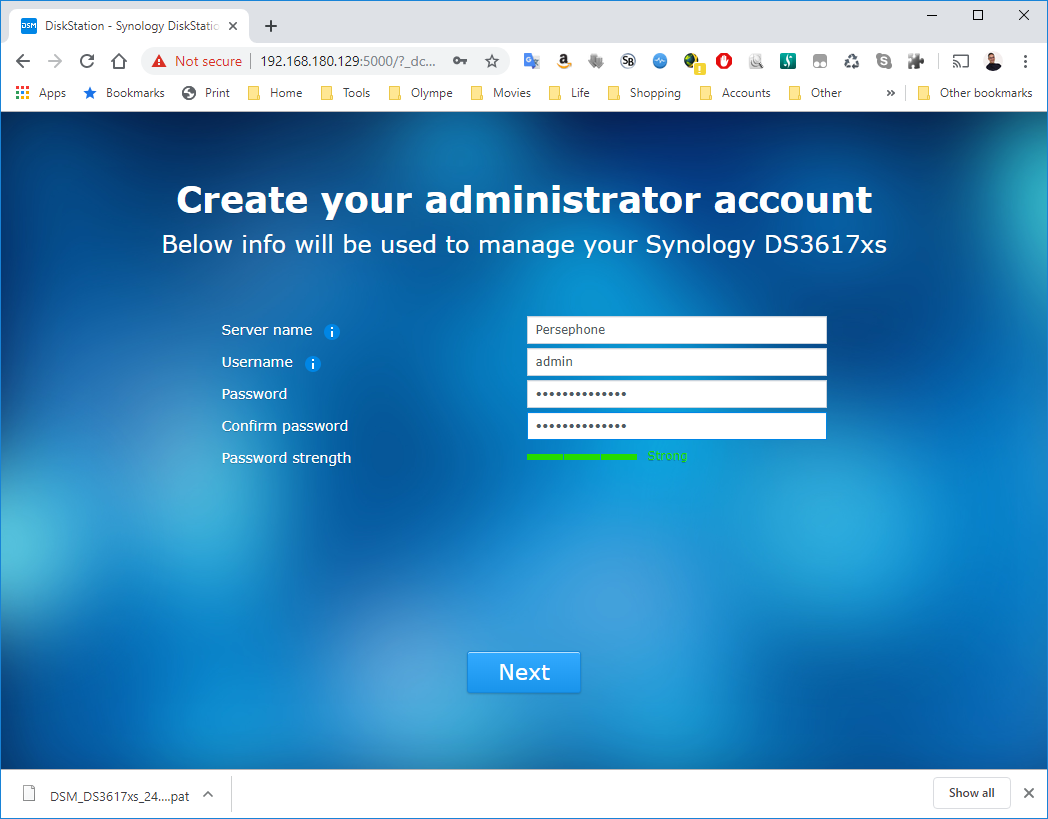
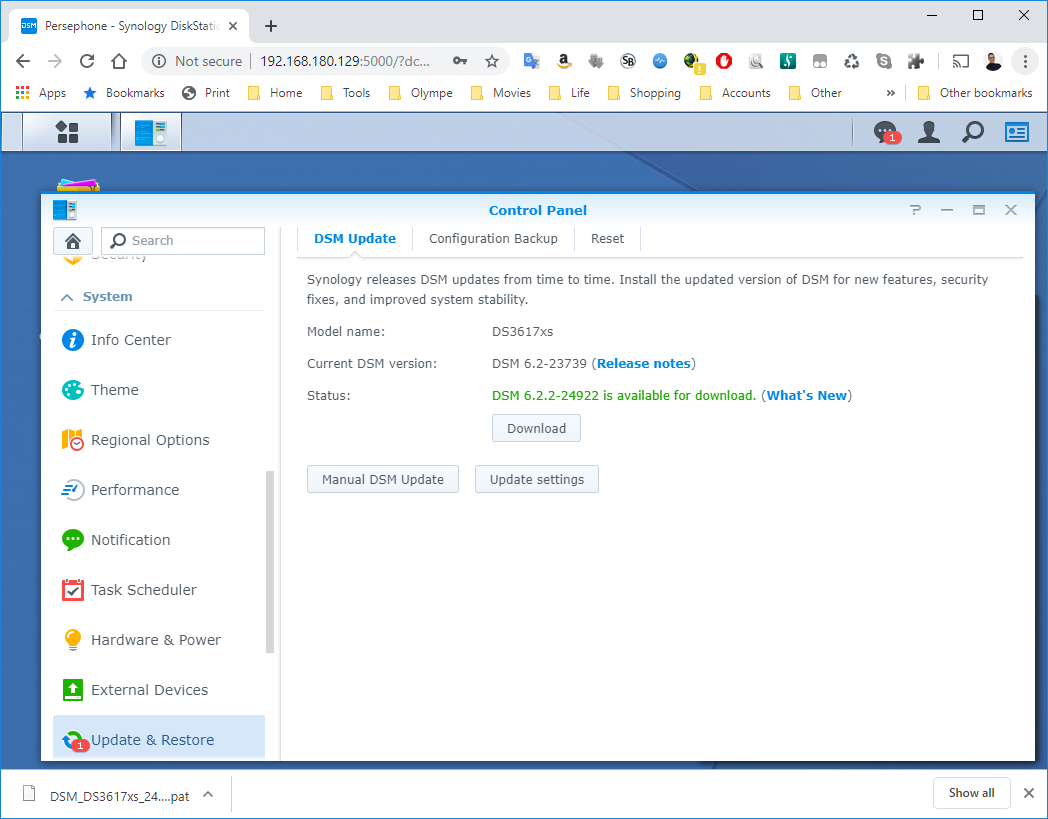
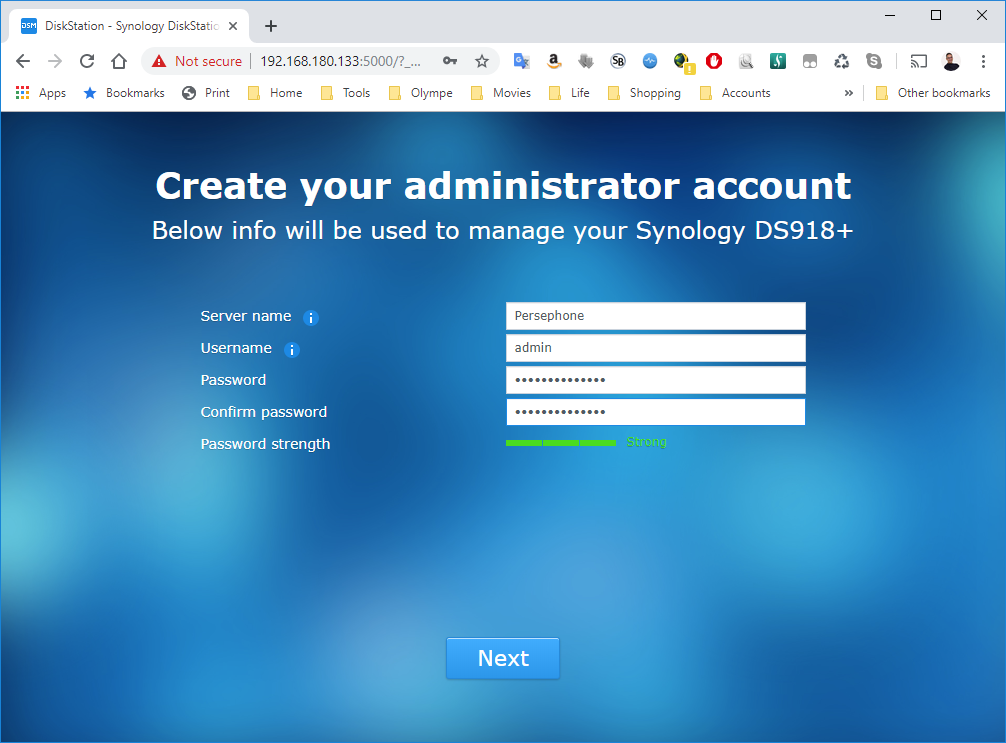
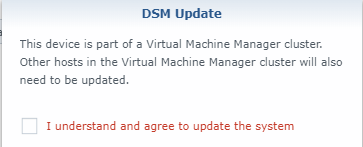
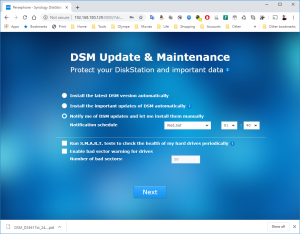
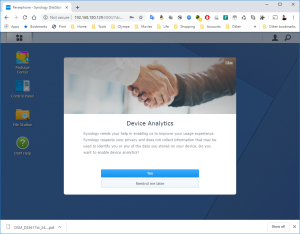
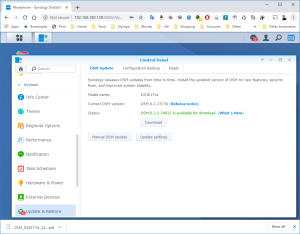
14: You will now be able to login into the VM and configure it. DO NOT select “Install the latest DSM version automatically” or “Install the important updates of DSM automatically”!!! The image 37739 is the latest compatible with the loader used by this VM. Upgrading your DSM will break the VM.

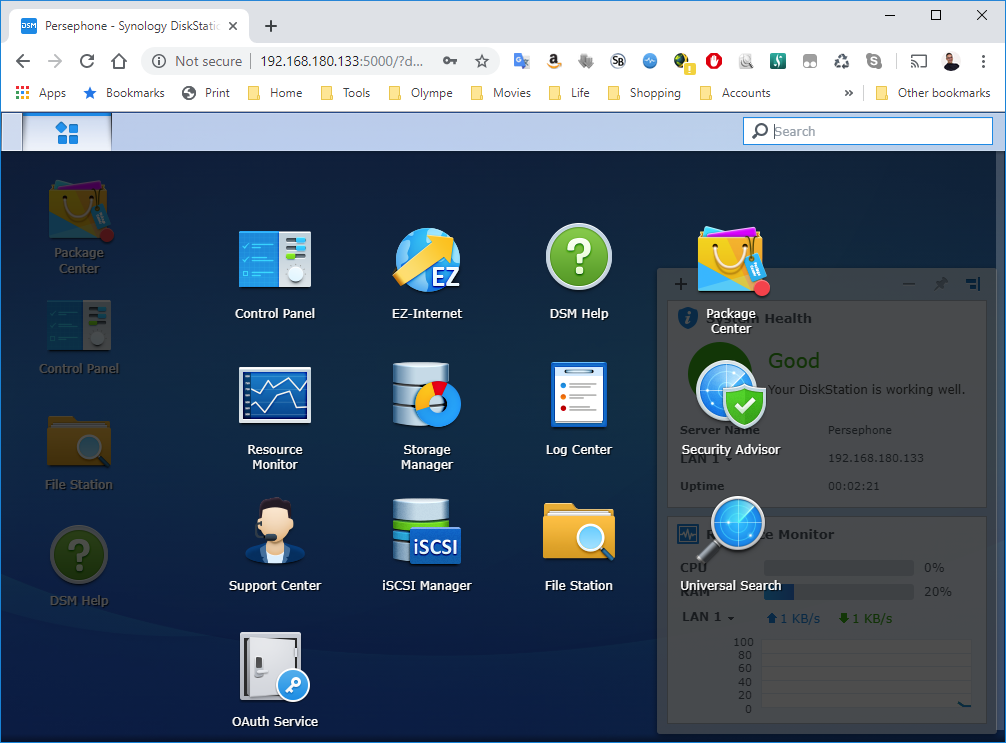
15: You have now a DS3617xs with the DSM 6.2.2-23739.
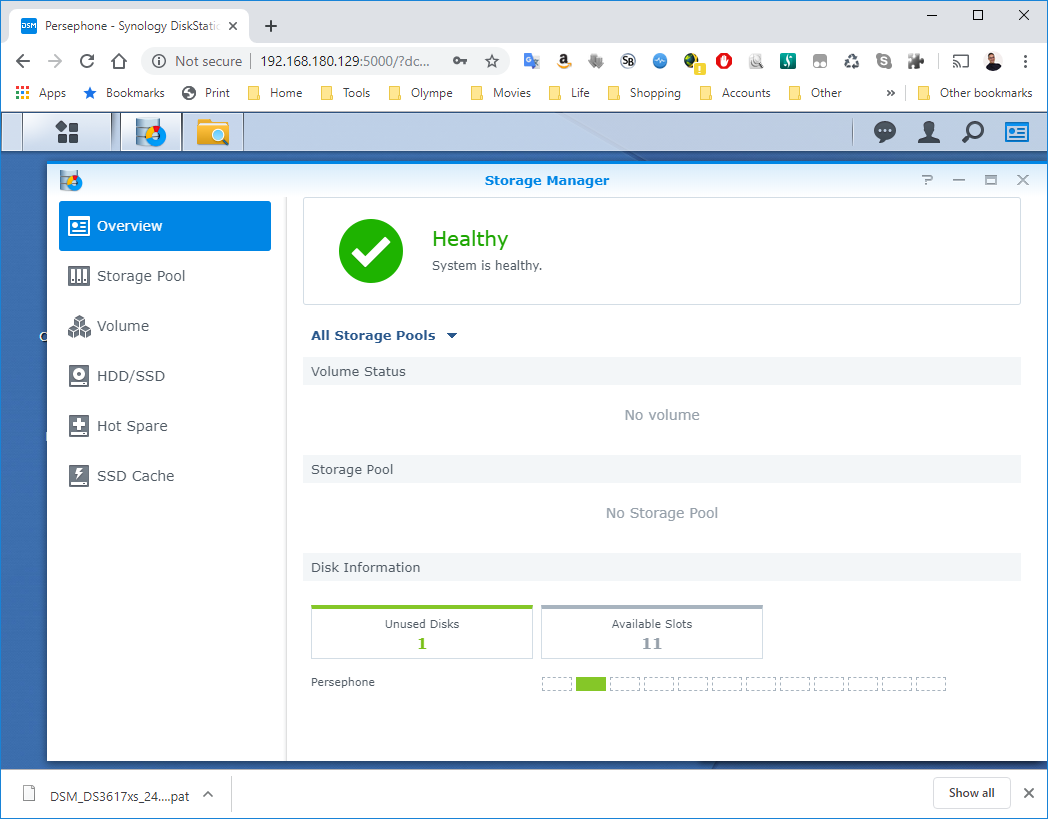
16: DO NOT upgrade or the disk will disappear and the VM won’t work anymore (Someone mentions that mounting the Disk on a SATA controller instead of a SCSI one helped… See here. But it didn’t work for me). Looking into the Synology Assistant, you would see that the Virtual Synology is not configured.
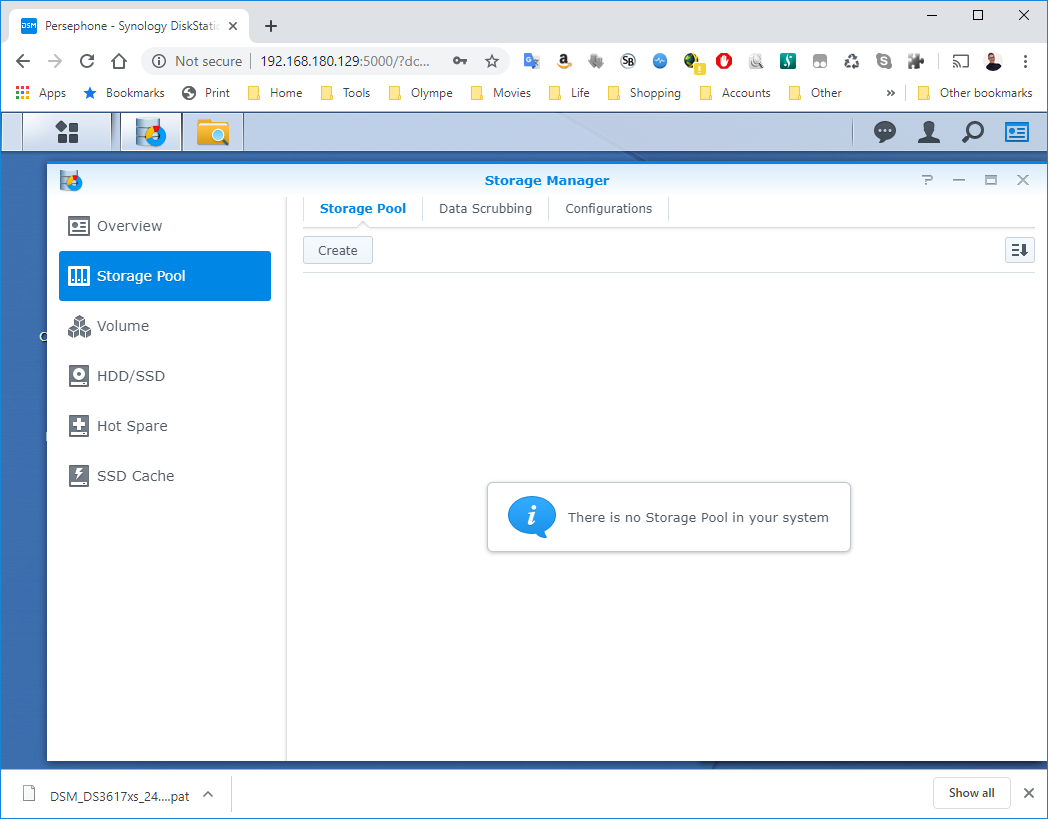
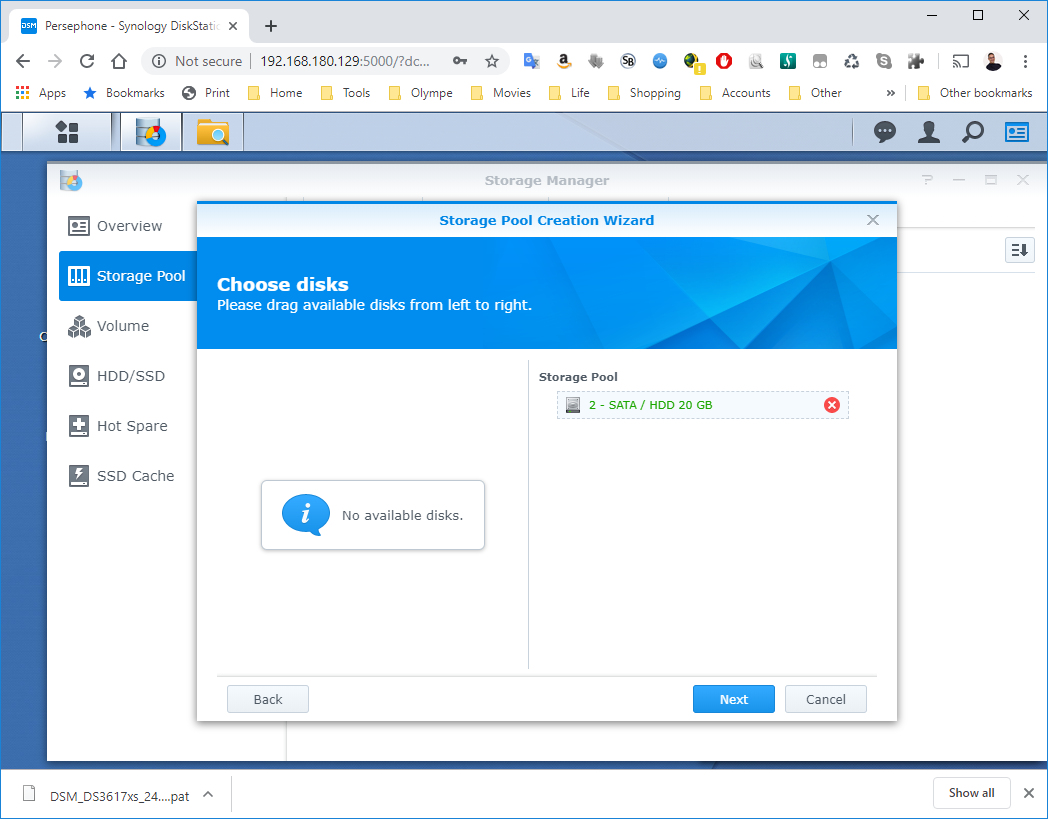
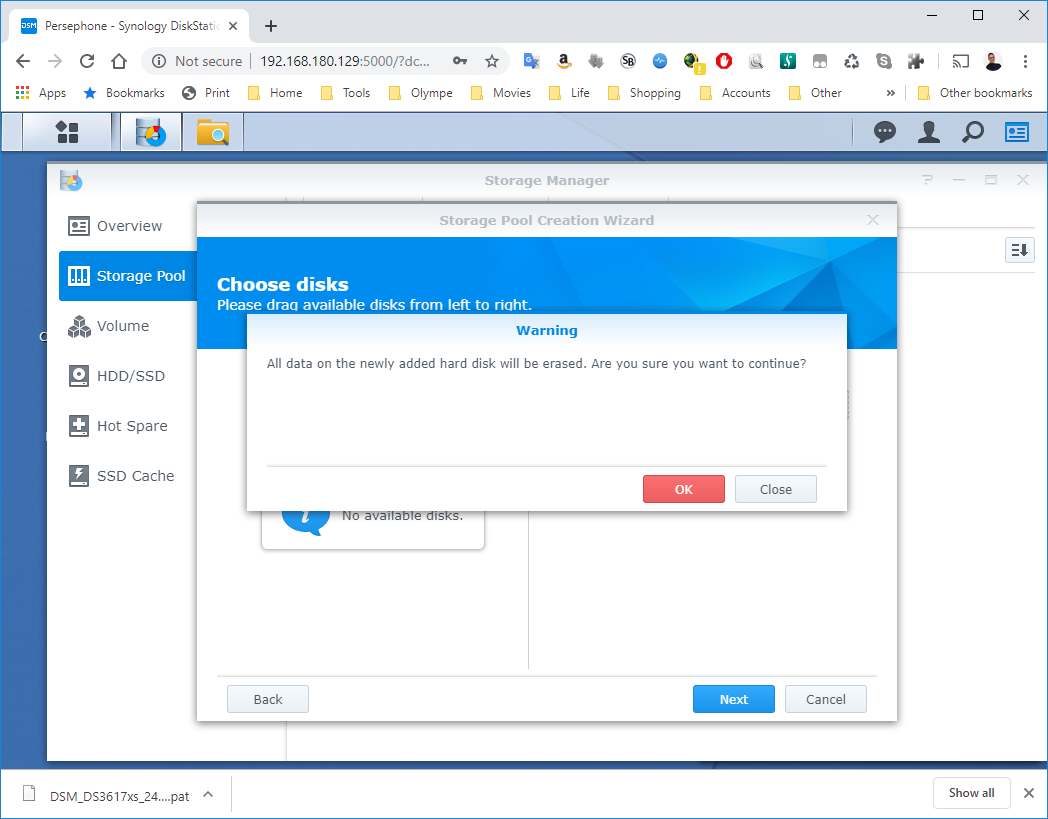
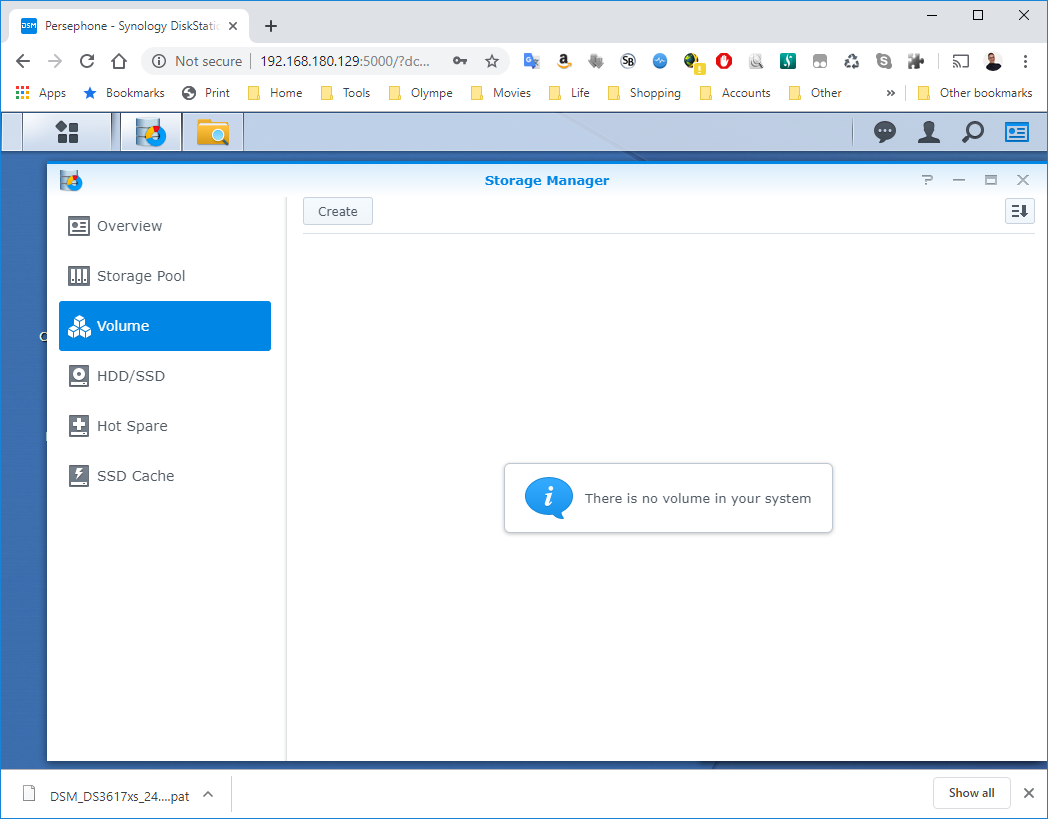
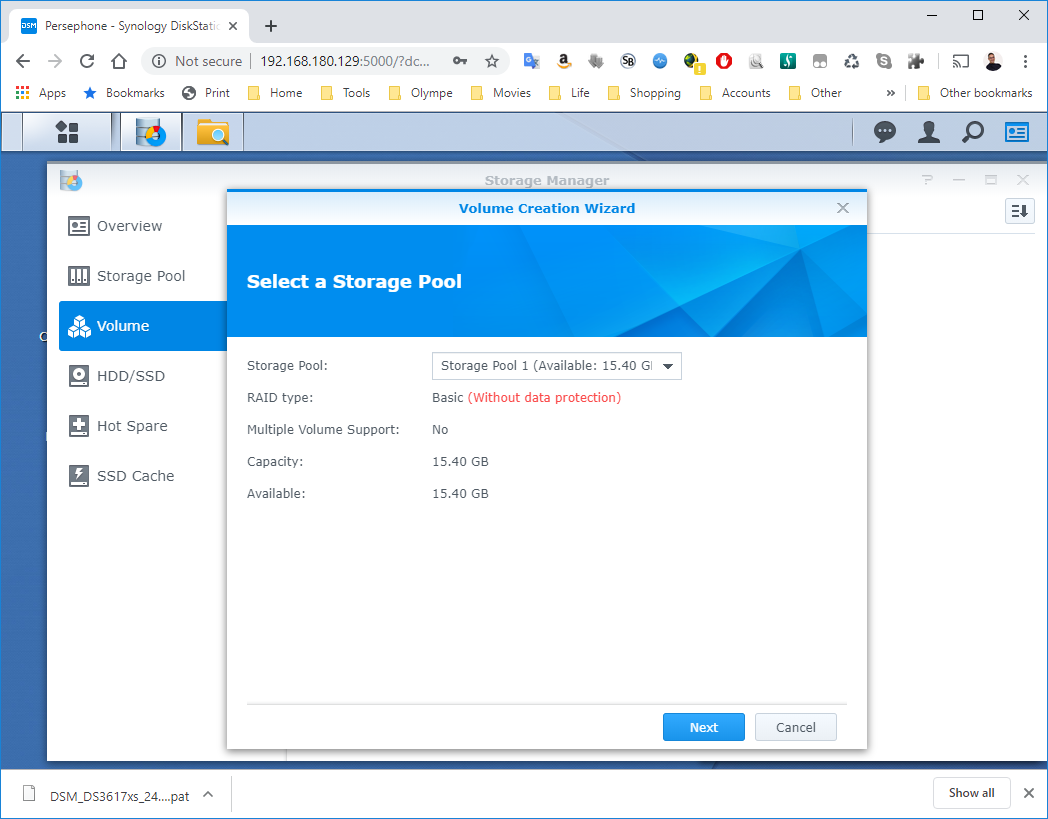
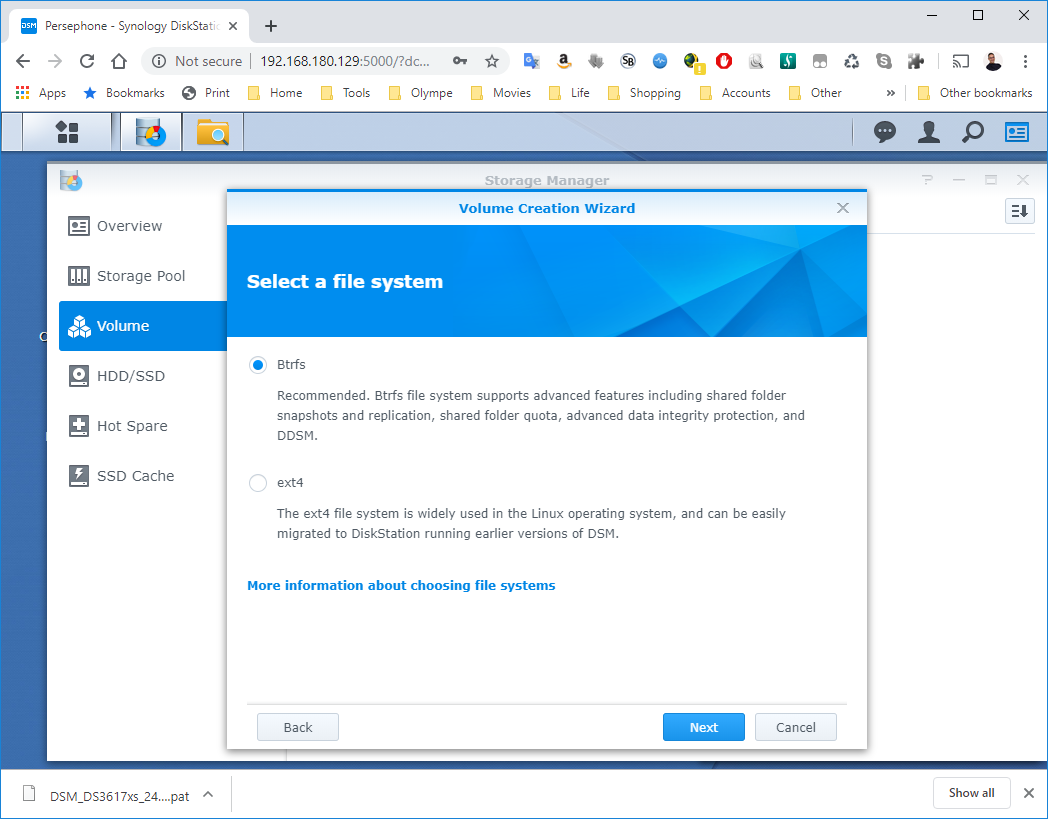
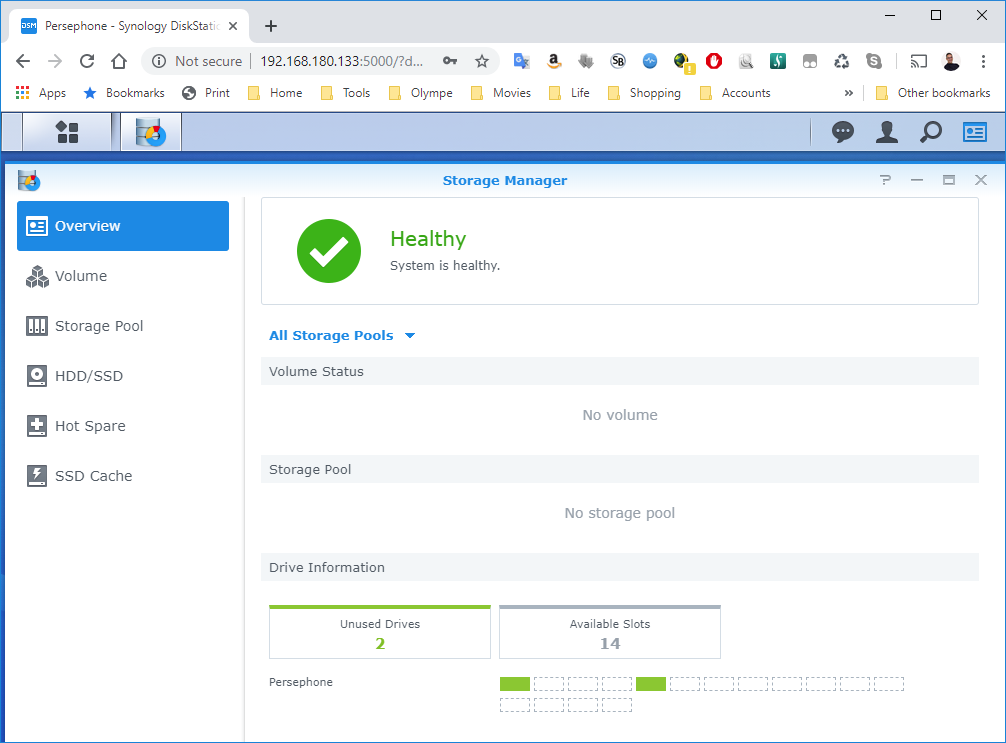
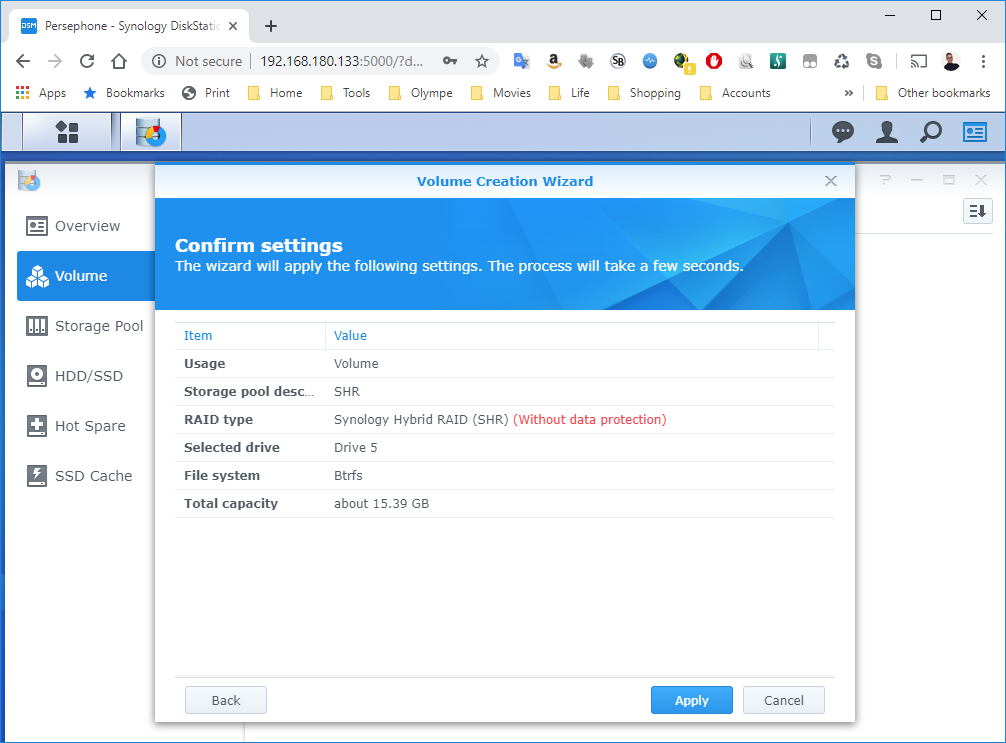
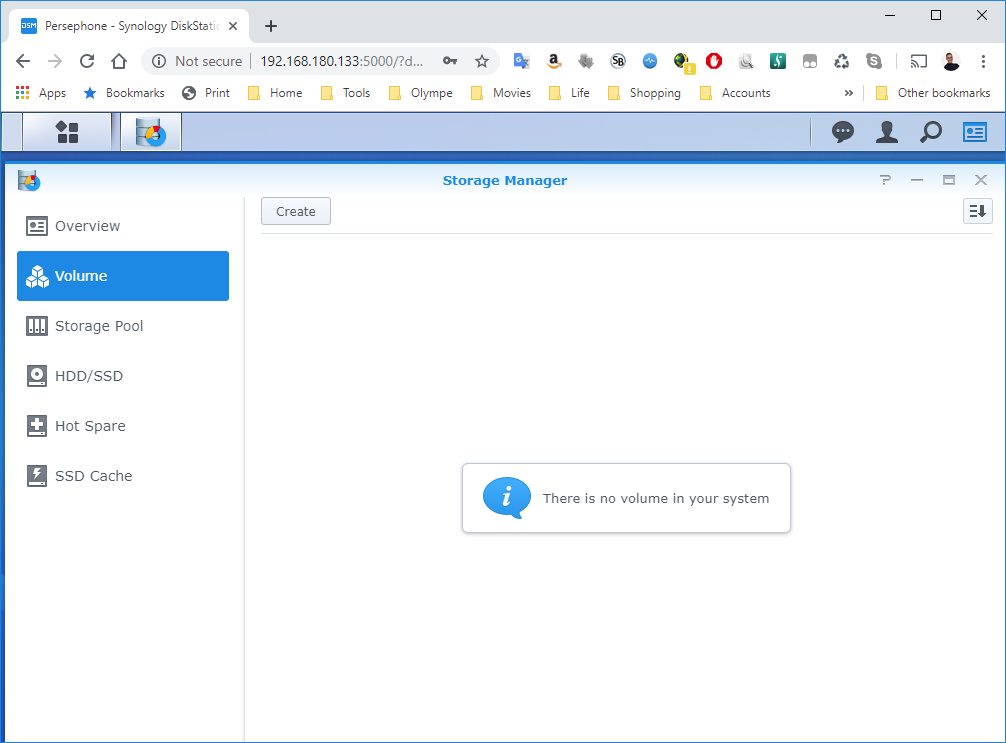
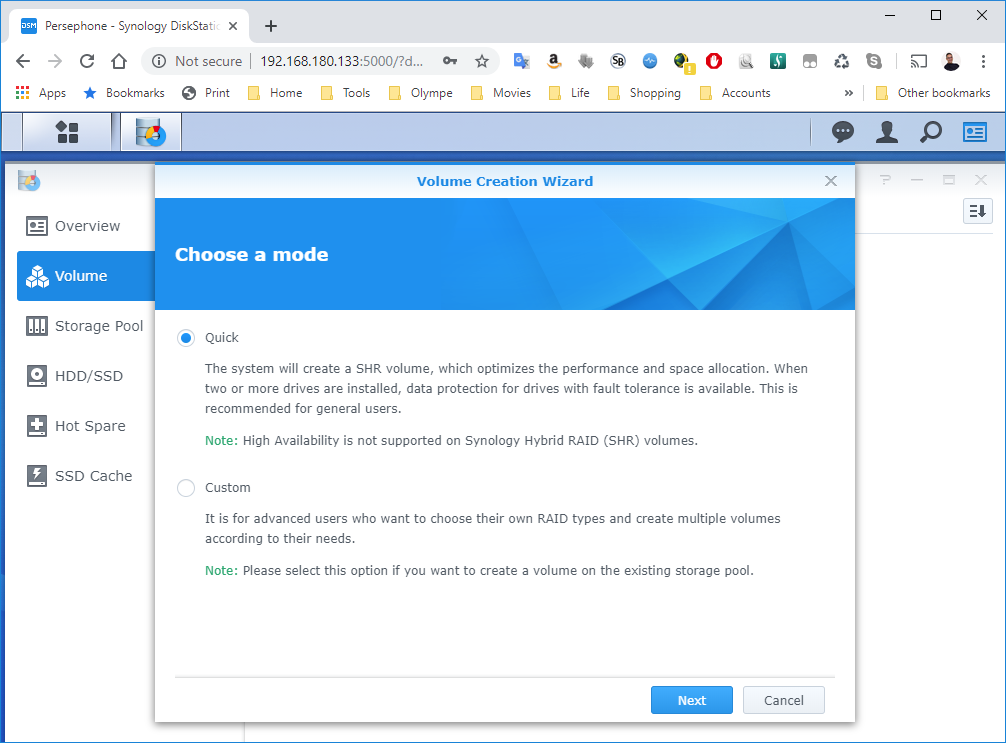
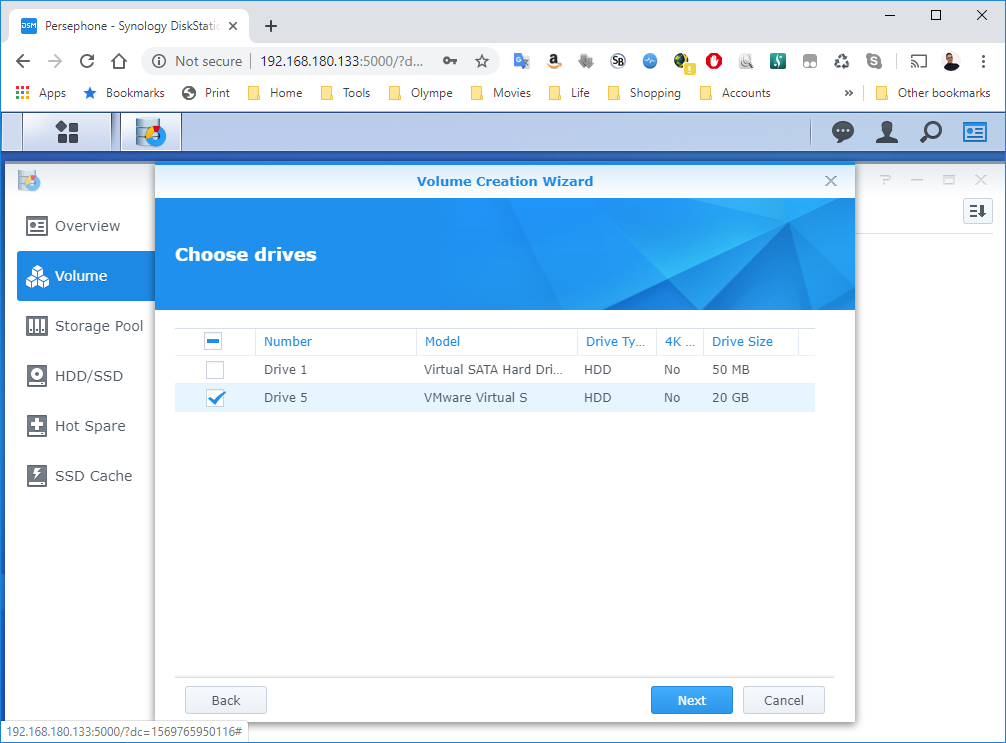
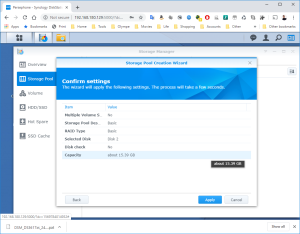
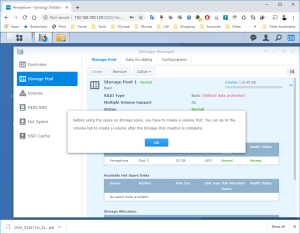
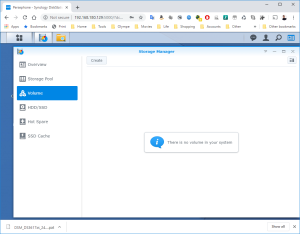
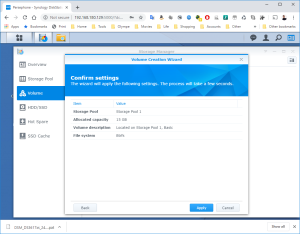
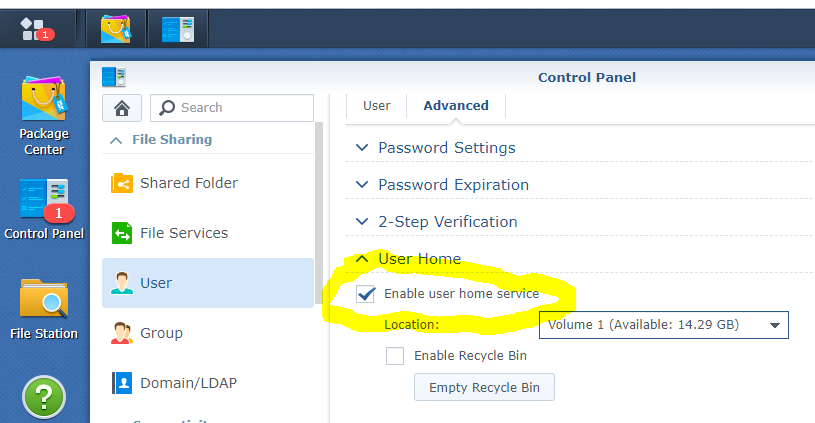
17: It’s now time to use the SCSI Hard Disk to create a first Volume. Open the DSM Main Menu and start the Storage Manager. Go to “Storage Pool” and click “Create”. Use the HDD of 20GB. Next, go to “Volume” and click “Create”. Use the “Storage Pool” created previously.


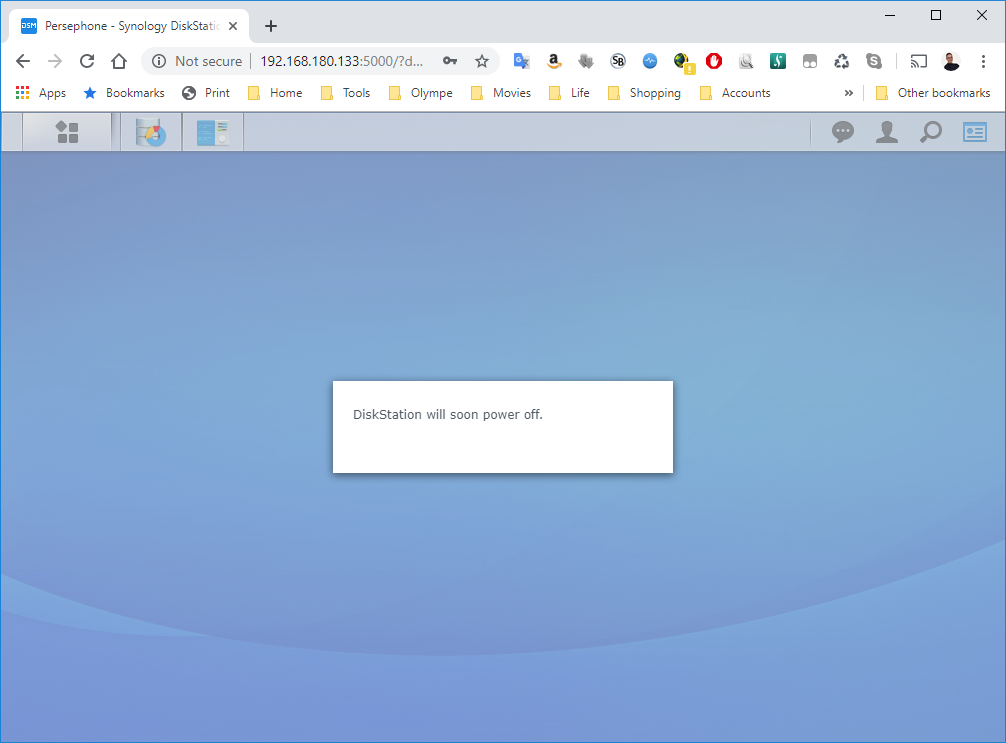
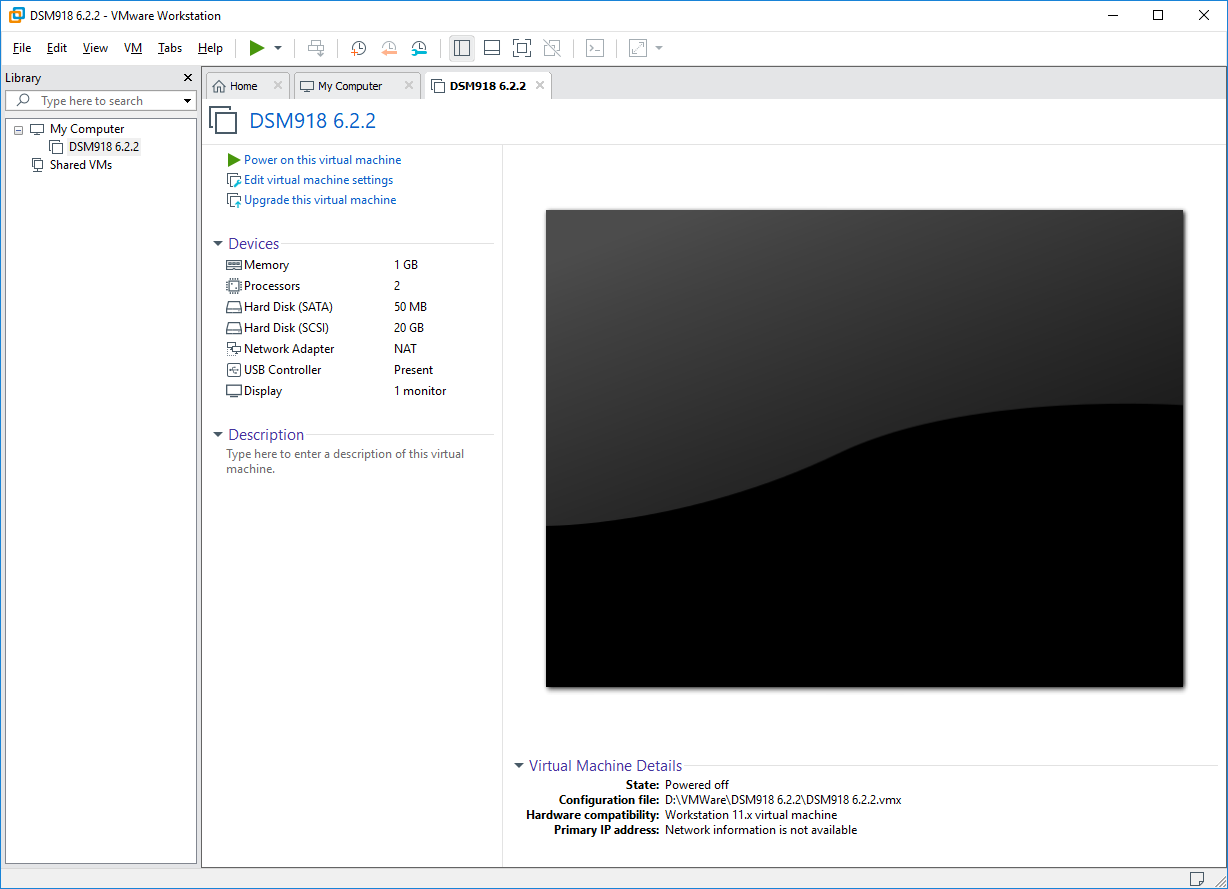
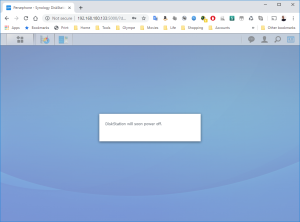
18: Now, you can upgrade the VM to your version of VMWare. Shutdown the DSM Properly (via the menu on the Buddy Icon in the top-right corner). The VM will soon stop.
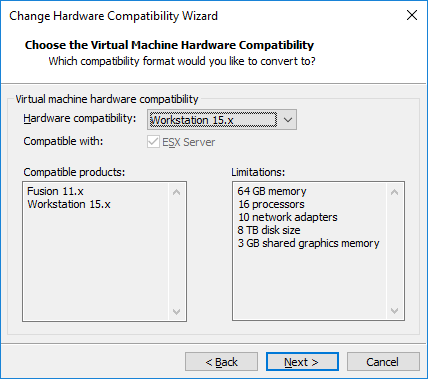
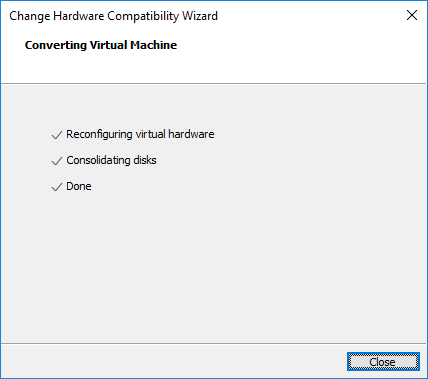
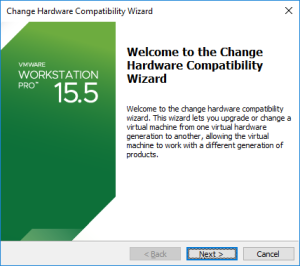
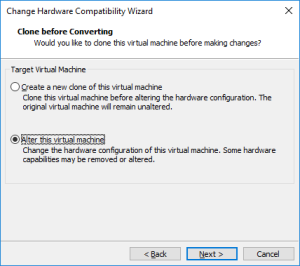
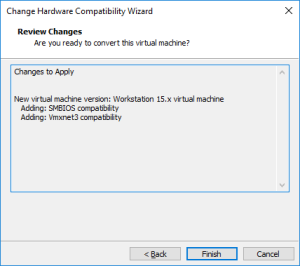
19: Once the VM stopped, upgrade it by clicking on “Upgrade this virtual machine”.


Et voilà !

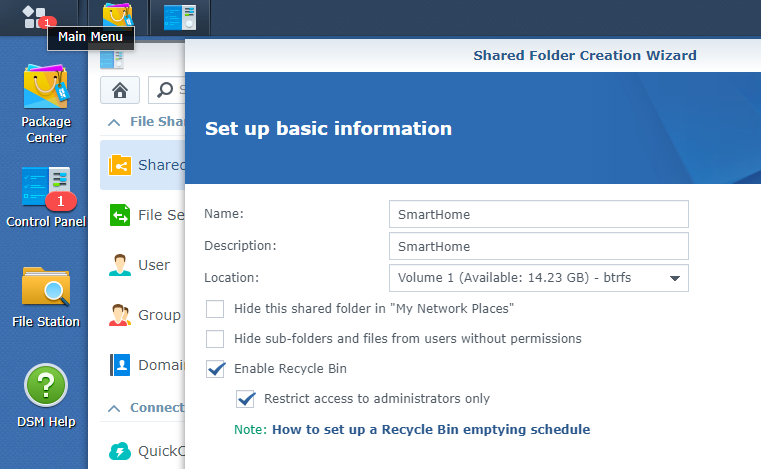
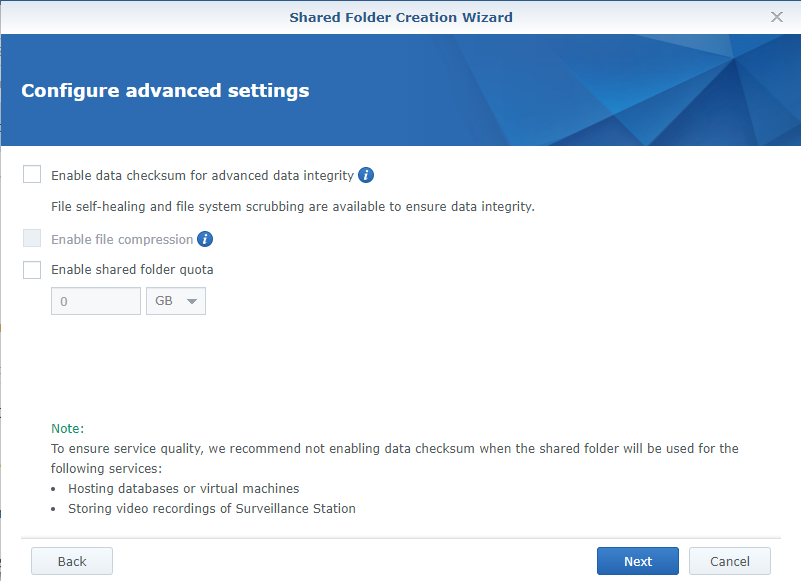
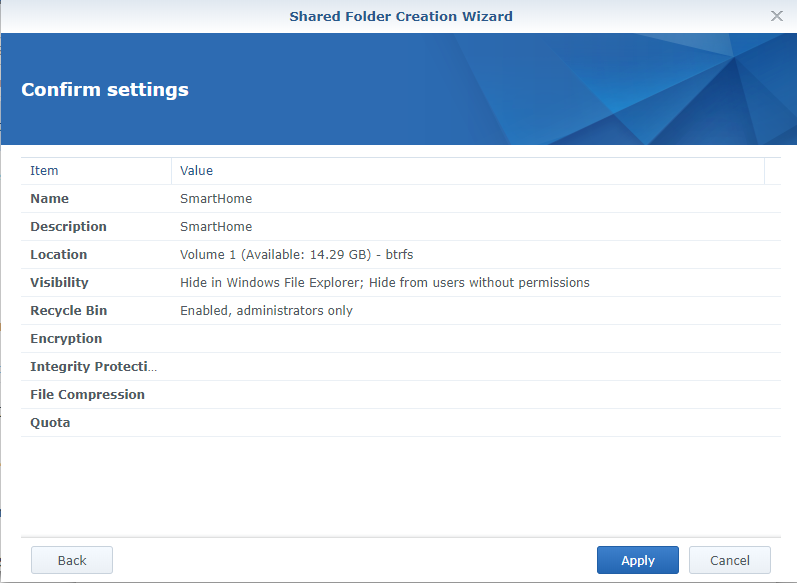

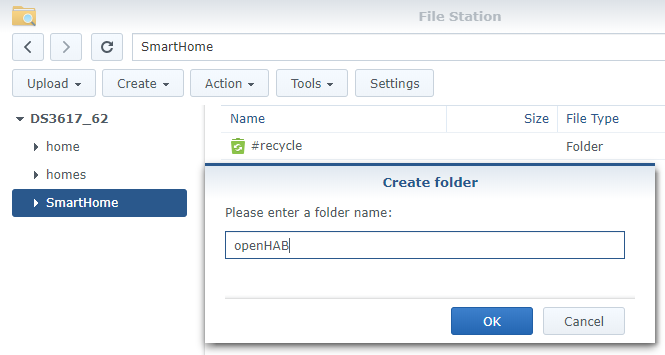
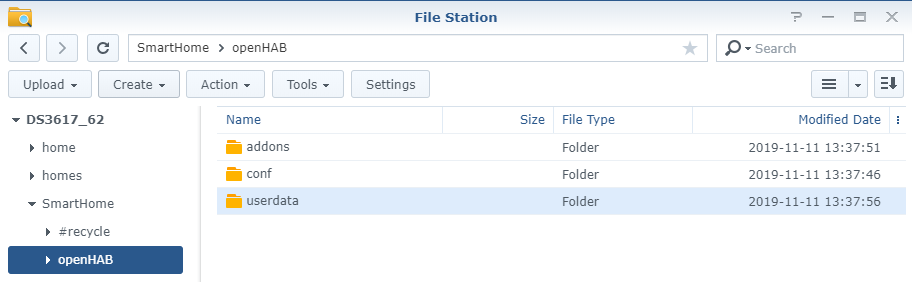
 Use the subfolder “openHAB” created on the Shared folder “SmartHome :
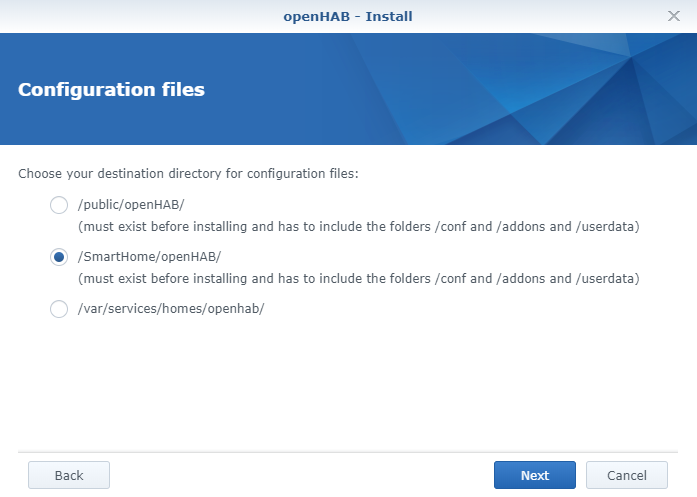
 You should also have the following content in the folder “openHab” of the Shared Folder “homes” :
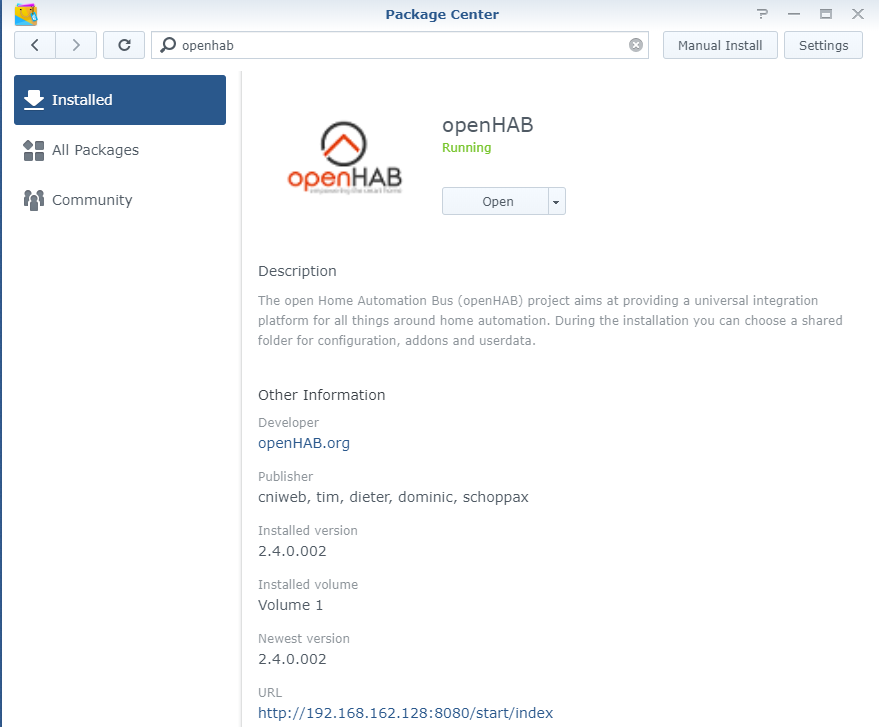
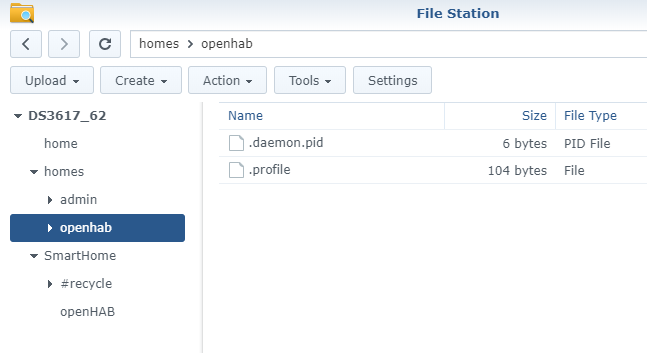 Finally, check that openHab is running fine and finalize the setup by opening the Package “openHAB” via the Package Center > Installed > OpenHAB. There, click on the “Url” at the bottom of the screen :