Many tutorials explain how to reboot in Safe Mode. But they usually need you to already be in a Windows session for that. What if Windows doesn’t start well anymore and the usual F8 doesn’t work? Well, you can enable the classic Boot Menu via the Command Prompt of a Recovery Drive.
Click to Read More
In my case, the Graphic Cards’ drivers were corrupted. So Windows was actually still booting but I couldn’t do anything as not having access to the UI. I had to restart in safe mode to remove those drivers and reinstall them. But without a UI, impossible to change Windows’s Startup Options…
Typing F8 during Windows boot didn’t gave me access to the Boot Menu as, since Windows 8, the boot so fast that there is no way to interrupt it anymore – except if you have enabled F8 explicitly, sacrificing a couple of seconds during startup. This can be done by opening an elevated Command Prompt and executing:
- bcdedit /set {default} bootmenupolicy legacy
To undo this reopen the elevated Command Prompt and type:
- bcdedit /set {default} bootmenupolicy standard
If F8 is not enabled, you can force Windows to present you the Boot Menu using a Recovery Drive (or USB Key):
- If you don’t have a Recovery drive yet,
- Go to another Windows 10 PC (a x64 if your PC is a X64, or x86 otherwise)
- Search for “Recovery Drive” in the Windows Start Menu/Screen
- And Select “Create a Recovery Drive” (No need to back up system files to the recovery drive).
- Boot your other PC on that Key (depending on you BIOS, you can use F8, F12, … to access to Device Boot Menu. See a list here).
- Select your Keyboard and enter the “Troubleshoot” Menu.
- Enter next the “Advanced Options” Menu.
- Notice that with this Windows Recovery Drive, you won’t have the “Startup Settings” menu in the “Advanced Options”. This one is only available when you reboot your PC with the “Advanced Startup” Options or when Windows failed to boot twice and enter the Repair mode automatically (NB.: You can obviously use that trick to access the Startup Settings and boot is Safe Mode: boot the PC and switch it off when Windows is starting).
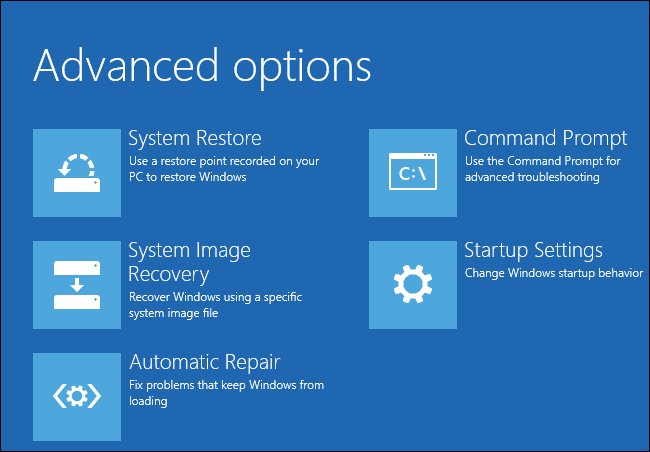
- So, no choice here but enter the “Command Prompt” menu
- In there, type: bcdedit /set {bootmgr} displaybootmenu yes
- Type next: exit
- And shutdown completely before rebooting your PC.
- You should now be prompted to select your OS. Press F8 there to access other Boot options 😉
Et voilà.
Once everything is back to normal with your Windows, run a command Prompt as Admin and disable the Boot Menu by typing:
- bcdedit /set {bootmgr} displaybootmenu no
![]()