• Play Meta/Oculus VR Games with a HTC Vive VR headset

    My daughter wanted to play “Vader Immortal” which is only available on Meta Quest for Oculus, while I have a HTC Vive Pro 2.

    Installing “Revive” and starting the game from “VivePort” did the trick.

    Click to Read More

    If you have an HTC Vive, you should have “VivePort” and “SteamVR” installed already. The issue is that VR Games for Oculus (Rift) are compatible with SteamVR, but not available in Steam for Vive. But as explained on the web, there are tricks…


    Download and install the “Oculus Rift Software” (using your old Oculus account, a Meta account or your Facebook account), but SKIP the hardware setup part !


    Next, download and install the latest stable release of “Revive“. Once installed, close its Dashboard.


    Then, open “Oculus” to install a free Game, for testing purpose.

    Go to Settings > Library Locations > Edit, to pick the folder where you want to store your games:

    Reminder: Just in case you want to use the same location as your games for Steam, this one can be found via Steam’s menu View > Settings > Downloads > Steam Library Folders


    Go next into the Oculus Store > Top Free, and pick, for example, “Répulbique VR” to install it.


    Once installed, you will obviously not be able to run it from the Oculus Dashboard, as you don’t have any compatible hardware. Instead, run “Steam VR”:

    And keeping both “SteamVR” and “Oculus” opened,  rerun “Revive”

    In the Dashboard of “Revive”, you should see your Oculus games.

    Click once onto one to run it. If it starts but closes suddenly soon after (wait a minute to be sure that it’s definitively closed, as most games  “popup” again later) , run also “VivePort”:

    Just as a summary, you should now have SteamVR, Oculus, Revive and VivePort opened : 


    In VivePort, you should see your new Oculus Games

    If you do not see them, close SteamVR, Oculus, Revive and VivePort (via the SysTray menu !!) and restart them: SteamVR, Oculus, Revive and VivePort. Also double check that your heaset and two remotes are turned on.

    Start the games from there. At least for me, they just runs fine. Only when run from Revive, they “auto-close” themselves without any notification.

    [PS: check the list of compatible games vader]

    Et voilà,

    Loading

  • Setup DSM 7.1 in a Virtual Synology DS3622xs+ using VMWare

    Here is a step by step “How-To create a Virtual Machine to emulate a DS3622xs+ running DSM 7.1” using VMWare and a Loader from redpill

    Click to Read More

    I used a tutorial from internet to create a VM in VMWare 16 and exported this one as ovf. Using that ovf, you can easily setup your own VM with a DS3622xs+ running DSM 7.1.

    1: Download and unzip this package, containing:

    • the configuration of the virtual machine (dsm.ovf and two disk.vmk),
    • the boot file for DS3622xs+ (synoboot.vmdk) and
    • the image of the DSM 7.1 for DS3622xs+ (DSM_DS3622xs+_42661.pat)

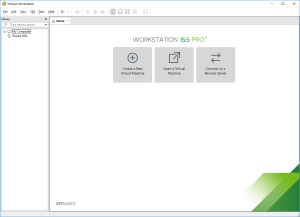
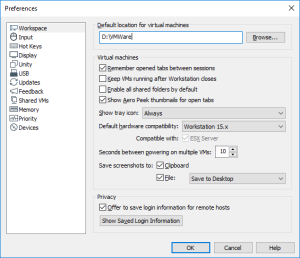
    2: Open VMWare Workstation. If you never configured the default location where you want to create your Virtual Machines, press CTRL-P to open the “Preferences” panel. There, set this default location (I am using E:\VMWare).

    3: Go next to “Windows Explorer”, in the folder where you have unzipped the package, and double click dsm.ovf. This is going to import the VM into VMWare. Type a name for the new virtual machine (I am using DSM3622xs+ 7.1) and click “Import”.

    4: Here is the outcome to the importation. You can now click on “Power on this virtual machine”. If you want, you may also first increase the Memory, the Processors or the size of the Hard Disk 2 and 3 (Do not touch the first Hard Disk  which contains the boot loader).

    5: 5 sec after starting the VM, the bootloader will run:


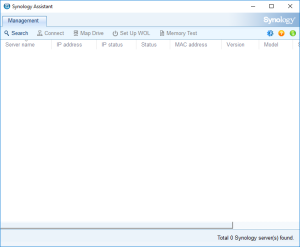
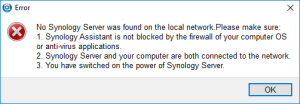
    6: Open the “Synology Assistant”, which is more efficient than the page http://find.synology.com to find your VM, and after +/- 3 minutes (depending on the perf of your PC) click on “Search”. If you didn’t wait long enough, you will see an Error message (In such a case, check that you have enabled the option “Allow compatibility with devices that do not support password encryption” in the preferences – via the gear icon in the top-right corner – and/or click Search “Again”. I never had to do this more than 3 times).

    7: Finally, the Assistant will find your VM. A webpage should automatically open (Otherwise, double-click on the VM). Approve the EULA and click Install.

    8: Click next on Browse to select the image of the DSM 7.1 for DS3622xs+ and Select the file “DSM_DS3622xs+_42661.pat” in the folder where you unzipped the package downloaded previously.

    9: Finally, click on “Next” and confirm that the installation can override the disk… (You can safely tick the “I understand…” it’s the virtual Hard Disk member of the VM. No worry 😉 )

    10: The installation will take a few minutes

    11: Once the installation complete, you will see in the VMWare Workstation that the VM is rebooting. On the installation page, you see a countdown.

    12: You should soon see that it’s installing packages before being finally ready to “start”

    13: If you are requested to login into the VM, do it as “admin” without password and configure it. Next configure your new NAS (Do not accept automatic updates !!!).

    I did skip the creation of Synology account and didn’t agree on Device Analytics or the display of this Nas in the Web Assistant.

    14: It’s now time to use the Hard Disk 2 and 3 to create a first Volume. Open the DSM Main Menu and start the Storage Manager (Then, it’s just a next, next, next journey depending on which Disk Array you want).

    15: Et voila, you have now a brand new DS3266xs+ with the DSM 7.1-42661 (DO NOT UPGRADE !!! The NAS would go into a “Recoverable” and I have no resolution for that)

    Loading

  • JBL Link 20 and 300 having crunchy, crackling, static pop noise

    Since I am using a mesh network (based on TP-Link Deco M9 plus) I started to have more and more crackling noise on both my JBL Link 20 and 300, even if located very close to the repeaters. The only solution is to reset the JBL.

    Click to Read More

    It’s a very common issue, due to the “Wifi stability”, not only experienced with the TP-Link Deco M9 Plus (quich are actually quite good for their purpose) and even not only with the JBL (Read these posts).

    I have read a lot of posts on this issue and none could help. it has been useless to update the firmware, to open the devices and apply the tricks and tips found on the web, …

    The only trick, which work immediatly, is to reset the JBL and reconfigure it in Google Home. Next, it works like a charm.. for quite some time (months in my case)… but at the end, the crackling noise come back and you have to reset again.

    To reset the JBL Link 300, hold both the “Bluetooth” and the “Volume up” buttons for up to 20 seconds (until you see the “Mute” button becoming orange) as ilustrated on the video here after. Next wait until you the JBL has rebooted and open Google Home to reconfigure it.

    To reset the JBL Link 20, hold the “Mute” button for up to 10 sec until the Wifi led switch off. Next hold both the “Mute” and “Power” buttons for about 20 seconds (until it restarts) as ilustrated on the video here after. Next wait until you the JBL has rebooted and open Google Home to reconfigure it.

    Loading

  • Setup DSM 7.0.1 in a Virtual Synology DS918+ using VMWare

    Here is a step by step “How-To create a Virtual Machine to emulate a DS918+ running DSM 7.0.1” using VMWare and a Loader from redpill

    THIS DOES NOT WORK ANYMORE (?): issue betwen the .pat file version and the loader => Try the DSM 7.1 with DS3622+ available here

    Click to Read More

    As for my previous packaging (DSM 6.2.2 on DS918+), I simply used various tutorials from internet to create a VM in VMWare 15 and exported this one as ovf

    1: Download and unzip this package, containing:

    • the configuration of the virtual machine (dsm.ovf, disk.vmdk and synoboot.vmdk),
    • the boot file for DS918+ (synoboot-falt.vmdk) and
    • the image of the DSM 7.0.1 for DS198+ (DSM_DS918+_42218.pat)

    2: Open VMWare Workstation. If you never configured the default location where you want to create your Virtual Machines, press CTRL-P to open the “Preferences” panel. There, set this default location (I am using E:\VMWare).

    3: Go next to “Windows Explorer”, in the folder where you have unzipped the package, and double click dsm.ovf. This is going to import the VM into VMWare. Type a name for the new virtual machine (I am using DSM918+ 7.0.1) and click “Import”.

    4: Here is the outcome to the importation. You can now click on “Power on this virtual machine”. If you want, you may also first increase the Memory, the Processors or the size of the Hard Disk 2 (Do not touch the Hard Disk 1 which contains the boot loader).

    5: 5 sec after starting the VM, the bootloader will run:


    6: Open the “Synology Assistant”, which is more efficient than the page http://find.synology.com to find your VM, and after 1 minute click on “Search”. If you didn’t wait long enough, you will see an Error message (In such a case, check that you have enabled the option “Allow compatibility with devices that do not support password encryption” in the preferences – via the gear icon in the top-right corner – and/or click Search “Again”. I never had to do this more than 3 times).

    7: Finally, the Assistant will find your VM. A webpage should automatically open (Otherwise, double-click on the VM). Approve the EULA and click Install.

    8: Click next on Browse to select the image of the DSM 7.0.1 for DS918+ and Select the file “DSM_DS918+_42218.pat” in the folder where you unzipped the package downloaded here previously.

    9: Finally, click on “Next” and confirm that the installation can override the disk… it’s the virtual SCSI Hard Disk member of the VM. No worry 😉

    10: The installation will take a few minutes

    11: Once the installation complete, you will see in the VMWare Workstation that the VM is rebooting. On the installation page, you see a countdown.

    12: You should soon see that it’s installing packages before being finally ready to “start”

    13: You will now be able to login into the VM and configure it.

    14: It’s now time to use the Hard Disk 2 to create a first Volume. Open the DSM Main Menu and start the Storage Manager.

    15: Et voila, you have now a brand new DS918+ with the DSM 7.0.1-43 Update 2.


    Loading

  • How to change the color of a Fibaro Wall Plug using Z-Wave PC Controller

    I have been searching for an easy way to change the color of my Fibaro Wall Plugs without coding/scripting/configuring anything… The solution is to use the “Z-Wave PC Controller” from Sigma on a Windows PC!

    Click to Read More

    I have the Fibaro FGWPef-102, documented here. As per that documentation, to set the color of the plug when it’s ON or OFF, one has to send the color code to respectively the parameter 41 or 42 (a parameter of size 1 byte):

    Here is how to do it with Z-Wave PC Controller (version 5 here under). Run the application on your PC, once the controller is plugged into it (I am using a Sigma ACC-UZB3). Click on the gear icon to select the port of your controller and click “OK”.

    Now:

    1. Select a node representing one of your Fibaro Wall Plugs in the top left frame and press Enter (or click the “Node Info” button) to fetch the available commands
    2. Select the Command Class “CONFIGURATION” in the bottom left frame 
    3. Select the Command “CONFIGURATION_SET” to set a new value
    4. Set the Parameter Number to 41 or 42 as documented above. Set the Size to 1 and the Configuration Value to the desired color. Ex.: 08 for Cyan.
    5. Click on Send

    To be sure it works, look the color of your Wall Plugs 😀 

    Or, you can now

    1. Select the Command “CONFIGURATION_GET” to read the value
    2. Put 41 or 42 as Parameter Number
    3. Open the Log file to see the output which will be returned by the Command
    4. Click on Send. You should see in the log a Configuration report with the value set previously. Here “08” (Cyan)


    “Z-wave PC Controller” is available inside the free “Simplicity Studio” of SiLabs, as explained here. You only have to subscribe to get it ! (As an alternative, if you have already an SiLabs account, click here to download it directly). The user manual is available here.

    Et voilà.

    Loading

  • How to identify the Philips Hue sensors in OpenHab ?

    When looking at the Things within OpenHab, each “Hue Motion Sensor” device appears as multiple things: the “Motion sensor xyz” itself but also a “Hue ambient light sensor i” and a “Hue temperature sensor i”. “Motion sensor xyz” is the name you gave to the device via the Philips Hue App and “i” is a sequential id which can’t be easily linked to the related “Motion sensor” device… The App Hue Essentials can help you !

    Click to Read More

    On the screenshot bellow, one can see that I have renamed the Motion Sensors into “Motion sensor Door” and “Motion sensors Entry”, within the Philips Hue App. NB.: Only the Motion sensors appears in the Philips Hue App. One doesn’t see the Temperature and Ambient Light sensors…

    In OpenHab, we see all the sensors, but the Ambient Light and Temperature sensors are not named accordingly to the related Motion sensors. Instead, the are named “Hue ambient light sensor i” and a “Hue temperature sensor i” and one has no idea which one is part of the “Motion sensor Door” or “Motion sensor Entry”:


    The App Hue Essentials is not free but is really great (opposite to Philips Hue, you can for example control devices from multiples Bridges without switching from one to the other all the time). It’s the first App I found, made for end users (and not for developers), which give access to the internal sensors of a selected device. I.e.: the other Apps list all the sensors but does not tell which sensors belongs to which device.

    One way to identify which sensor belongs to which device is to go to the Devices (1) within the App Hue Essentials, select the device (2).

    Next , select, the menu Details (1 then 2):

    In these details, you see the Identifier of the device. Here, the identifier is 13. 

    Back into OpenHab, you can now filter the list of Things on ‘:13’ and find the device. 

    That was quite useless as the name of the device is the same in OpenHab and Philips Hue… but you can see that, obviously, the “Unique ID” displayed in Hue Essentials (00:17:88:01:06:44:42:35) is not the full id displayed (0107:ecb5fa857069)..

    One can do the same to find the id of the other sensors of this device: instead of the menu “Details”, select now the menu “Temperature” or “Light Level”. One can see immediatly the name of the related sensor (Here under “Hue light sensor 1”). One can also take the menu “Detail” (1) to take note of the identifier (here under “14”) to filter for it in OpenHab’s Things list.

    The best is however to rename these sensors according to their device (The “Hue light sensor 1” could be renamed “Hue light sensor Door”), remove all of them (especially the “Motion Sensors” which were properly named otherwise,  the other sensors won’t be re-detected) and rescan for Hue’s Things in OpenHab.

    Et voilà.

    Loading

  • Install Z-Stick & ConBee II on RPI/Openhabian

    Here is how to configure properly an Aeotec Z-Stick Gen5 and a Conbee II stick on a RPI 4 installed with Openhabian (running OpenHab 3)

    Click to Read More

    First, be sure that openhabian can access the serial ports. The easiest is to configure that via openhabian-config > System Settings > Serial Port:

    sudo openhabian-config 

    You can also do it with raspi-config > Interfacing Options > Serial :

    sudo apt-get install raspi-config
    sudo raspi-config

    > Would you like a login shell accessible over serial? → No
    > Would you like the serial port hardware to be enabled? → Yes


    Next, check that the sticks are well plugged with the command:

    lsusb

    You should see something like

    Bus 002 Device 001: ID 1d6b:0003 Linux Foundation 3.0 root hub
    Bus 001 Device 011: ID 1cf1:0030 Dresden Elektronik ZigBee gateway [ConBee II]
    Bus 001 Device 005: ID 0658:0200 Sigma Designs, Inc. Aeotec Z-Stick Gen5 (ZW090) – UZB
    Bus 001 Device 002: ID 2109:3431 VIA Labs, Inc. Hub
    Bus 001 Device 001: ID 1d6b:0002 Linux Foundation 2.0 root hub

    In order to always have the USB sticks mounted on the same “port”, instead of being assigned once on /dev/ttyACM0, once on /dev/ttyACM1, … create a UDEV Rule file:

    sudo nano /etc/udev/rules.d/99-usb-serial.rules

    Type the following, using the ID of the USB sticks found above, in this file:

    SUBSYSTEM==”tty”, ATTRS{idVendor}==”0658“, ATTRS{idProduct}==”0200“, SYMLINK+=”ttyUSB-ZWave”, GROUP=”dialout”, MODE=”0666″
    SUBSYSTEM==”tty”, ATTRS{idVendor}==”1cf1“, ATTRS{idProduct}==”0030“, SYMLINK+=”ttyUSB-ZigBee”, GROUP=”dialout”, MODE=”0666″

    If you didn’t prepare openhabian for ZigBee via sudo openhabian-config > System Settings > Serial Port, grant the following access for openhab :

    sudo adduser openhab dialout
    sudo adduser openhab tty

    Now, reboot (sudo reboot) and test if symlink was created with the command :

    ls /dev/tty*

    You should see

    /dev/ttyUSB-ZigBee
    /dev/ttyUSB-ZWave

    Add edit openhab config file to add the symlinks to the PATH variable for Java (NB: for openhab 2, the file is namge openhab2 !!):

    sudo nano /etc/default/openhab

    Search the line with EXTRA_JAVE_OPTS and modify accordingly to complete the parameter ‘Dgnu.io.rxtx.SerialPorts’:

    EXTRA_JAVA_OPTS=”-Xms192m -Xmx320m -Dgnu.io.rxtx.SerialPorts=/dev/ttyUSB-ZWave:/dev/ttyUSB-ZigBee

    Now, reboot again (sudo reboot) and install Phoscon, the application to manage the ZigBee devices. The easiest is to install it (on port 8081 as recommended) via openhabian-config > Optional Components > deCONZ:

    sudo openhabian-config

    You can also look here on the phoscon website for a manual setup

    If you have a RPI 4B, also update the WiringPI like this:

    cd /tmp
    wget https://project-downloads.drogon.net/wiringpi-latest.deb
    sudo dpkg -i wiringpi-latest.deb

    You can now open phoscon to login and search for ZigBee devices on http://<your RPI IP>:8081

    If after a reboot, this UI is not available, then enable manually the service:

    sudo systemctl enable deconz

    If you want to change the port of Phoscon, edit the parameter ‘http-port’ in this file:

    sudo nano /lib/systemd/system/deconz.service


    Finally, install the following addons (Bindings) in OpenHab :

    • “Dresden Elektronik deCONZ Binding”
    • “Z-Wave Binding”

    The ConBee gateway will be detected automatically by OpenHab and appear twice in the ‘Inbox’: once as Deconz and once as Hue (indeed, it emulates a Philips Hue Bridge). If it was not detected automatically, open the Phoscon UI > Gateway > Advanced (Gear Icon at the bottom of the page) and CLick on “Authenticat App”. Then add the Thing manually into OpenHab using the Scan button of:

    OpenHab UI > Administration > Parameters > Things > + (Add Thing) > Dresden Elektronik deCONZ Binding


    The Zwave gateway will only appear if you add it explicitly into OpenHab:

    OpenHab UI > Administration > Parameters > Things > + (Add Thing) > Z-Wave Binding > Z-Wave Serial Controller

    In the field Serial Port, type manually ‘/dev/ttyUSB-ZWave’ (without the quotes) and click ‘Create Thing’

    Wait for about 10 seconds and the gateway will soon become online.

    Et voilà.

    Loading

  • RPI 4/Openhabian into an Argon One Case


    If you installed Openhabian onto an RPI hosted into an Argon Once Case, here is how to configure the Argon One.

    Click to Read More

    Install the scripts to manage to Argon One’s features:

    sudo curl https://download.argon40.com/argon1.sh | bash

    Configure the fan cooler, for example depending on the temperature, with the command:

    sudo argonone-config

    Select the option 2 and type 10 for 55 °C, 55 for 60 °C and 100 for 65 °C, meaning that the fan speed will by 10% at 55 °C, etc…


    In order to configure the Argon One to turn on automatically after a power failure, you have first to enable the i2C. The easiest is to do it with the raspi-config command, which can be installed with:

    sudo apt-get install raspi-config

    Then run it:

    sudo raspi-config

    And go to the menu “Interface option”, and select the entry “I2C” to enable the loading of the I2C kernel module.

    Now you can check that it works with the command:

    i2cdetect -y 1

    And finally set the Power-On feature with the command:

    i2cset -y 1 0x01a 0xfe


    Now, you can press the power button of the Argon One :

    • twice to reboot
    • +3 sec to shutdown and power off
    • +5 sec to force the shutdown


    Et voilà

    Loading

  • Use Android Tablet as additionnel screen

    A Galaxy Tab S7 can be used out-of-the-box as second screen for a Windows 10 laptop or PC connected on the same Wifi. But what about using this tablet as additionnel screen for a PC connect via ethernet ? The solution is SuperDisplay. And it works for most Android Tablets…

    Click to Read More

    You won’t be able to connect your Galaxy Tablet S7 as second screen with your windows PC, as explained here, if this one is not connected via Wifi. 

    It’s a pitty as using a tablet with a pen to do photo editing for example is really great.

    The solution is simply to use an alternative “wireless display” solution such as “SuperDisplay”; install the App on your tablet and the related drivers on your PC, et voilà !

    Loading

  • EdgeRouter X – Speed limited to 250Mbps instead of 1Gbps

    I have upgraded my Internet abonnement from 100Mbps to 1000Mbps but couldn’t get more than 250Mbps. The reason was not an issue with the fiber or the modem but a limitation on my EdgeRouter X.

    Click to Read More

    I bought this Ubiquiti router to have the capability to view the bandwidth on each port as well as to fine-tune the configuration if required. Its OS “EdgeMAX” is indeed very flexible and powerful. Obviously, I did check that it was capable to deliver 1Gbps. 

    It was clear for me that it would be “1Gbps for all ports” (4 ports). But as the Router is connected on a Switch “1Gbps per port”, that was not an issue for my LAN (And it was much cheaper).

    Nevertheless, having max 250Mbps was disappointing.


    This throughput was reached with defaults settings, as I didn’t fine tune anything so far.

    The solution was to disable the “hardware offload” as well as the “flow-accounting (NetFlow)” (NB.: QoS may also not be used, but it was the case).

    To disable these features, click on ‘CLI’ in the upper-right corner to open a console and login with your administrator account. Then type:

    configure
    set system offload hwnat enable
    delete system flow-accounting
    commit
    save
    exit
    reboot

    Once the router as completed the reboot, you get the maximum bandwidth !

    Et voilà.

    Loading

Tags


Acer iDea 510 AirPlay Android Backup DD-WRT DNS DS209+ DS713+ DS1815+ FlexRaid Galaxy Galaxy S2 Galaxy S7 Google Assistant Google Home HTPC Kies MCE MySQL Nabi 2 Nvidia TV Shield One Plus One OpenHab Outlook Philips Hue Plex RAID Raspberry PI Remote Desktop Root Access Samsung Scripts Synology Team Build Visual Studio VMWare Wi-Fi Windows Windows 8 Windows 8.1 Windows 10 Windows Server 2012 XBMC Xpenology ZigBee

Categories


Archives