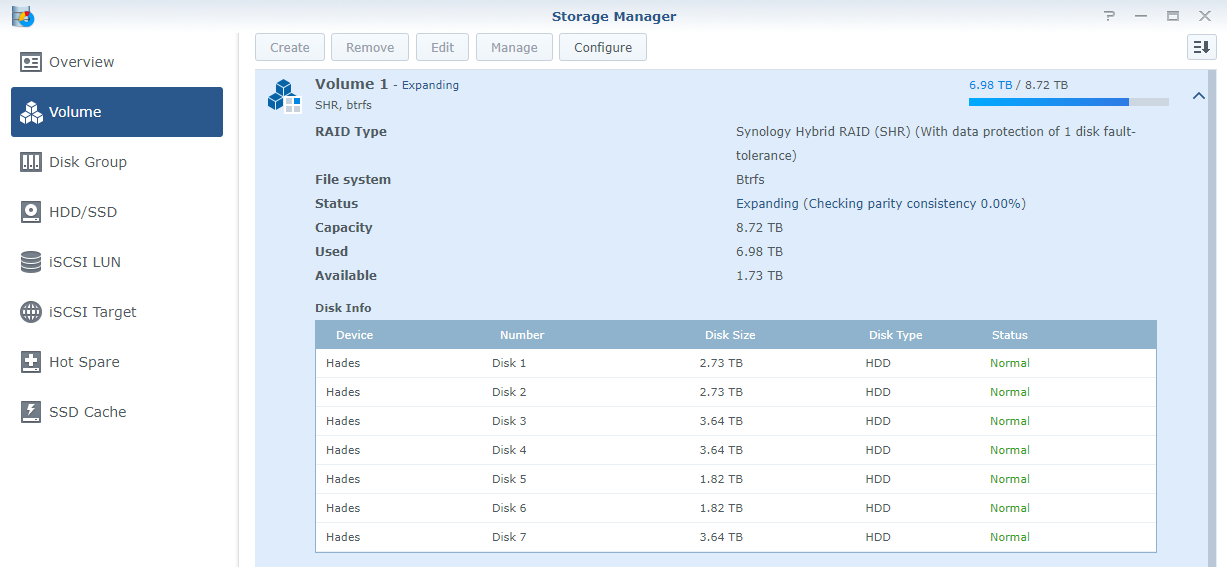
I did start an expansion of my main volume by adding 2 x 3 TB, 24h ago, and looking at the progress, it’s still 0%. But it seems that the display is incorrect. Looking via a console, on can see some concrete progress.
Click to Read MoreClick to Close
If I look into the Storage Manager, I see no progress:
Expanding (Checking parity consistency 0.00%)
Expand Volume No Progress
To see some progress, try the following command in a ssh console:
cat /proc/mdstat
One can see that a disk is currently resyncing and should end in xxx minutes. Another one is waiting for a resync.
I always forget plenty of details useful to work on my Synology, such as path, tips & tricks, command or service names, etc.. So, to retrieve them more easily, I will publish them here.
If something goes wrong and you look for information, delete all existing logs (rm -R) and redo the failing operation. Next, look for newly created logs 😉
Web Server
The Web server can be nginx, apache22 or apache24, as:
Configured globally in the Web Station > General Settings > HTTP back end Server or
Configure per Virtual Host in Web Station > Virtual Host
Config files are per Web server types:
Apache 22’s configs are under /usr/local/etc/apache22. Ex.:
virtualhost config file: /usr/local/etc/apache22/sites-enabled/httpd-vhost.conf (notice: changes in this file are lost after restarting the Web Station)
Apache 24’s configs are under /usr/local/etc/apache24
Nginx’s configs are under usr/local/etc/nginx
But also in the Web Station configs:
Virtual Host, depending if using php56 or php 70, are also in /var/packages/WebStation/etc/php56/conf.d/webstation_vhost.ini (notice: changes in this file are lost after restarting the Web Station)
Documentation about installation scripts are here .
The etc folder of the package is a link onto /usr/syno/etc/packages/<Package Name>/
A script must exit 0 to succeed. Any other value will fail the installation/upgrade/uninstallation.
One can redirect all errors into the log with code like this:
exec 2<&-
exec 2>>/var/log/MyPackageErr.log
All information logged in $SYNOPKG_TEMP_LOGFILE are displayed at the end of the installation/upgrade/uninstallation in any cases (success or failure).
Add a <br> at the end of each line in $SYNOPKG_TEMP_LOGFILE to have a nice display. Ex.: sed -i ‘s/$/<br>/’ “$SYNOPKG_TEMP_LOGFILE”
One can decide to fail an installation/upgrade/uninstallation with code like this:
if [ -s “/var/log/MyPackageErr.log” ]; then
sed -i ‘s/$/<br>/’ “/var/log/MyPackageErr.log”
cat /var/log/MyPackageErr.log >> $SYNOPKG_TEMP_LOGFILE
exit 1
fi
Add or Remove an port configuration in the firewall by command:
if [ “${SYNOPKG_PKG_STATUS}” == “UNINSTALL” ]; then
${SERVICETOOL} –remove-configure-file –package $<Package Name>.sc >> /dev/null
fi
The structure of the <Package Name>.sc file is described here https://help.synology.com/developer-guide/integrate_dsm/install_ports.html
Following ports are used by Synology : https://www.synology.com/en-us/knowledgebase/DSM/tutorial/Network/What_network_ports_are_used_by_Synology_services
Using commands is only required with firmware version < 6.0-5936
I wanted to replace the smallest disks of my NAS with bigger ones. Unfortunately, some packages where installed on those. To avoid uninstalling/reinstalling everything, I did wrote a shell script which does the job, as well as a Package for Synology to offer a web interface.
Click to Read MoreClick to Close
Here the first version of my script:
[shell]
#!/bin/bash

TARGET=$1
PACKAGE=$2

if [[ $PACKAGE == "" ]]
then
	echo "Usage: mvpkg Target Package"
	echo "      Target must be like 'volumex' where x is a numeric."
	echo "       Package must be the name of a package."
	exit
fi

if [[ $TARGET != volume[0-9]* ]]
then
	echo "Usage: mvpkg Target Package"
	echo "       Target must be like 'volumex' where x is a numeric."
	echo "       Package [$PACKAGE] must be the name of a package."
	exit
fi

#Check the package and check the result: "enable" (is start), "disable" (is stop) or "does not exist"
output=$(/usr/syno/sbin/synoservicecfg --status "pkgctl-$PACKAGE" | grep Service)

if [[ $output == *"does not exist"* ]]
then
	echo "The service $PACKAGE can't be found."
	exit
else
	#find the current volume of the package and its link
	output=$( ls -la /var/packages/*/target | grep "/$PACKAGE/")

	link=$(echo $output | grep -oP "\/var/packages/.*/target"
	volume=$(echo $output | grep -oP "volume\d*")
	path=$(echo $output | grep -oP "\/volume.*")

	if [[ $link != "/var/packages/$PACKAGE/target"* ]]
	then
		echo "The service $PACKAGE is not correctly installed."
		exit
	fi

	if [[ $volume != "volume" ]]
	then
		echo "The service $PACKAGE can't be located."
		exit
	fi

	if [[ $volume == $TARGET ]]
	then
		echo "he service $PACKAGE is already on $TARGET."
		exit
	fi

	if [[ "$path" != "/$volume/@appstore/$PACKAGE" ]]
	then
		echo "The service $PACKAGE does not have a standard location."
		exit
	fi

	#List Packages with dependency on this one
	#/usr/syno/sbin/synoservicecfg --reverse-dependency pkgctl-$PACKAGE

	#Stop the package and all its dependencies
	output=$(/usr/syno/sbin/synoservicecfg --hard-stop "kgctl-$PACKAGE" | grep warn)

	if [[ $output != *"have been set"* ]]
	then
		echo "The service $PACKAGE couldn't be stopped."
		exit
	fi

	if [ -d "/$TARGET/@appstore/$PACKAGE" ]; then
		mv "/$TARGET/@appstore/$PACKAGE" "/$TARGET/@appstore/$PACKAGE-$(date -d "today" +"%Y%m%d%H%M").log"
	fi

	#remove the link on the previous volume
	rm -f "$link"

	#move the package
	mv "$path" /$TARGET/@appstore

	#link with the  package on the new volume
	ln -s "/$TARGET/@appstore/$PACKAGE" "$link"

	#Replace link also in local
	local="/usr/local/$PACKAGE"
	if [ -L "$local" ]; then
		rm -f "$local"
		ln -s "/$TARGET/@appstore/$PACKAGE" "$local"
	fi

	#update settings
	sed -i "s/$volume/$TARGET/" "/usr/syno/etc/packages/$PACKAGE/*" > /dev/null

	if [[ $output != *"is enabled"* ]]
	then
		echo "The service $PACKAGE didn't restart properly once moved from $volume to $TARGET."
	else
		echo "The service $PACKAGE has been moved successfuly from $volume to $TARGET."

		#Restart packages depending on the one moved
		output=$(/usr/syno/sbin/synoservicecfg --reverse-dependency "pkgctl-$PACKAGE")

		output=$(echo $output | grep -Po "pkgctl-([^\]]*)")
		for string in $output
		do
			/usr/syno/sbin/synoservicecfg --start $string"
		done
	fi

	#Restart the package and all its dependencies
	output=$(/usr/syno/sbin/synoservicecfg --hard-start "pkgctl-$PACKAGE" | grep Service)

	#Check if the package has been correctly restarted
	output=$(/usr/syno/sbin/synoservicecfg --is-enabled "pkgctl-$PACKAGE")
fi
[/shell]
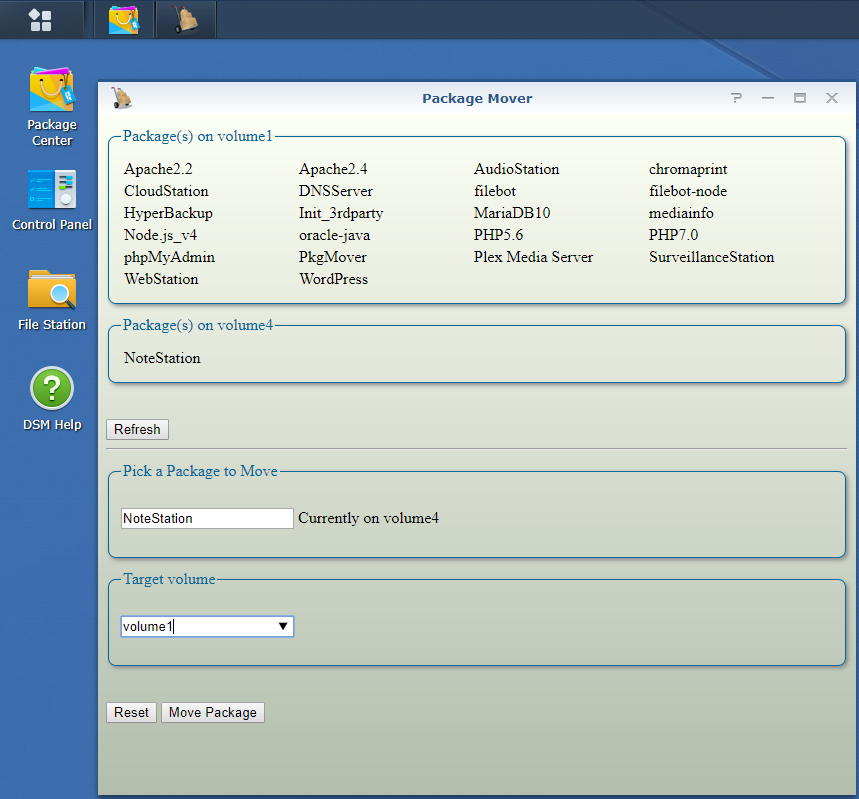
I did use it to move: AudioStation, CloudStation, DNSServer, NoteStation, PHP5.6, PHP7.0.
During the move, the package could temporary appear in the Package Center as needing to be repaired:
Repair Package444
Simply wait until the operation is completed and click next on “Refresh” in Package Center. Also, check that no other service was stopped but not restarted !! Restarting other services with dependency is not (yet) managed by the script.
WARNING: Moving some packages resulted in troubles (Packages never able to restart). Ex.: Apache Http Server 2.2 and 2.4, the Node.js, Unofficial Java Installer, WordPress. These packages did not restart properly after being moved. I still have to investigate why, but they displayed the error “failed to run the package service” for ever (even after restarting the NAS). Something I known is that there are also Symlinks onto packages in /usr/local/. My script takes those into account. But there are possibly other such dependencies somewhere else ?! Most package could fortunately be returned in their orignal state very easily by moving them back to their original volume.
Important notice
MariaDB. Before moving it, open it via the DSM main menu and change the volume where the DB files are stored.
If you wonder which package is on which volume, the easiest is to run this command in a shell: ls -la /var/packages/*/target
Troubleshooting
WordPress. After moving, it was stuck in the “repair state”. I simply backuped its folder (/volumex/web/wordpress => /volumex/web/wordpress.bkp), clicked on Repair, reconfigured it to use a new DB, stopped it once fully reinstalled, deleted its new folder and replaced it with the backup (/volumex/web/wordpress.bkp => /volumex/web/wordpress) before restarting wordpress and deleting the new DB.
Node.js, FileBot-Node and the Unofficial Java Installer. I simply clicked on Repair to fix them.
Plex Media Server. during y first attempts, it didn’t restart. I did simply install manually the latest version and the “update” fixed the problem without loosing any setting/library/etc… With the latest version of my script, the move succeeded.
Can’t restart. Look into Package’s installation path, for config files possibly still pointing at the old volume. Use for this purpose a command like: find -L /var/packages/<package_name>/ -type f -print0 | xargs -I {} -0 grep -l “volumex” “{}”
If you find such config files, possibly update them by replacing the old volume (volumex) with the new volume (volumez) using a command like: sed -i “s/volumex/volumez/” <config_file_path>
Stuck ? If you can’t stop/restart a service correctly and can update this one manually, then delete it via a console, Click next Refresh in the Package Center and reinstall it:
ls -la /var/packages/<package_name>/target => this is showing you the volume<x> where it’s installed
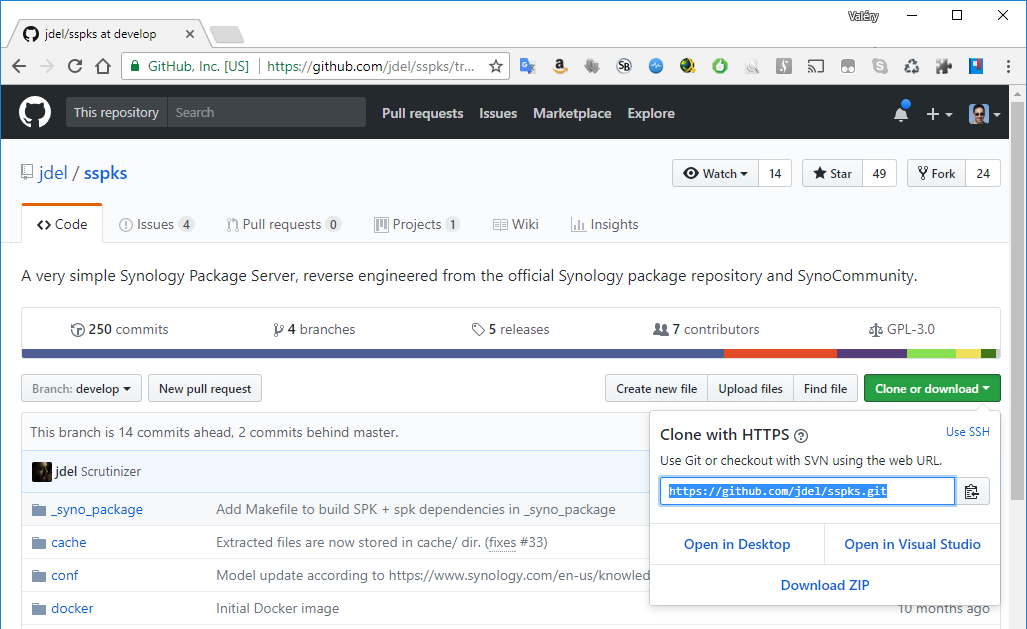
I did create a “Synology Package” to be able to move packages easily from the DSM. You can find it on my own Synology Repository (See Blog’s menu “SPK Server”). You will find the script in the Package if you “unzip” it, in \package\ui\mvpkg.sh
Package Mover
[EDIT 13-10-2017] I have added support in the package to start/stop/delete packages, display reverse and forward dependencies. Only delete a packages if you are screwed.
[EDIT 24-02-2018] The sources for my package are available on GitHub (named Package Manager).
[EDIT 23-12-2018] Since a recent update of DSM, the feature to list dependencies between packages does not work anymore.
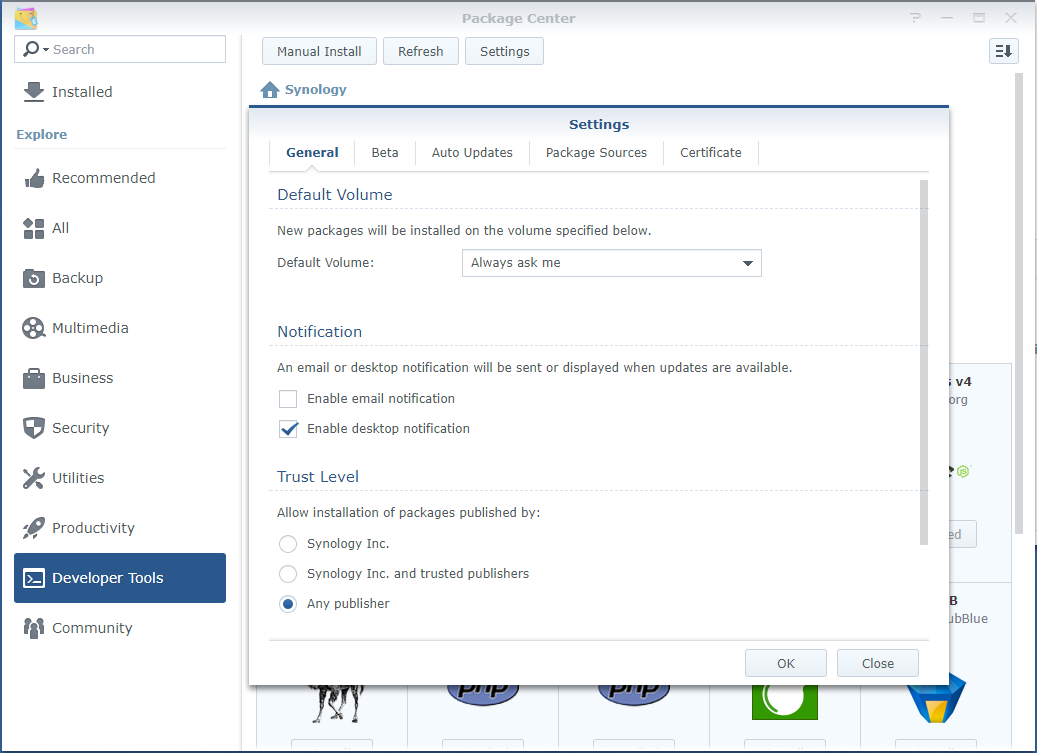
I got the following message when trying to install third parties packages on my Synology: “failed to install ‘…’. This package is not published by Synology Inc,
The solution is simply to Trust Any Publisher.
Click to Read MoreClick to Close
Go into the “Package Center” > Settings > General tab and select “Any Publisher” in the section “Trust Level”
Trust Any Publisher
After reinstalling my Synology and trying to access various modules, I got web pages displaying “the service is disabled now”. E.x.: for WordPress, phpMyAdmin, …
The solution was quite simple: Go into the “Package Center” and you should see that the modules are stopped. Start them 😉
My OnePlus One being only used to play music via AirPlay, it’s always plugged into his craddle. I knew this was not good for the battery life and started to look for an App able to prevent my mobile to reload as long as its battery was not less than a certain percentage. I found a paper recommending to reload only once the battery was lower than 25, but also recommending to no reload higher than 85%. And I found an App able to control this on many rooted android phones: “Battery Charge Limit“.
Click to Read MoreClick to Close
According to this paper, it’s not good for lithium batteries’ life to do cycles between full charge (100%) and full discharged (0%). Ex.: Doing cycles between 85% and 25% provides a longer service life than doing cycles between 100% and 50%.
For sure, only a full charge (100%) will provide the specified energy of the battery, and therefore its maximum runtime. So, one has to find a compromise:
Cycles between 75–65% offer longest life
Electrical Vehicles do cycles between 85–25% to prolong battery life
Cycles between 100–25% give long runtime, makes best use of battery, but reduces battery life.
All being linear, the life-prolonging mid-range of 85-25% reduces the energy to 60 percent.
More details on the App “Battery Charge Limit” on this blog.
My OnePlus One is already a quite old mobile, but I am still using it at home to play music. I recently reinstall Cyanogen Mod 13 and wanted to root it as this is required to use AirAudio. To avoid doing many manual operations, I looked for a fully automated toolkit and found “Bacon Root Toolkit“.
Single and double quotes typed in a post are displayed by WordPress as directionnal quotes: ‘blabla’ or “blabla” (I.e.: left/right single/double quotes). This becomes an issue when publishing “shell scripts” samples to be copy/pasted. The solution is to type “encoded quotes”. Ex.: & #39; for ' or & #34; for " (without the blanks between & and #).
Click to Read MoreClick to Close
This is due to the WordPress converting StraightQuotes to Pretty Quotes… a feature also named Smart Quotes and due to a filter running in WordPress: the “wptexturize”.
Here after, an example I used to post to illustrate how to send custom notifications from a script running on a Synology. The code was directly copy/pasted here from a shell script opened within Notepad++ (where the quotes appeared as ' and ").
As you can see above, the single and double quotes are displayed by WordPress as symbols: ‘…’ and “…”.
The problem is that readers who copied/pasted as-is this sample in their script got execution errors. Indeed, a ‘ and a ' are not interpreted the same way within a shell.
To solve this issue, I did replace all ‘ and ” respectively by & #39 and & #34 (without the blanks between & and #). I don’t use the menu Insert > Special Character as
Another option would be to disable the “pretty-fication” feature… This can be done by opening up your theme’s functions.php file and pasting the following code at the bottom right before the closing ?> PHP tag:
remove_filter('the_content', 'wptexturize');
Notice that Quotes in preformatted text (as here just above) are not replaced by Smart Quotes. But one one side, this can’t be used on Quotes typed inline, and on the other side, I don’t use preformatted text for my code samples…
Yet another option would be to use a plugin like the Smart Quote Fixer to remove the Smart Quotes.
But I prefer to use type the num codes as I don’t want to disable Smart Quotes on the complete post…
Each time I restart my NAS (for update reasons), I have errors 404 when trying to reach any post of my WordPress blog, until I re-set permalinks’ settings. I finally fixed it by updating my WordPress with latest Synology’s package.
Click to Read MoreClick to Close
A long time ago, rebooting my NAS started to result systematically in 404 in my WordPress blog. I found a manual fix here: simply resetting WordPress permalinks’ settings was solving the problem… until the next reboot 🙁
But I never understood why rebooting my NAS was resulting in the lost of permalinks’ settings. And could find a definitive solution.
I finally took today an hour to reproduce and further investigate the problem (motivated by the shiny sun outside :p). I found that restarting only the WordPress Package was also resulting in this issue. I noticed more precisely that the .htaccess file was deleted when starting the package (not when stopping). I am sure that removing access rights on the .htaccess file for WordPress, as described here for example, would be a solution. But the not best one.
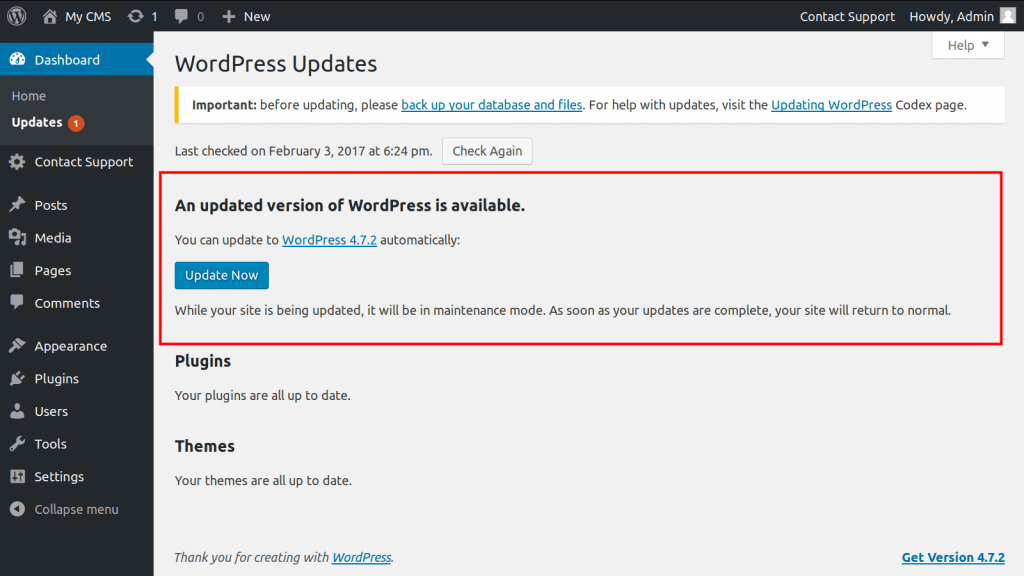
I found the best solution by accident. A long time ago, as I was interested in a version of WordPress more recent than the one available via Synology’s packages, I did a manual upgrade with the official WordPress setup. Since that time, I never did an update anymore with Synology’s Package Manager, but used the native WordPress update via its own Dashboard:
Today, I did a backup of WordPress’ installation folders and updated Synolgy’s WordPress Package. Once the update accomplished, I noticed that the .htaccess was containing information specific to Synology:
And now, when restarting WordPress, the .htaccess is not deleted anymore (and permalink’s settings are not lost). There is certainly a good explanation, that I ignore, but at least I won’t suffer 404 anymore.
And next time I update manually WordPress, I will pay attention to backup the .htaccess as specially clearly recommended here, as well as merging that .htaccess with the updated one after the update of the Permalinks’ structure: